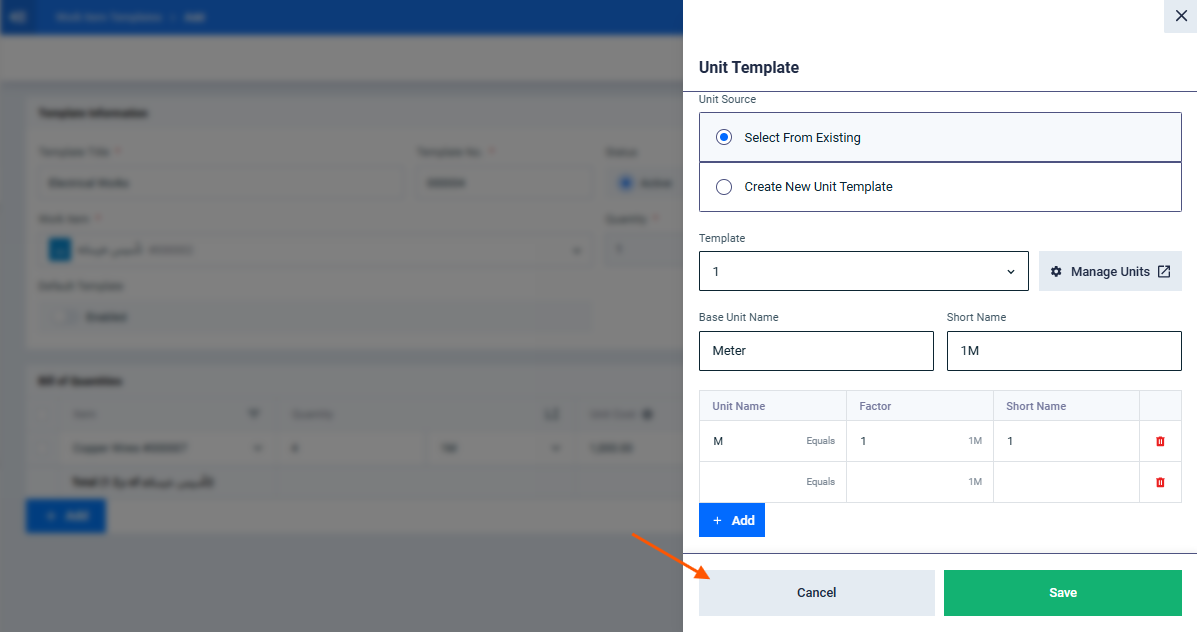

Managing Unit Templates and Their Factors from Within a Work Item Template
The system allows you to manage unit templates and their factors directly while creating or editing a work item template, without needing to navigate to inventory settings separately. This guide explains the required permissions, the steps to manage a unit from the side panel, its content, and the system’s behavior on save.
Permissions
The user must have the “Edit General Settings” permission to be able to manage units. If the user lacks this permission, the “Manage Units” button appears disabled, with a tooltip shown on hover: “Requires Permission.”
Access Point
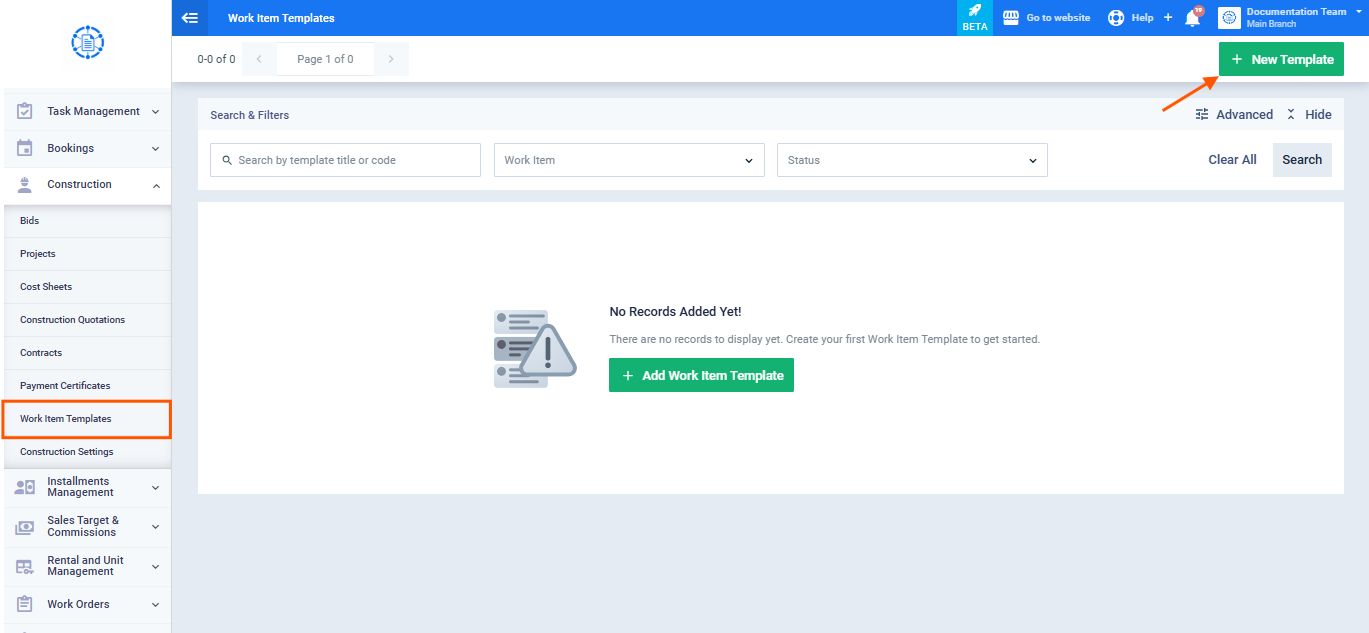
- From the main menu, click on “Construction,” then click on “Work Item Templates.”
- Click on the “New Template” button.
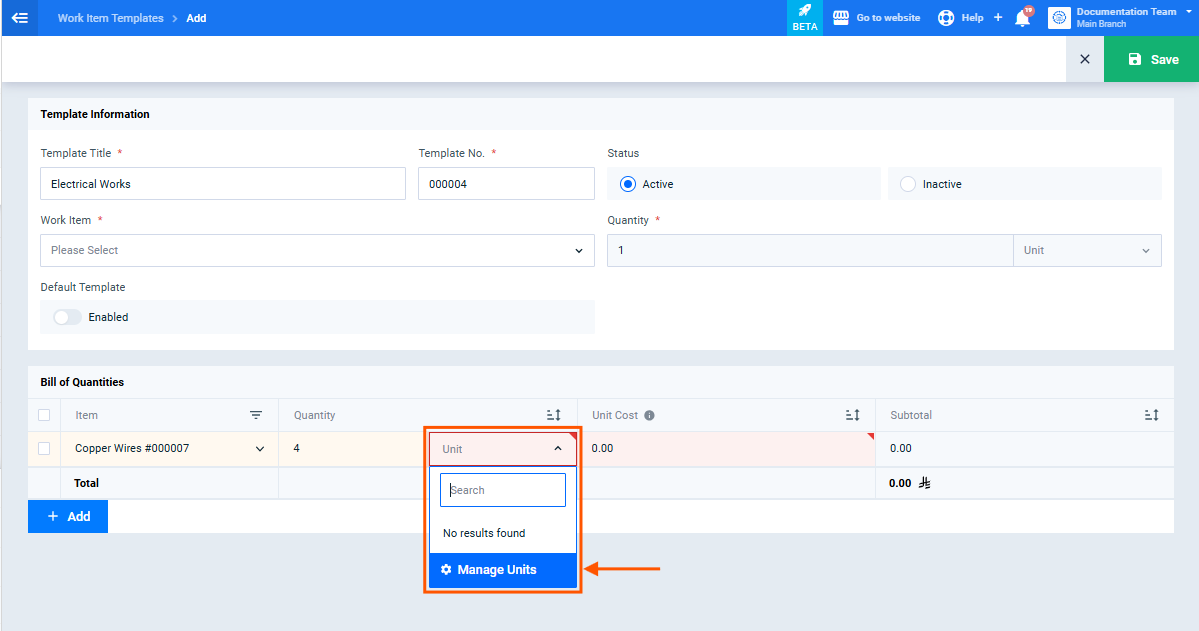
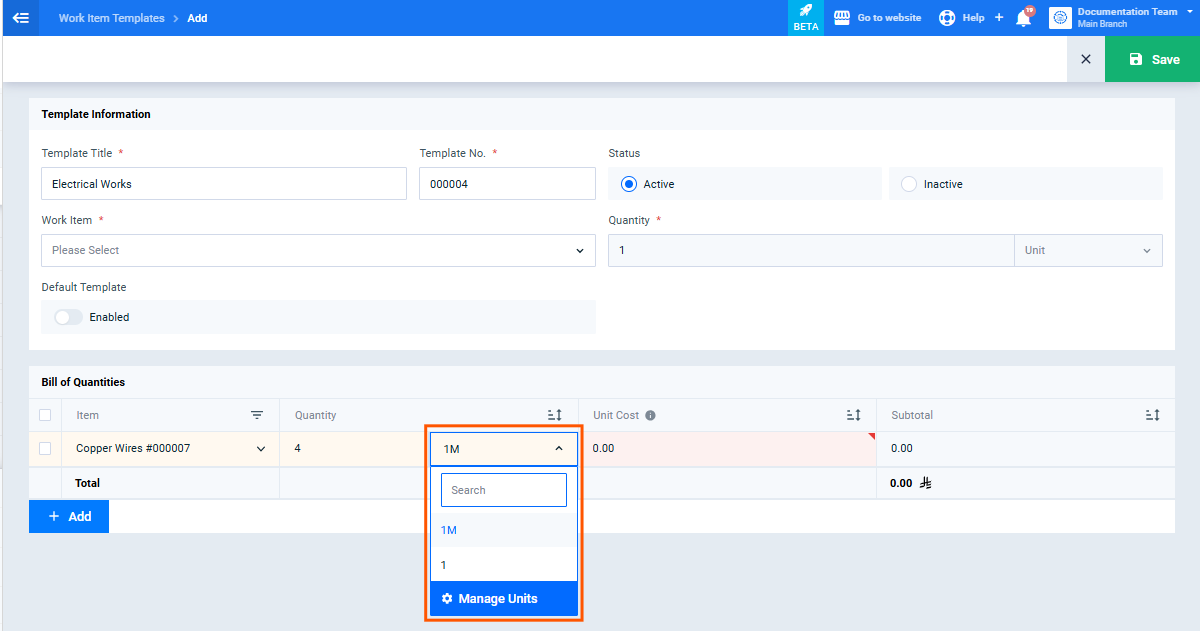
- Click the dropdown for the “Unit” field for that item; a search box (“Search”) appears for searching within the available units.
- At the bottom of this list, click the “Manage Units” button (accompanied by a settings icon).
Side Panel Content
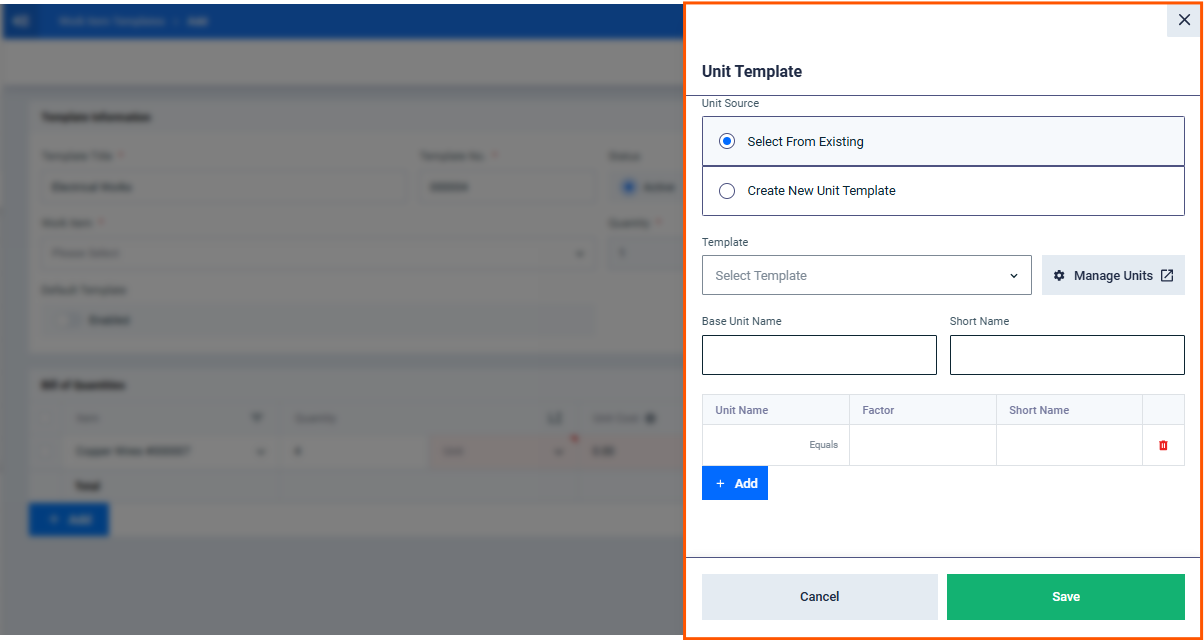
A side panel titled “Unit Template” opens, containing:
Unit Source
Two radio button options:
- Select from Existing: to select and edit an existing unit template.
- Create New Unit Template: to create a completely new unit template from scratch.
When “Select from Existing” Is Chosen
- Template: a dropdown titled “Choose Template,” showing all unit templates previously defined in Inventory Settings.
- Base Unit Name: automatically populated based on the selected template.
- Short Name: automatically populated based on the selected template.
- Factors Table: displays the list of units linked to the template, with the following columns:
- Unit Name.
- Factor.
- Short Name.
- A delete button (trash icon) for each row.
- “+ Add” button: adds a new row to define an additional factor (unit) within the same template.
Steps to Manage a Unit
- Click “Manage Units” as described above.
- Choose “Select from Existing” to edit a current template, or “Create New Unit Template” to start a new one from scratch.
- If editing an existing template: modify the unit names or factors, or add a new factor via the “+ Add” button.
- If creating a new template: enter the base unit name, short name, and then add the required factors.
- Click the “Save” button to complete the action.
- After saving, return to the “Unit” dropdown, and select the desired factor (unit) from among those defined in the saved template.
System Behavior on Save
- When the side panel is saved, the selected template — whether newly created or an edited existing one — becomes the template linked to this material or work item on the current line.
- When you open the “Unit” dropdown again, all the factors (units) belonging to the saved template appear, so you can select the appropriate one for this line.
Validation Rules in the Bill of Quantities
- If a valid unit (factor) is not selected for an item, a validation message appears: “Please select a valid unit factor.”
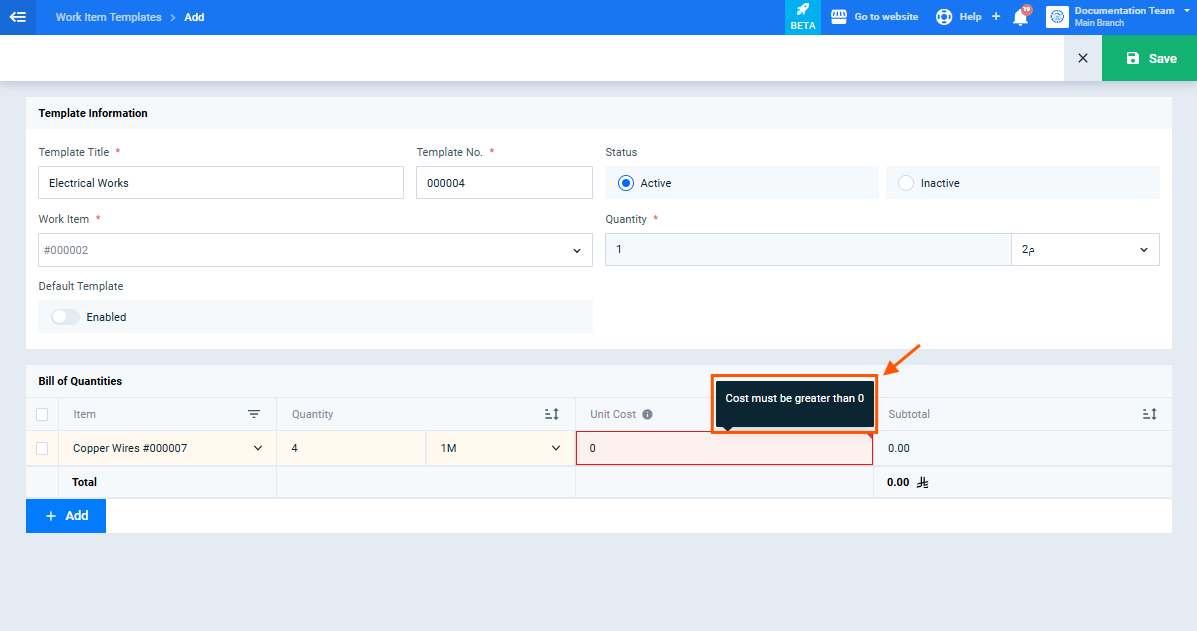
- The “Unit Cost” value must be greater than 0; otherwise, the message “Cost must be greater than 0” appears.
Bill of Quantities Summary
A “Total” row appears below the table, showing in parentheses the quantity, unit, and linked work item, for example: “Total (1 m² of Electrical Works)”, along with the total cost value.
Restrictions on Editing Templates Linked to Recorded Transactions
If an item is already linked to a unit template, and it already has transactions recorded in the system, the selected template cannot be changed entirely; the user can only add new factors (units) to the current template.
Canceling
You can click “Cancel” to close the side panel without applying any changes to the template.