


PNR and Booking Files for Travel and Tourism Companies Comprehensive Guide
Travel and tourism companies have distinctive features due to the nature of their activities, requirements, and the services they offer. Through an efficient application of booking files and PNR, you can easily monitor your activities.
How to Add a Work Order
Note: The “Work Order” in this tutorial refers to the client’s Reservation files.
The reservation file includes all the data, plans, and budgets for each client’s reservation.
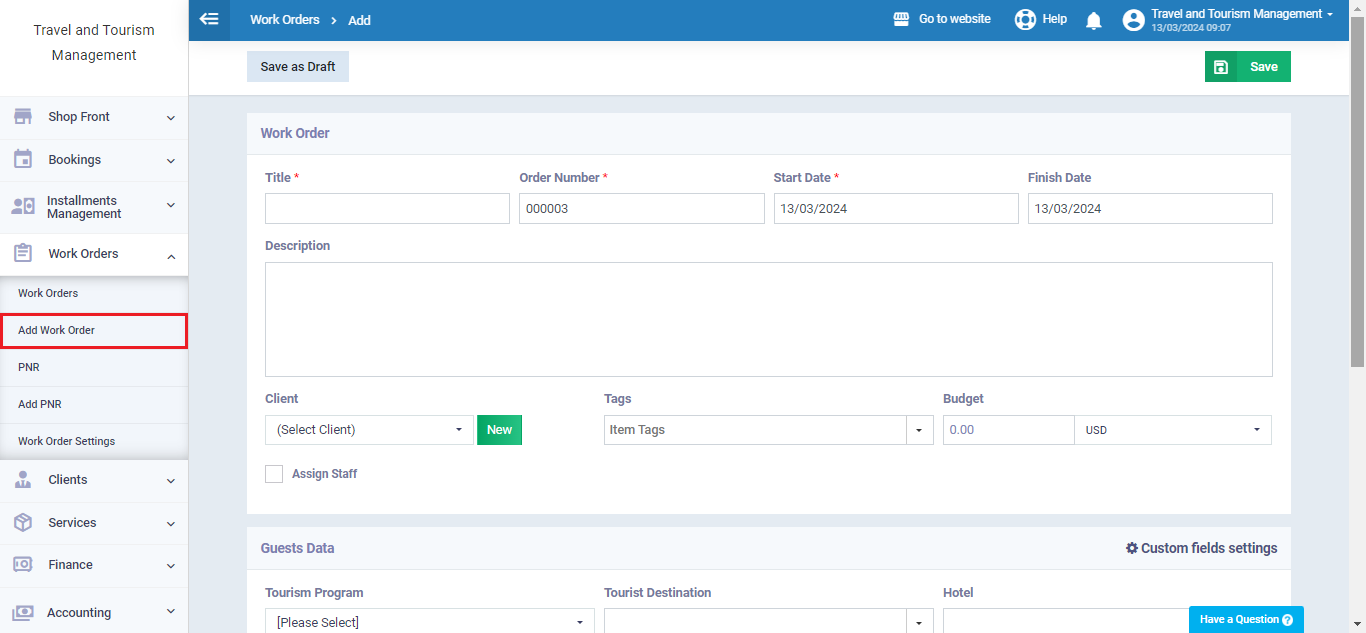
Click “Add Work Order” under “Work Order” in the main menu.
Enter the work order data
-
Title: The name of the work order as it will appear in the work orders list in the account.
-
Order Number: A number or code that distinguishes the work order and is automatically assigned sequentially. It can be edited or the sequencing method can be changed by adjusting the “Sequential Numbering Settings” within the account.
-
Start Date: The arrival date of the included traveling clients in the work order.
-
Finish Date: The departure date of the reservation and the return of the specified travelers in the work order.
-
Description: Provide a general description of the nature of the new work order or any notes.
-
Tags: Write keywords about the work order to assist in search operations within the program.
-
Client: Select a client from the list if the work order is associated with a specific client.
-
Budget: Specify the total value of the work order budget.
Click on “Save“
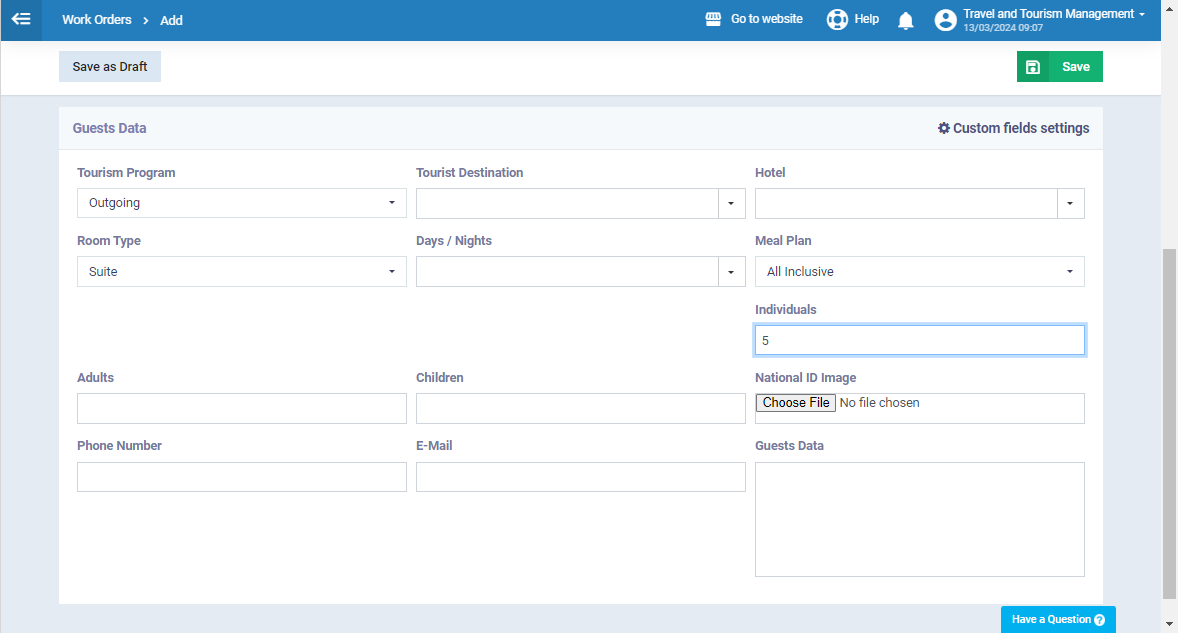
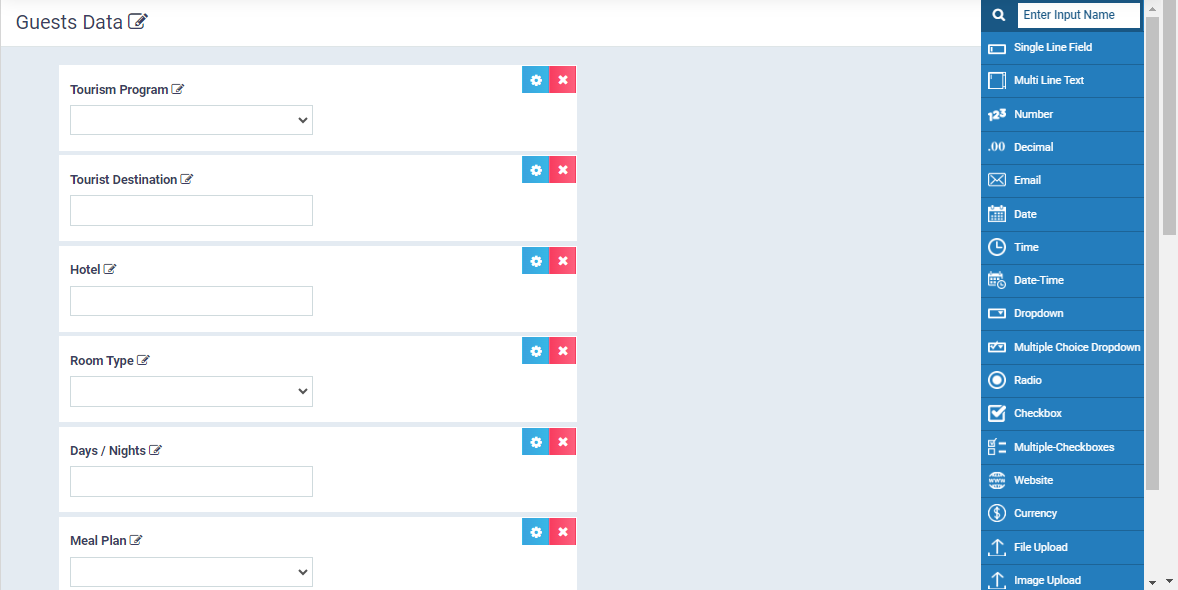
Enter Guests’ Data as Follows
-
Tour Program: Choose from the dropdown menu the type of tour program: (Outgoing – Domestic – Honeymoon – Nile Cruise – Hajj and Umrah – Tours).
-
Tourist Destination: Write the name of the country or place the client is heading to and press the “Enter” button.
-
Hotel: Write the name of the hotel and press the “Enter” button.
-
Room Type: Choose from the dropdown menu the type of room: (Single Room – Double Room – Triple Room – Suite).
-
Days/Nights: Write the number and press the “Enter” button.
-
Meal Plan: Choose from the dropdown menu the type of meal plan: (Full Board – Half Board including breakfast and dinner only).
-
Individuals: Write the number and press the “Enter” button.
-
Adults: Write the number and press the “Enter” button.
-
Children: Write the number and press the “Enter” button.
-
National ID Image: Upload an image or PDF file of the client’s ID card.
-
Phone Number: Write the client’s phone number.
-
Email: Write the client’s email address.
-
Guests Data: Enter the names of guests and any additional information about them.
Click on “Save“
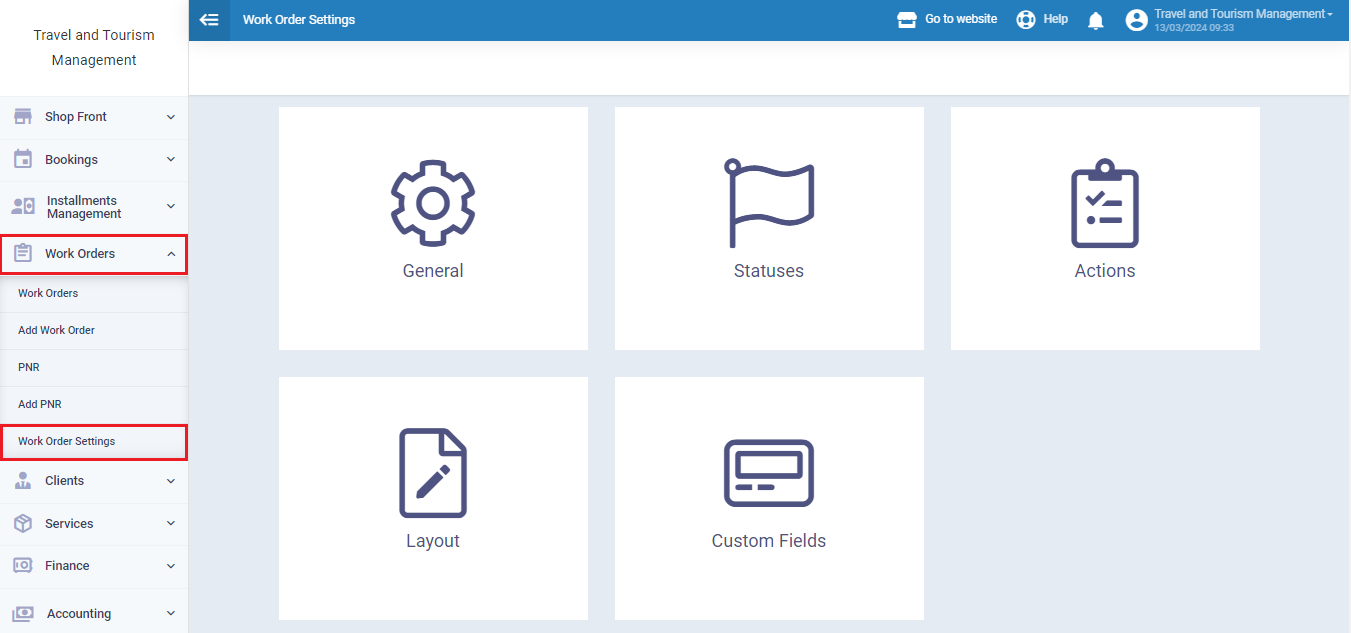
Work Order Settings
Despite the system being configured with fields related to travel and tourism companies to suit the nature of the activity, you can easily reset these fields and properties through the settings.
Click on “Work orders settings” from the dropdown menu of “Work orders“.
First Setting: Budget Calculation
After clicking on “Work order Settings“, click on “General“.
Choose the budget account from the dropdown menu to be one of the following options:
-
Expenses: In this case, expenses and purchase invoices assigned to the work order are compared to the total project budget.
-
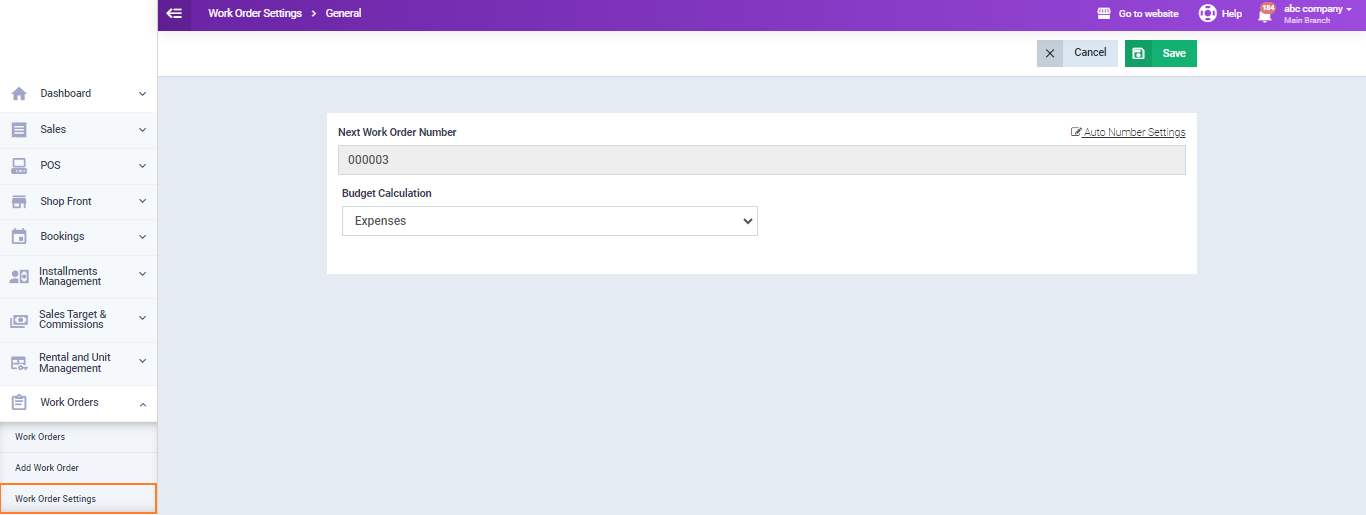
The total expenses or invoices are calculated compared to the budget.
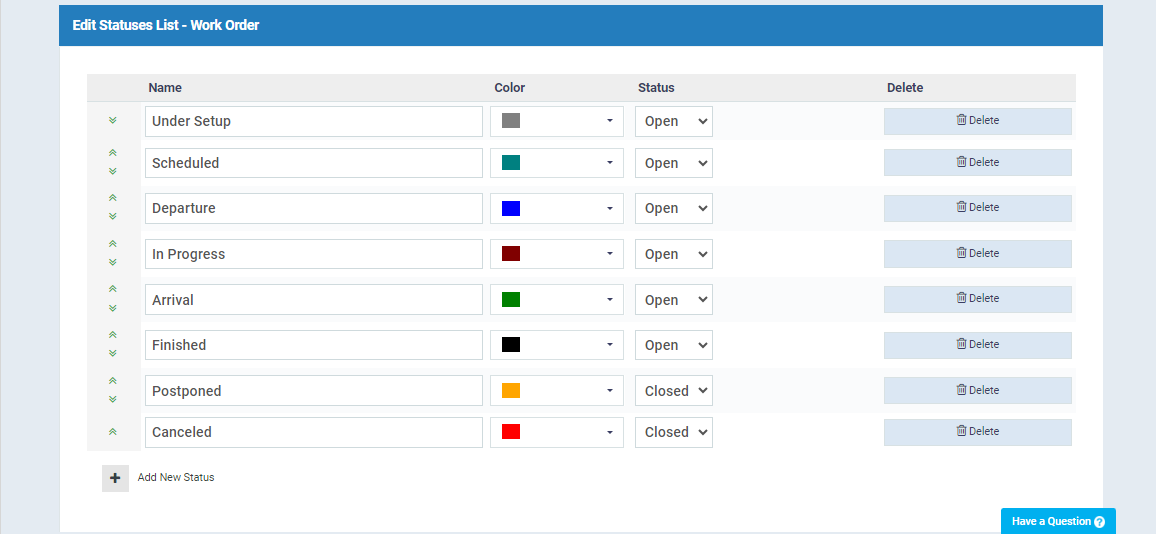
Second Setting: Statuses
After clicking on “Work order Settings” select “Statuses“
You will find work order statuses ready as follows:
- Under Setup: Open.
- Scheduled: Open.
- Departure: Open.
- In Progress: Open.
- Arrival: Open.
- Finished: Closed.
- Postponed: Closed.
- Cancelled: Closed.
Third Setting: Actions
Click on “Work order settings” then select “Actions“
You will find the following actions automatically created:
- Reception
- Escort
- Pick up / Drop
- Housing
- Tourism Guiding
- Tourism Program Amend Request
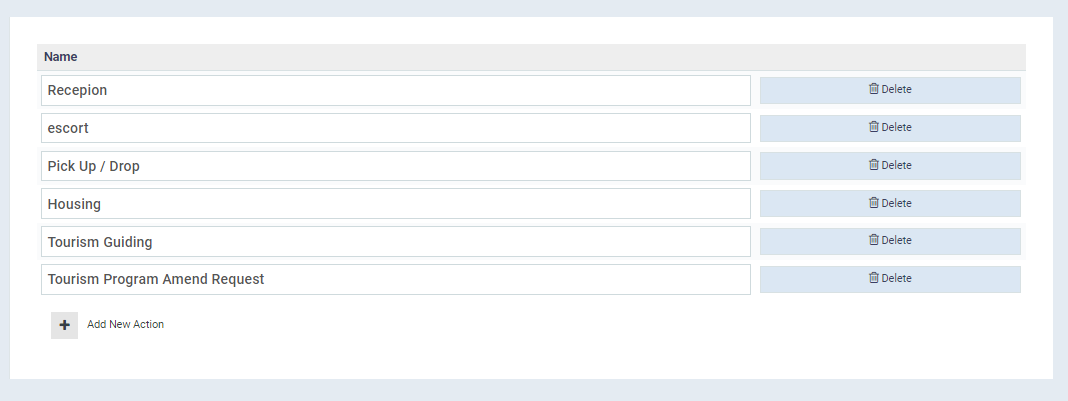
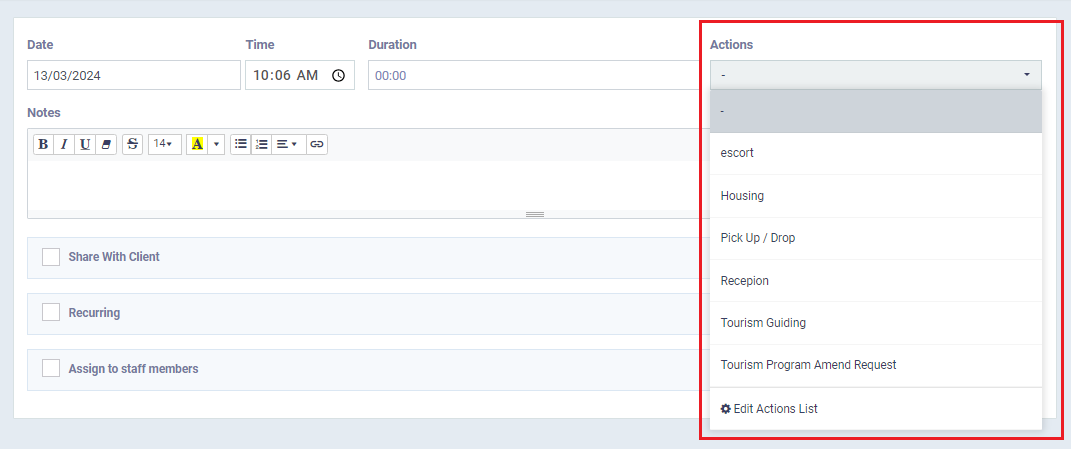
Actions are used when scheduling an appointment with the work order.
Click on the “Schedule Appointment” button.

Then choose the action on this appointment.
Fourth Setting: Work Order Layout
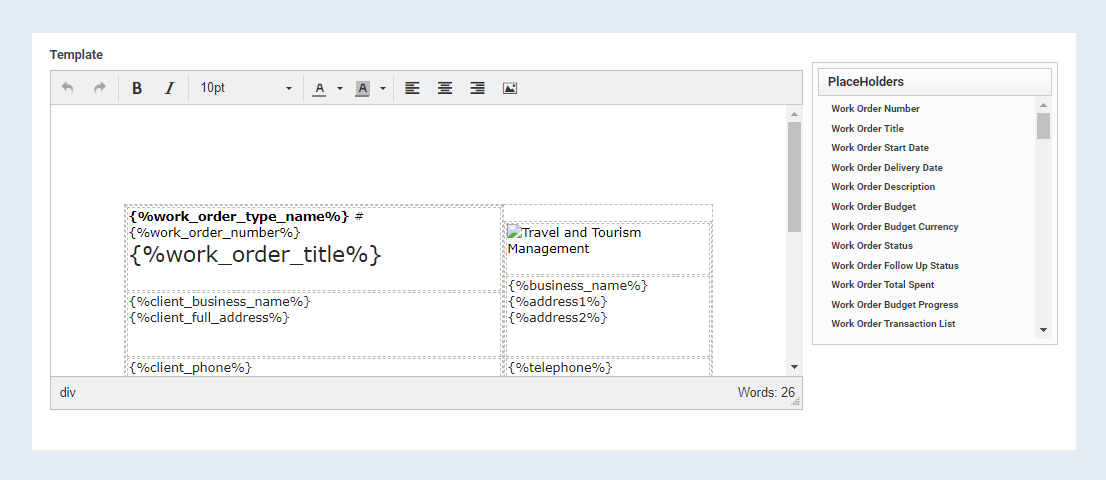
Fifth Setting: Custom Fields
When creating a reservation file, you will find some data specific to guests. You can control these fields through the custom fields settings for the work order.
After clicking on “Work Order Settings“, click on “Custom Fields“.
What is PNR and How to Add it
Through the PNR app, you can add a sales invoice and a purchase invoice for the service provided from the same screen, which facilitates the program’s operation and the calculation of profits for each service.
Click “Add PNR” under “Work Order” in the main menu.
Enter the usual data for the sales invoice, in addition to the purchase price for each item and the supplier.

After saving, the PNR will appear as follows, where you can notice the total profit, and profit for each item, and you can delete and edit.