How to Create an Invoice
Thousands of invoices are issued daily, and because they are a frequently used document, the system makes it easy for you to create invoices. It provides a simple and clear interface with the features you need throughout the invoicing process. In this article, we’ll guide you step by step on setting up the process of creating and tracking electronic invoices.
Create a New Invoice
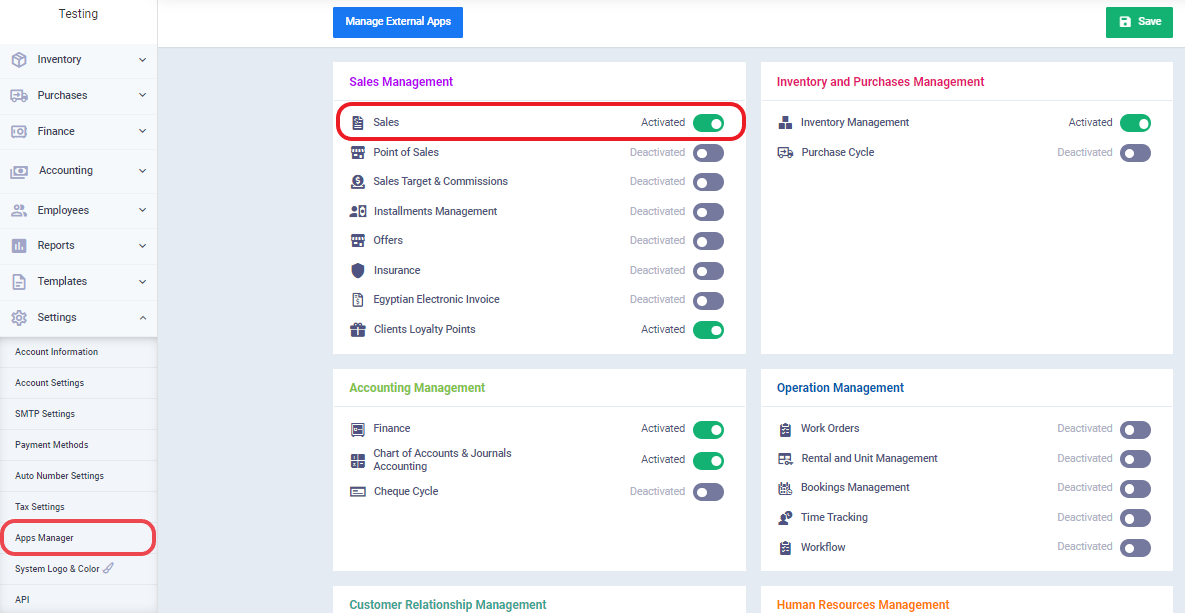
To create an invoice, make sure to activate the “Sales Application” from the “App Manager” section.
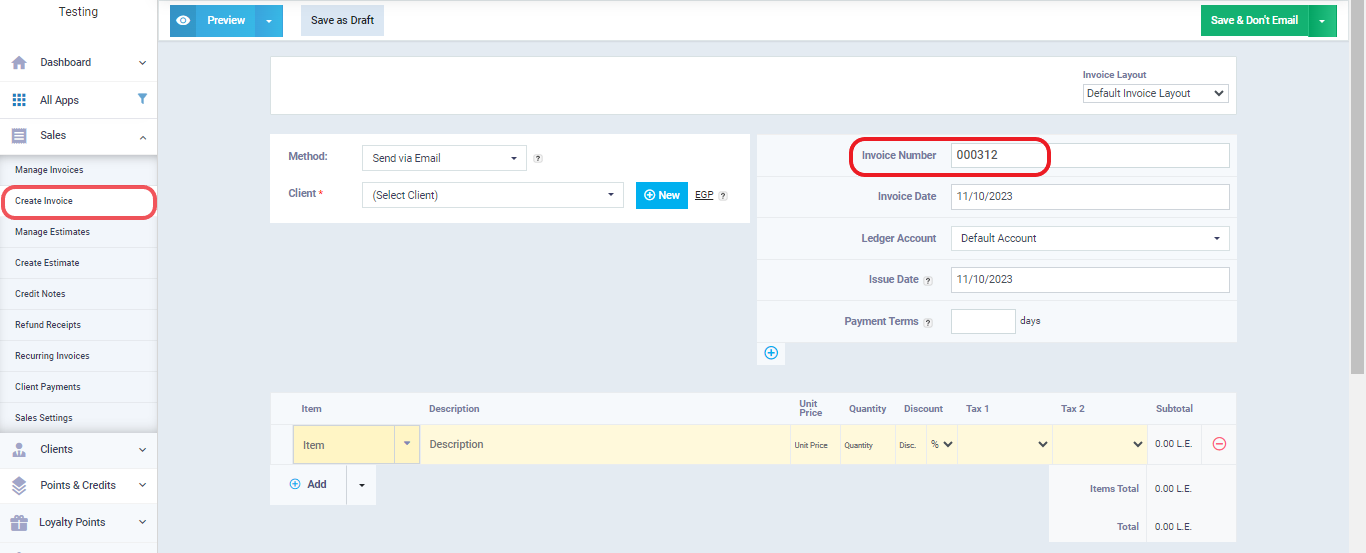
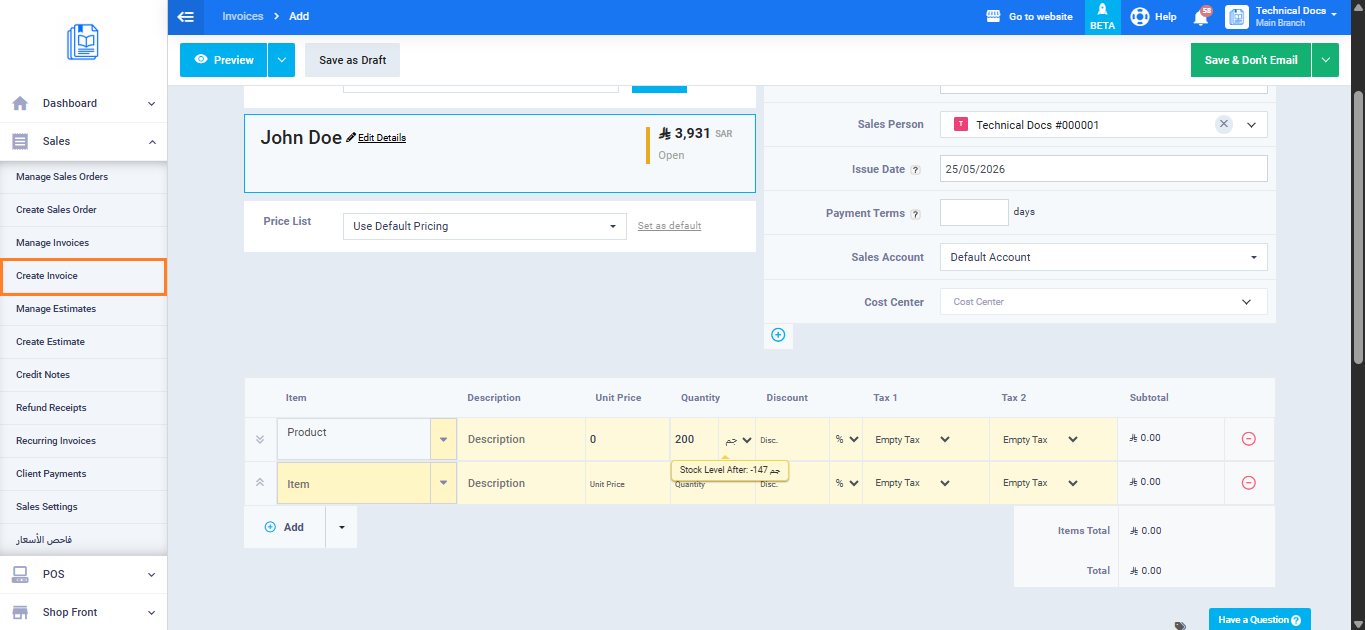
Click on “Sales” in the main menu, then click on “Create Invoice” to find a new invoice that has been automatically created with a unique serial number. You can then specify the invoice date, which is automatically set to the creation date, and also the issue date, which you can set on the same day or before or after it.
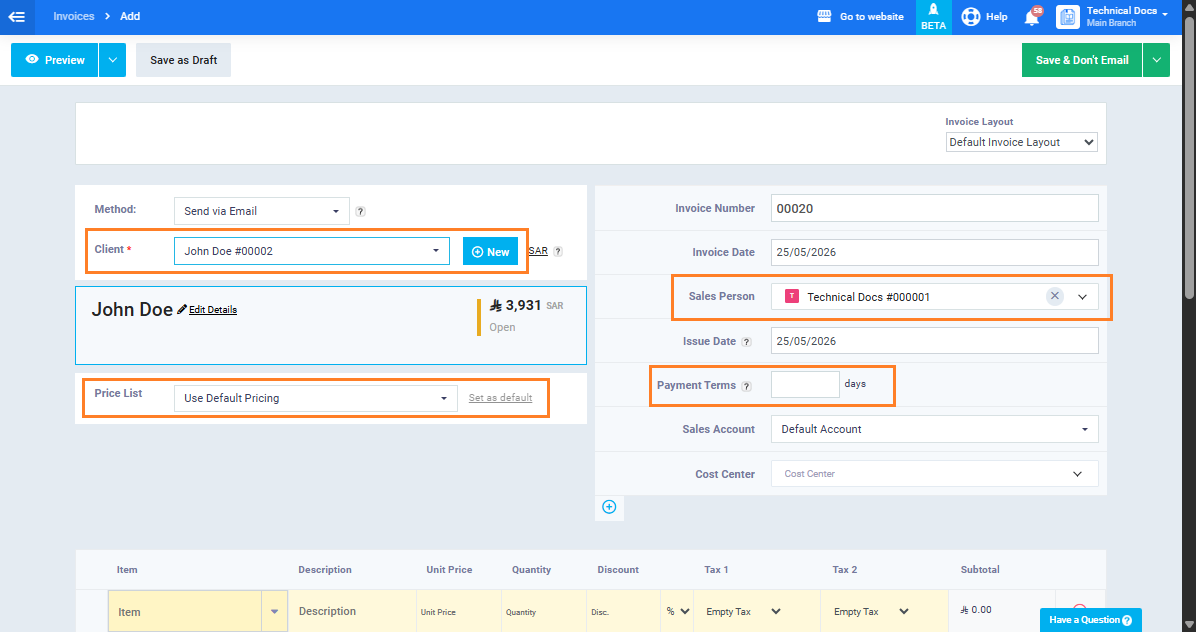
The “Client” field allows you to select the Client associated with the invoice from the system’s client database. Alternatively, you can add a new client by using the button next to the field.
The “Salesperson” field is used to assign invoices to a specific salesperson, facilitating later tracking and performance evaluation of employees and the calculation of sales commissions.
The “Payment Terms” field specifies the number of days allowed for the client to pay the invoice.
The “Price List” is a list containing special prices for specific products or all products. During invoice creation, you can choose from this list, and product prices will be automatically calculated based on the prices in this list rather than the regular prices associated with the products since they were added to the inventory.
Completing the Basic Information for the Invoice
After entering the basic information and selecting the client for the invoice, you can add products, specify quantities, modify the price if you want to change the default product price in your inventory, and choose the tax applied to each product individually.
Many invoice options give you a degree of control, and you can use them whenever you want, or you can simply stick to the basic invoice details without additional details.
The Invoice Options Include:
- Discounts and Adjustments:
-
- Discounts: There are two ways to add discounts to invoices. You can apply discounts at the item (product/service) level, which can be enabled when adding products to invoices next to the tax field. Alternatively, you can apply discounts to the total invoice amount, as shown in the screenshot below. For percentage discounts, you can choose to apply them to either individual items or the entire invoice. You can also apply a fixed discount amount, specifying it in the currency used in the invoices.
Here are the steps for adding discounts in the user manual.
- Loyalty Points:
If you implement a loyalty points program through the system, which results in granting points to the client with each purchase, these points can be used as a discount when issuing a new purchase invoice. The client specifies the number of loyalty points they want to redeem, which is then converted into a cash discount based on the predefined loyalty scheme for the client.
- Adjustment:
The actual amount on an invoice often contains fractions, and many accountants prefer to round these fractions and issue the invoice for the nearest appropriate whole number, like rounding in mathematics where, for example, 5.8 is rounded to the nearest whole number 6, and 5.4 is rounded to 5.
In the adjustment box, you write the number you want to subtract or add from the invoice to make the total an even number. The adjustment amount is written as a positive value (+) if you are adding an amount that the clients will bear, and as a negative value (-) if you are deducting the adjustment amount and bearing it yourself on behalf of the client.
- Account:
Select the account from the chart of accounts that you want to link the invoice to, or leave the default account as it is.

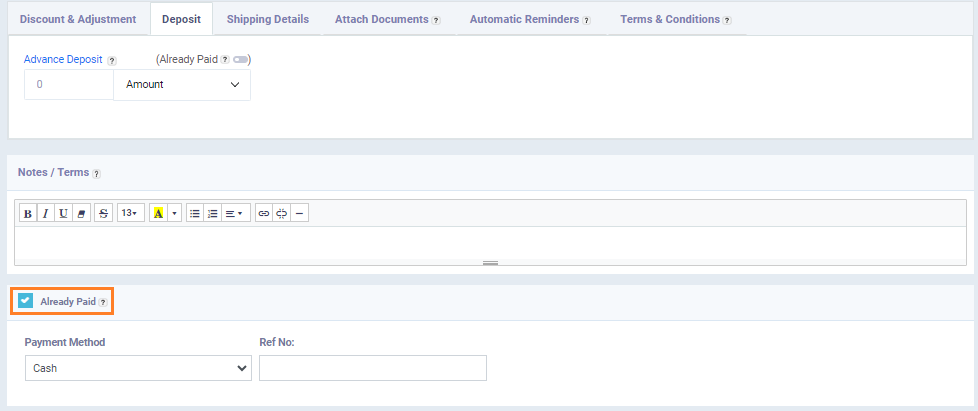
(2) Deposit:
Advance Payment: If an agreement has been made for the client to pay a specific amount of the total invoice amount as an advance payment, the amount or percentage of it from the total invoice value is recorded. The invoice status will then be marked as partially paid. However, it should be noted that the client can still delay payment of the advance.
- Advance Payment Already Paid:
If the advance payment has already been made, the “Paid Already” button is activated, along with specifying the payment method and the cash register to which it was paid.
- Reference Number: Add the reference number if available, which is associated with the cheque when making payments.

- Already Paid:
In case the invoice is already paid, you can activate this button instead of using the partial payment associated with depositing a partial amount.
(3) Shipping Information:
- Shipping Address:
This refers to the client’s shipping address, which may or may not appear on the invoice. The options are as follows:
- Automatic: To display one of the addresses registered in the client’s profile on the invoice, with a preference for showing the secondary address.
- Do Not Show: To hide the shipping address within the invoice.
- Show Client’s Primary Address: To display the client’s primary address as the shipping address on the invoice.
- Show Client’s Secondary Address: To display the client’s secondary address as the shipping address on the invoice.
- Shipping Costs:
This is where you add the shipping costs to be collected from the client.
- Warehouse:
To write the warehouse from which the products will be shipped. You can activate the “Choose Warehouse for Each Item” feature if you want to ship each product from a different warehouse.

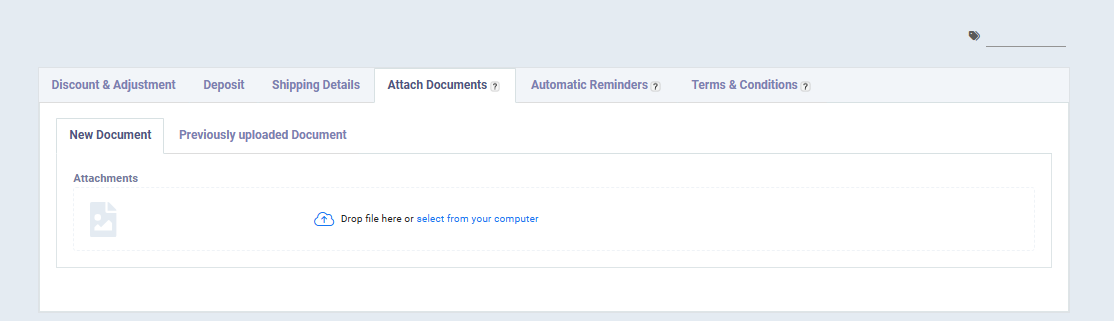
Attaching Documents:
- Attach a New Document:
You can do this by choosing the document you want to attach from your computer.
- Attach a Document Previously Uploaded:
Documents that you have previously uploaded are displayed for you to choose from without the need to search on your computer.
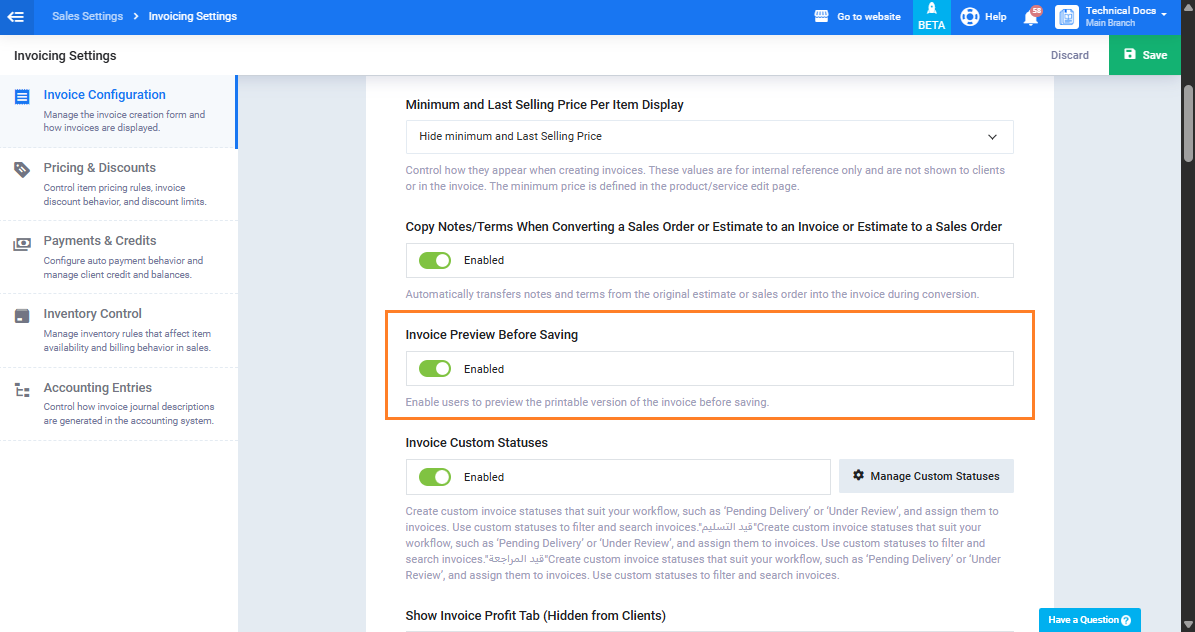
Controlling Invoice Preview Permissions
Before saving the invoice, you can preview how it will be displayed by using the “Preview” button. This allows you to see the final appearance of the invoice and make any necessary edits before saving and printing it.
However, if you don’t want to activate this feature to prevent access to any copies or final forms of the invoice without the final save, you can go to “Sales Settings” in the main menu, then select “Invoicing Settings.”

Enable “preview invoice before saving” option, this feature is enabled. If you don’t activate it, system users won’t be able to preview the invoice.
Invoice Profit Display
You can easily determine the profit generated by each invoice by comparing the purchase prices of products with the selling price and deducting expenses and discounts.
Note: Profit can be either positive (+) in case of gain or negative (-) in case of loss.
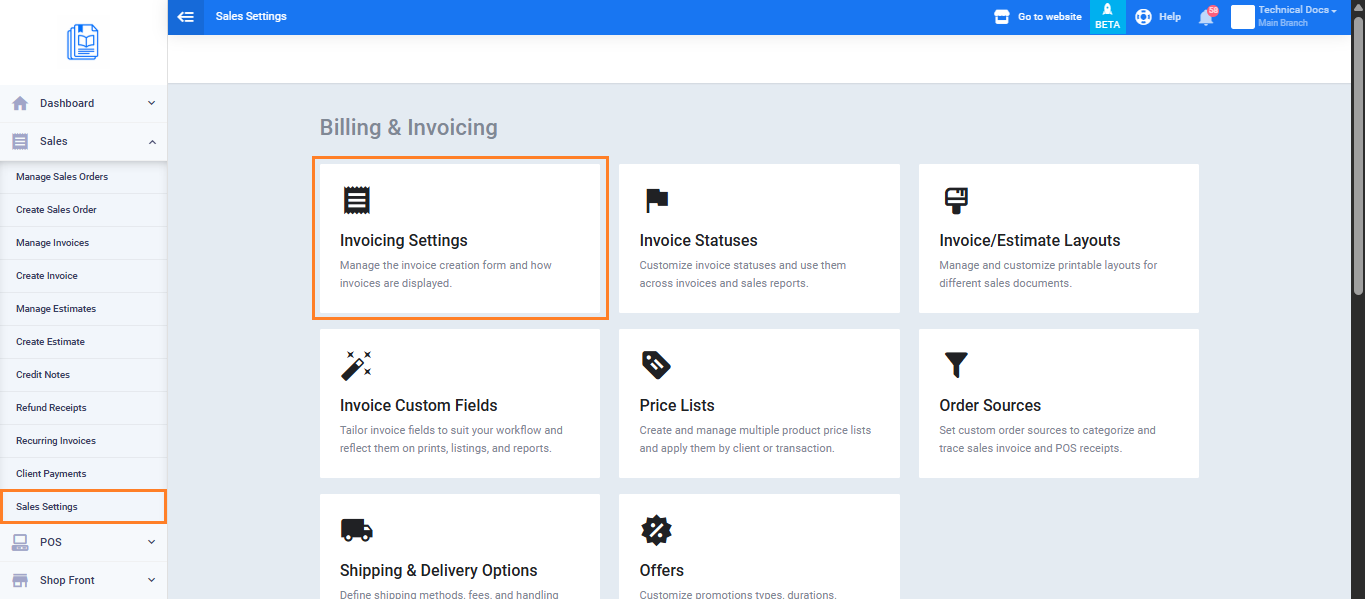
Go to “Sales Settings” under “Sales” in the main menu and click on “Invoicing Settings.”
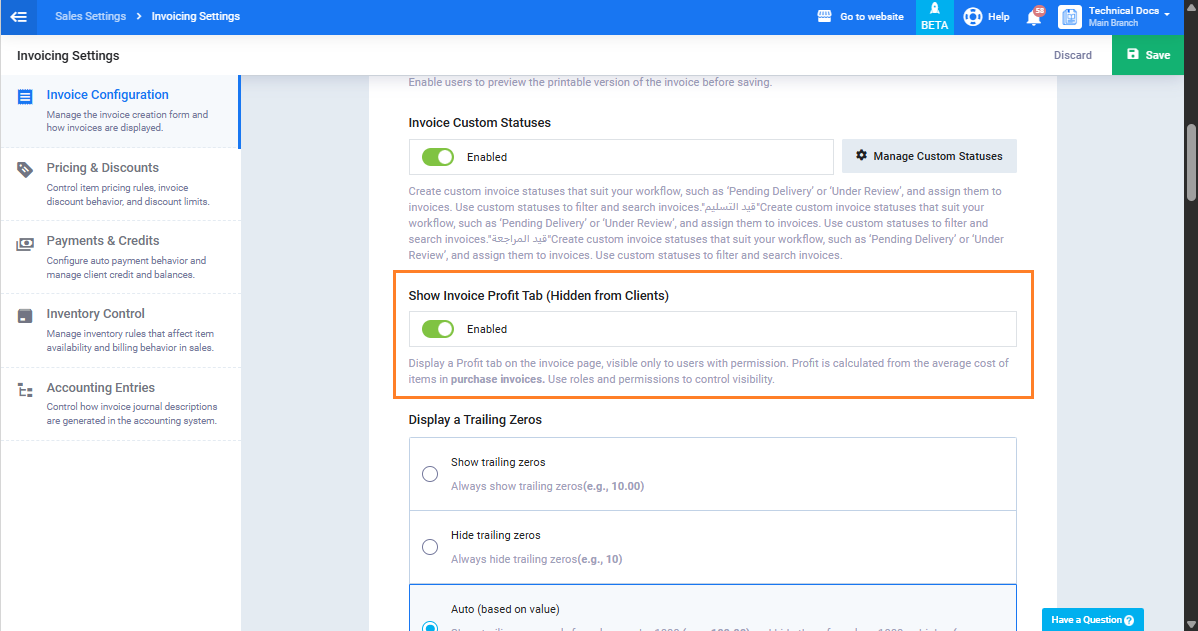
Enable the “Show Invoice Profit Tab” feature and click “Save.”
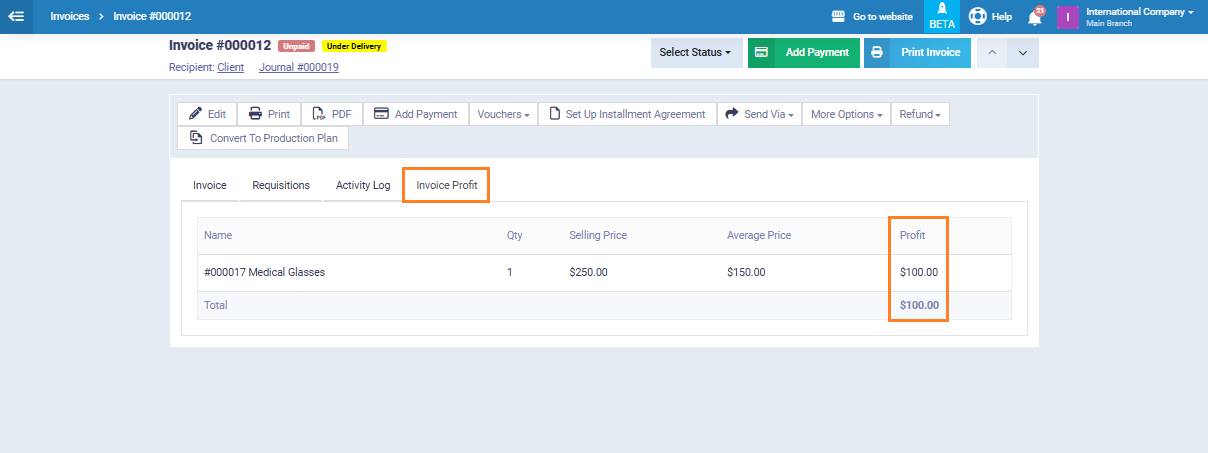
Go to “Manage Invoices” under “Sales” in the main menu and click on the invoice for which you want to display the profit.

Click on the “Invoice Profit” tab to find a comparison that will show what you have gained or lost as a result of this invoice.
Actions on Invoices
After issuing the invoice, there are several specific actions available to you to manage the invoicing process. You can access these actions by clicking on ‘Manage Invoices’ under ‘Sales’ in the main menu and selecting the invoice for which you want to take a specific action. The most prominent of these actions include:
After issuing the invoice, there are several specific actions available to you to manage the invoicing process. You can access these actions by clicking on ‘Manage Invoices’ under ‘Sales’ in the main menu and selecting the invoice for which you want to take a specific action. The most prominent of these actions include:
- Editing the invoice.
- Sending the invoice to the client via email, WhatsApp, or sending a text message with a link to view the invoice and its details.
- Printing the invoice on paper or downloading it as a PDF file.
- Adding a payment to the total invoice amount or a part of it.
- Issuing receipts related to product shipments.
- Adding installment options to the invoice, specifying the installment period and amount, and setting up automatic reminders for the client.
- Creating credit notes or returns for the invoice.
- Sending the invoice to the tax authority, where the invoice is only sent to the tax portal when you press this button to authorize the submission.
- You can also assign a custom cost center to the invoice or create a linked purchase order.
- Of course, you can delete the invoice as long as it has not been sent to the tax authority.

Manage Invoices
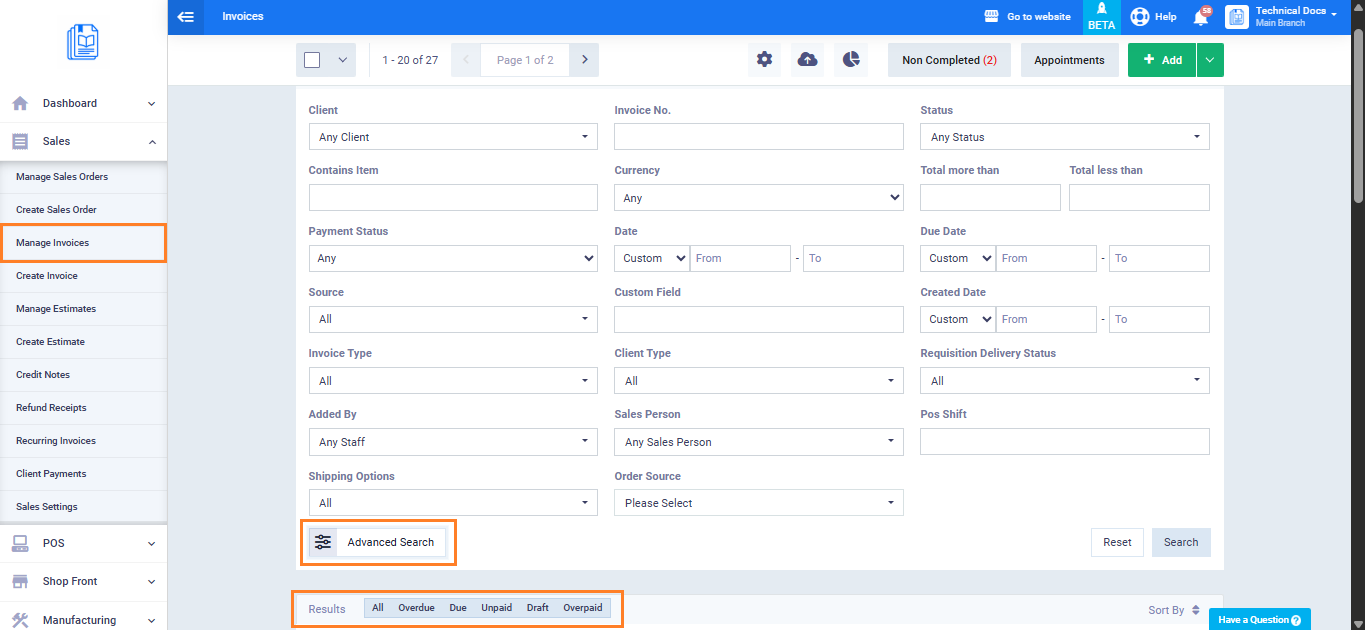
Through ” Manage Invoices,” which is accessible from the “Sales” menu, you can view a list of all your invoices. You have the option to use search filters and different statuses to find the invoices you’re looking for more efficiently and to get an analytical overview of a specific category of your invoices. Additionally, you can take some quick actions, set reminders, or select a specific invoice to access a comprehensive list of actions. You can also create a new invoice from this section.
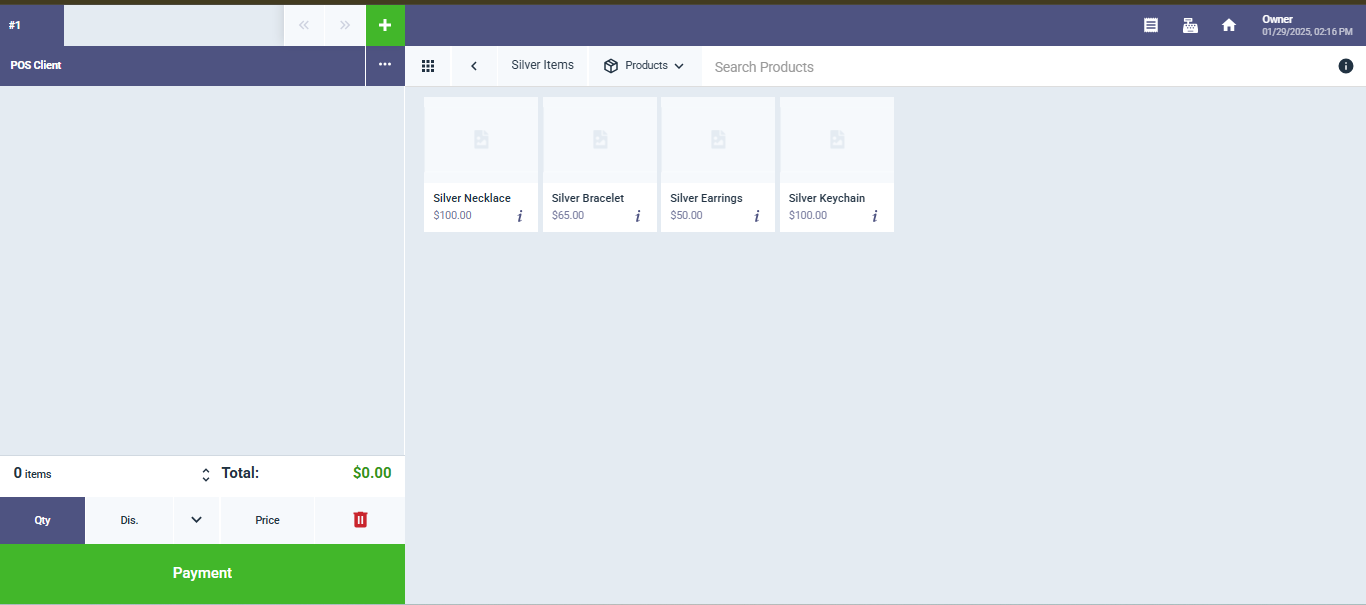
Invoicing through Point of Sale
In addition to issuing invoices through the regular method, you can use Point of Sale (POS) software, also known as a cash register system. This is particularly useful for retail stores that rely on quick sales, such as supermarkets. You can customize shifts for your employees, where each employee is responsible for their session, and they close the session and hand over their duties at the end of their shift.