


Adding a Discount to the Invoice After Saving it Through the Credit Notes
We often need to apply a discount to an invoice after it’s been saved, but we can’t edit invoices after issuance due to regulations set by the Tax Authority and Customs.
However, there is a method to add a discount to the invoice after saving it without needing to modify the invoice. To implement this method, please follow these steps:
First: Add a New Service
Add a new service and name it “Discount.” We route its sales account to the “Allowed Discount” account through the following steps:
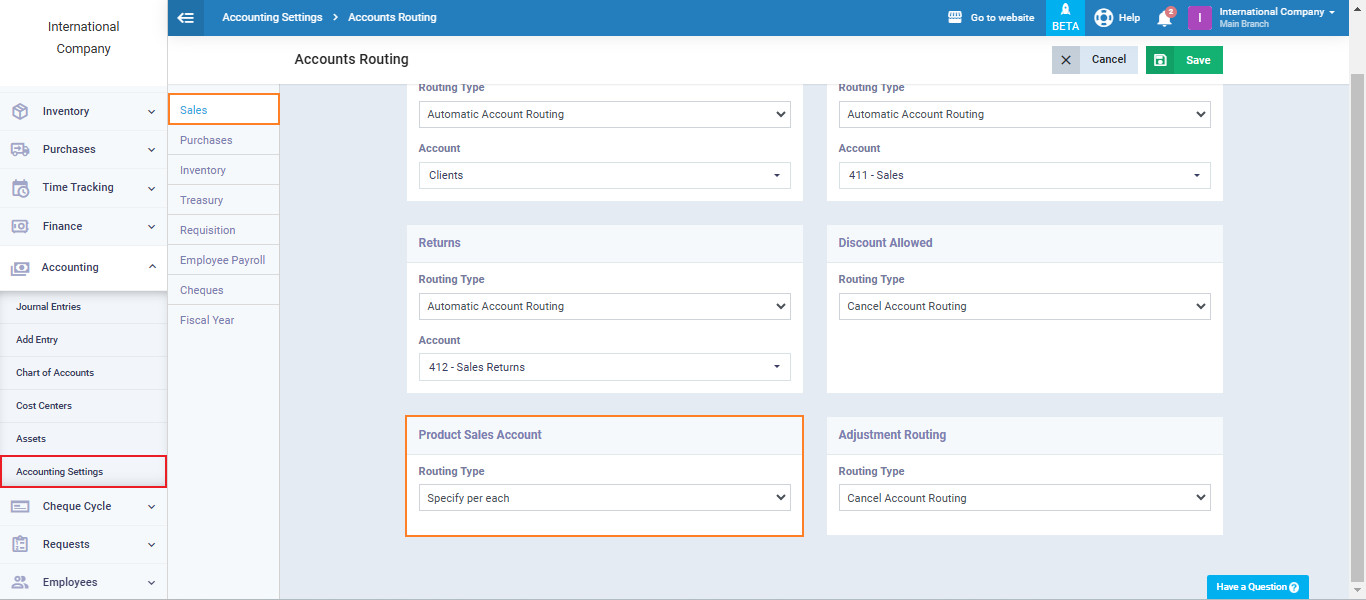
Configure the accounting routing for the “Product Sales Account” as follows:
- From the main menu, click on “Accounting.”
- Click on “Accounting Settings.”
- Click on “Account Routing.”
- Click on the account routing for “Sales” from the menu on the left.
- Select the “Route Type” for “Product Sales Account” and choose “Specify Per Each.“
- Click the “Save” button.
-
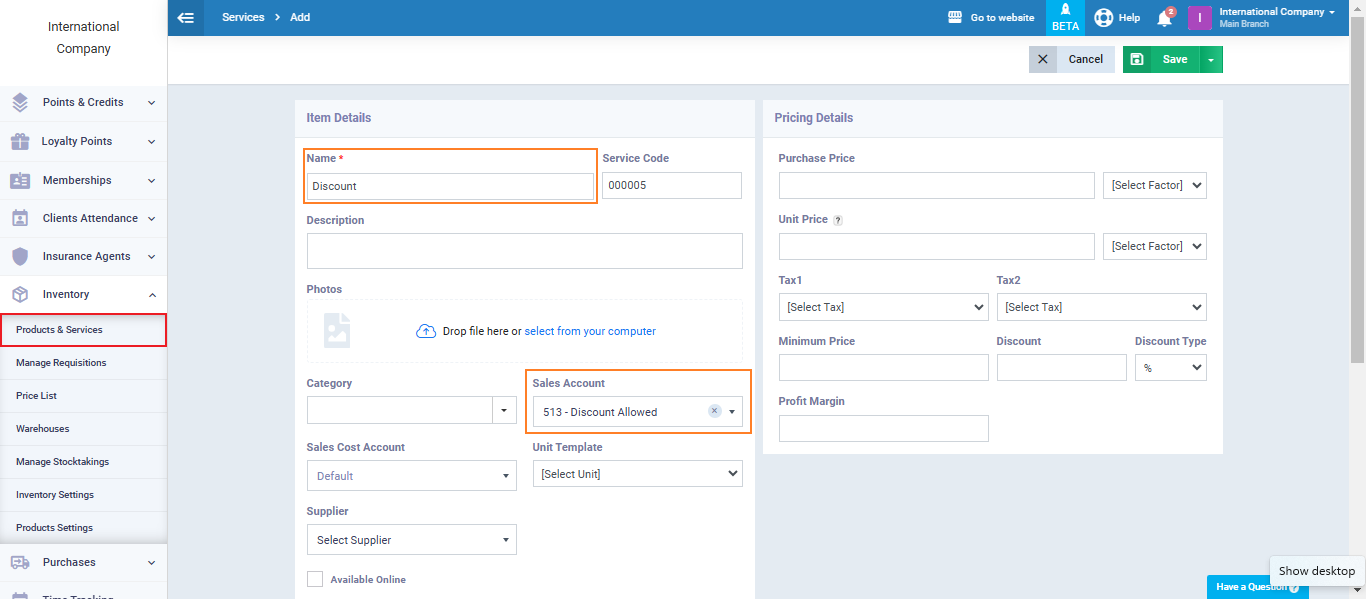
- Adding a “New Service” and routing its sales account can be done by following these steps:
- From the main menu, click on “Inventory.”
- Click on “Products and Services.”
- Click on “Add Service.”
- Enter the word “Discount” or any other suitable name with the same meaning in the Name field.
- Within the service profile, select “Sales Account” and set the sub-account to “Discount Allowed.”
- Click “Save.”
- Important Note:
Before proceeding to the next step, it’s essential to be aware of the option ”
Auto-Pay Invoices Using Client Credit.” found in “Sales Settings” > “Invoicing Settings.” Why?
If this option is enabled, the system will automatically pay any unpaid or partially paid invoices for the customer when a balance is added to their account. In the next step, we will create a credit note, resulting in a credit balance in the client’s account equal to the discount.
If the client has other unpaid previous invoices, the system will use the added balance to pay these invoices, and we want to add this balance to a specific invoice. Therefore, it’s recommended to disable this option if it’s enabled to ensure this process is done correctly. You can re-enable it after completing the mentioned steps if desired.
Second: Create a Credit Note
Adding a credit note with the discount value only can be done as follows:
- Click on “Sales” from the main menu.
- Click on “Credit Notes.”
- Click the “Create Credit Note” button.
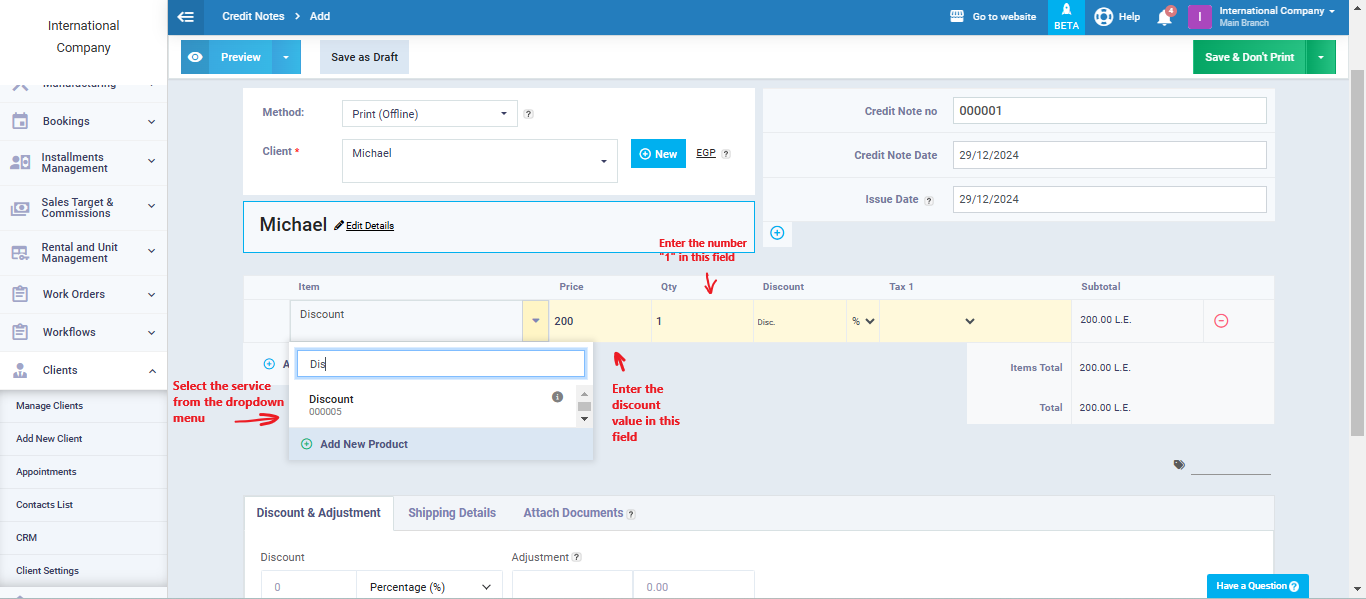
- Within the credit note, follow these steps:
-
- Select the client in the “Client” field from the registered customers (the client for whom you want to add a discount).
- In the “Item” field, select the “Discount” service that was added in the previous steps.
- Then, enter the discount value in the “Unit Price” field.
- Add the quantity as “1,” as shown below.
-
-
Save the credit note after following the previous steps.
-
Important Note:
The credit note created in the previous steps will result in a credit balance for the client, which we will add as a discount to the invoice. To perform this correctly, the invoice’s status should be “Unpaid” before proceeding. If the invoice you want to add a discount to is marked as “Fully Paid” (meaning the full invoice amount, including the discount, has already been collected), you can delete the payment from the invoice before implementing this process. To delete a payment from an invoice, follow these steps:
- From the main menu, click on “Sales.”
- Select “Manage Invoices” from the menu.
- Click on the invoice from which you want to remove payments.
- In the invoice view screen, click on the “Payments” tab.
- Click on the “…” (more options) button next to the payment and choose “Delete” from the menu.
- Confirm the deletion by clicking “Yes” when prompted.
The payments on the invoice will be removed, and it will return to the “Unpaid” status. If the invoice had multiple payment transactions, it will become “Partially Paid” until all payments are removed. Now, the invoice’s status is “Unpaid,” and you can proceed with the next steps.
Third: Distributing the Credit Balance Resulting From the Credit Note on the Invoice to Calculate the Discount.
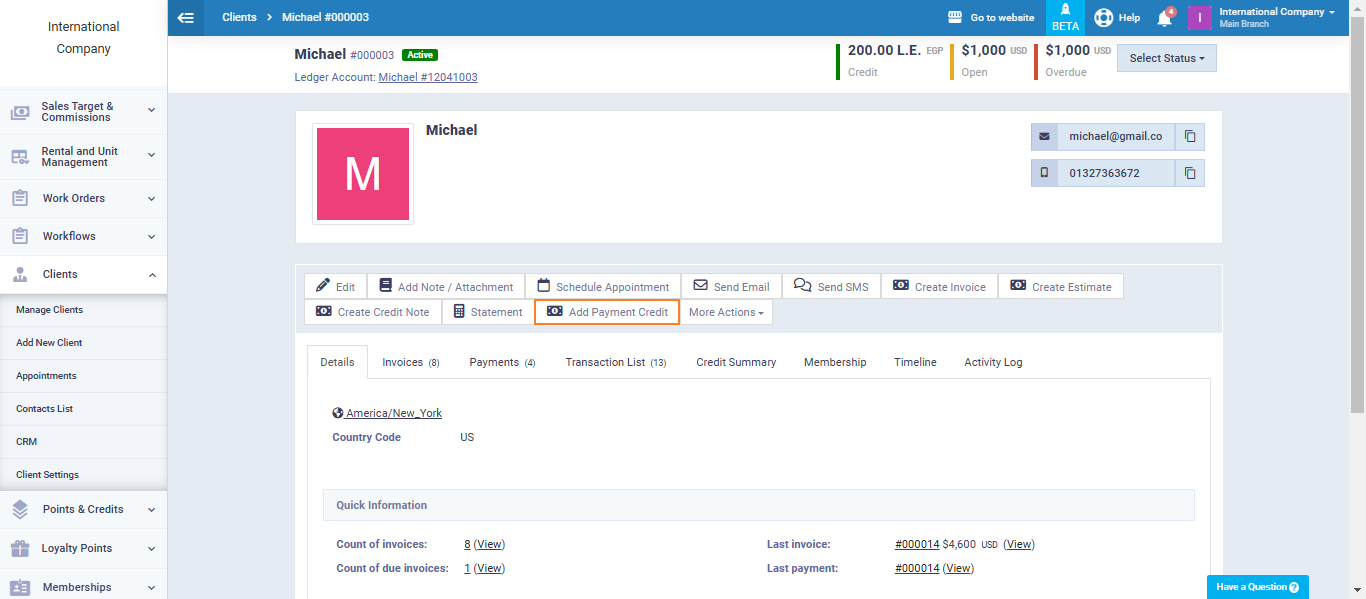
The credit balance resulting from the credit note is distributed to the invoice within the client’s account to calculate the discount as follows:
- Click on “Manage Client” from the main menu.
- Click on “Clients.”
- Click on the client’s profile you want.
- The screen displays all the client’s details, with the “Client’s Credit Balance” shown at the top.
- Click on the “Add Payment Credit“.
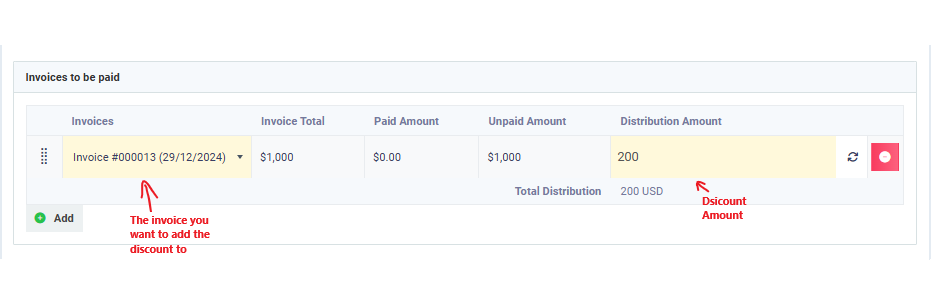
- Choose the invoice to which you want to add the discount from the list of invoices.
- Enter the discount value in the “Distribution Amount” field, ensuring it matches the balance to be distributed (resulting from the credit note).
- Click “Save,” as indicated below.
After following these steps, if you check the invoice, you will find that its status has become “Partially Paid” with the discount value deducted. In this case, you can add a payment transaction to the invoice for the net amount without the discount, making the invoice “Paid.” This way, you have addressed the accounting aspect, and in your client’s account, you’ve collected the desired revenue without any excess amount.