Issuing Credit Notes and Return Invoices
There are always policies for exchanges and returns that guarantee the client the right to refund their money or a portion of it for various reasons. Your invoicing system should be able to handle these common scenarios. Therefore, we provide you with two methods to track the money owed to the client and process it correctly from an accounting perspective. In this article, we will show you how to issue a credit note or a refund receipt and how to track the resulting entries for each of them.
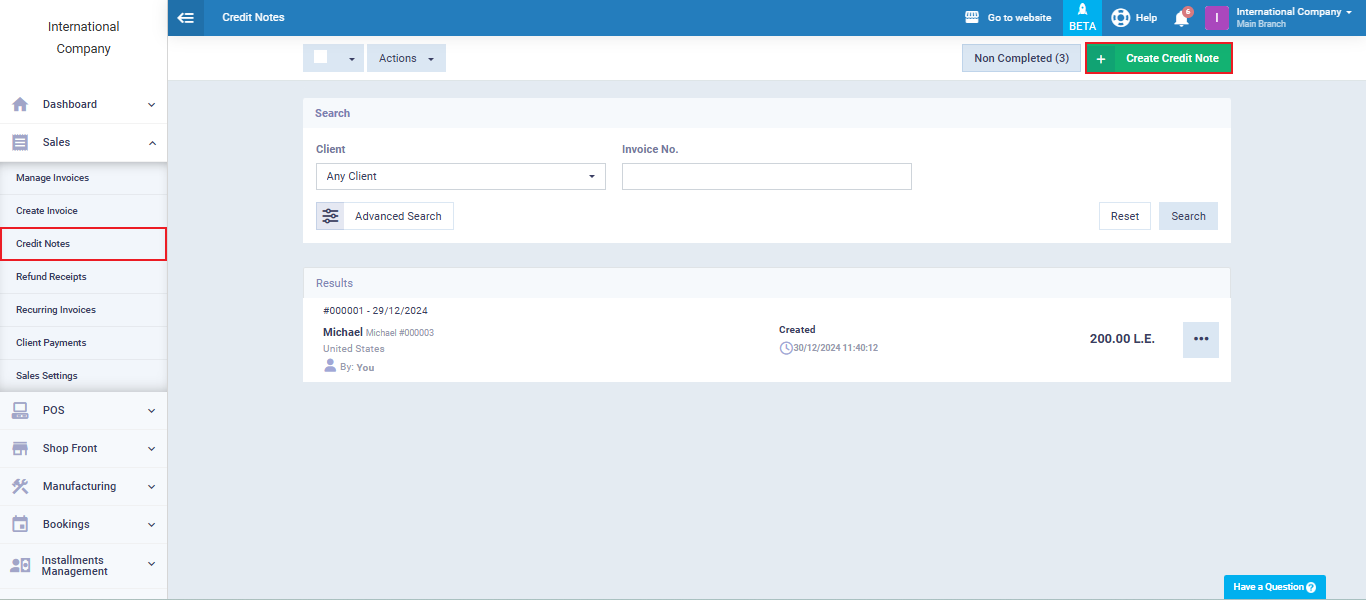
How to Create Credit Note
You would issue a credit note if there were errors in invoices or the products listed in the invoice, which could result in the client owing a specific amount. Another scenario could be when a client wishes to refund an amount they paid in advance before the invoice was issued or the products were delivered. In any such case that requires recording an amount owed to the client, you can issue a credit note.
You can issue a credit note separately from any invoices. You can also issue it against a specific invoice. To issue a credit note, you can follow these steps:
- Click on “Credit Notes” from the main menu.
- Then, click on “Create Credit Note.”
This allows you to create a credit note to adjust the client’s balance, either for a specific invoice or for any other reason that requires recording an amount owed to the client.
If you want to issue a credit note associated with an invoice, you need to go to “Manage Invoice,” click on the invoice for which you want to create the credit note, and then click on “Create Credit Note.”

In both cases, you simply need to fill in the credit note details just like you would for a regular invoice and then save it.

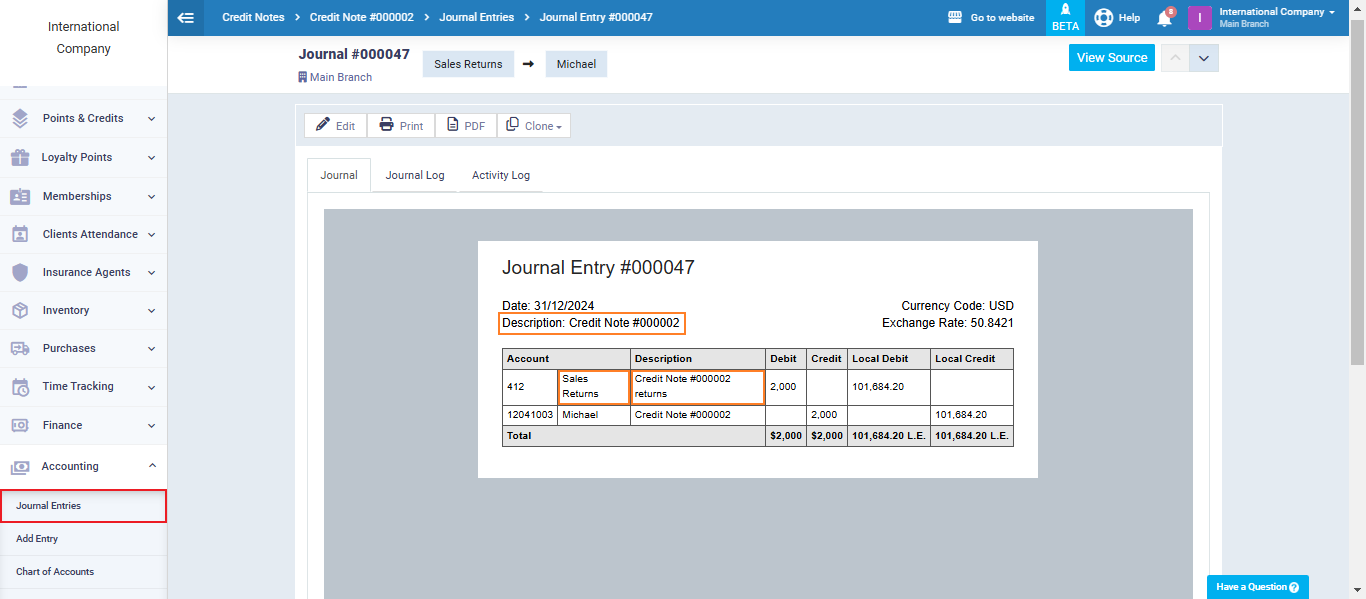
You’ll find the credit note entry created automatically, and it will be recorded along with the refund receipts in the accounts receivable in journal entries.
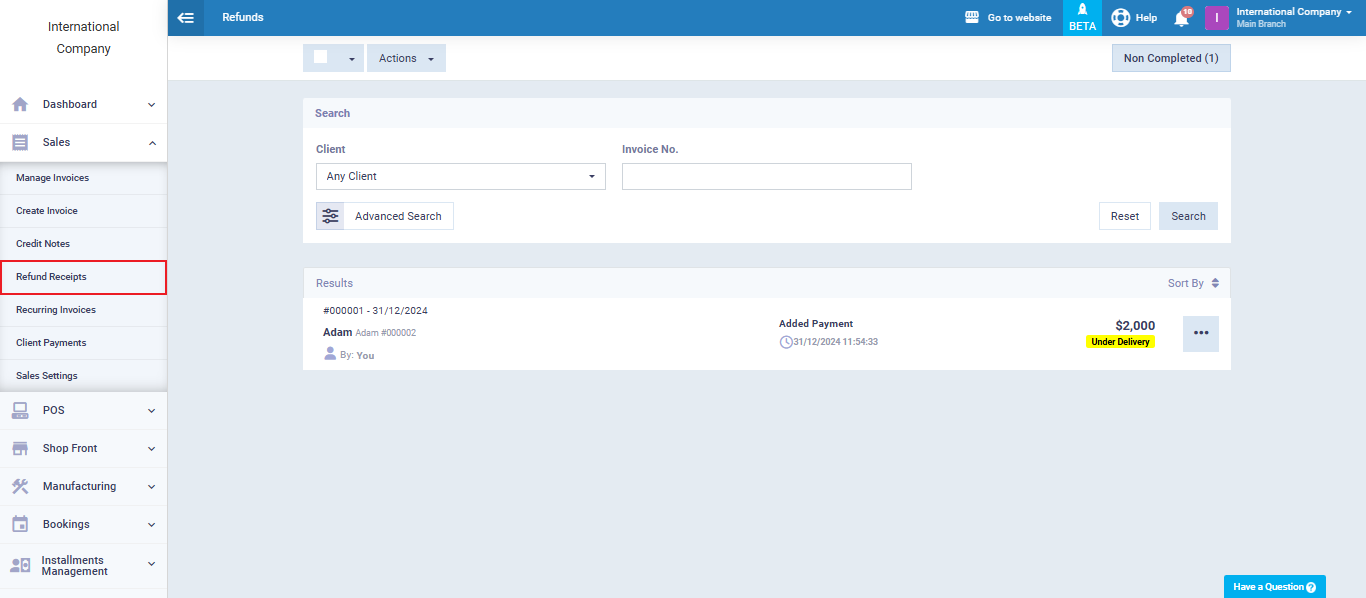
How to Create a Refund Receipt
If a client returns an invoice, and you want to adjust your accounts and inventory, you can simply issue a refund receipt.
Click on “Manage Invoice” from the main menu, and use the search and filtering tools to easily find the invoice for which you want to create a return. Then, click on this invoice.

After opening the invoice screen for the one you want to create a return for, click on the “Create Refund Receipt” button.
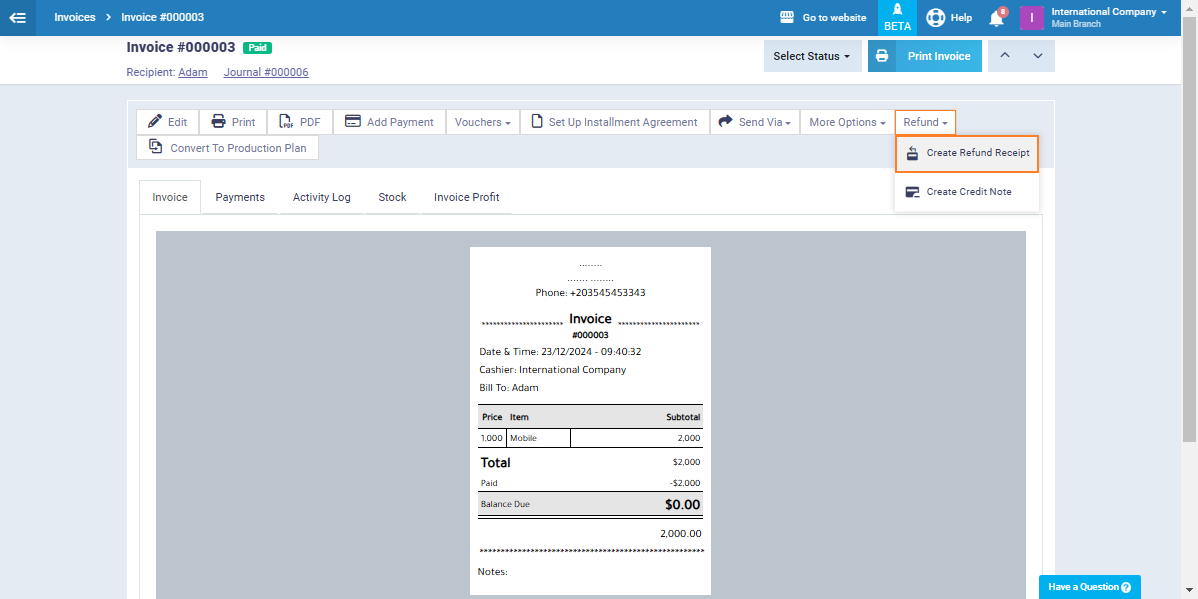
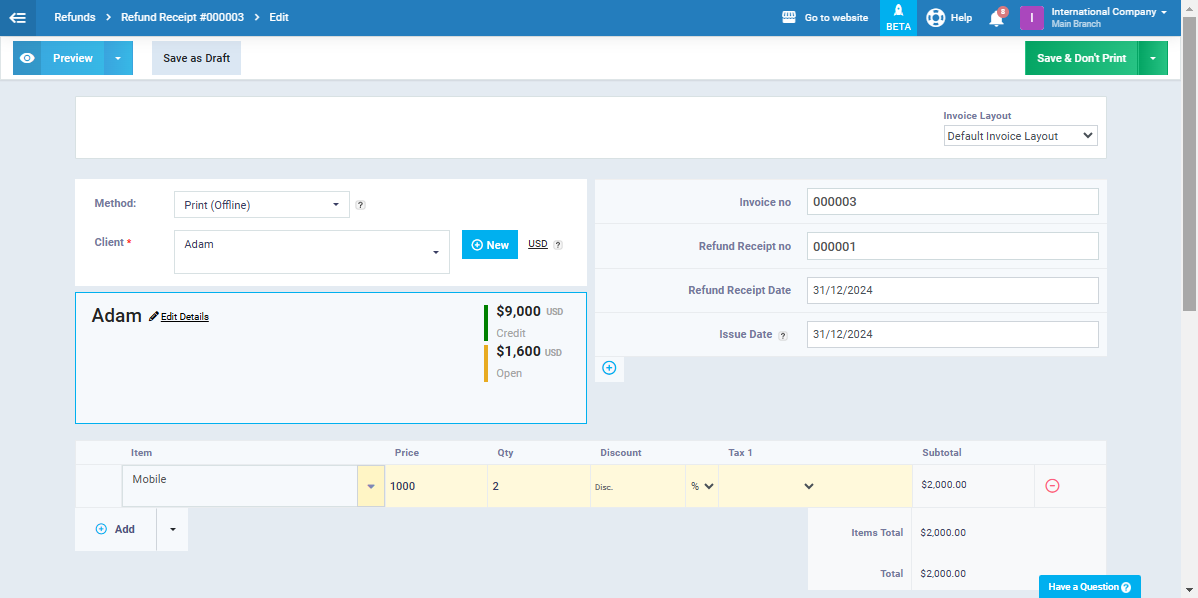
You will find the invoice data already present automatically; you just need to ensure its accuracy and click the “Save” button to generate the complete return invoice.
For example, if a client purchased 2 mobile phones and wants to return one of them, you can modify the return details to make it 1 instead of 2. This will generate a partial return for the value of 1 mobile only.
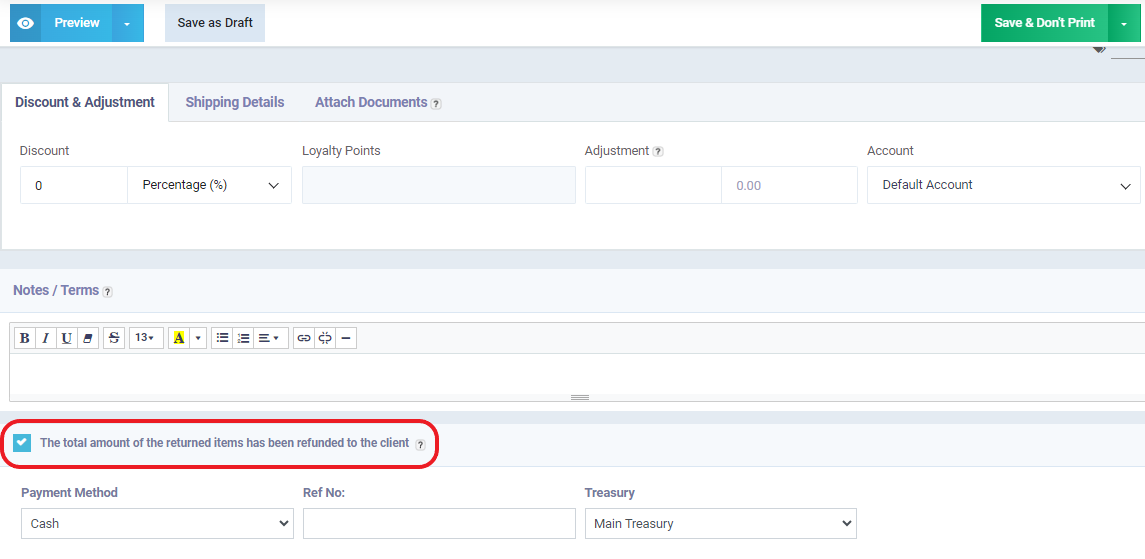
Please note that if you have refunded the invoice amount to the client, click on the symbol next to “The total amount of the returned items have been refunded to the client ” and select the method of refund, whether it’s cash, bank transfer, or any other method.
However, if you haven’t refunded the amount to the client, it will be converted into credit, which can be used to pay the client’s future invoices. In this case, do not activate the “Refunded to the Client” option.
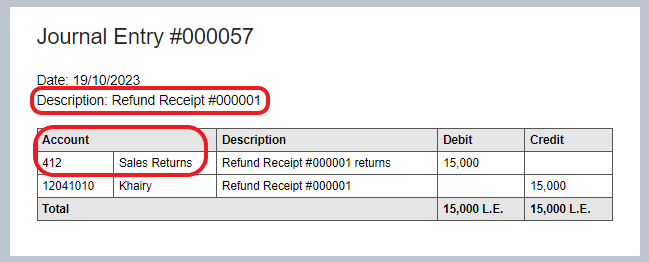
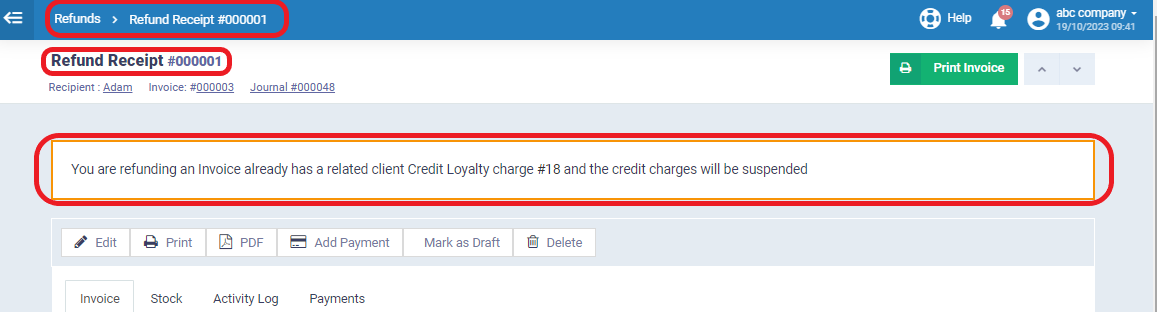
The refunded receipt entry is created automatically and is recorded in the accounts payable with the credit notes.
To view all the return invoices you have issued, click on “Refund Receipts” in the “Sales” dropdown menu on the main menu.