


Sales Invoice Routing
“Account Routing” is one of the features provided by the system to give users more flexibility in managing their accounts. While the chart of accounts has a standard structure – or default structure, if you will – through the account routing feature, you can redirect transactions to a different account as needed, instead of routing them to the default account.
In the following paragraphs, we will explain how to specifically route a sales invoice account, from the default sales account to another account, with examples.
Activating the Sales and Chart of Accounts Apps
To take the account routing step, it is necessary to activate both our Sales and Cart of Accounts apps in your account. You can use the following links to perform this step:
Setting the Account Routing Type
After ensuring that both the sales and chart of accounts apps are activated, set the account routing type to ‘Specify Per Each” instead of ‘Automatic Account Routing.’ This is because the system does not provide the account routing feature by default, and you need to notify the system to enable the account routing option on the invoice screen.
To carry out this step, refer to the Sales Account Routing Guide, specifically, the section related to directing the sales account on invoices.
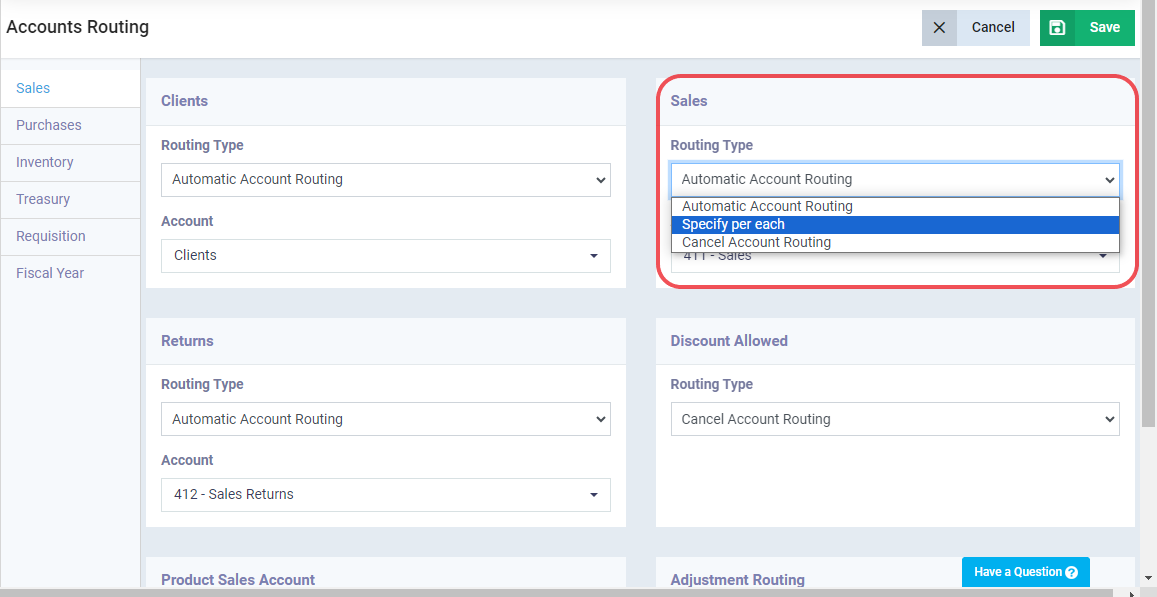
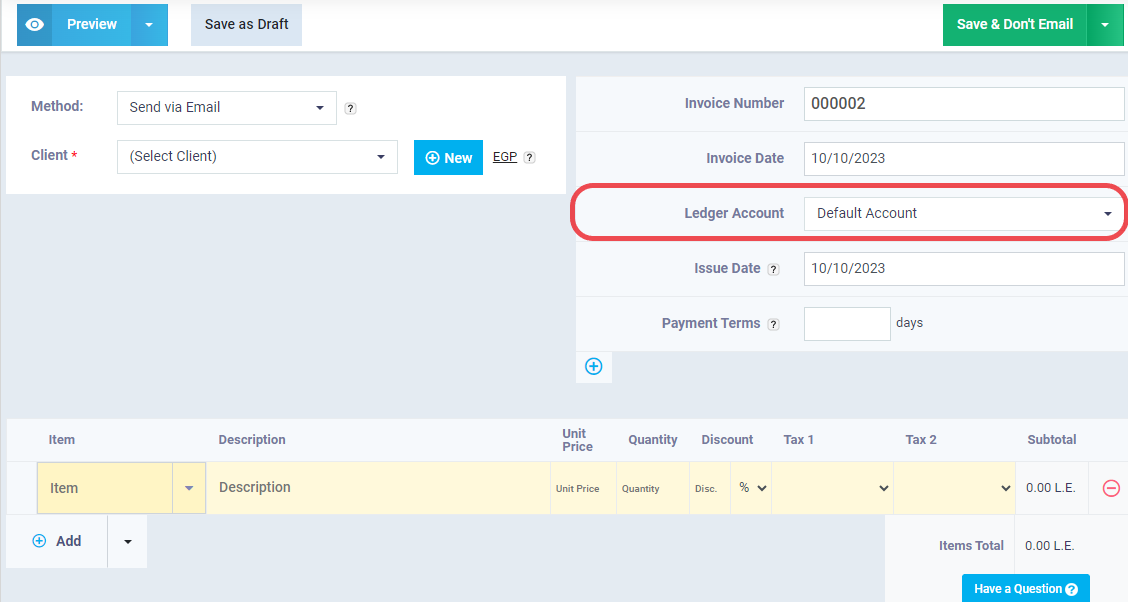
As shown in the previous screen, we have set the account routing setting to ‘Specify per each,’ and as a result, the account routing option will appear on the invoice screen, as shown in the following screen:
If you set the account routing setting to ‘Default,’ this option will not appear on the invoice screen.
Steps to Route the Sales Invoice Account
Let’s assume that we want to route the sales invoice account for the client Adam to the “Main Branch Sales” account instead of the default “Sales” account. To do that, we follow these steps:
Click on “Sales” from the main menu and choose “Create Invoice.”
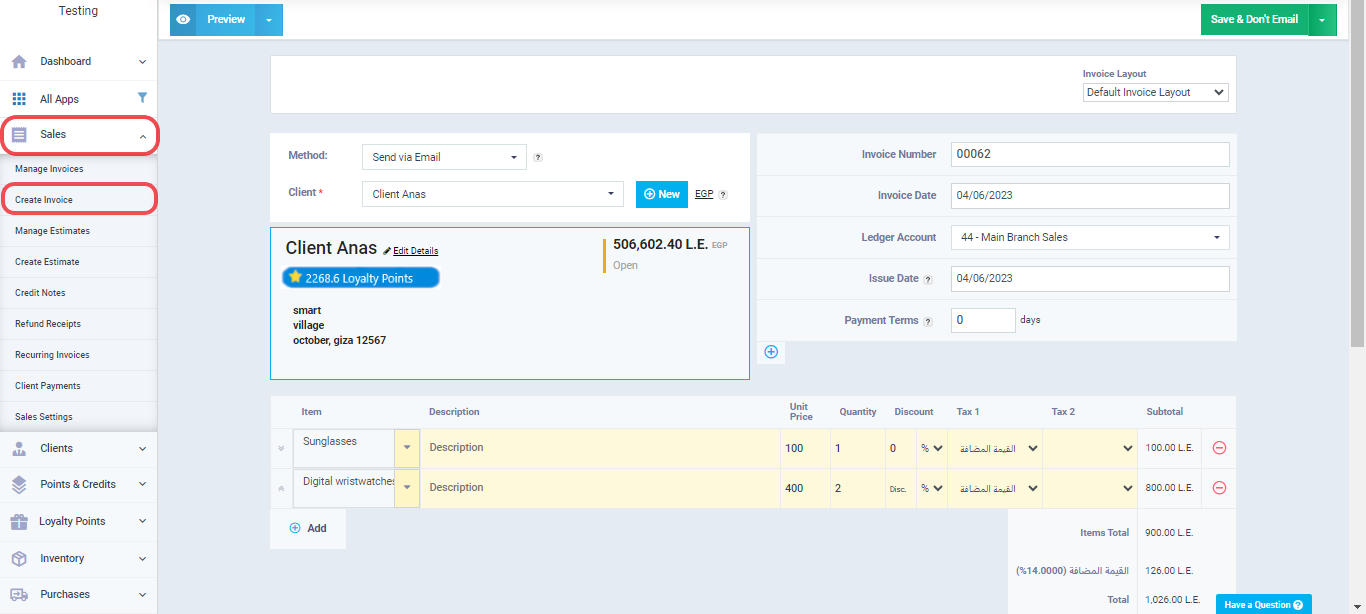
Go to the Ledger account field and select the “Main Branch Sales” account to which we want to direct the invoice’s profit.

Continue filling in the rest of the invoice details using the “Guide for Creating a New Sales Invoice”.
Review the Invoice Entry for Verification
In light of the above, you can review the sales invoice entry to verify the accounts receivable that received the revenue from the sales invoice. To do this, follow these steps:
- Click on “Accounting” in the main menu and select “Journal Entries.”
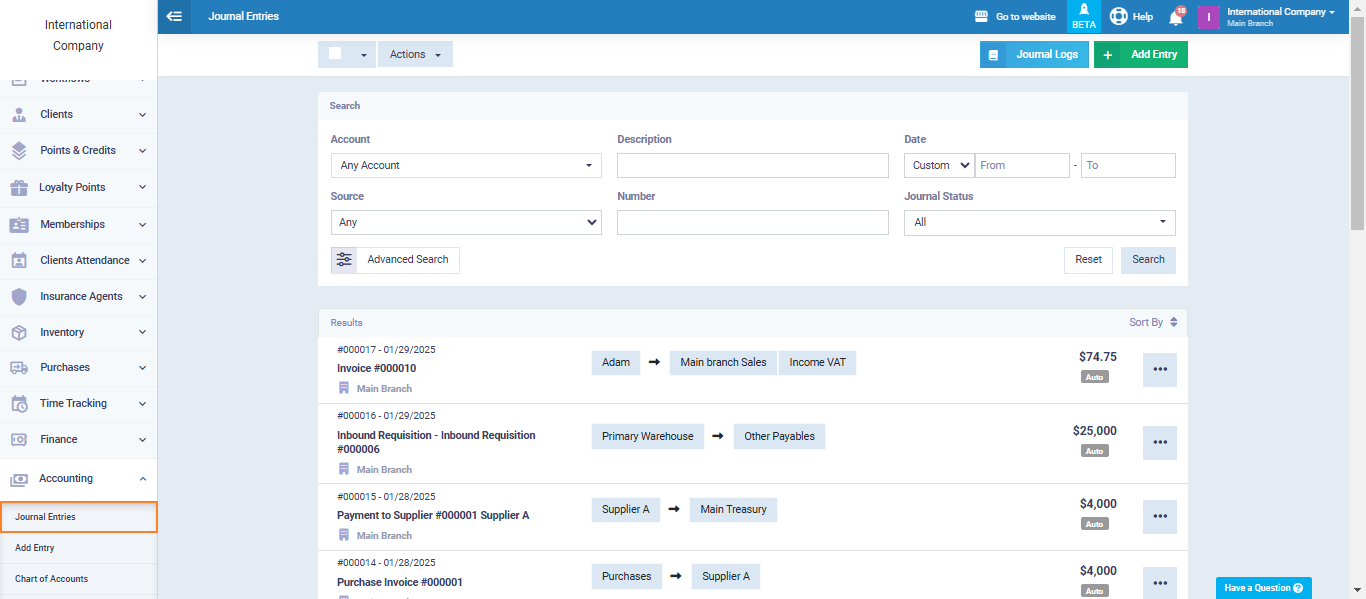
We select the journal entry for the sales invoice using the invoice number.
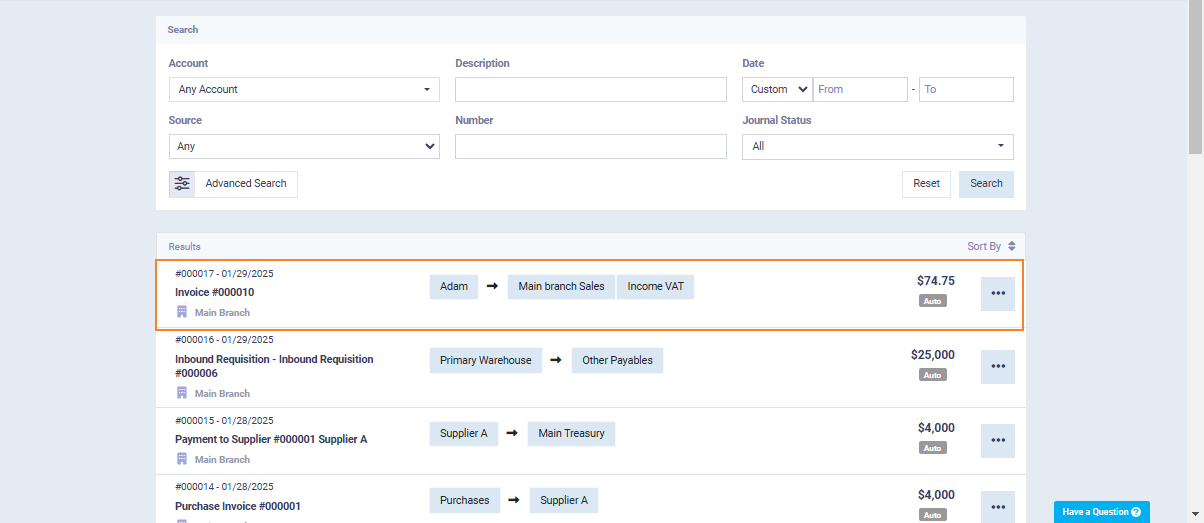
As shown in the following journal entry screen, the transaction has been recorded from the account of the client Anas (debit) to the main branch sales account (credit).
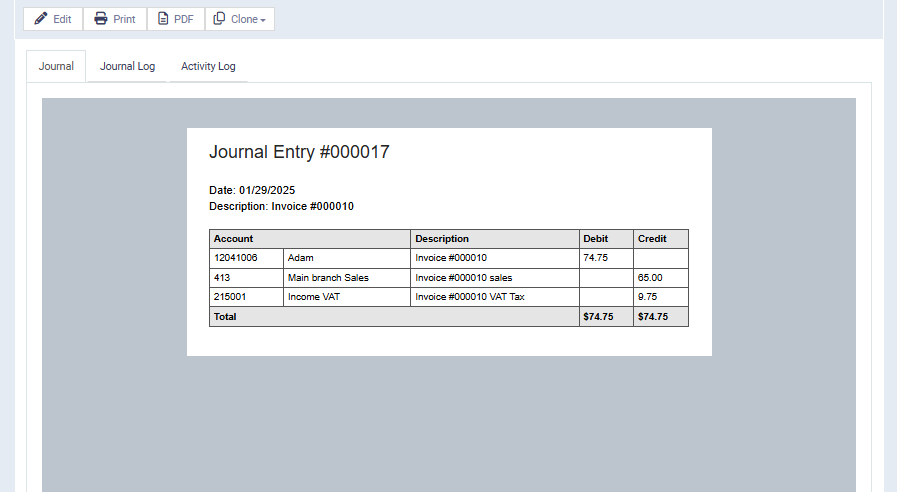
And thus, we have successfully routed the profit from the invoice to the main branch sales account instead of the default account, which is sales.