


Importing Invoice Items From an Excel File
The system allows you to import invoice data with multiple items from an Excel file all at once, eliminating the need to manually enter each item individually. You can follow simple steps to transfer all the data from an Excel file directly to the invoice screen. In the following lines, we will explain these steps with an illustrative example.
Notes Regarding the Excel File
Before taking any step, it is important to have an Excel file containing the invoice data. To ensure that the system recognizes this data correctly, please keep the following in mind:
- Ensure that the products you want to import from the Excel file already exist in the system. Otherwise, they will not be recognized. It is recommended to use the product code rather than its name, as typing the name differently from what is in the system may lead to recognition issues.
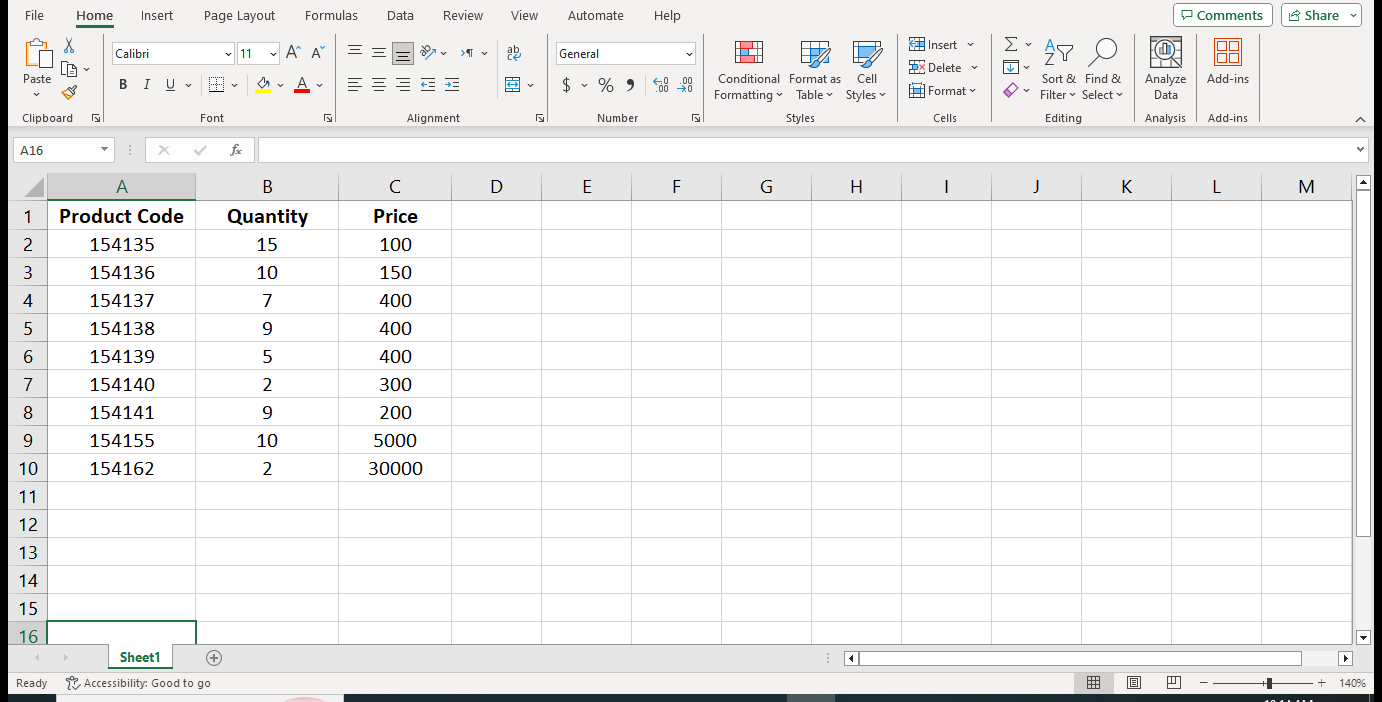
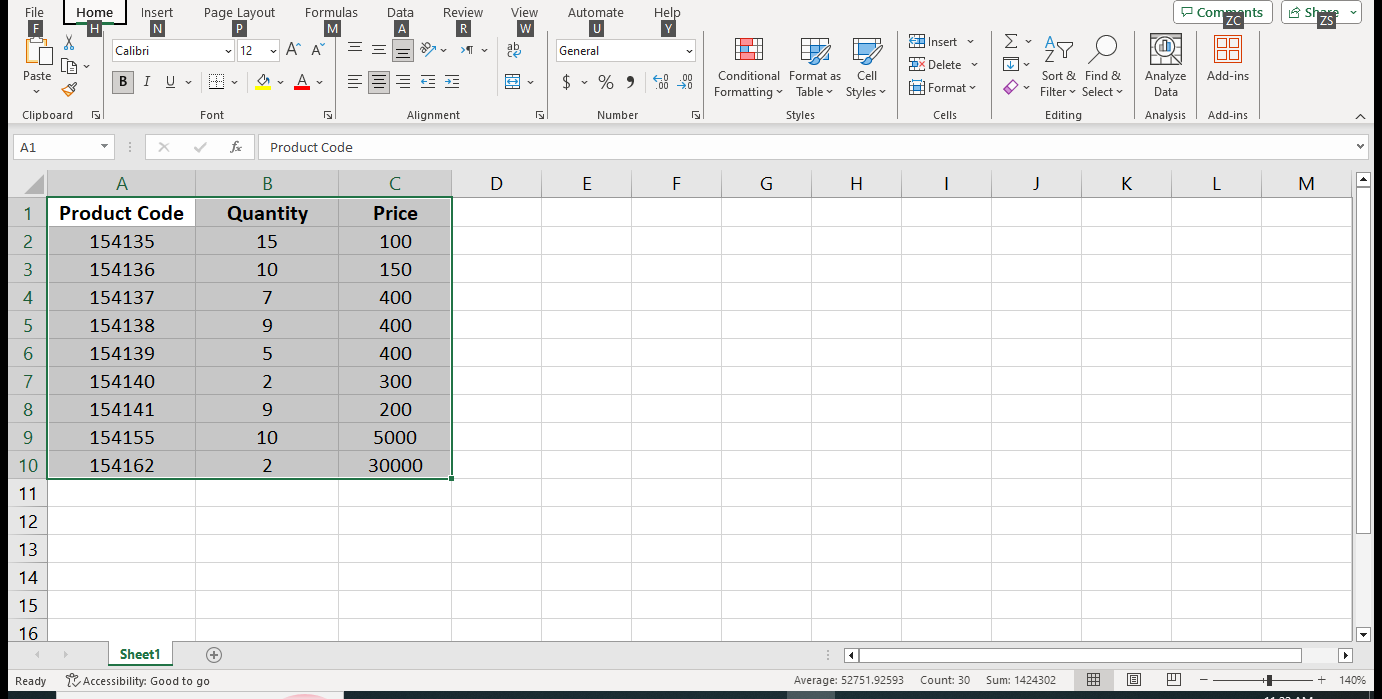
- Display the invoice data in the Excel file in a specific format as follows:
-
- Column 1: “Product Name” or “Product Code”
- Column 2: “Quantity”
- Column 3: “Price”
Importing Products into the Invoice Screen
After considering the previous two notes, we will now move on to the steps for copying products from the Excel file to the invoice screen on your account.
The First Step: Open a New Invoice Creation file.
Take the usual steps to open a new sales invoice creation file, as follows:
- Click on “Sales” from the main menu and select “Create Invoice.“
- Enter the “Client Details” and the main invoice details, referring to the Create Sales Invoice Guide for assistance.
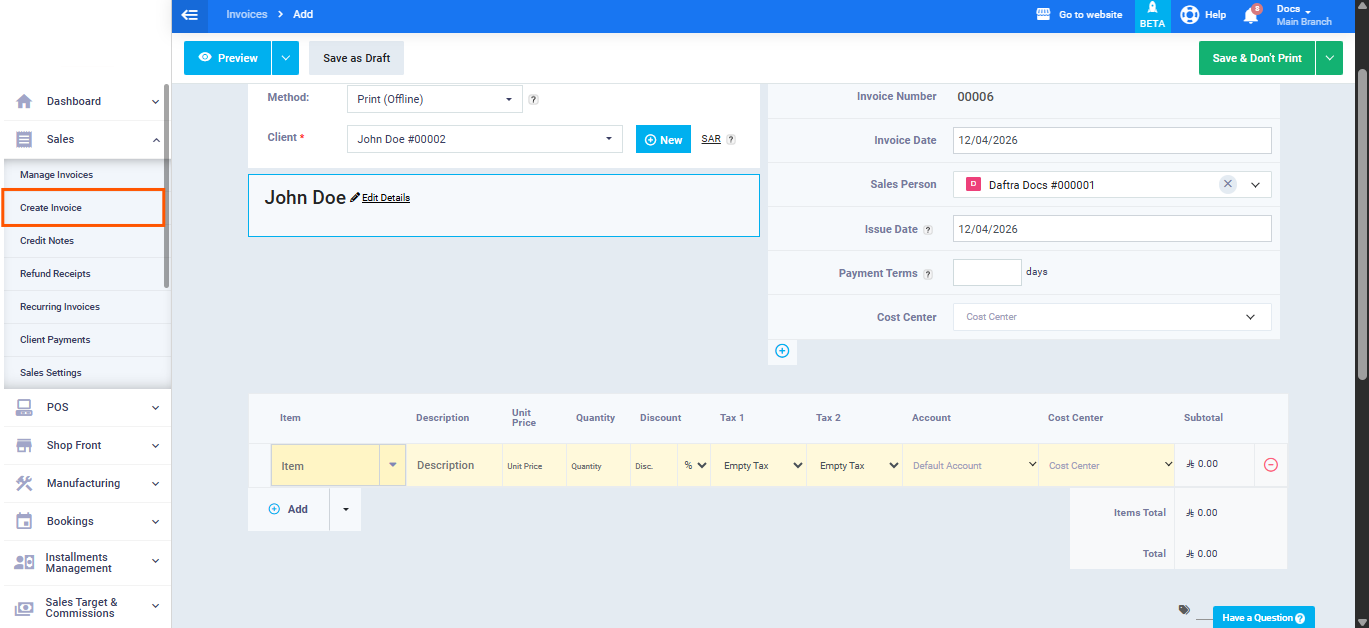
As shown in the previous invoice screen, we have selected the client “John Doe.” In the second step, we will add invoice items by copying their data from the Excel file.
The Second Step: Copy Products From the Excel File to the Invoice Screen
To copy the invoice items’ data from the Excel file in one go, follow these steps:
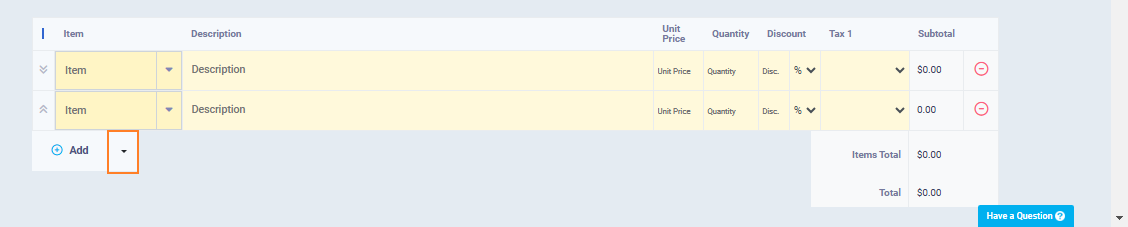
- Click the arrow icon next to the “Add” button.
-
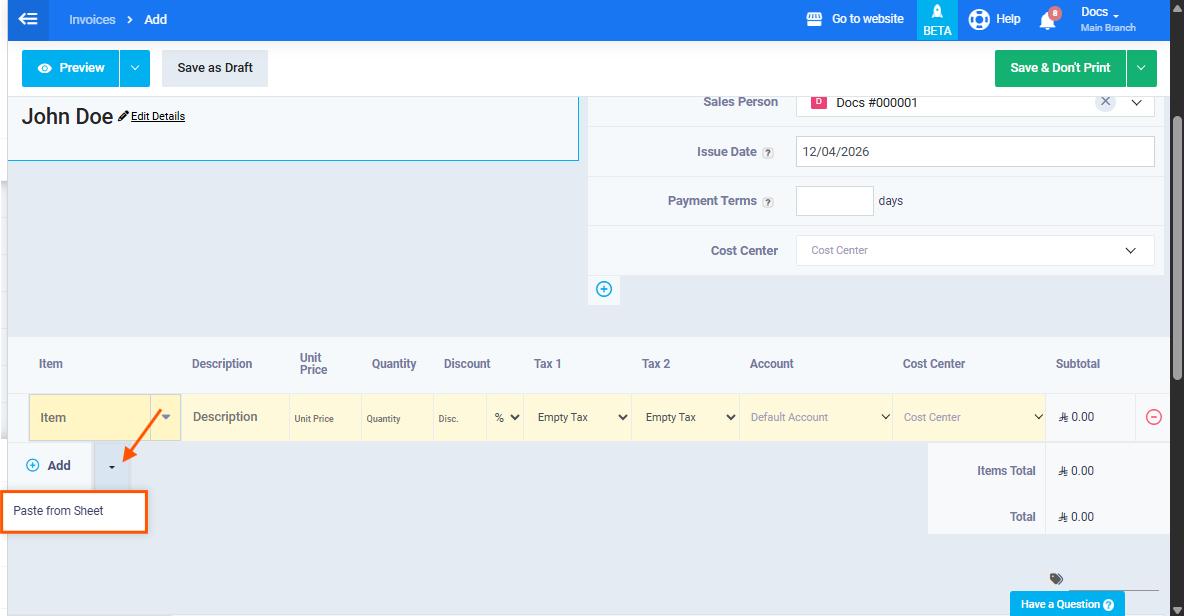
Click on “Paste From Sheet.”
-
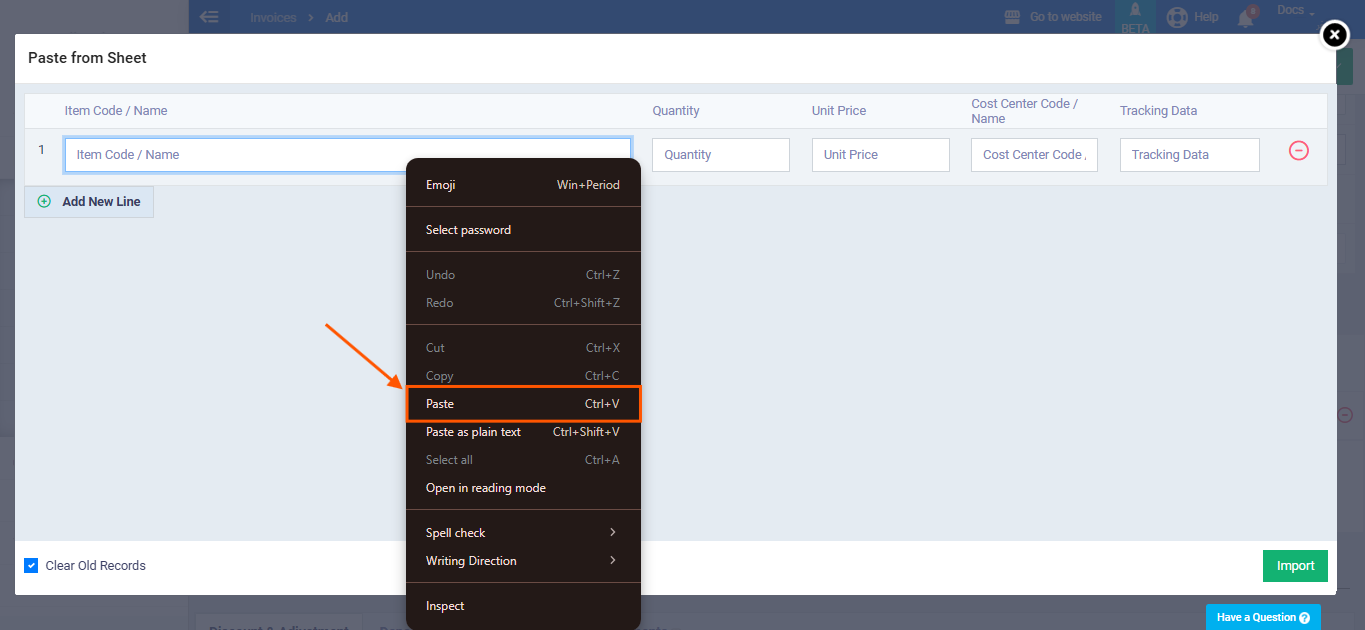
The following pop-up screen will appear to us.
-
Now, we must select the invoice items’ data and copy it from the Excel file as shown in the following image.
When using the “Copy from Spreadsheet” feature, a set of columns will appear where you need to enter or paste the data in the same order, as follows:
- Item Name/Code: Used to identify the product or service within the invoice. You can enter either the item name or its code as registered in the system. It is recommended to use the item code to ensure accurate recognition.
- Quantity: Represents the number of units for each item added to the invoice.
- Unit Price: The selling price per unit of the item, which is used to calculate the total value of the line item.
- Cost Center Name/Code: Used to assign a cost center to each line item, helping accurately allocate costs and revenues in accounting reports.
- Tracking Data: Used to enter item tracking details (if applicable), and should be filled based on the tracking type enabled for the product.
Note: The “Tracking Data” column appears only if tracking is enabled for the product. The entered data must match the defined tracking type for each item to ensure accurate inventory and accounting operations.
Then, paste it into the pop-up screen for adding invoice item data, as shown in the following image.
-
Once you click on “Paste,” make sure to add all the invoice items data, then click on “Import.”
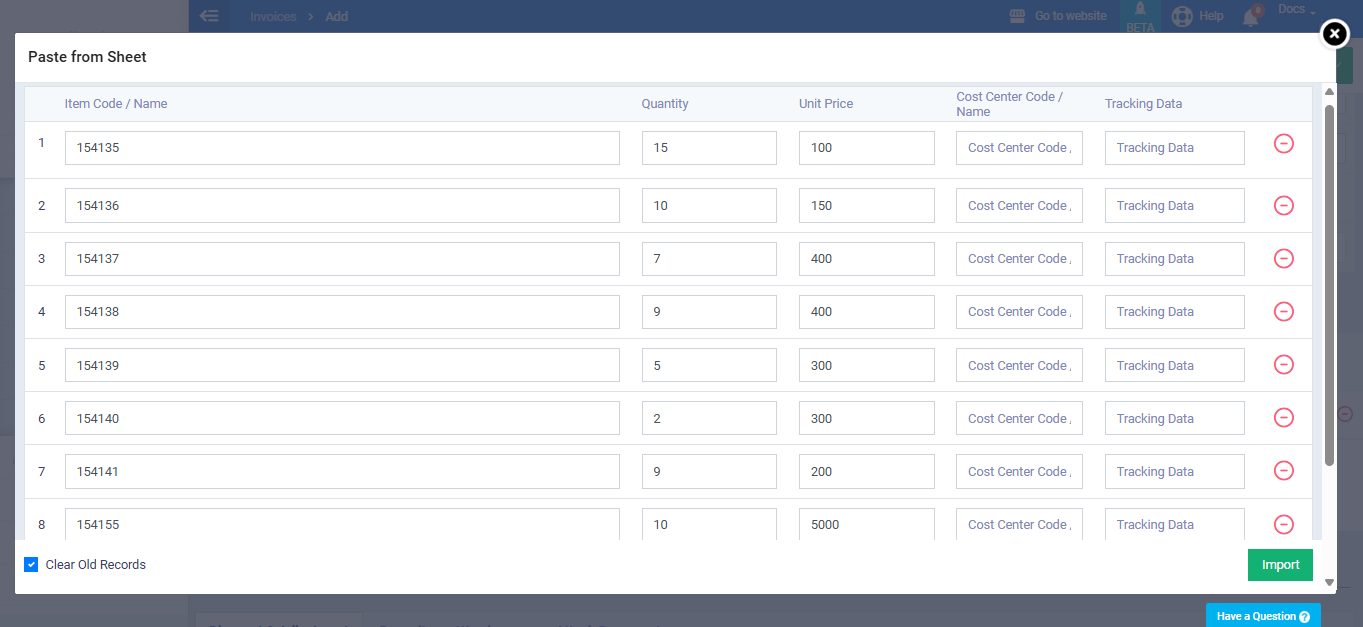
- As seen in the previous image, all the invoice items’ data has been added at once without copying and pasting data for each item individually or manually adding them from the invoice screen.
- After clicking “Import,” the system automatically returns us to the invoice screen, where we can see that the items have been successfully added with quantity and price data, as shown in the following image.
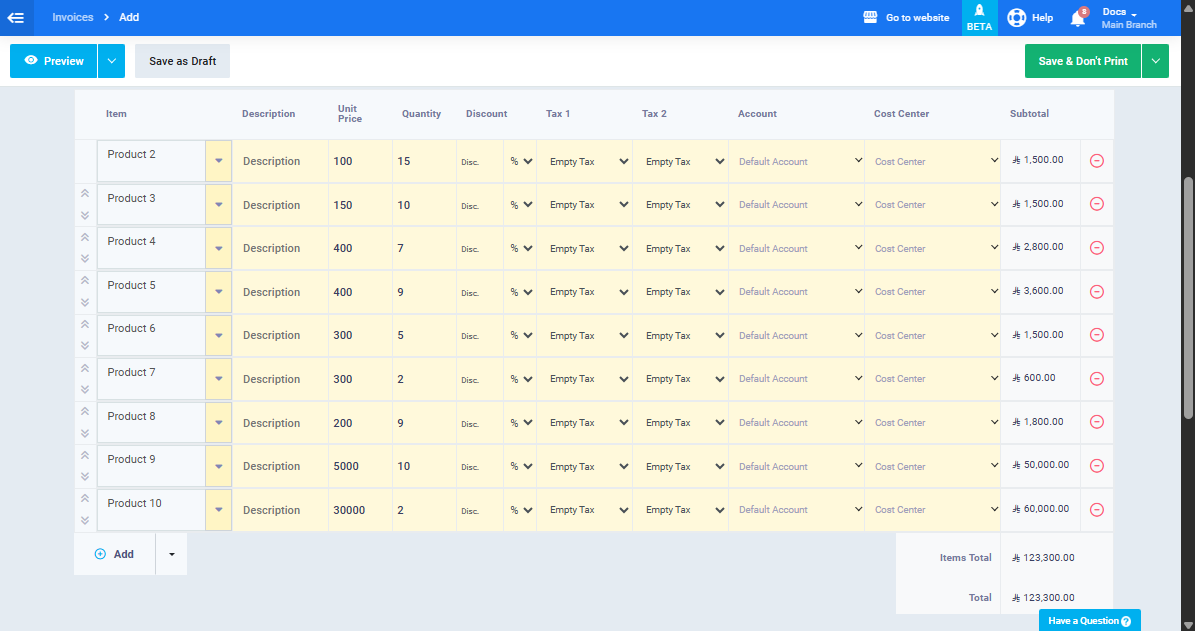
Now, you can continue adding or deleting any other related invoice data, whether it’s additional products, payment, settlement, or shipping details. After ensuring the accuracy of all invoice data, save the invoice according to your preferred method, whether it’s saving with printing or sending via email to the client.
In this way, you have successfully imported invoice item data in bulk to the invoice screen, which is a useful feature when your invoice includes many items available in an Excel file. This saves you the hassle of adding each item’s details manually one by one.