Creating a Custom Field on the Invoice.
The regular invoice in the system includes all the necessary data in a clear and organized interface. However, there are templates available that allow you to create a custom invoice template for your business, which you can reuse at any time. There’s also the option of adding custom fields that enable you to include specific information on your invoices based on your business needs, regardless of the type of information you need to add.
Here are detailed steps on how to create a custom field on the invoice.
Adding a Field to Invoices
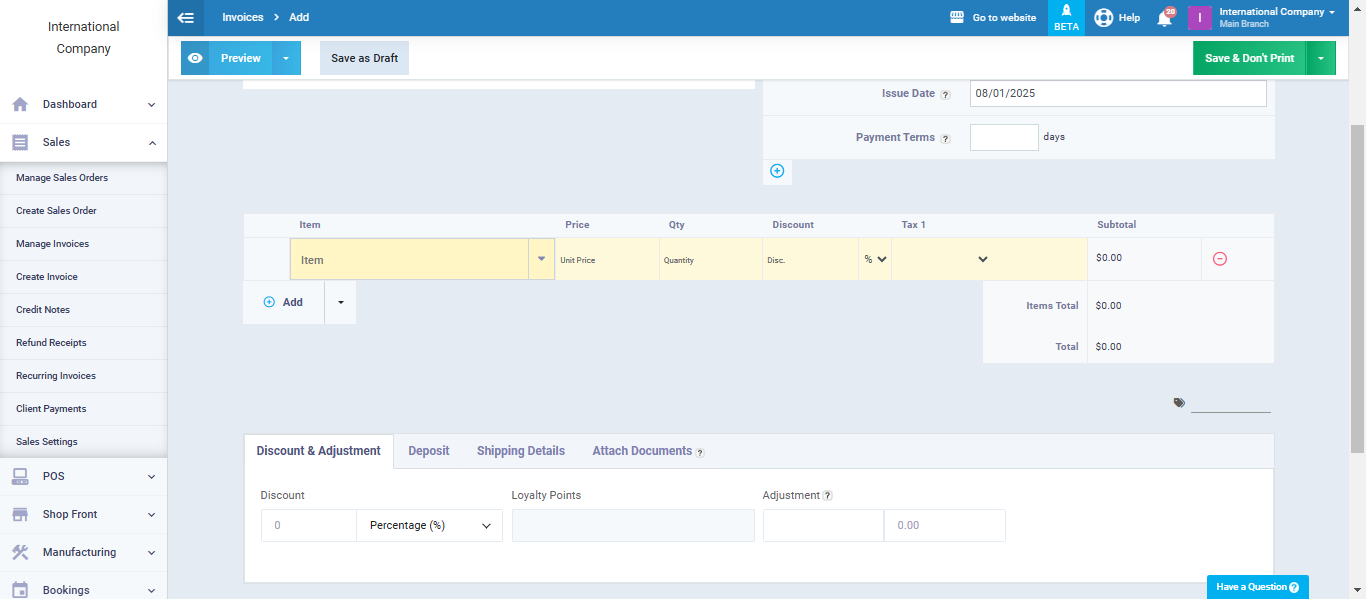
You can now see a part of the default invoice screen, which you can use if you don’t need to create a custom field.
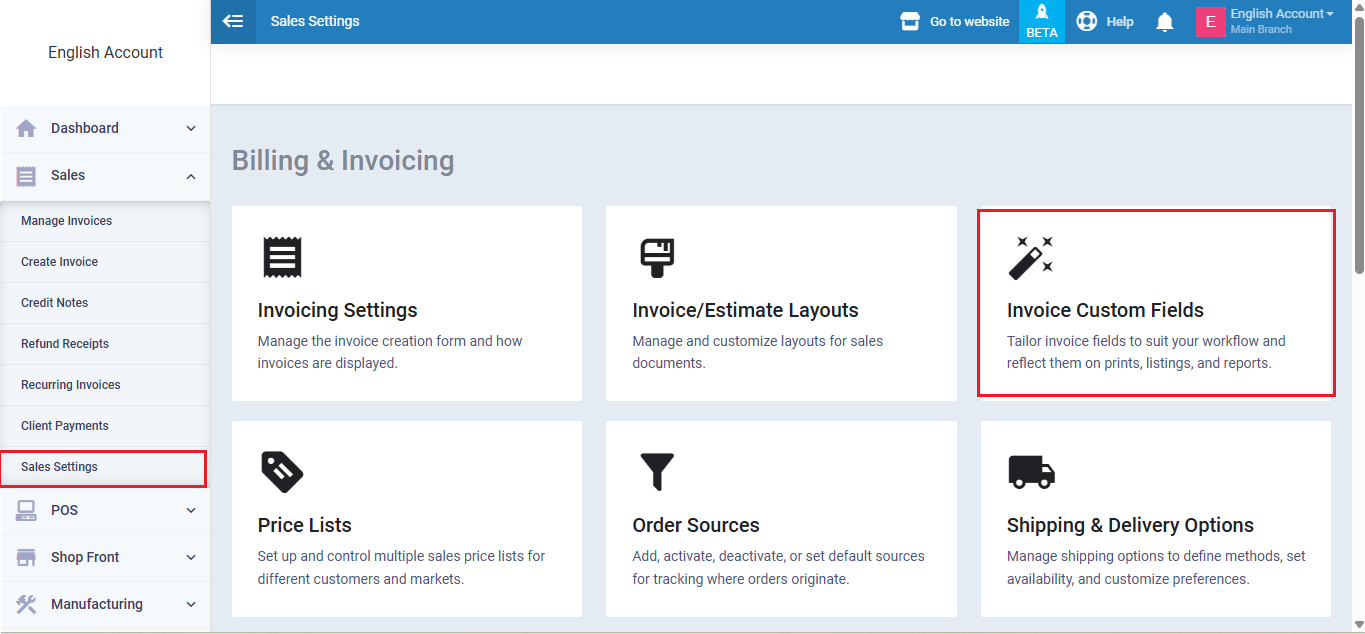
If you want to add a new field, you can do so by going to the “Sales Settings” under “Sales” in the main menu, then click on “Custom Fields.”
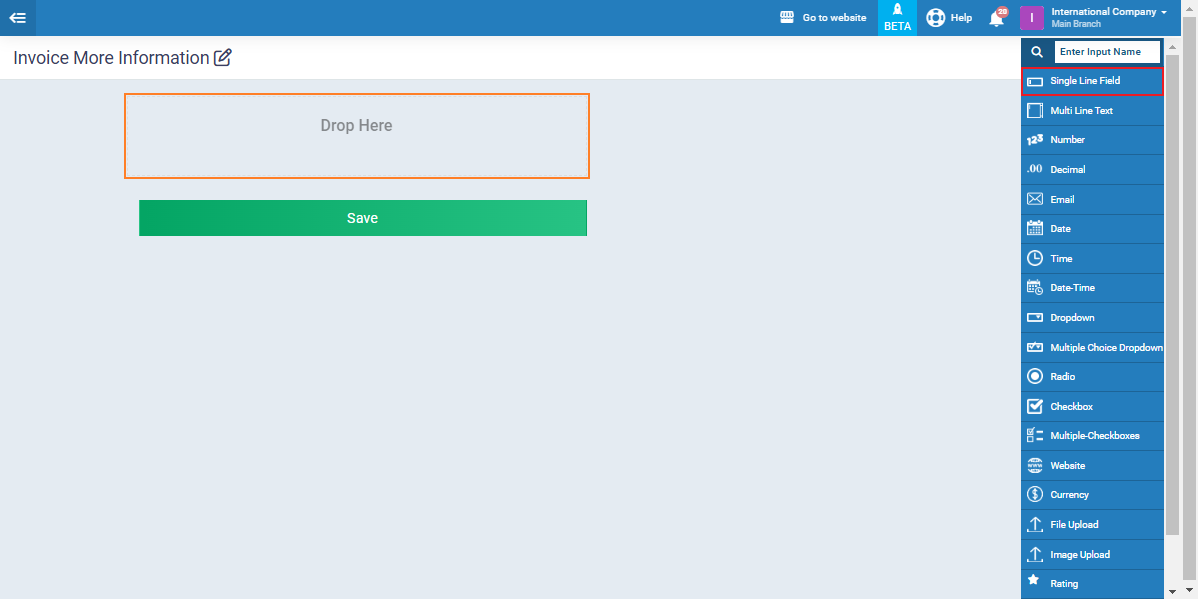
You will see a list of different types of custom fields, and you can choose the field type and give it a suitable name for the intended use of that field.
For example, the field could be a link, a text field for words and letters, a numeric field, or a dropdown list with various choices, and so on. However, you can use each field type for many purposes, such as using the text field for entering the client’s name, employee name, or product shipping address.
All you need to do is click on the field you want to attach to the invoice, drag it to where it says “Drop Here,” adjust the field settings, and click “Save.” It will then appear when creating a new invoice.
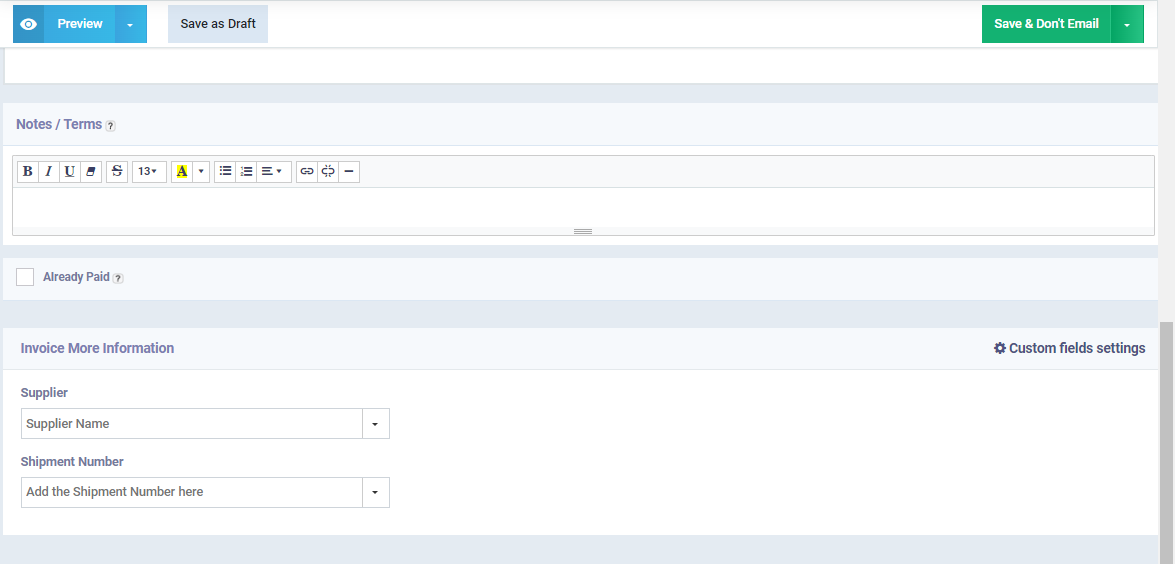
Example of Adding the Custom Fields Feature to Invoices
Let’s assume that your business requires dealing with multiple suppliers for the same product, and the quality varies, so you want to track each product to know the supplier for each invoice you issue to a client. How can you add fields to help you with this in the invoice?
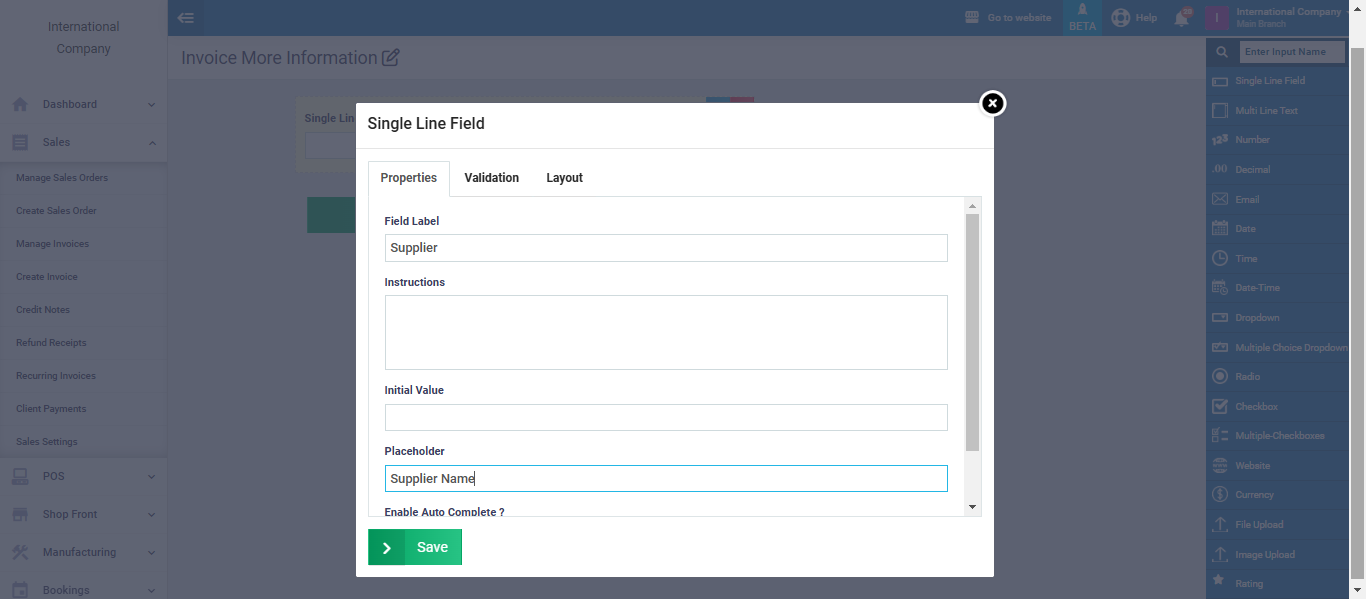
Drag the single-line text field item, drop it in the “Drop here” area, and prepare to configure the field properties.
Properties:
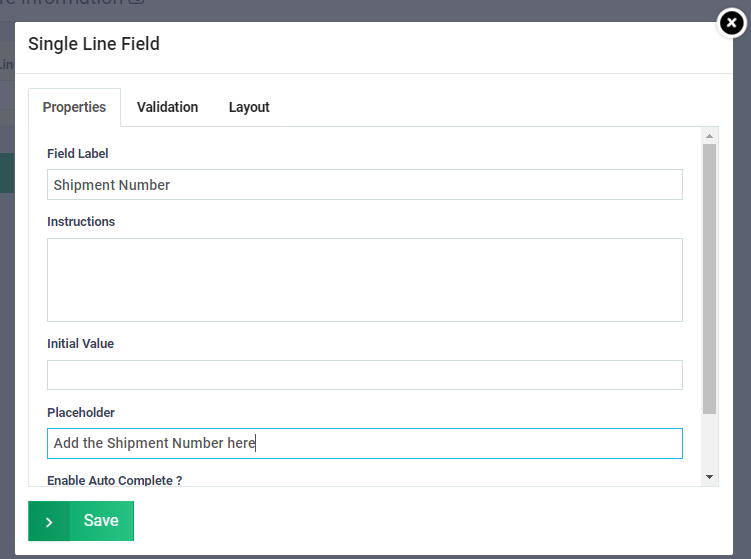
Field Name: Supplier.
Instructions: If you want to explain the nature of the field keep this explanation for reference by you or those with access to the custom fields to understand the nature of the field.
Initial Value: You can add a value that will appear automatically in the field when creating an invoice, which can be useful if there is a recurring value, such as adding the name of a supplier you often deal with.
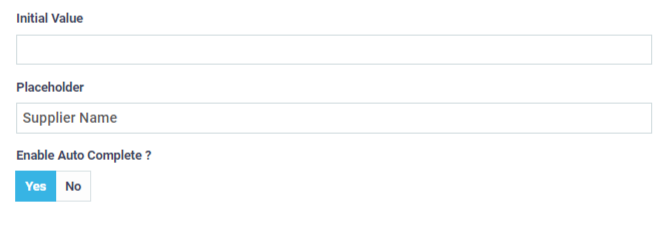
Placeholder: This is the phrase that appears in the field margin, guiding you on what the field is for, such as “Enter the supplier’s name here.”
Enable auto-fill if you want the system to suggest values similar to what you’re typing based on the data stored in the system.
For example, when you activate the auto-fill feature, if you’re typing, for instance, the name of a supplier like “David” in the Supplier field, the system will suggest this supplier’s name when you start typing the first letter of their name next time. This allows you to easily select it without having to type the full name again.
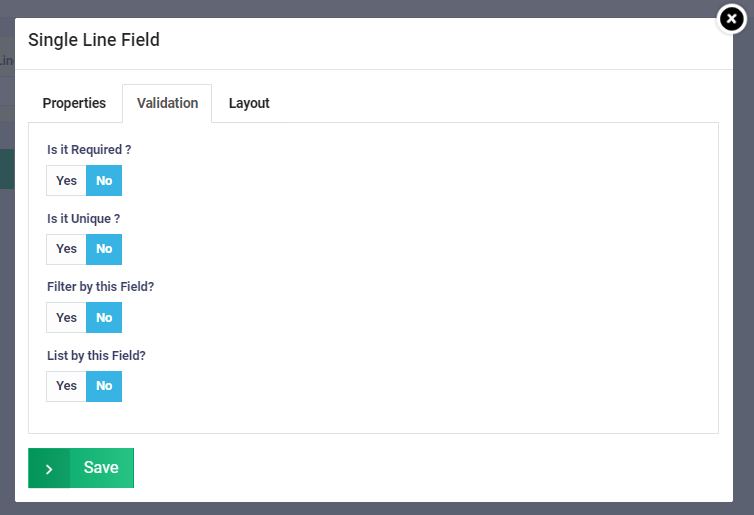
Validation:
This set of properties relates to the field itself, not the values within it, and includes the following:
- Required: Activate this if you want this field to be mandatory, meaning that an invoice cannot be issued without filling in this field.
- Unique: Enable this if the values in this field must be unique, preventing them from being repeated in other invoices.
- Filter by this Field: If you want to activate filtering using this field, which is one of the advanced search techniques for sorting data.

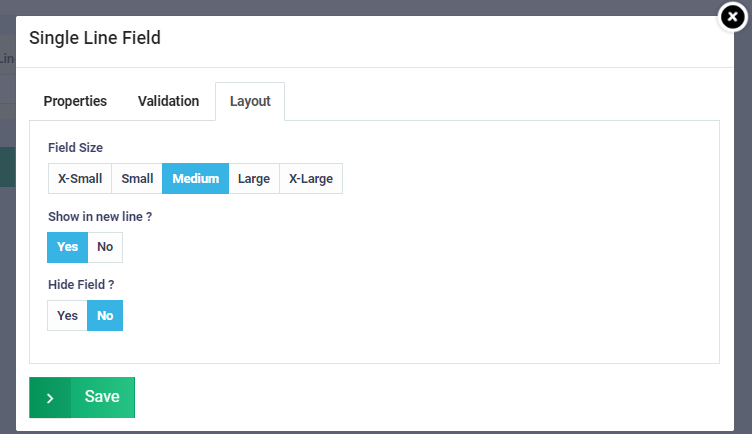
Layouts:
This group is related to the formatting of the field, allowing you to control:
- Field Size: You can determine the size of the field.
- Display in New Row or Same Row: Choose whether to display the field in a new row or the same row alongside other fields.
- Control Field Visibility: You can control whether to show or hide the field on the invoice.
Drag the element for the numerical field (the field of numerical type), which consists of one line, and drop it at “Drop Here.” Prepare to adjust the field’s properties.
The properties of numerical fields are similar to textual fields, with some differences such as controlling the minimum and maximum values that can be received in this field.
The fields will appear in this manner, and you should save them to find them in the invoices later.
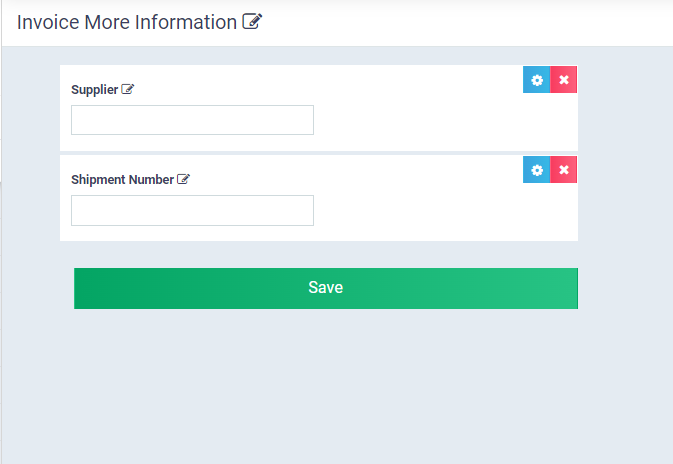
The custom fields will appear in the invoices like this after saving them.