


Converting an Estimate into an Invoice Directly
Estimates and invoices are two sides of the same coin. An Estimate can be seen as an initial invoice, containing product or service information, estimated costs, client data, and any other relevant details. If an agreement is reached between you and the client, you will then need to create an invoice.
To simplify the process, the system allows you to create an estimate and directly convert it into an invoice without the need to create a new invoice from scratch. Additionally, there are other advantages that we will discuss in the following sections.
Create an Estimate
Creating an estimate in the system is a straightforward process. Since our focus in this topic is specifically on how to convert an estimate into an invoice directly, we will not go into the details of the creation process. Instead, we will provide an overview in the following paragraphs. For a more in-depth explanation and clarification, you can refer to the guide on creating a new estimate.
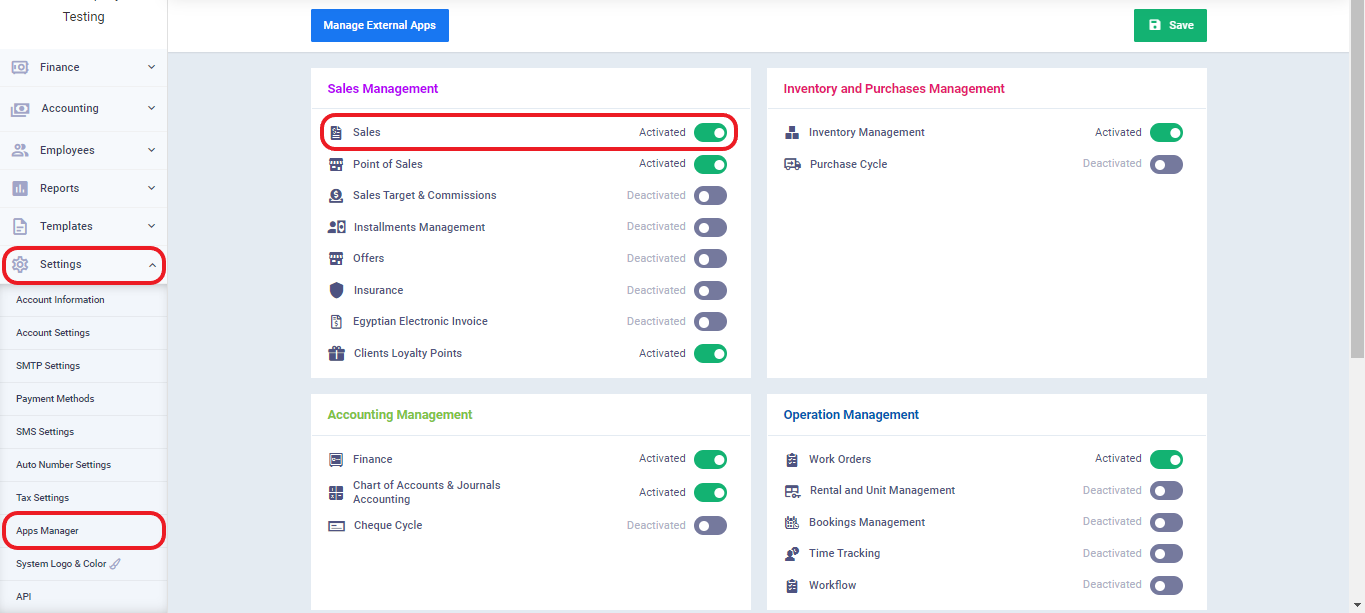
Activate The Sales App
Before starting the steps to create an estimate, it is essential to enable the sales app in your account.
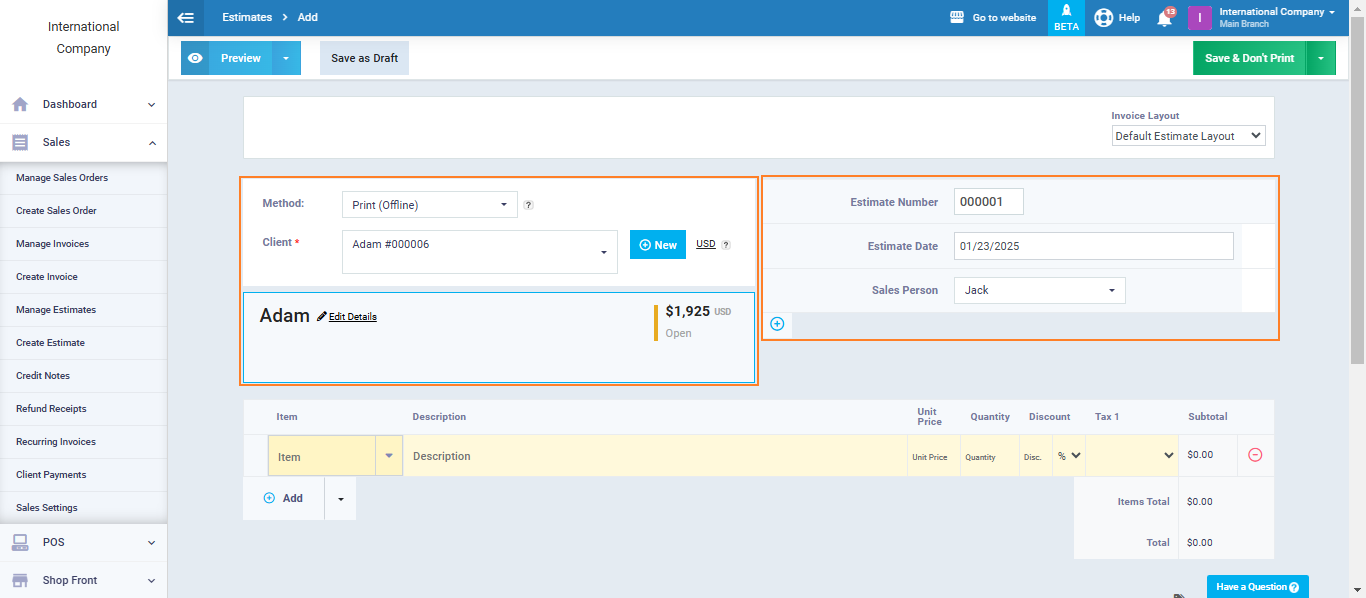
First: Fill in the General Details for the Estimate.
The general details for the estimate include how to save the estimate, the client’s name, estimate number, estimate, and the salesperson.
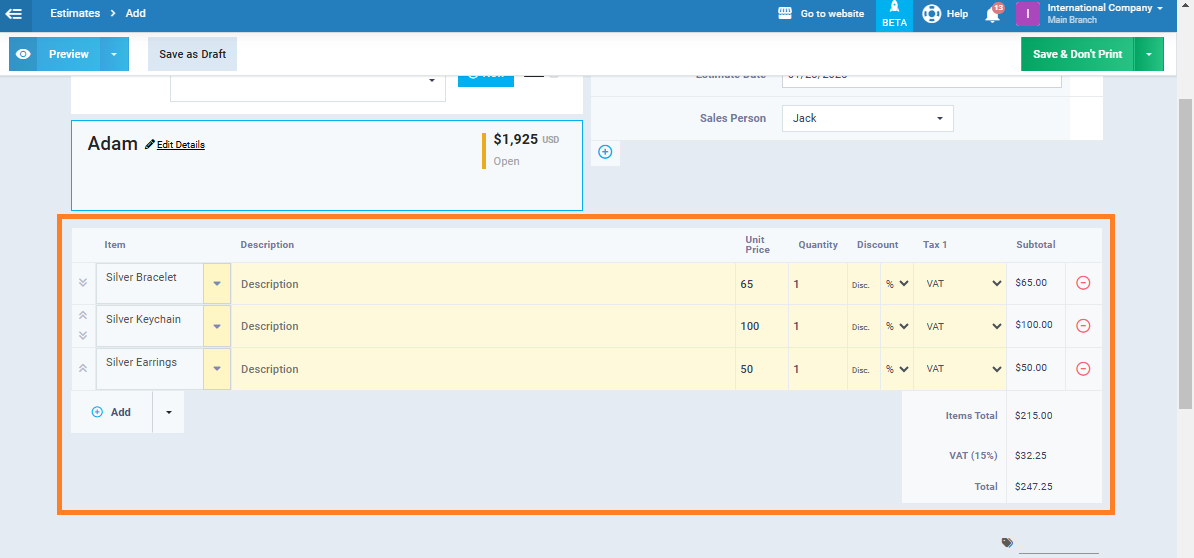
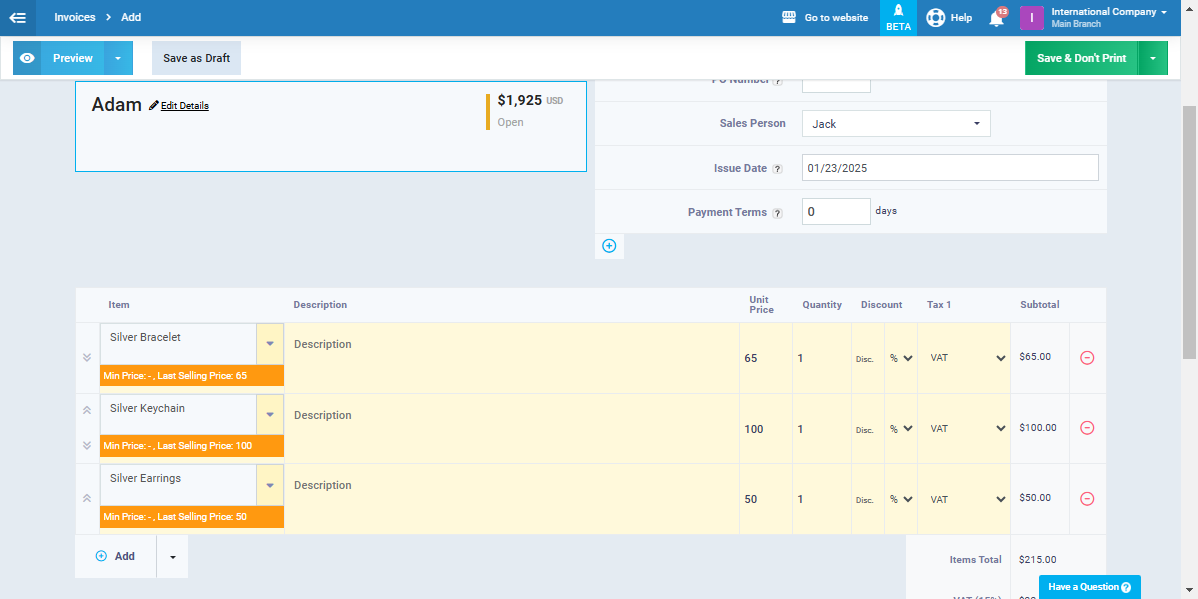
Second: Fill in the Details of the Estimate Items
The details of the estimate items include the products and services included in the estimate, the unit price, quantity, item-level discount, and tax information applicable to the estimate.
Third: Fill in the Shipping and Discount Details.
The discount details at the estimate level, settlement, as well as shipping details and options, associated costs, and applicable taxes.

Fourth: Add Notes and Terms
In this part of the estimate, you can add terms, conditions, or notes related to the estimate. There is a text area that can be formatted as needed, as shown in the image.

Converting an Estimate into an Invoice Directly.
We have successfully created the estimate for the client, Ashrakat. She has accepted it. Now, to complete the sales process, we will need to create a sales invoice.
You have the option to create a new sales invoice, or you can directly convert the estimate into an invoice, saving time and effort. This can be done by clicking on the ‘Convert to Invoice‘ button and confirming the conversion, as shown in the following image.”
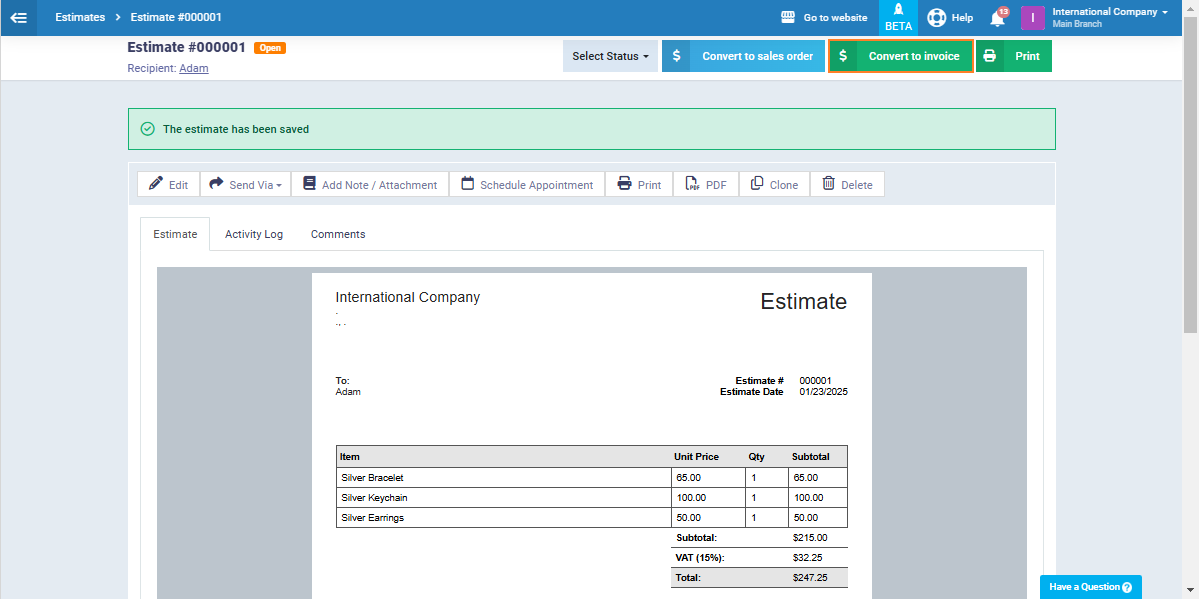

After confirming the approval of the estimate, the system will take you directly to the sales invoice screen, which will include all the estimate details. You will only need to review the invoice details and then click ‘Save and Send.’
Thus, we have reached the end of the topic on creating an estimate and converting it into an invoice. We have covered the details of how to create a new estimate, send it to the client for approval, and convert the estimate into a sales invoice after the client’s approval.