


Integrating Daftra with the Egyptian Tax Authority (ETA)
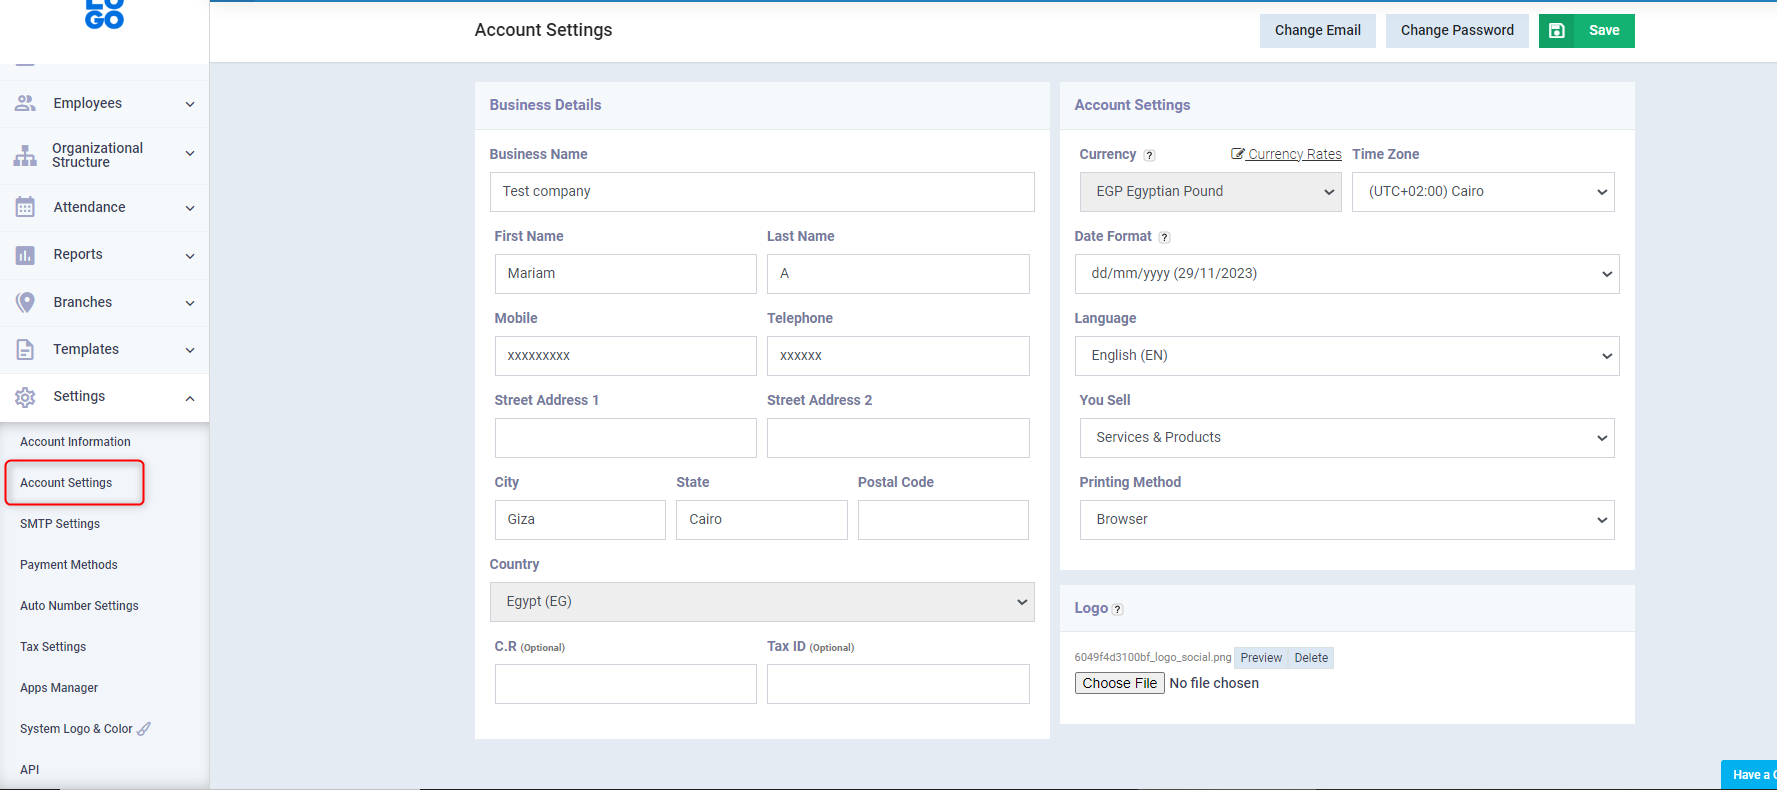
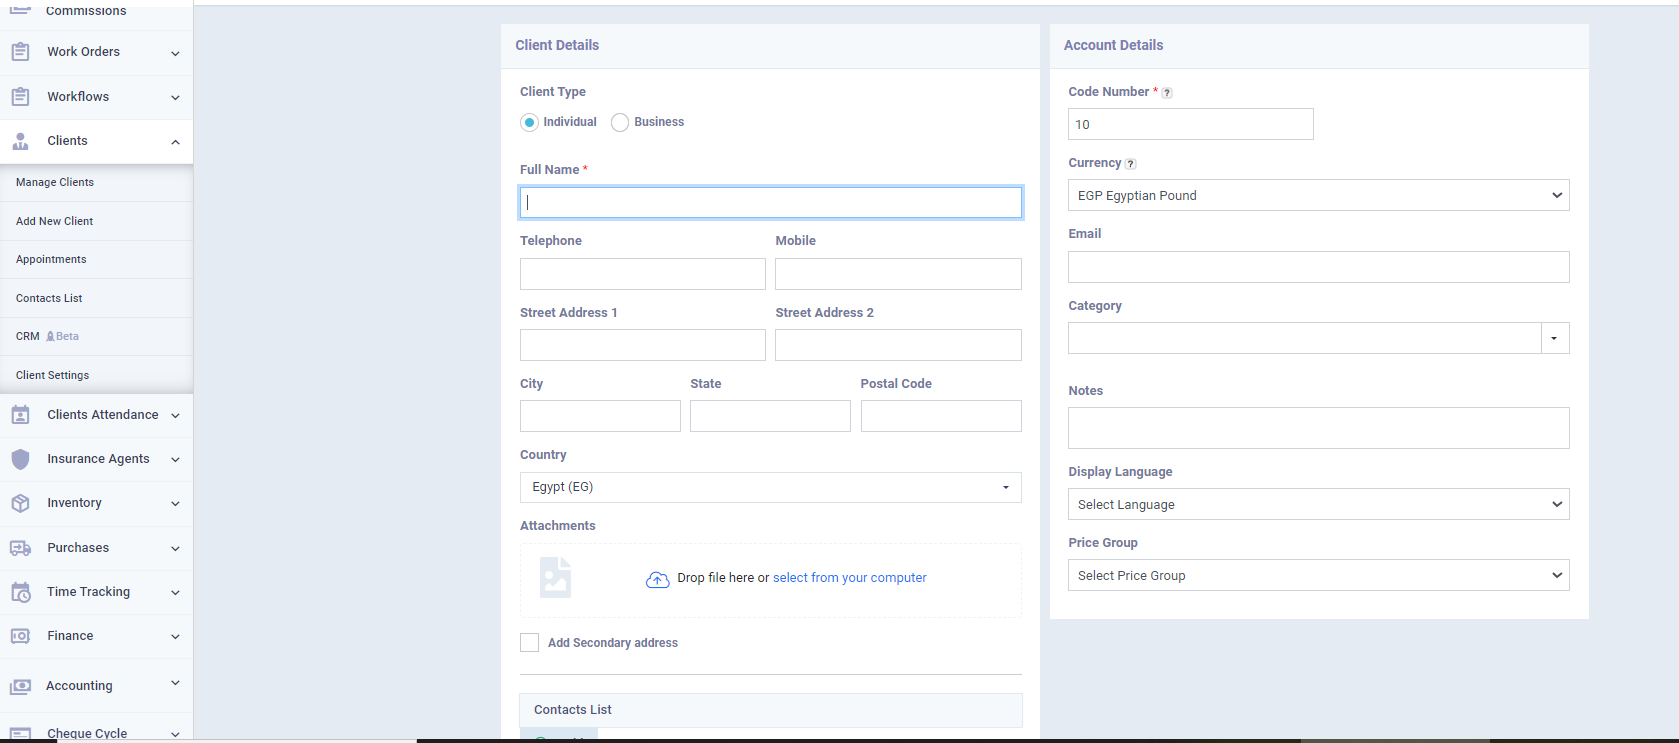
1- Add your account information on Daftra (Your company’s details):
- Go to Settings.
- Choose Account Settings.
- Fill in all your company’s details
- Example: Business Name, Tax Number, Commercial Registry, Address…etc.
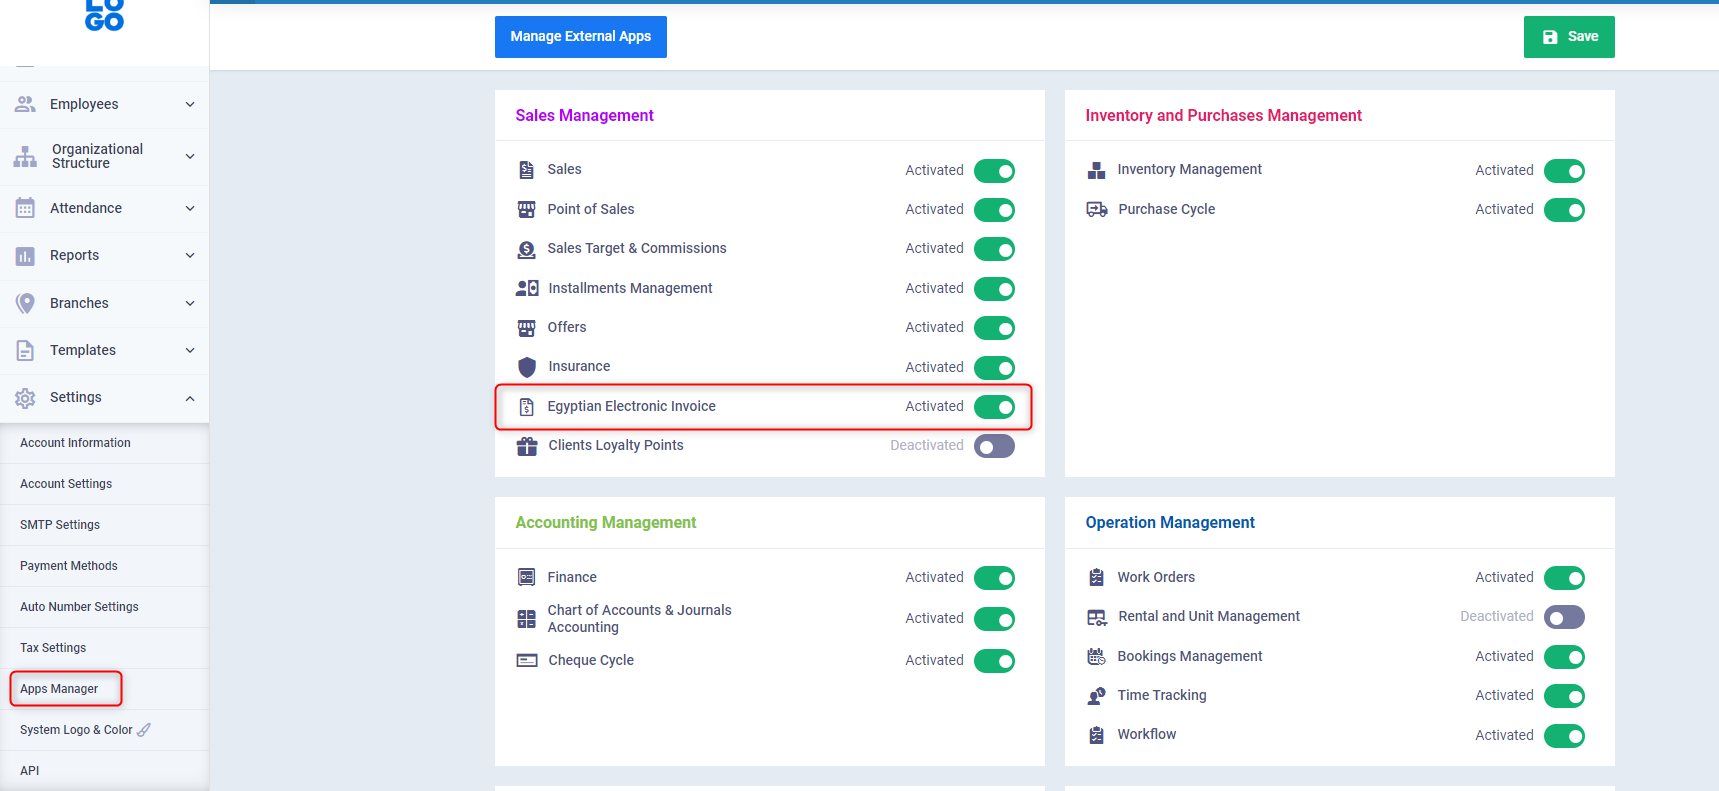
2- Activate the Egyptian Electronic Invoice app on your Daftra account:
- Go to Settings.
- Choose Apps Manager.
- Ensure the “Egyptian Electronic Invoice” button is activated, showing “Activated” in green.
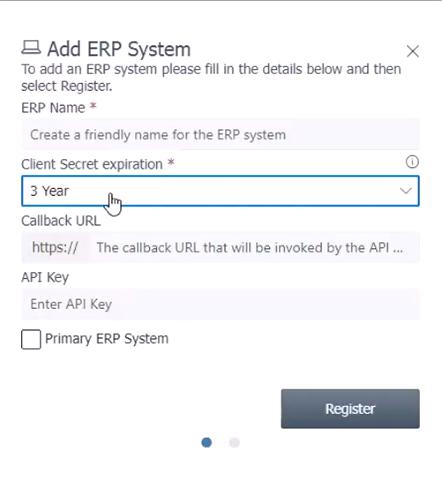
3- Add Daftra as the approved ERP system on the Electronic Invoice Portal:
- Go to the Egyptian Tax Authority website and log in to your account on the Electronic Invoice Portal.
- Then click on the Taxpayer Profile.
- In the Representatives section, click on Register ERP.

- Write the name Daftra.
- And choose the period you will recognize Daftra as your accounting system linked to the Tax Authority.
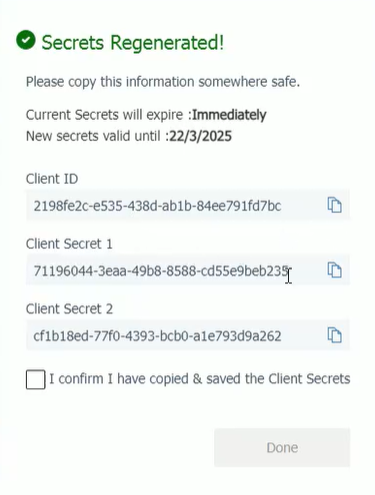
4- Generate the secret keys for linking Daftra with the Tax Authority website:
- After registering Daftra as your ERP system.
- Click on Regenerate Secrets.
- If you have saved the secret keys when registering your account on the Electronic Invoice Portal, do not repeat this step.

- In the first field, stop the old secret keys immediately or within a suitable period for you.
- From the second field, choose the expiration period of your secret keys.
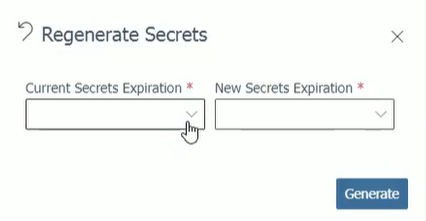
- You will see the secret keys that we will use for the connection; keep the window open until Daftra is ready to receive the keys.
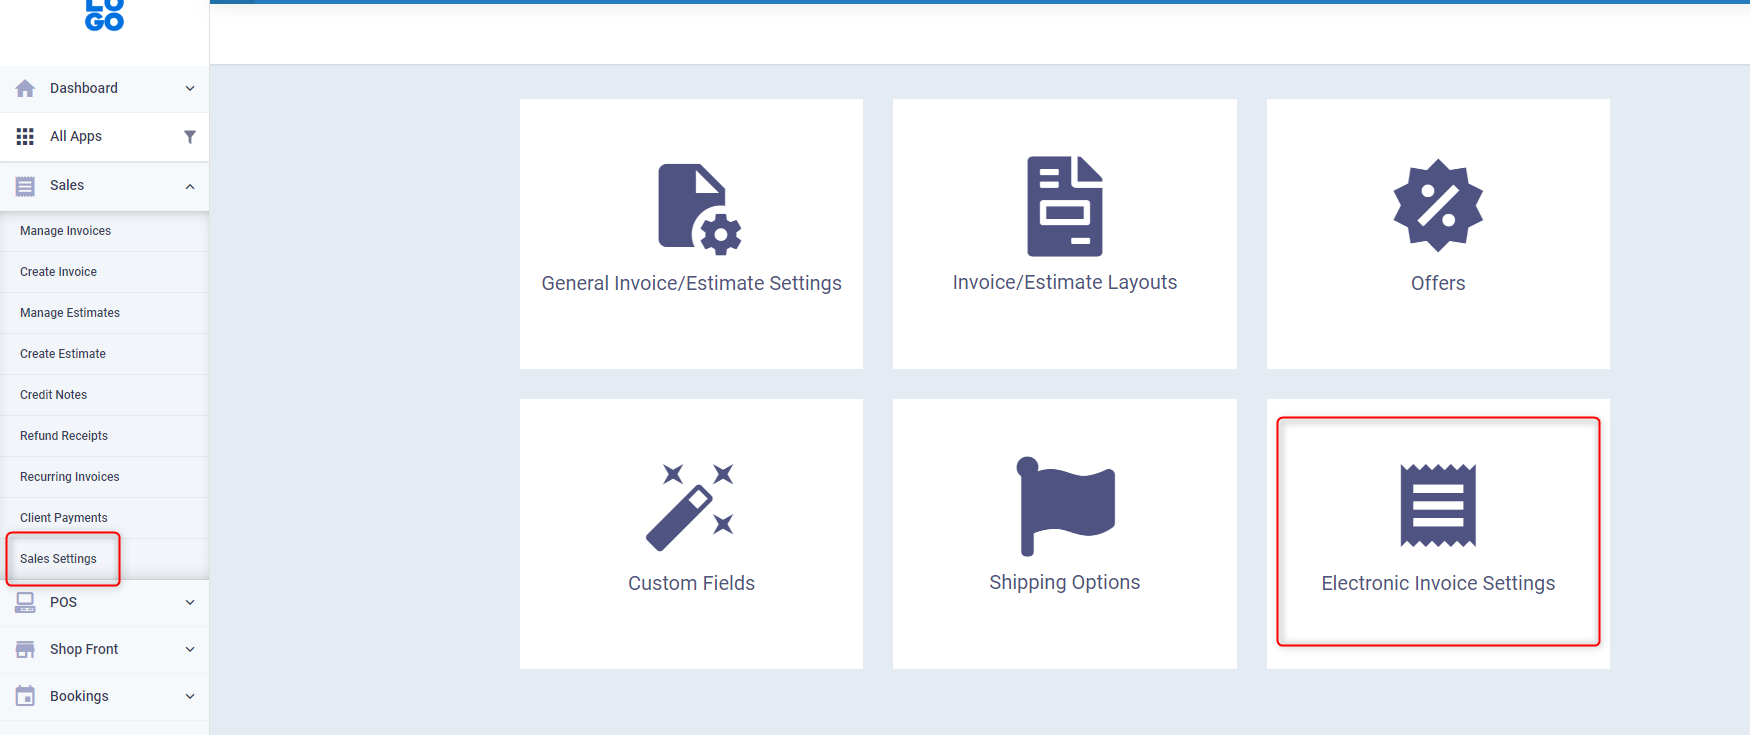
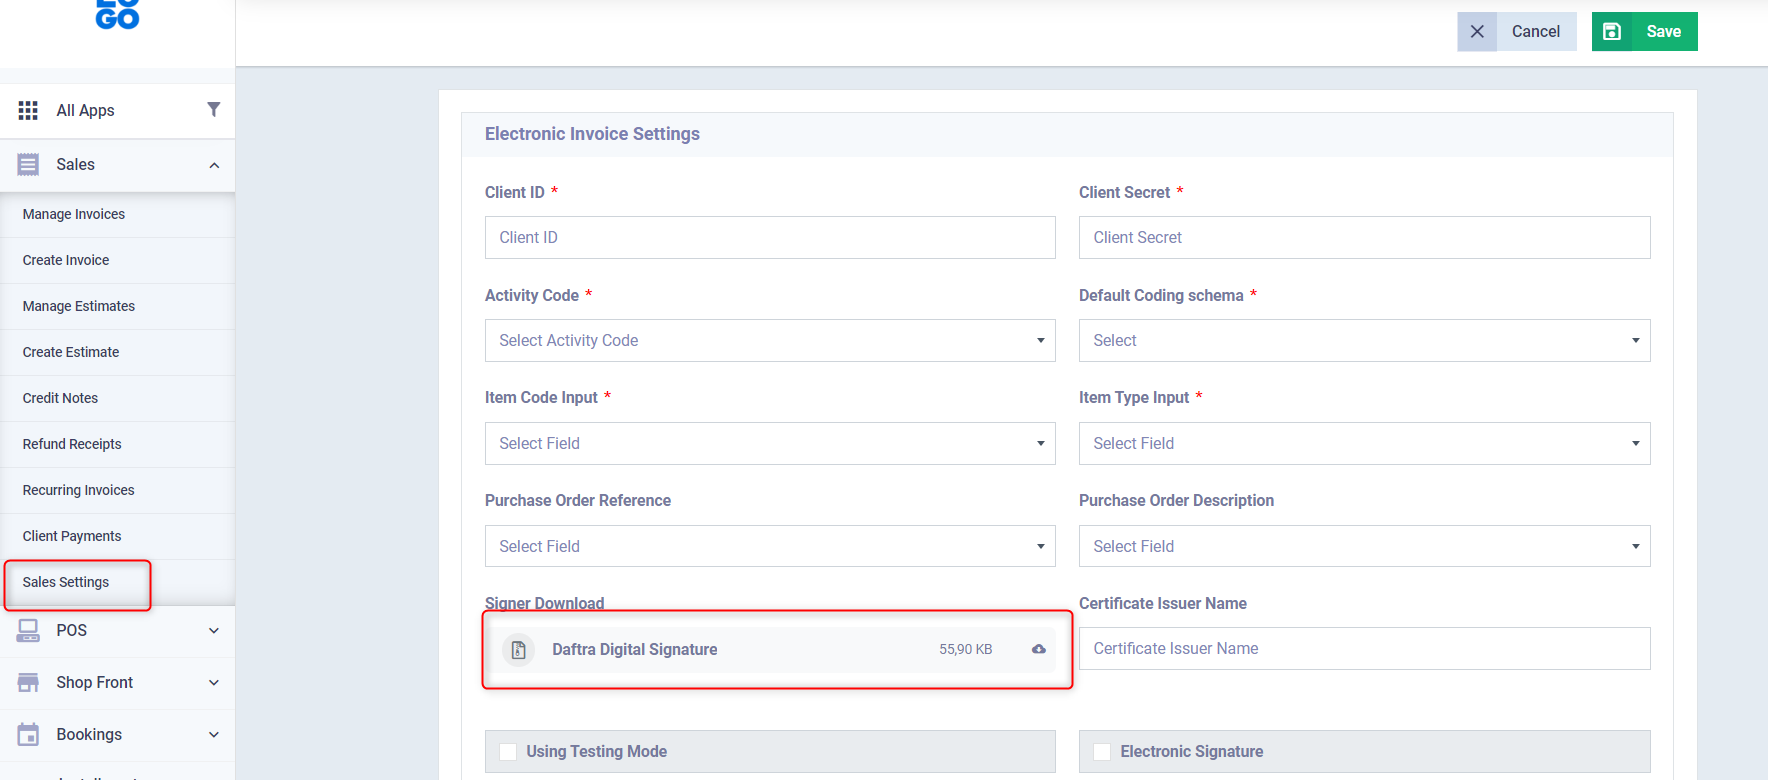
5- Set up the Electronic Invoice settings on Daftra:
- Go to Sales.
- Choose Sales Settings.
- Click on Electronic Invoice Settings.
 In the first field (Client ID):
Enter the Client ID by copying it from the Egyptian Electronic Invoice Portal.
- In the second field (Client Secret):
Enter the first client’s secret key.
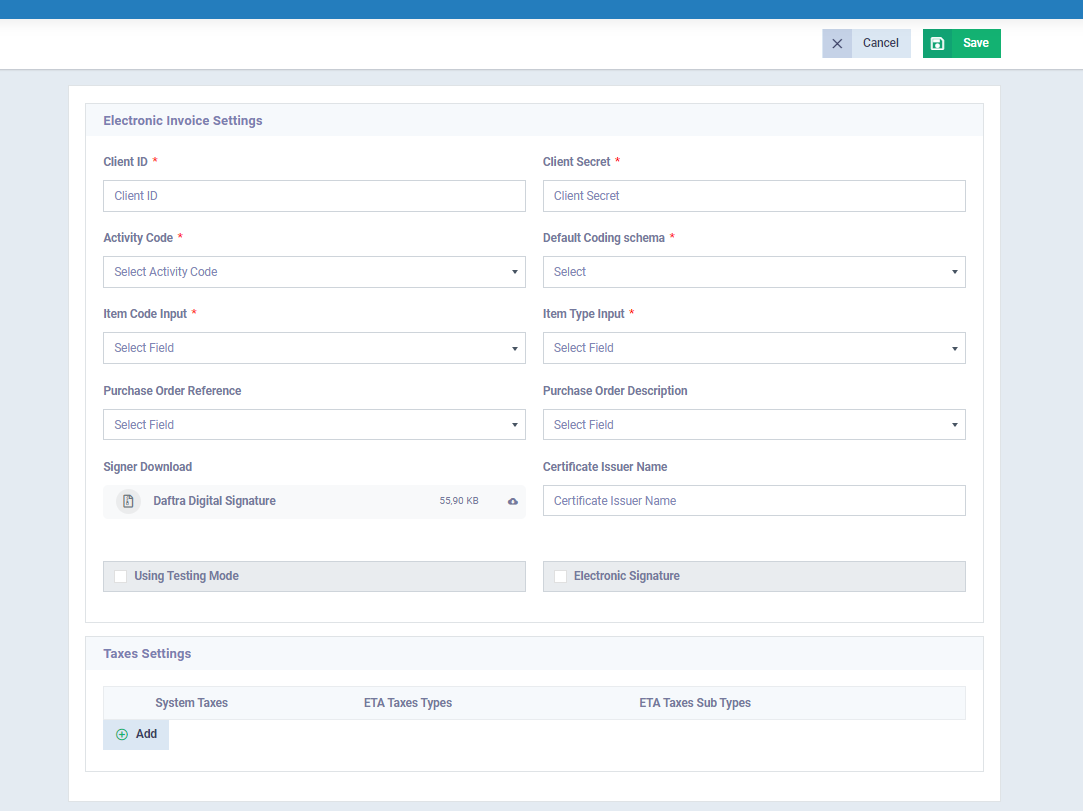
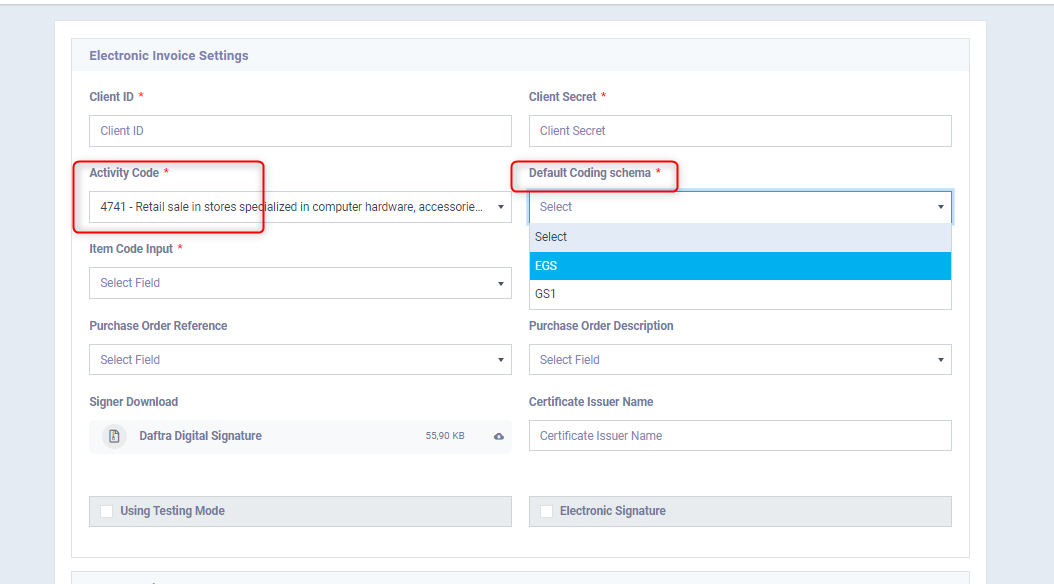
- In the third field (Activity Code):
- Go to the Tax Authority website.
- Then click on Taxpayer Profile.
- Select Branches.
- Copy the activated activity code for your business.
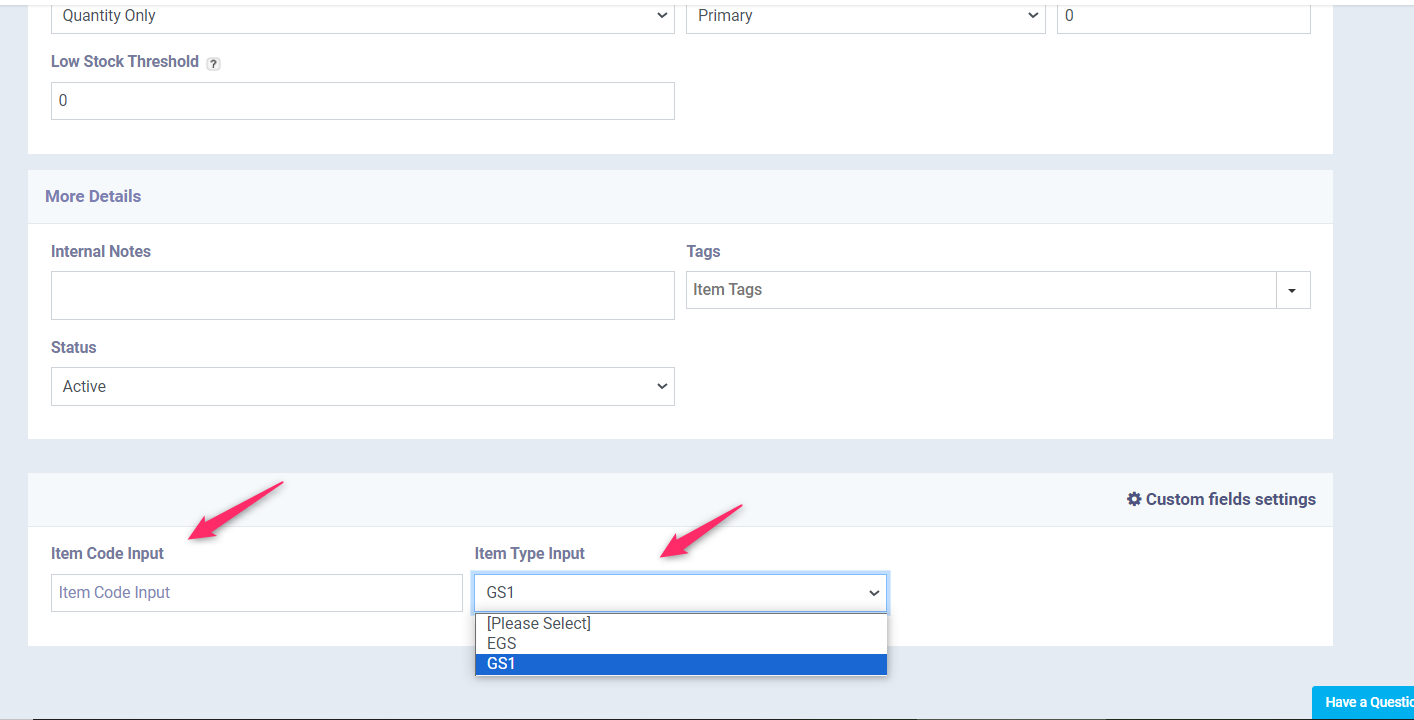
 In the fourth field (Default Coding Schema):
Choose the encoding type you used for your products, either
- EGS
or
- GS1
 By activating the Electronic Signature:
Click on the ✅
To see a field asking for the dongle PIN, enter the secret code received with the electronic signature token PIN.
And the name of the certificate issuer, e.g.,
Egypt Trust Sealing CA
(6)
Complete the details of clients and products:
- Make sure when adding a new client that all fields are complete, including the Commercial Register and Tax Card if the client is a business, and the National ID if the client is an individual.
- Similarly, when adding a product, enter its code as approved by the Tax Authority, and choose the Item Type Input.
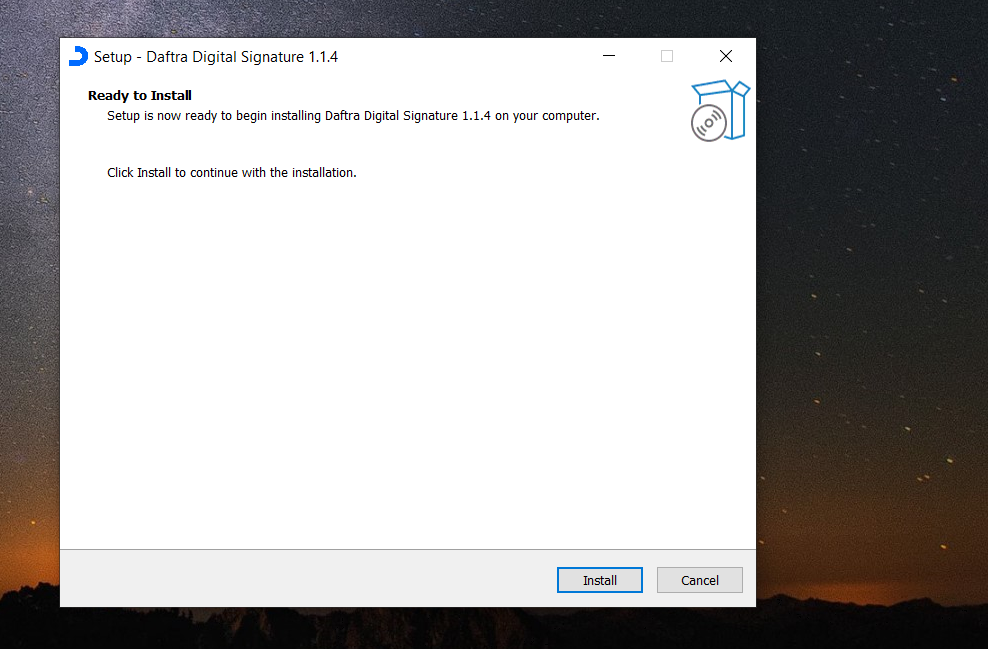
Finally, ensure the installation of Daftra’s app, which supports linking the system with the digital signature token, to issue invoices with the electronic stamp.
You can download it from within the Electronic Invoice Settings, after clicking on Sales Settings in the main menu of Daftra
Then proceed with the software installation on your device
This concludes the linking process. You will find that when issuing invoices on Daftra after following these steps, you will see the option “Send to ETA” allowing you to send your invoices to the Tax Authority and check the invoice status from the invoice display screen.