Back

Setting a Different Design for Each Document in the Purchasing/Sales Cycle

In addition to the default invoice layout, the system provides several other layouts that you can use as they are or modify by adding or removing some fields or by changing the design. In this article, we will review how to set a different default layout for each document in the purchasing/sales cycle.

How to Set a Layout as Default for a Document

To go to the invoice layout for editing the designs, click on “Sales Settings” in the main menu under “Sales” to go to sales invoice layouts, or click on “Purchase Settings” in the main menu under “Purchases” to go to purchase invoice layouts. Then, click on “Purchase Layouts.”


The layout you have already edited will be displayed. You can click on one of them or choose a different layout by clicking on the “New Layout” button.
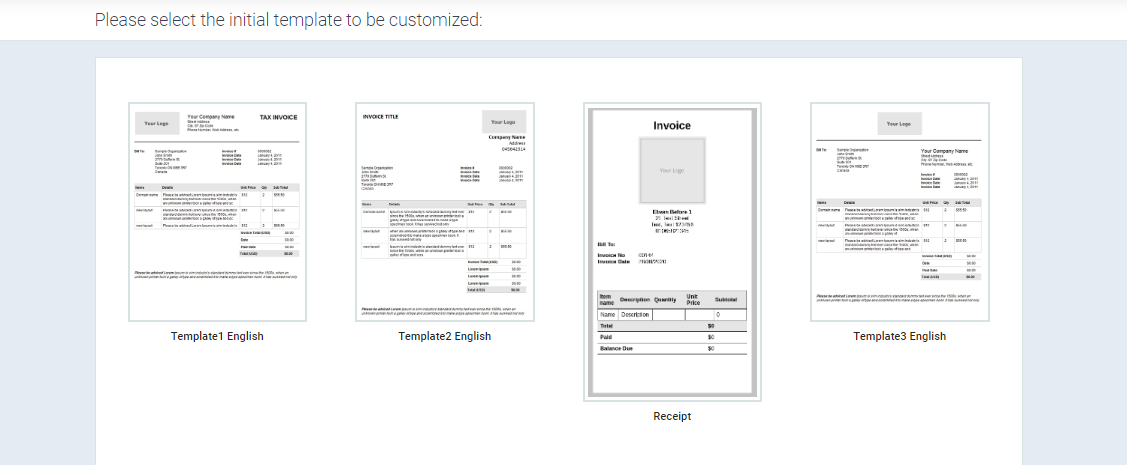

Choose a Layout


You can add the fields you want and control how these fields are displayed, or change the field name, which you can learn about in detail from the following explanations: Adding a custom field to the invoice – Changing the field name in the invoice layout – Controlling the display of items and their prices in the invoices.

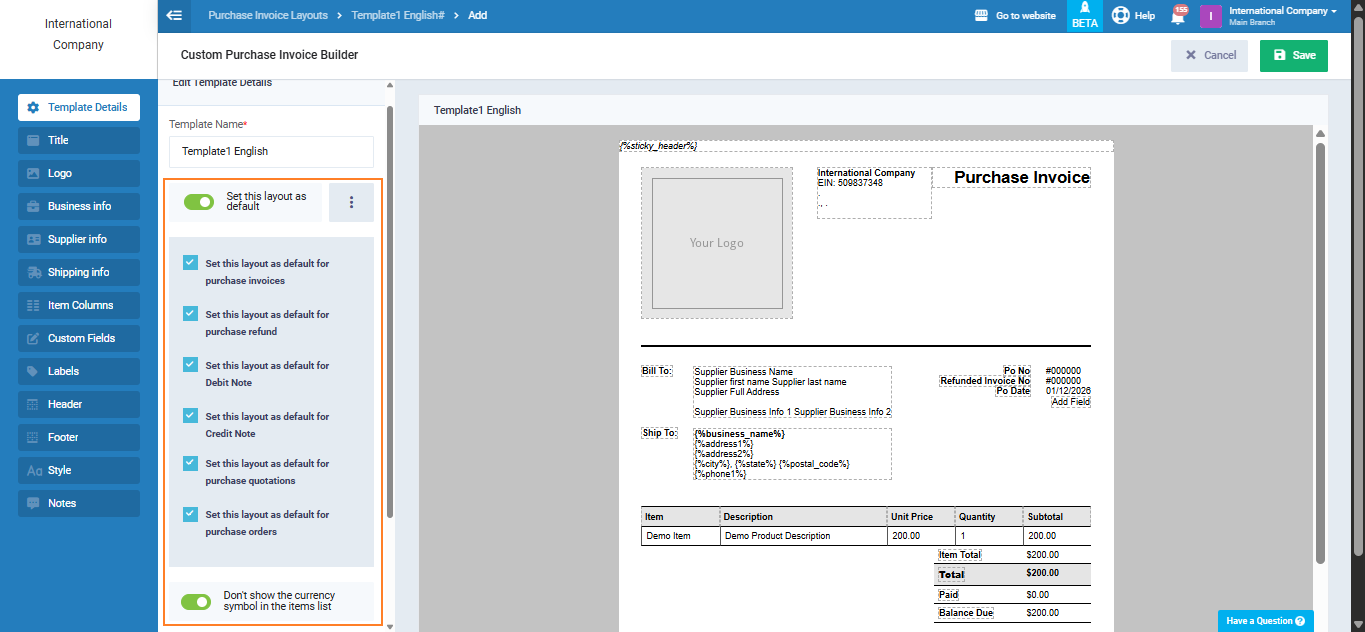
Enable the “Set this layout as default” feature, then activate the document for which you want to make this layout the default. Repeat the process and choose each time a different invoice.

Example:

You can make layout (A) the default for purchase invoices, while making layout (B) for purchase returns to distinguish the format of each document in your purchase cycle, and similarly for sales documents.


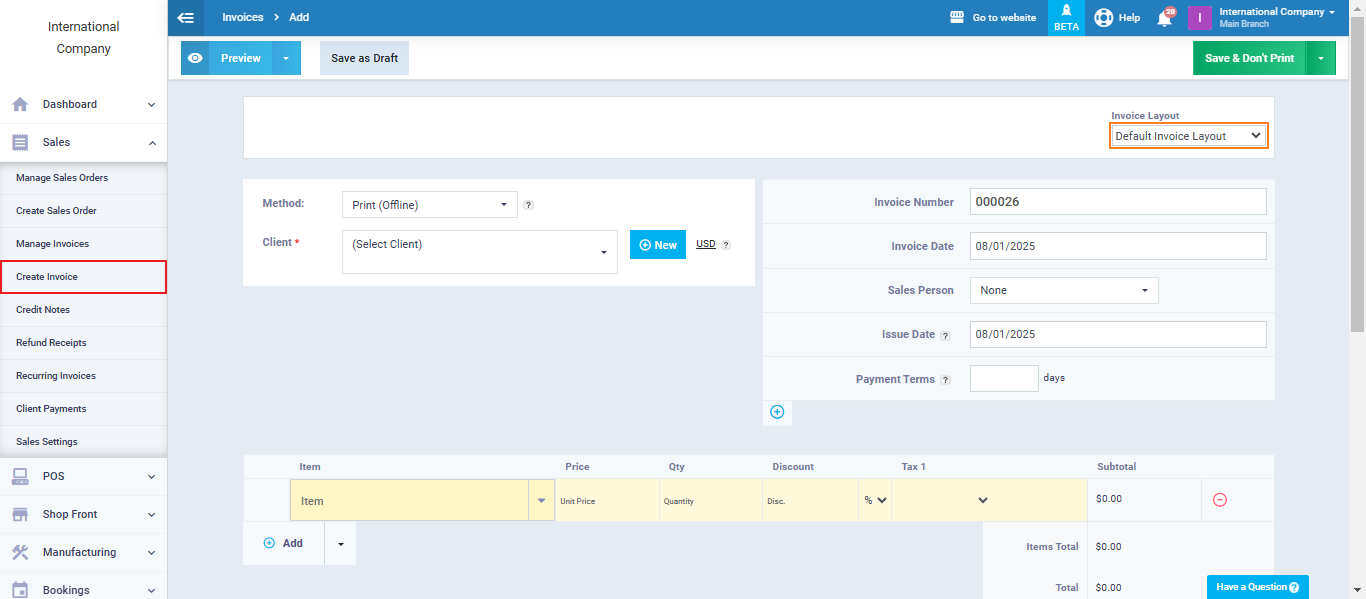
When creating a new invoice or document, the layout that you made the default for that document will appear, and you can change it from the drop-down menu next to the “Invoice Layout” field.