Routing the Purchases Account
The chart of accounts in the system is pre-configured to suit most business industries, and there is a main account for purchases named “Purchases Account” which is primarily used for routing entries. However, some businesses may require creating more than one purchase account to direct entries from them when creating a purchase invoice, according to what is appropriate for each invoice. Here are the steps in this guide.
Enabling the Purchases and the Accounting Apps
To take the step of routing accounts, it is necessary to activate both the Purchases app and the Chart of Accounts app in our account. You can use the following links for this step:
Guide to activate the Purchases App.
Guide to activate the Chart of Accounts App.
The Setup needed to route the Purchases Account
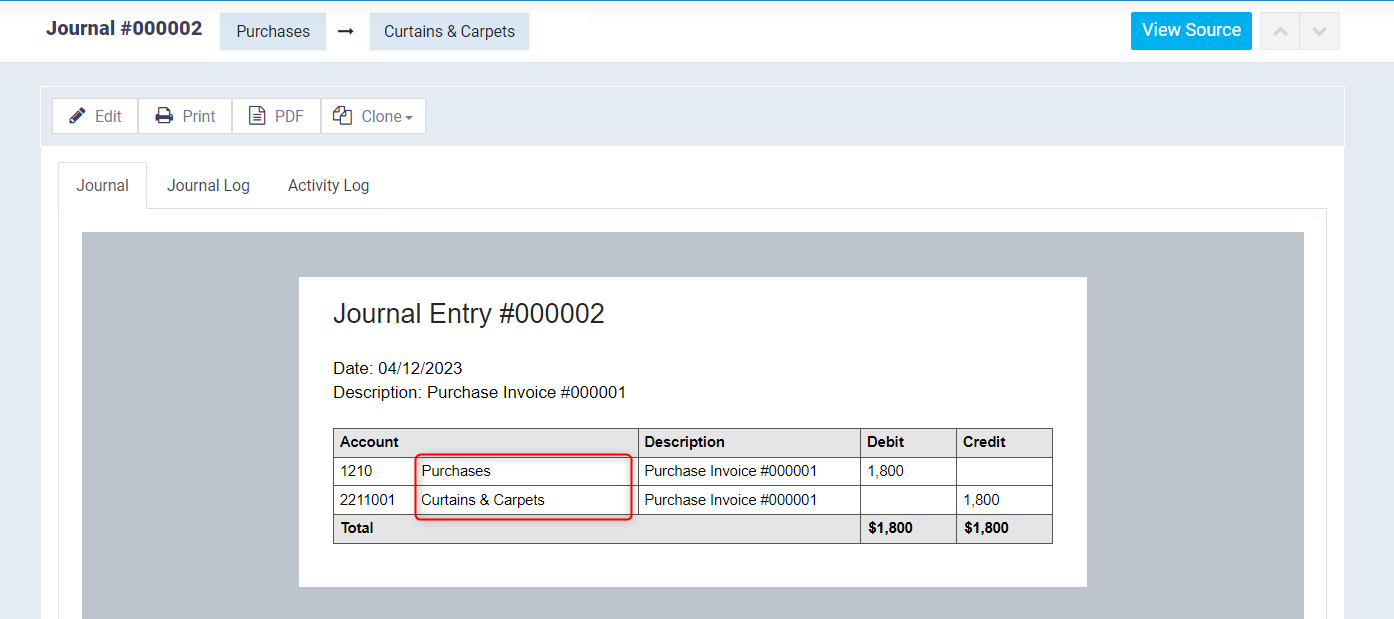
With the system’s default settings, the default account “1210- Purchases” is directed to have the following entry:
From A/C Purchases
To A/C Supplier (name of the supplier chosen in the purchase invoice)
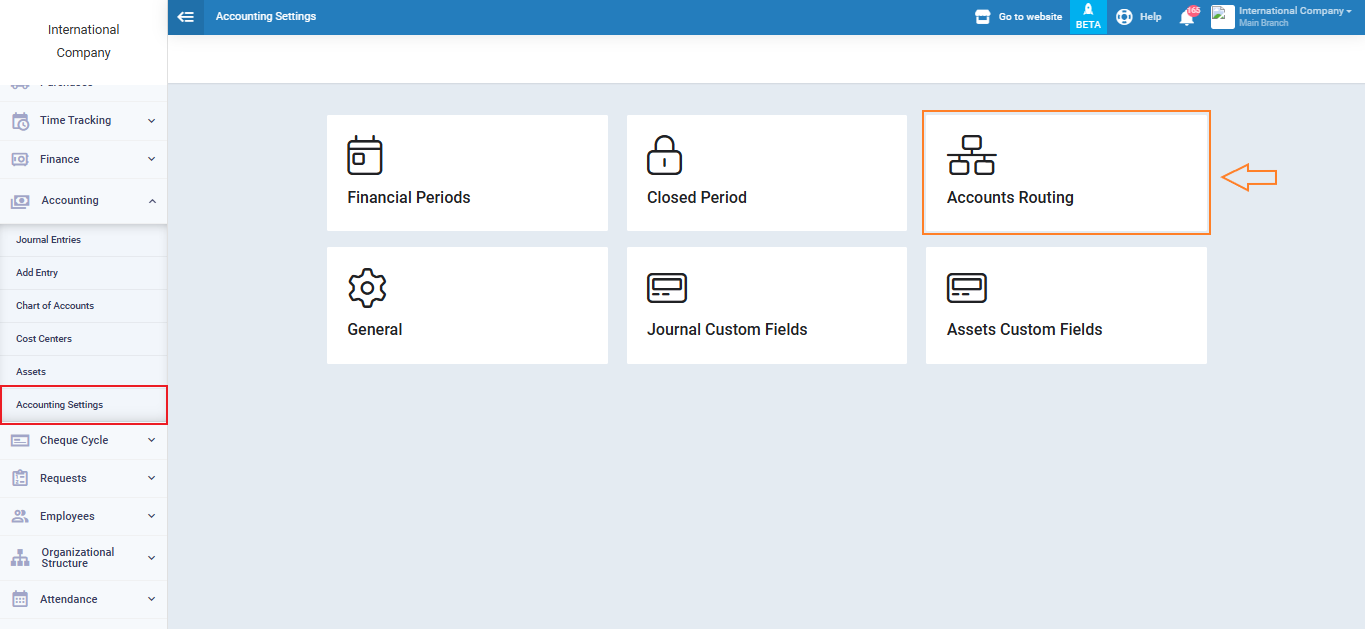
To enable the system to choose another account for routing purchase invoices, first, set up the Purchases Account Routing Settings by clicking on “Accounting Settings” under “Accounting” in the main menu and then click on the “Accounts Routing” card.
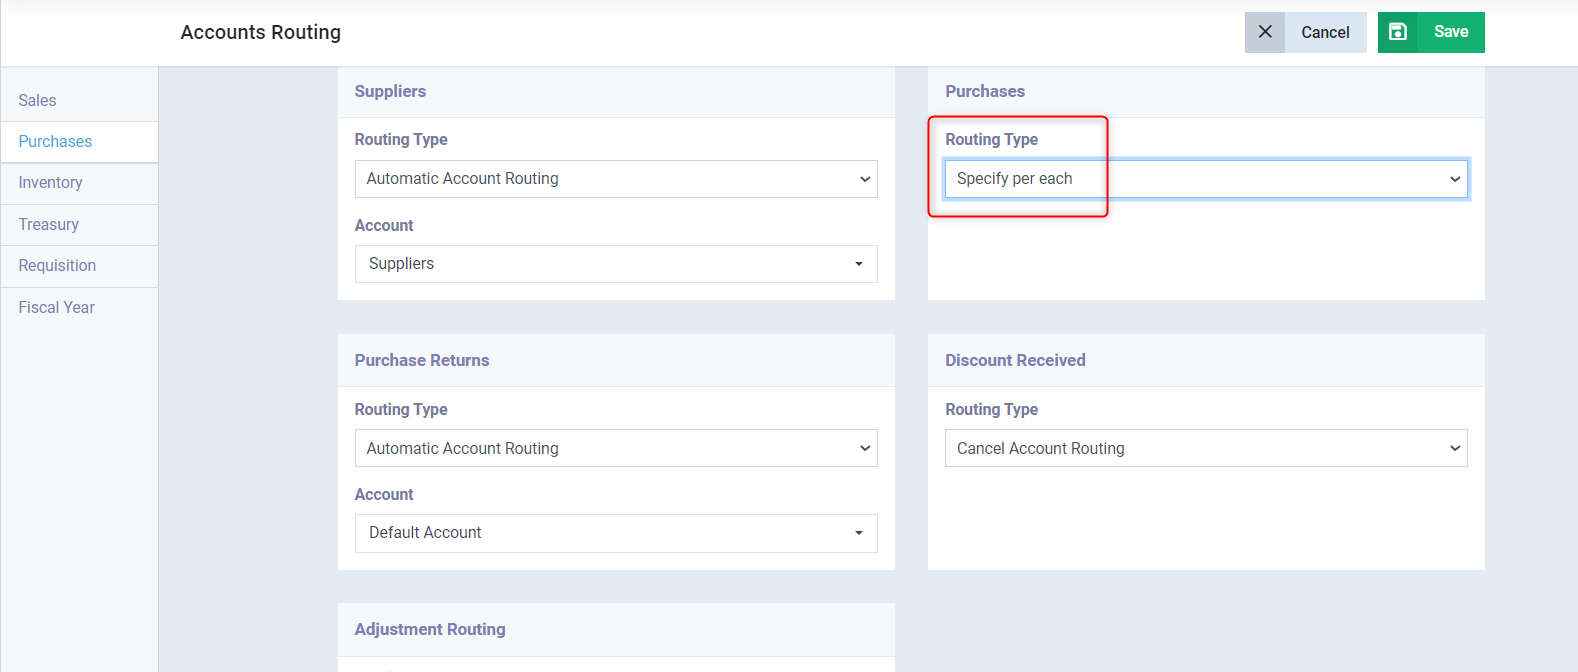
You will find the default setting for the routing type at the Purchases related accounts as “Automatic Account Routing”, where the account “Purchases” is default.
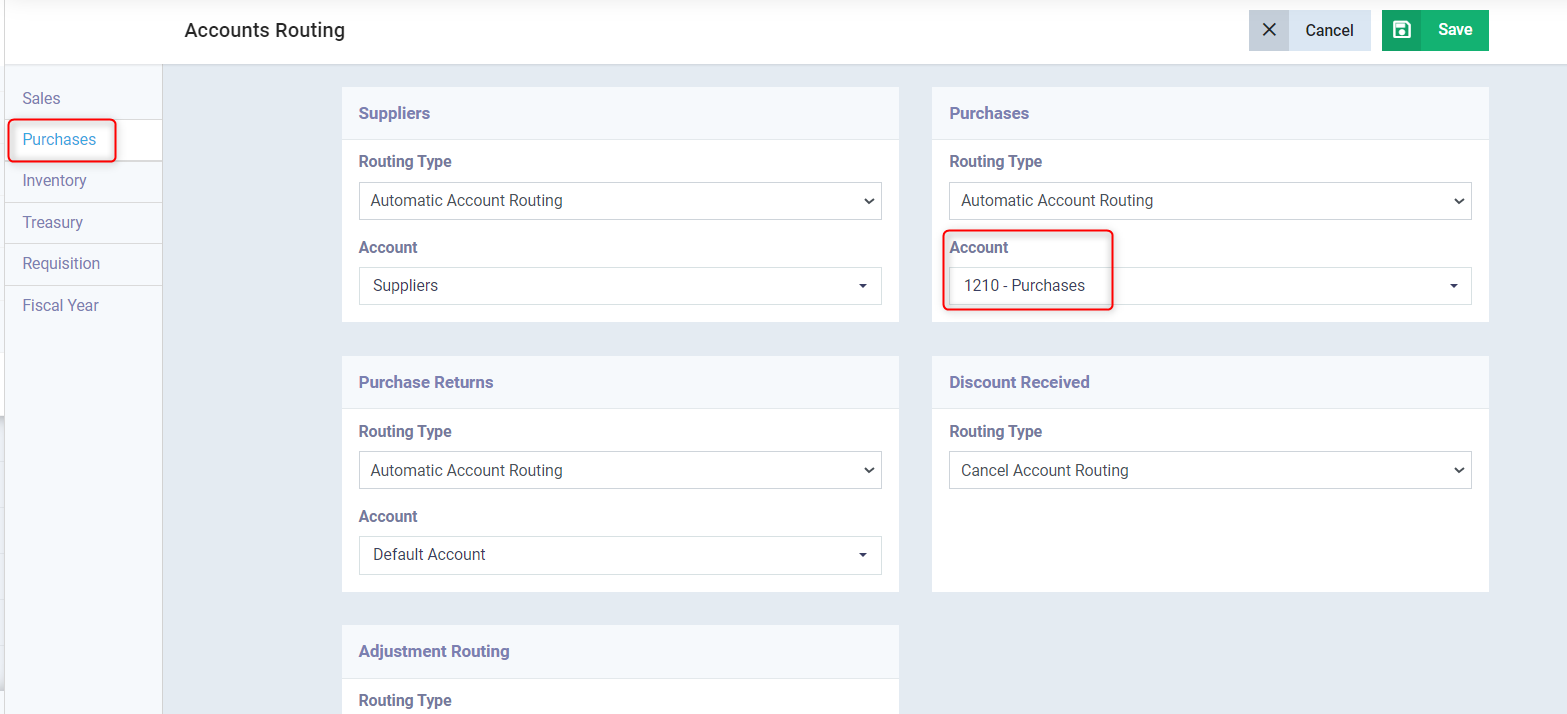
Click on the drop-down menu for the routing type and change it to “Specify per each” to allow selecting the account in the purchase invoice, then click the “Save” button.
Adding an Account for Purchases in the Chart of Accounts
To route the accounts of the purchase invoice from a different account than the default one, make sure this account already exists in the chart of accounts, or add it if it is a new account.
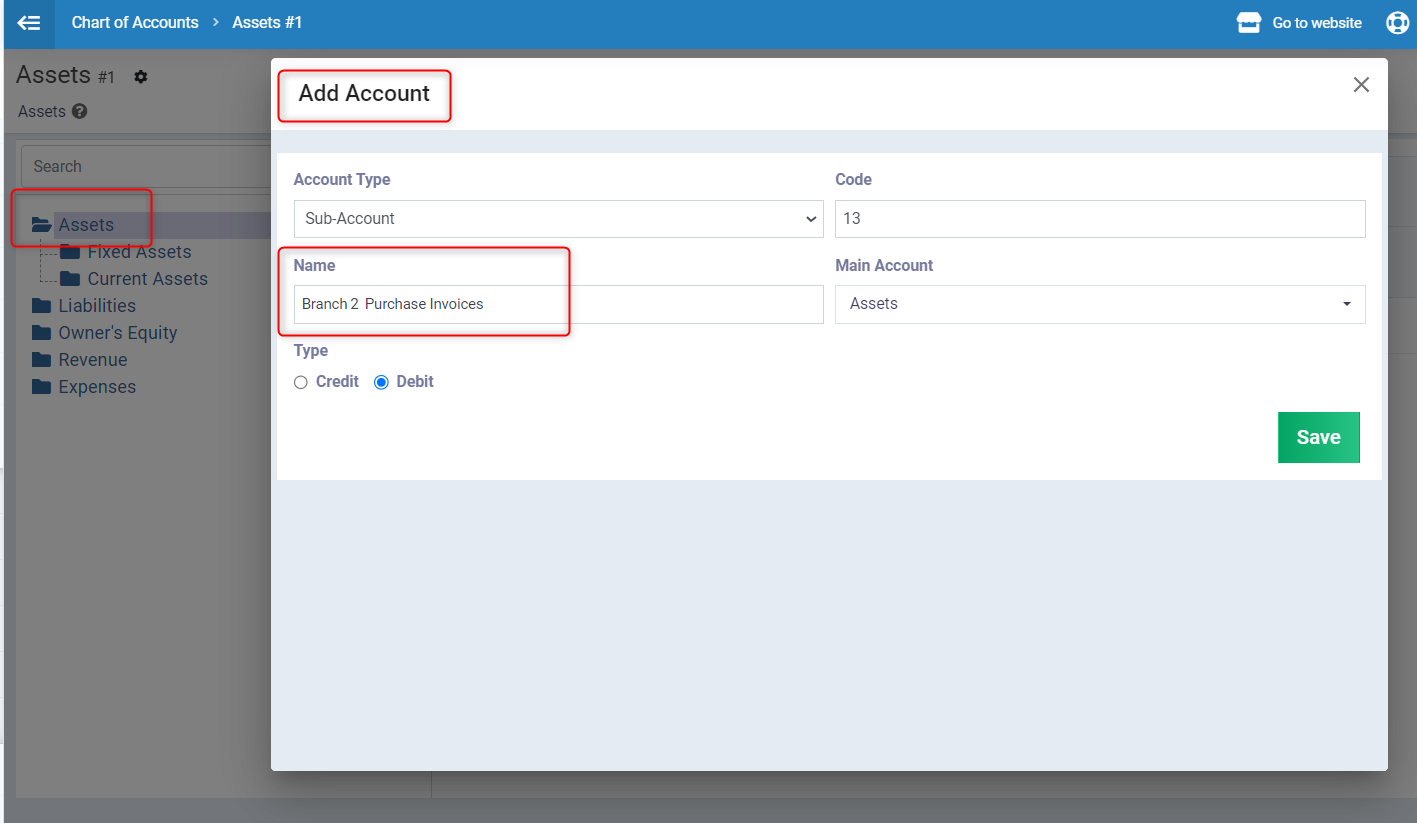
Click on “Chart of Accounts” under “Accounting” in the main menu. Click on the account from which you want to branch the new account and click “+ Add Account”. Write the name of the new account, for example, “Purchase Invoices – Branch 2”, to separate the purchase accounts for them from other branches. Then, choose the main account to branch from and click “Save”.
Selecting the Purchases Account in the Invoice
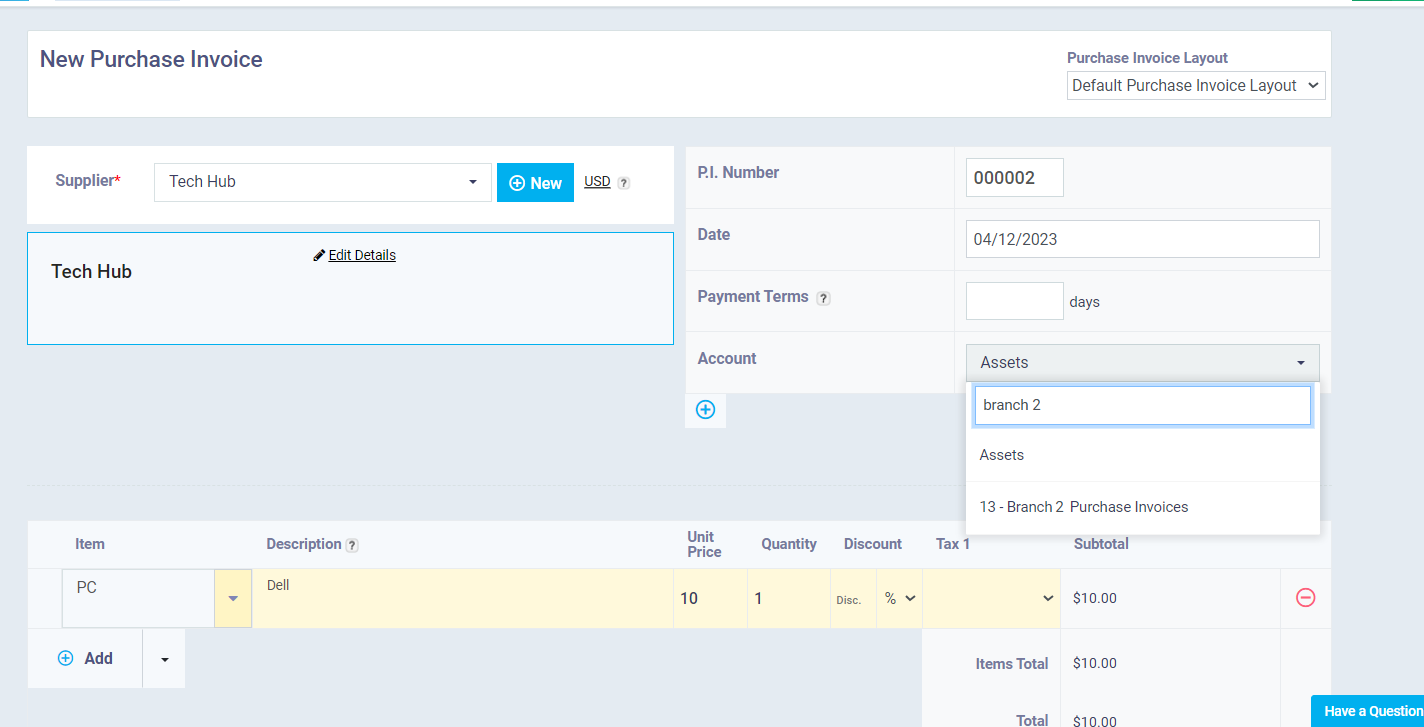
Click on “Purchase Invoices” under “Purchases” in the main menu and click on “New Purchase Invoice”
Then click on the dropdown menu next to the “Account” field and search for the name of the account you want to direct this purchase invoice from, then click on it. Let’s say the account is “Branch 2 Purchase Invoices”.
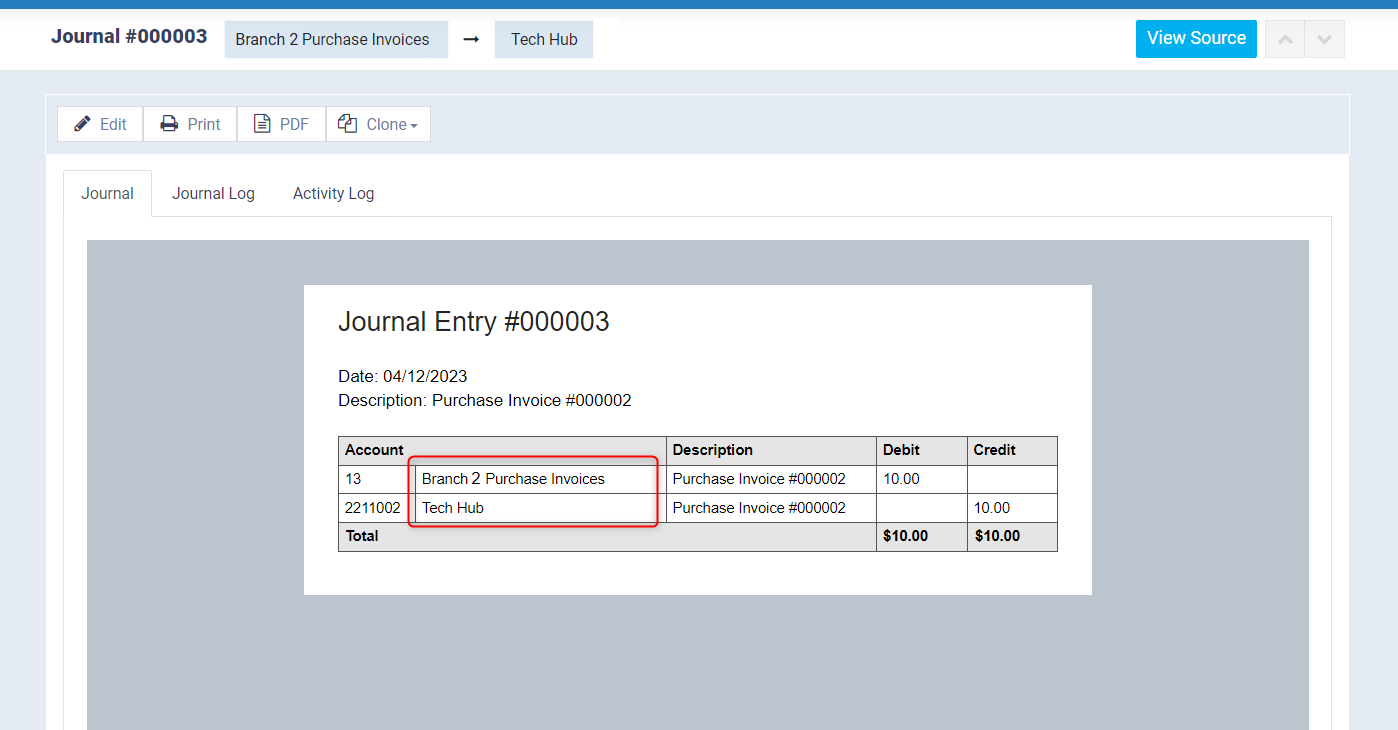
The entry of the purchase invoice that we have accounted for appears, where the entry is:
From A/C Branch 2 Purchase Invoices (the new account we created).
To A/C Tech Hub (the supplier)