Adding Purchase Invoice
In a complete purchasing cycle ledger that concludes with purchase invoices, you have the option for purchase invoices to be generated automatically as a result of converting purchase requests and orders into invoices. However, you can still skip the preceding purchasing cycle steps and start directly by adding the invoice.
In this article, we will review the details of creating a new purchase invoice, highlighting the settings for purchase invoices and the properties and features they reflect.
If you want to learn more about the complete purchasing cycle, refer to the “Purchasing Cycle” Guide.
How to Create a New Purchase Invoice
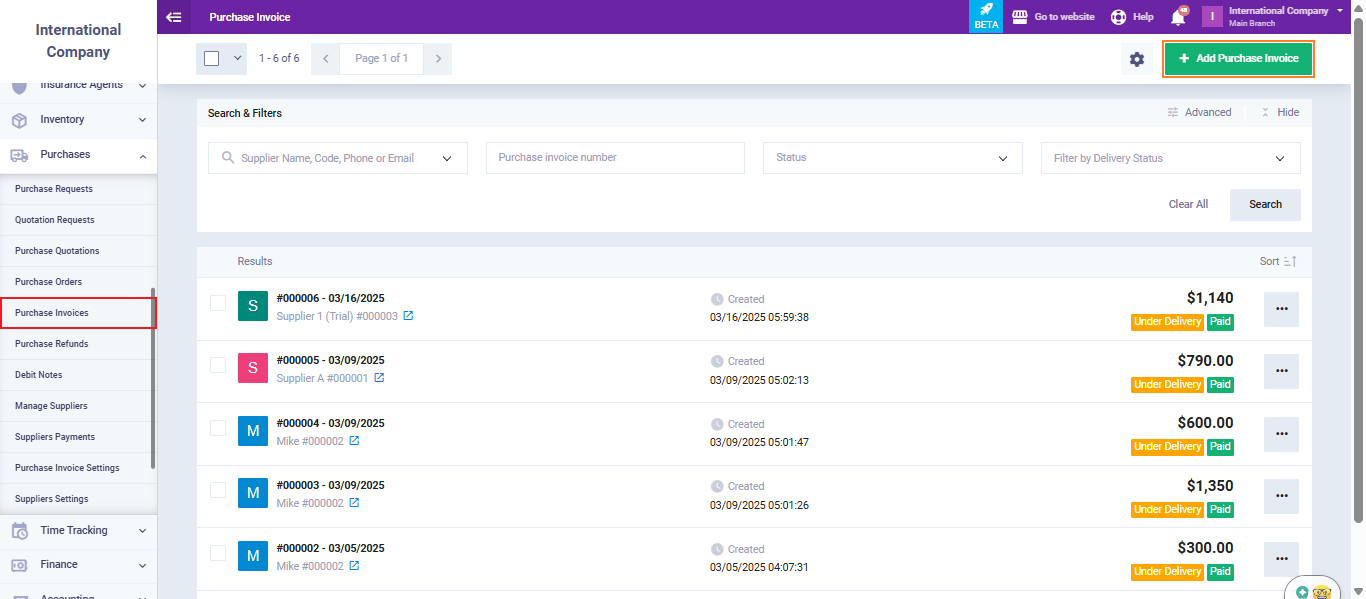
Click on “Purchases” in the main menu.
Then, click on “Purchase Invoices.”
Click on the “New Purchase Invoice” button.”
To find a new invoice, it has been automatically assigned a unique sequential number. You can specify the invoice date, which is automatically set to the creation date of the invoice, as well as the issue date, which can be set on the same day as the creation date or before or after.
The supplier field helps you select the supplier of the invoice from the system’s supplier database, or you can add a new supplier using the button next to it.
The payment terms field specifies the number of days allowed for you to pay the invoice.

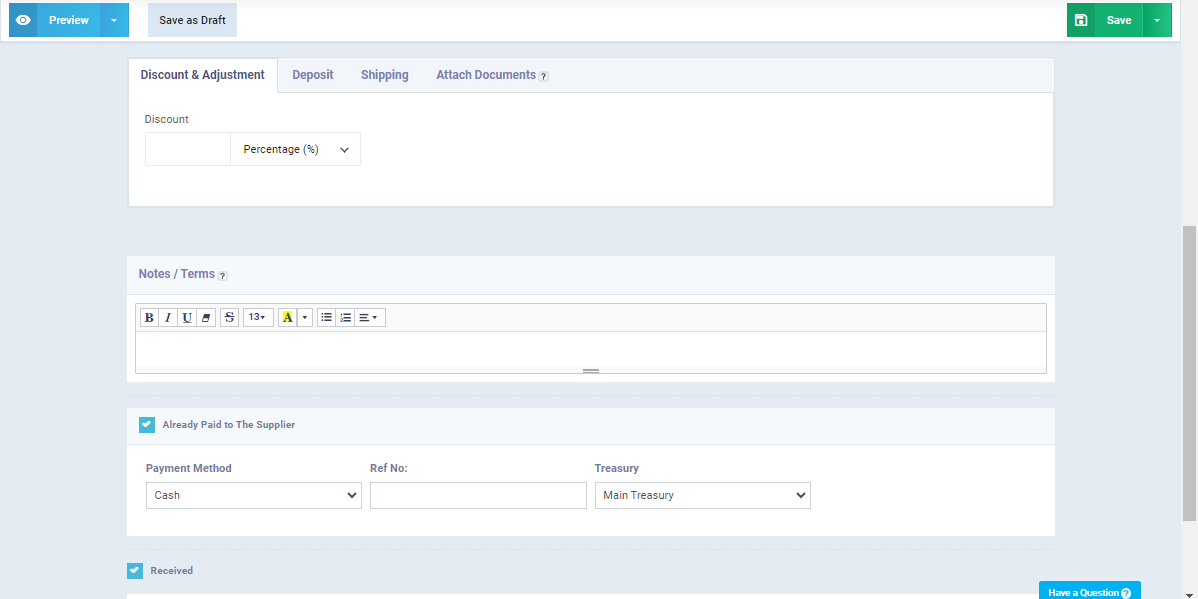
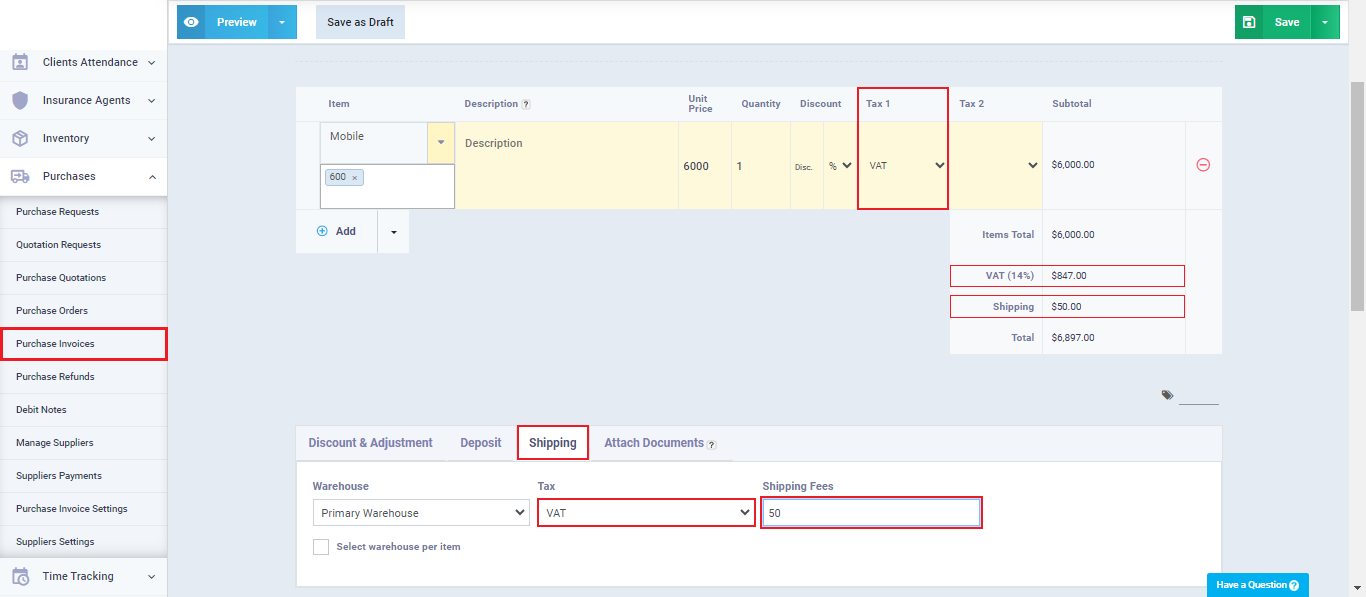
You have some additional properties to control invoices, such as discounts, settlements, deposits, and advance payments to the supplier. These are the same properties found in sales invoices.
Invoice Management and Permissions
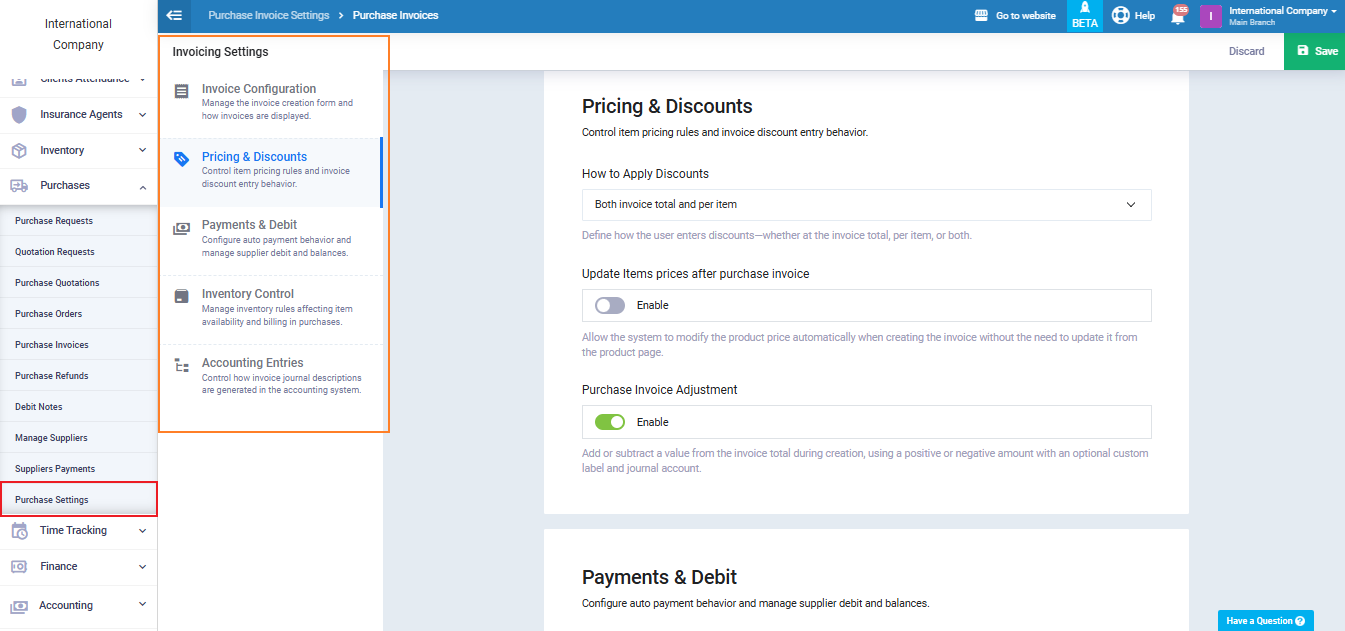
You can have greater control over purchase invoices through ‘Purchase Invoice Settings,’ which include features such as:
- Updating product prices after a purchase invoice.
- Auto-pay purchase invoices if the supplier has available credit.
- Mark Purchase Invoices As Already Paid By Default
- Purchase Request Manual Statuses
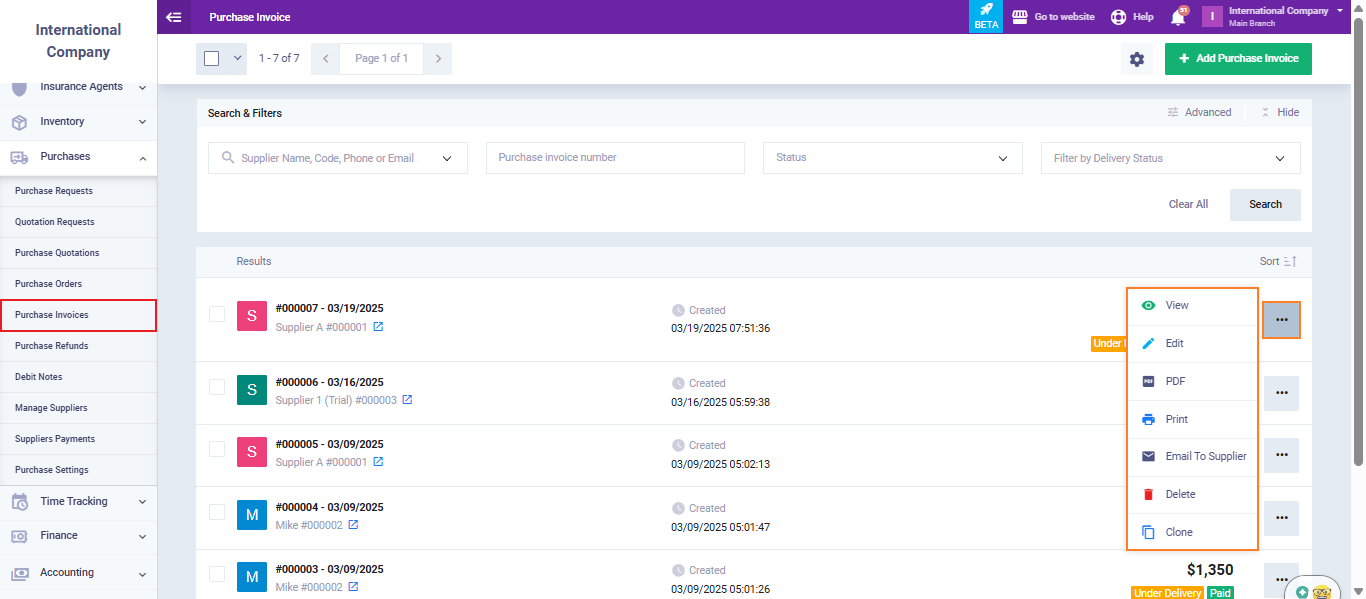
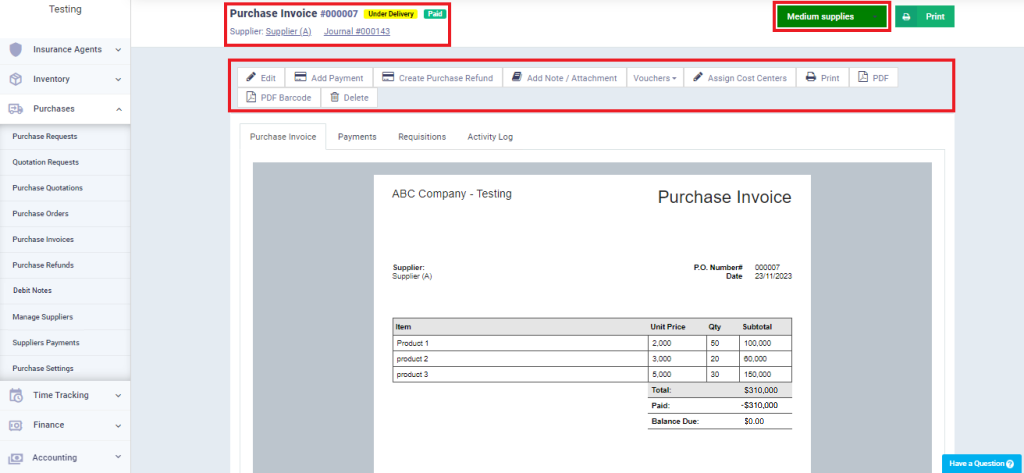
After issuing the invoice, there are several predefined actions available to help you manage the invoicing process. You can access these actions by clicking on ‘Purchase Invoices‘ under ‘Purchases‘ in the main menu and selecting the invoice for which you want to take action. The key actions include:
- Edit the invoice.
- Send the invoice to the supplier via email, or WhatsApp, or send a text message with a link to view the invoice and its details.
- Print the invoice on paper or download it as a PDF file.
- Add a payment transaction for the total amount or a portion of the invoice.
- Create debit notes or returns for the invoice.
- You can also assign a specific cost center to the invoice.
-
Through ‘Purchase Invoices’ under ‘Purchases‘ in the main menu, you can review the entire list of invoices. You can use search filters and different statuses to quickly access the invoices you are looking for and to take a quick look at an analytical overview of a specific category of your invoices.
Additionally, you can take some quick actions, schedule a date, delete multiple invoices at once, and create a new invoice.