Purchase Cycles Guide
Managing purchases is one of the most important operations within an organization, as it is responsible for providing the necessary needs to continue offering services and products optimally; ultimately contributing to achieving business goals and profitability. On the other hand, poor purchase management is one of the main reasons for declining quality and increasing costs.
Now, let’s learn about how to manage purchases in all its stages and steps on the system through this comprehensive guide.
Introduction about the Purchase Cycle
The complete purchasing cycle encompasses a series of stages, organized as follows:
- Purchase Request: Submitted by various departments to the purchasing department.
- Quotation Request: Initiated by the purchasing department and sent to suppliers to provide their quotes.
- Purchase Quotations: Presented by suppliers to the purchasing department to select the best quote.
- Purchase Order: Issued by the purchasing department to the chosen supplier to start the supply process.
- Purchase Invoice: The purchase order is converted into a purchase invoice upon receipt of the goods.
Although these steps are arranged as mentioned, it’s not mandatory for the purchasing cycle to start from the first stage, as it depends on the operational mechanism of each company..
In this context, the system has been developed to handle each stage automatically based on the previous one, ensuring professional management of purchases, thus enhancing quality and saving costs.
Enabling the Purchase Cycle App
To utilize the purchasing cycle in the system, you first need to activate the app.
Go to “Settings” from the main menu, then click on “Apps Manager“.
Then activate the “Purchase Cycle” app as shown in the following image:
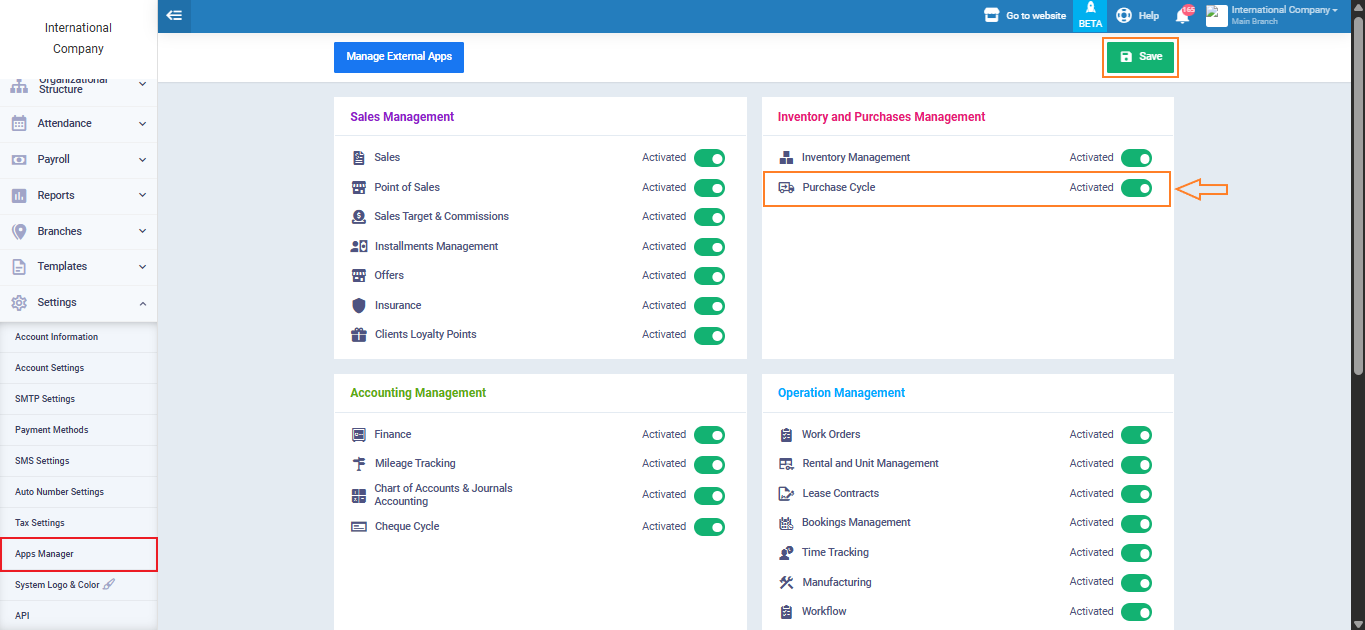
Then click on “Save“.
Purchase Requests
The purchasing cycle often begins with a purchase request submitted by one of the company’s departments, such as the marketing department, to the purchasing department. For example, a request for the purchase of a high-spec computer suitable for design programs and video editing.
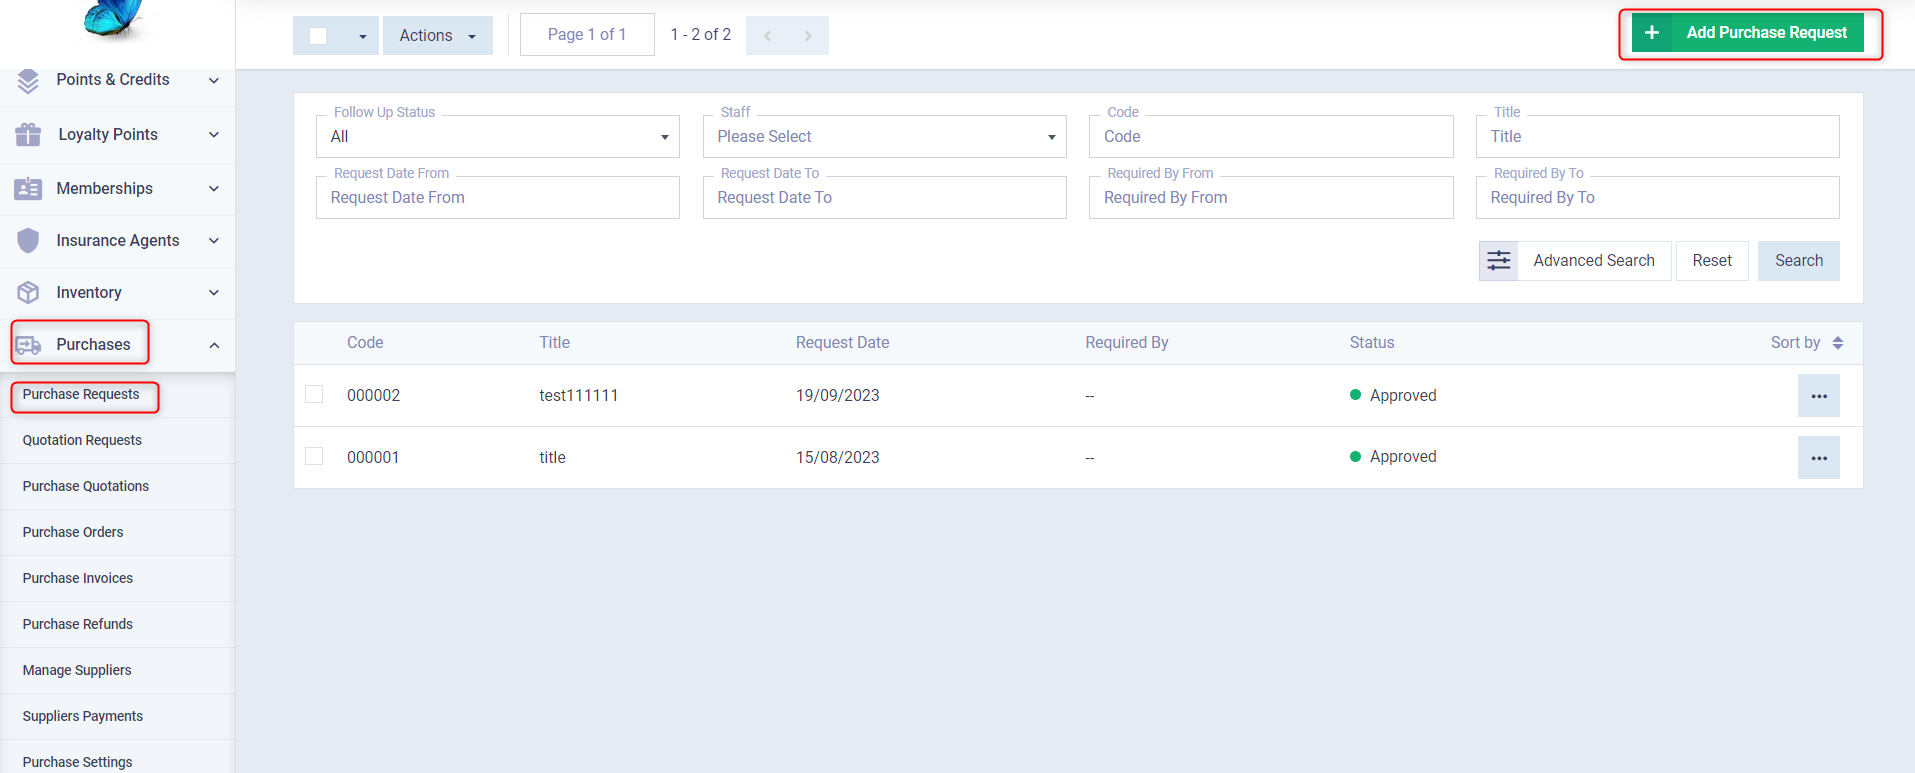
In this case, the marketing department manager submits a purchase request from their account, this is done by clicking on “Purchases” from the main menu, then “Purchase Requests“.
As shown at the top right of the panel, click on the “Add Purchase Request” button.
Now we begin filling in the details of the new purchase request as shown in the next image:
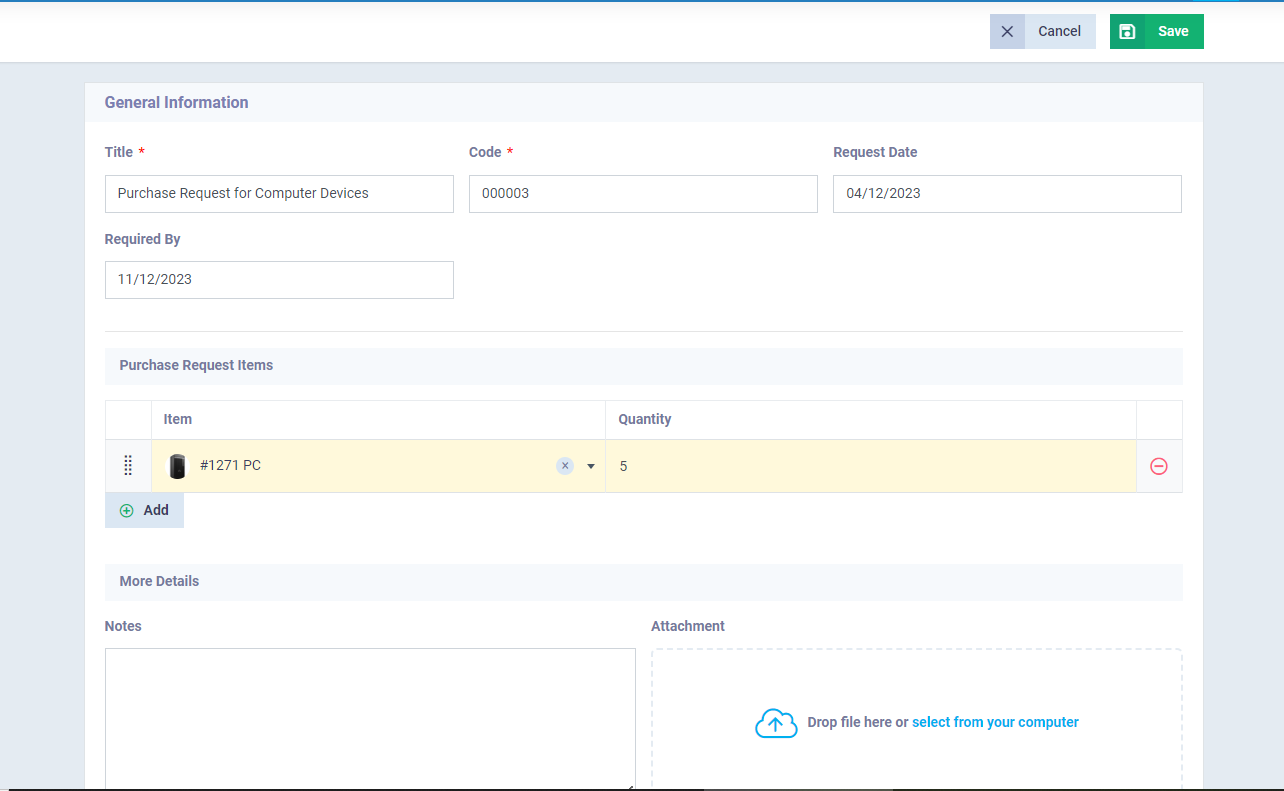
“General Information” Section:
- Title: In this field, choose a distinctive name for the purchase request.
- Code: Automatically generated by the system to maintain a sequence of purchase requests.
- Request Date: The date on which the purchase request is submitted.
- Required By: The planned date for the arrival of the requested purchases.
“Purchase Request Items” Section:
- Item: This field specifies the product to be purchased, which is a computer in this case. It is essential that the product is already defined in your account’s product file.
Refer to the guide Adding a Product/Service for successful completion of this step.
- Quantity: Here, specify the quantity desired by the requester. Precision is crucial in determining the quantity, as it cannot be changed later in the quoting and purchase order stages.
To add more products to the same purchase request, click on [+ Add].
“More Details” Section:
- Notes: The notes field is very important for specifying the product’s exact specifications and essential requirements.
- Attachment: If there are any illustrative images or attachments, you can attach them here.
Then click “Save“, ending the marketing manager’s role in submitting the purchase request and beginning the responsible management’s role in approving and validating the request as shown in the following image:
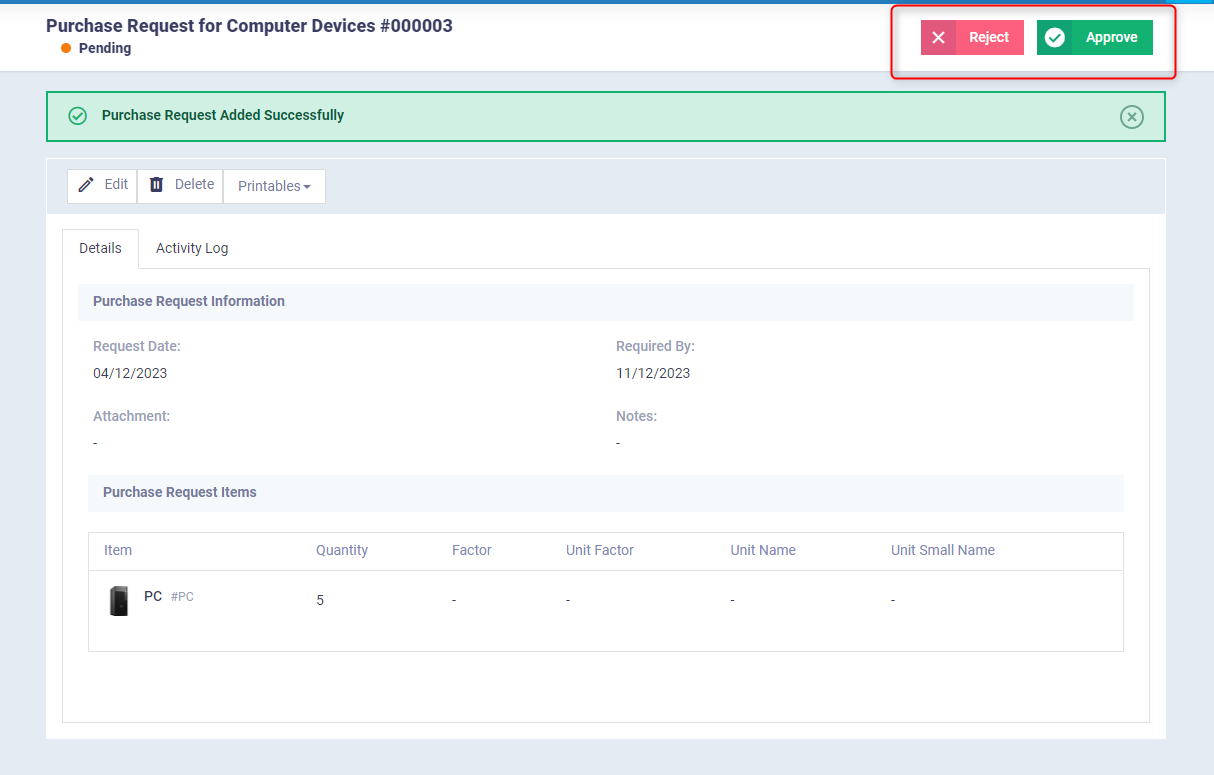
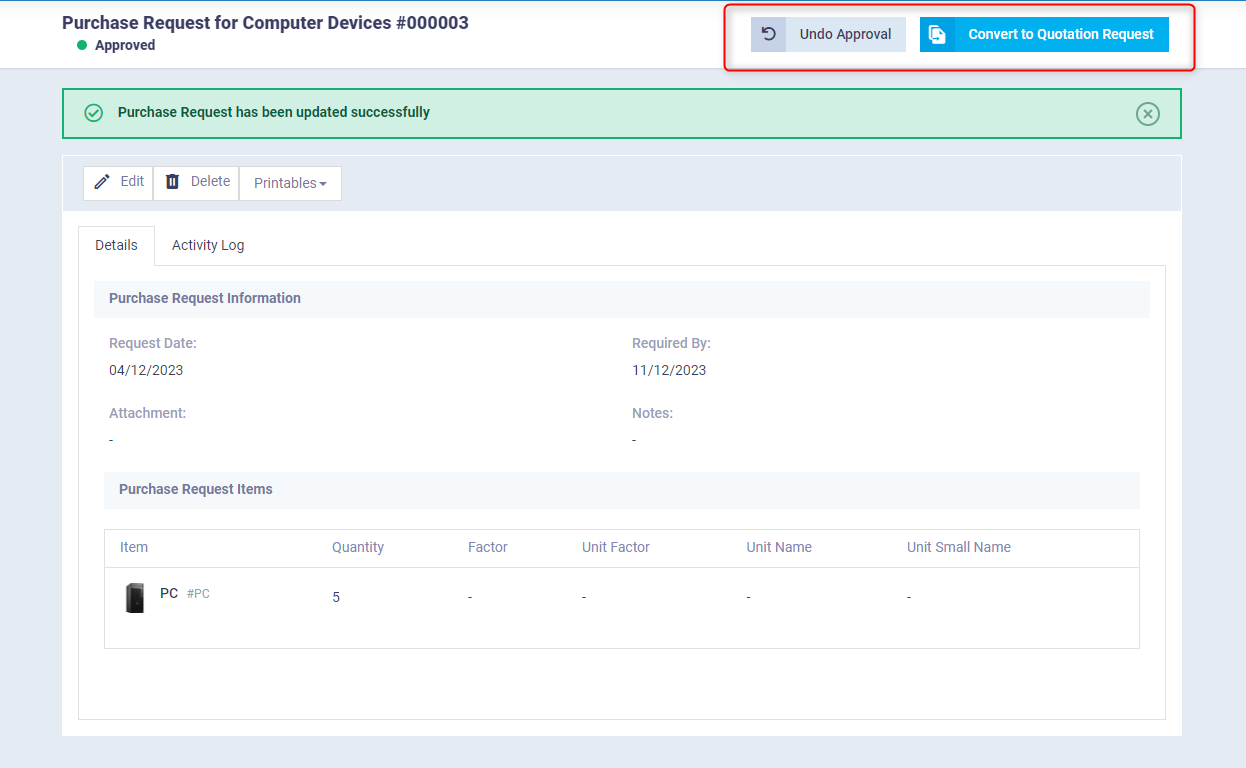
Once “Approve” is clicked, the next screen appears, where we can convert the “Purchase Request” into a “Quotation Request” or undoing the approval of the purchase request.
Purchase Quotation Requests
This step starts where the previous one ended, where we transform the “Purchase Request” into a “Quotation Request” by clicking on “Convert to Quotation Request“ as shown in the previous image.
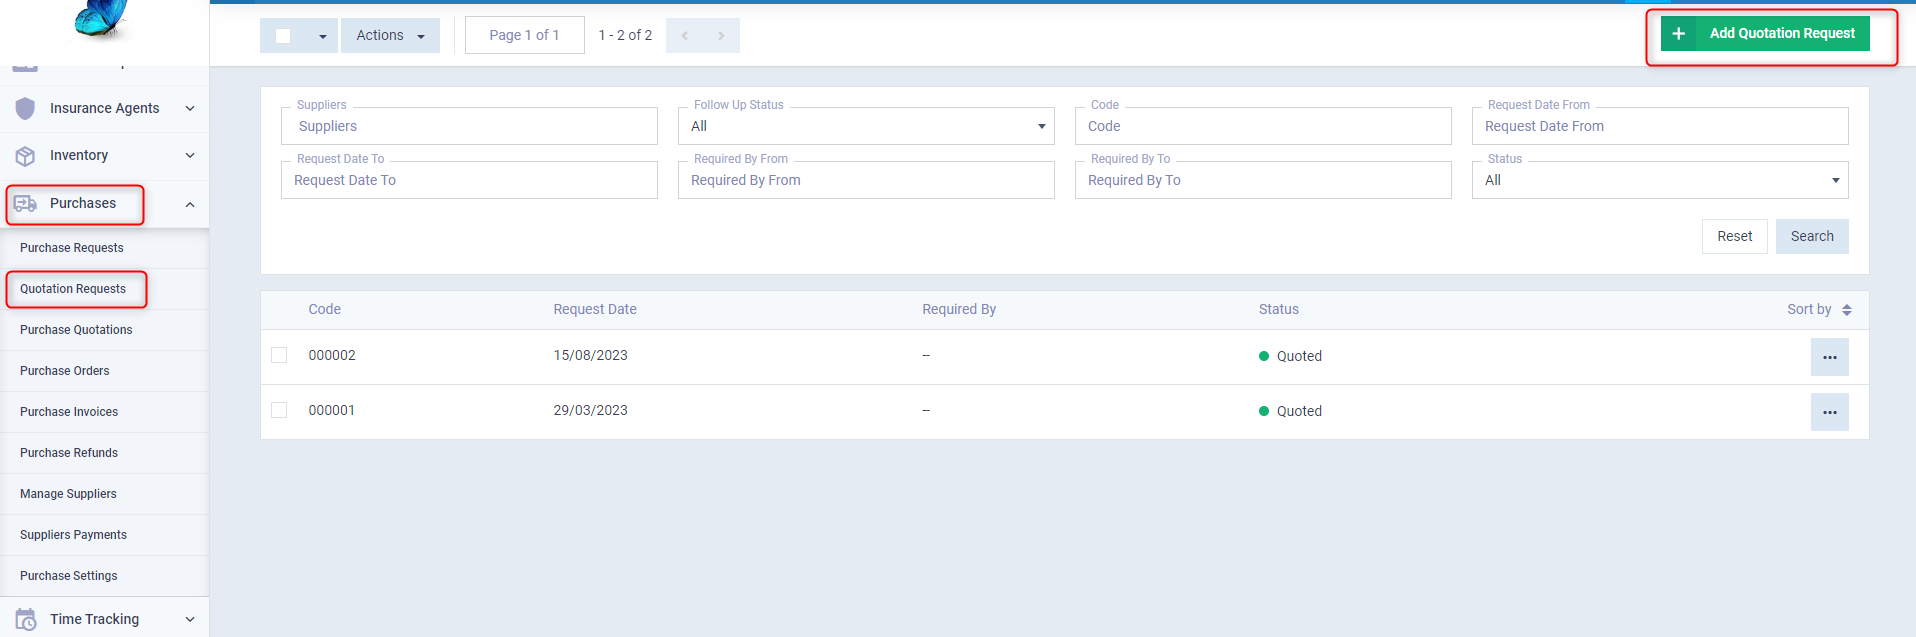
Alternatively, a new quotation request can be created by clicking on “Purchases” from the main menu, then “Quotation Requests“ and then “Add Quotation Request” as shown in the following image:
The details of the quotation request appear, which are generally similar to the purchase request details explained in the previous step, except for one specific aspect of the quotation request, which is “Suppliers“. The system asks us to add the suppliers from whom we wish to obtain quotations. Naturally, they must be defined in our account.
Refer to the guide Adding a New Supplier for completing this step.
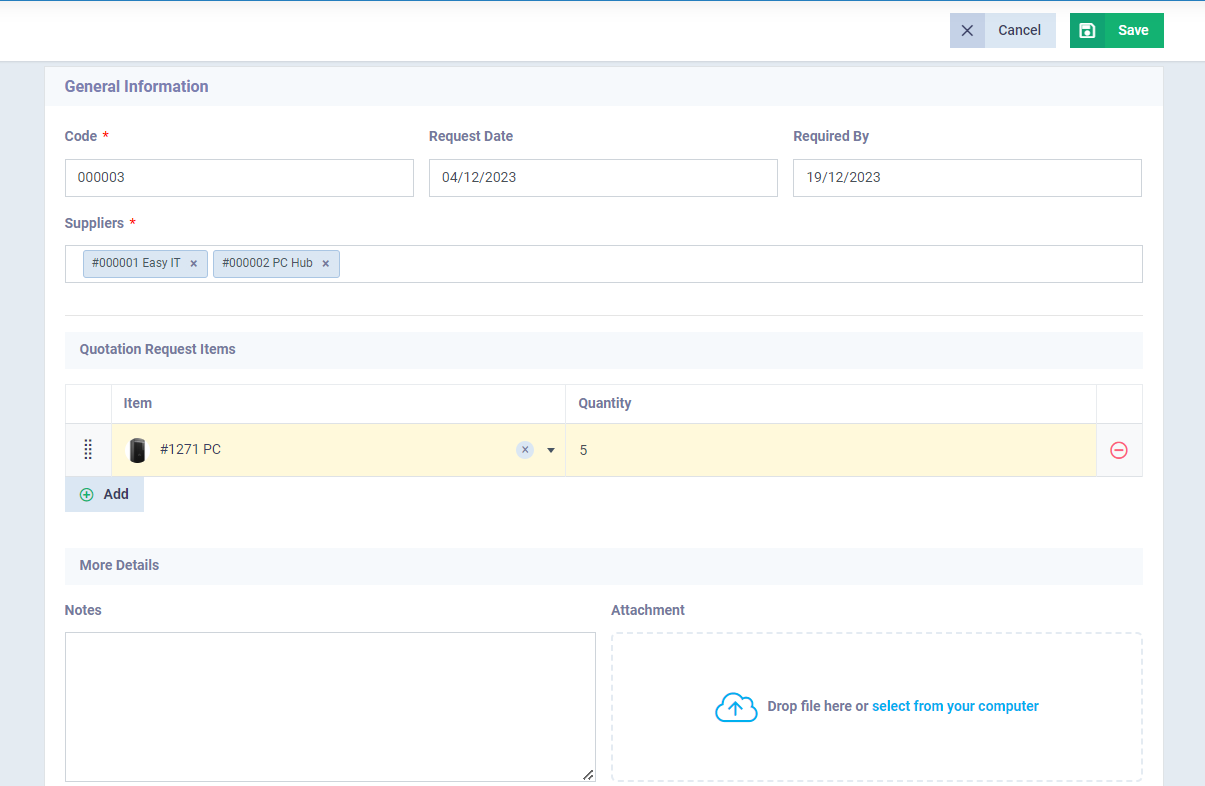
Then we click “Save” after completing all the data, thus creating a new quotation request that will be directed to the listed suppliers.
Purchase Quotations
After successfully creating the “Quotation Request,” the system allows you to directly convert it into a ” Purchase Quotation” as shown in the following image:

Additionally, a new quotation can be added by clicking on “Purchases” from the main menu, then “Purchase Quotations” and then “Add Purchase Quotation“

We start filling in the quotation details, noting that the quotation data largely matches the purchase request data explained earlier, with two exceptions:
- The first one: “Valid Until” date, where the supplier specifies the validity of the quotation, meaning that the quotation will no longer be valid after this period expires.
- The second one: relates to “Shipping Details” where we specify shipping and storage data. Note that if you only have the default warehouse, storage data will not appear, and only the “Shipping Fees” field will be visible.

After completing the “Quotation” details, we can take one of three actions: save only, save and send via email, or save and print.
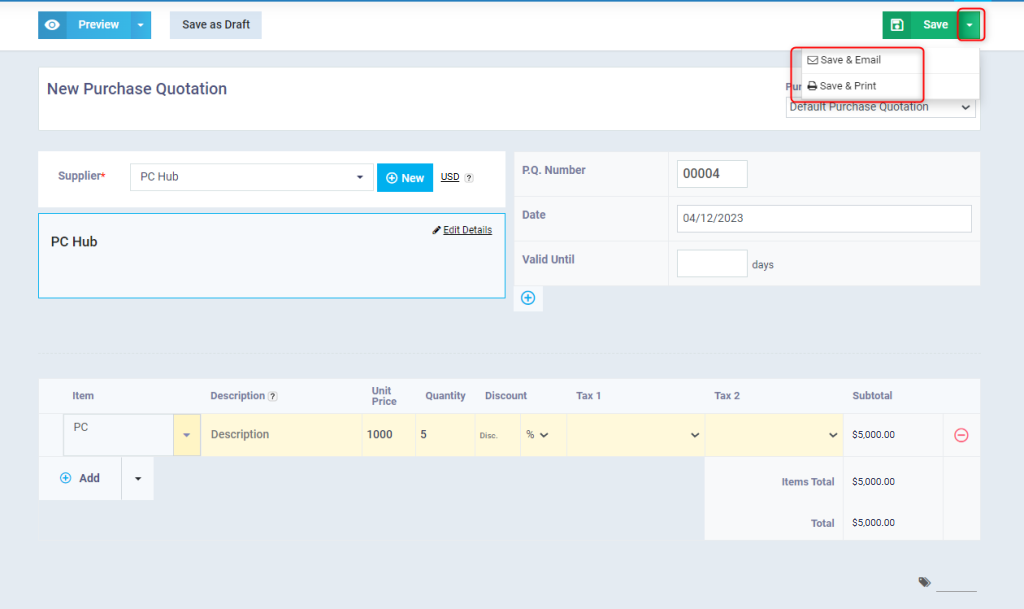
We can also download a PDF copy of the quotation after saving it.
The system now asks for your approval or rejection of the purchase quotation as shown in the following image, to determine whether we continue the purchasing cycle to the next step or not.

Upon approval, we move to the purchasing quotation panel shown in the following image:

Purchase Orders
As in the previous steps, we can convert the “Purchase Quotation” we recently created into a “Purchase Order” with a single button click, as shown in the previous image.
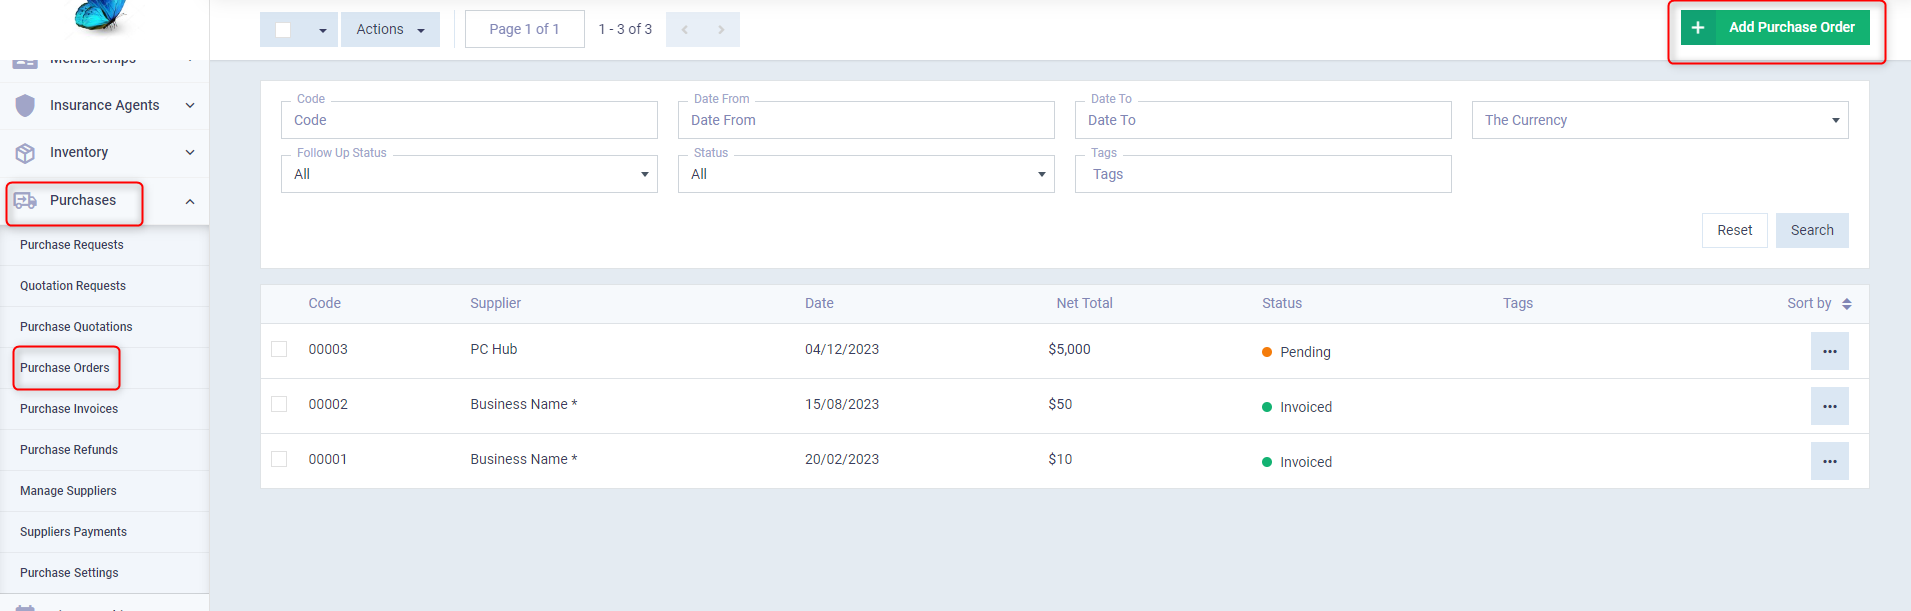
We can also add a new purchase order by clicking on “Purchases” from the main menu, then “Purchase Orders” and then “Add Purchase Order“:
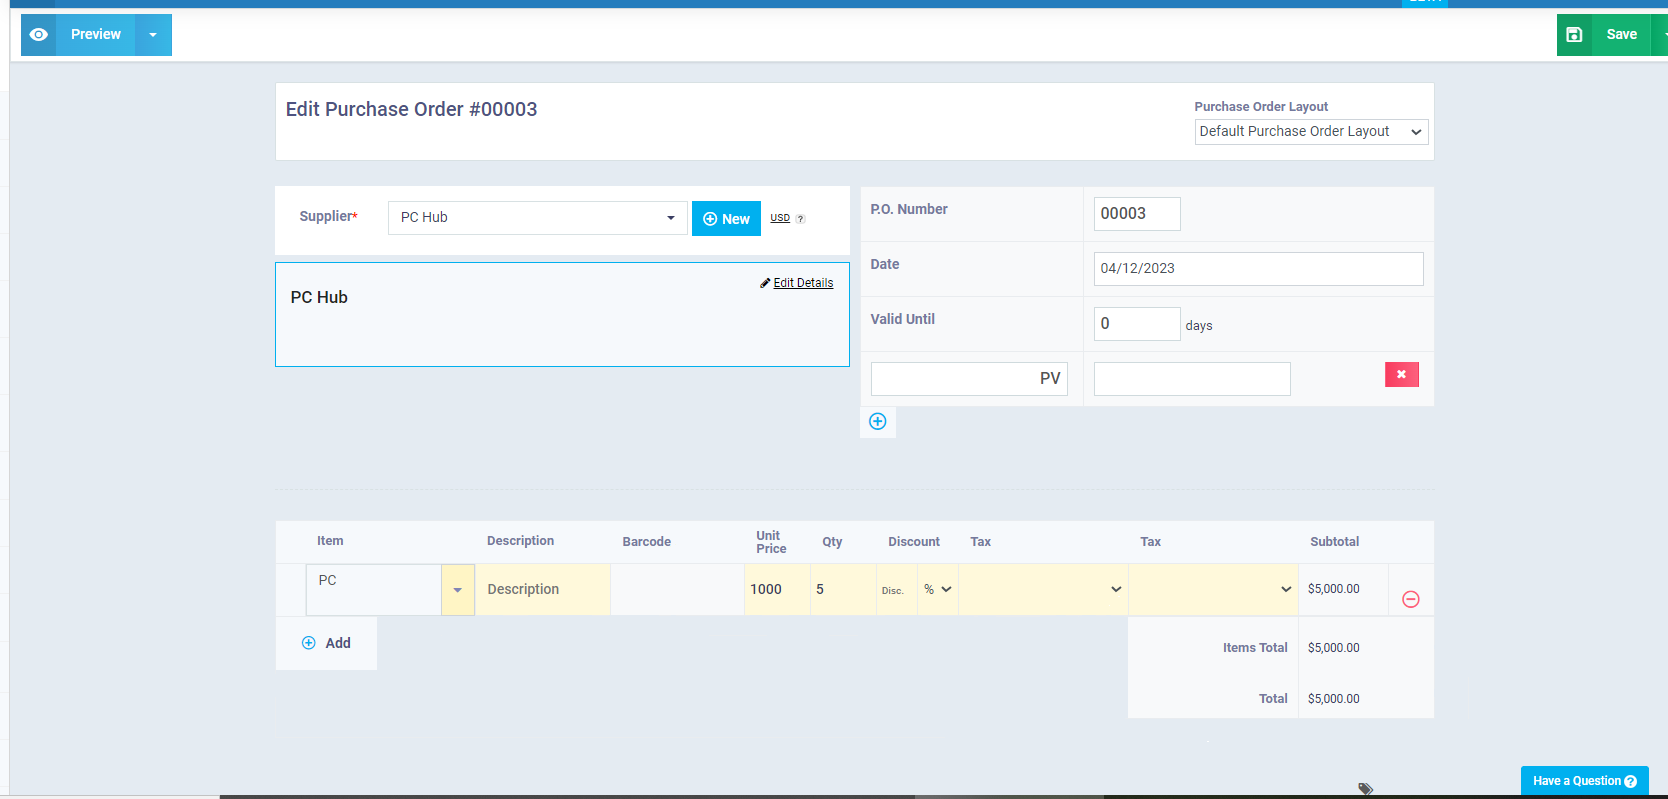
Now we begin to fill in the details of the purchase order, and as you can see in the following image, the data for a purchase order does not differ much from that of a purchase request.
Once we finish filling out the remaining data for the purchase order, we can save it only, or save and send it via email, or save and print it.
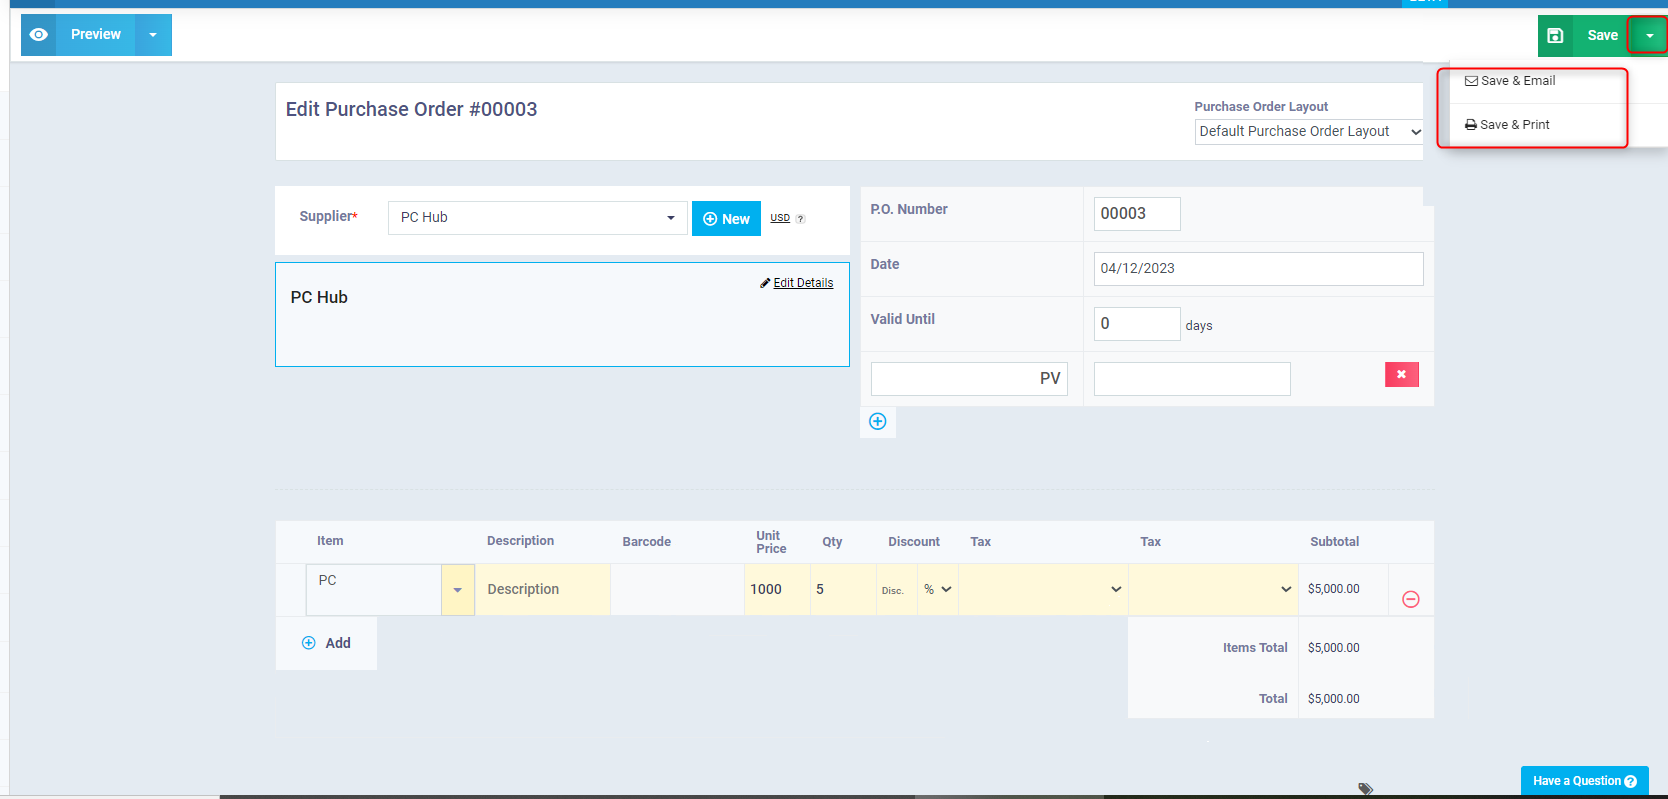
We can also download a PDF copy of it after completing the save process.
The system then allows you the possibility to cancel the purchase order before moving to the next stage of the purchasing cycle, or to decide to convert the purchase order into an invoice, which is the last stage of the purchasing cycle.
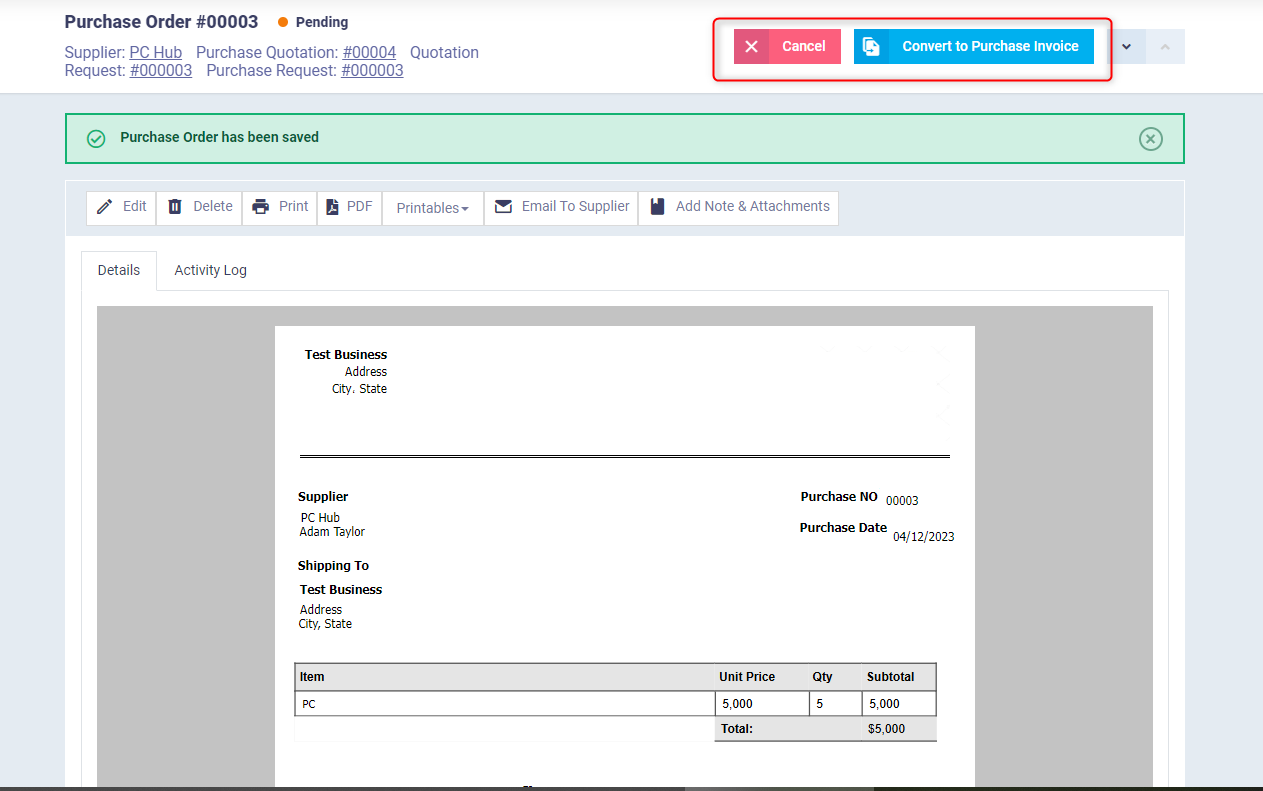
Just like in the previous stages of the purchasing cycle, by clicking on “Convert to Purchase Invoice,” you can start converting the purchase order into an invoice directly.
Here, it’s important to activate the option “Enabling Requisitions for Sales & Purchase Invoices” in case you want to directly convert the purchase order to a purchase invoice.
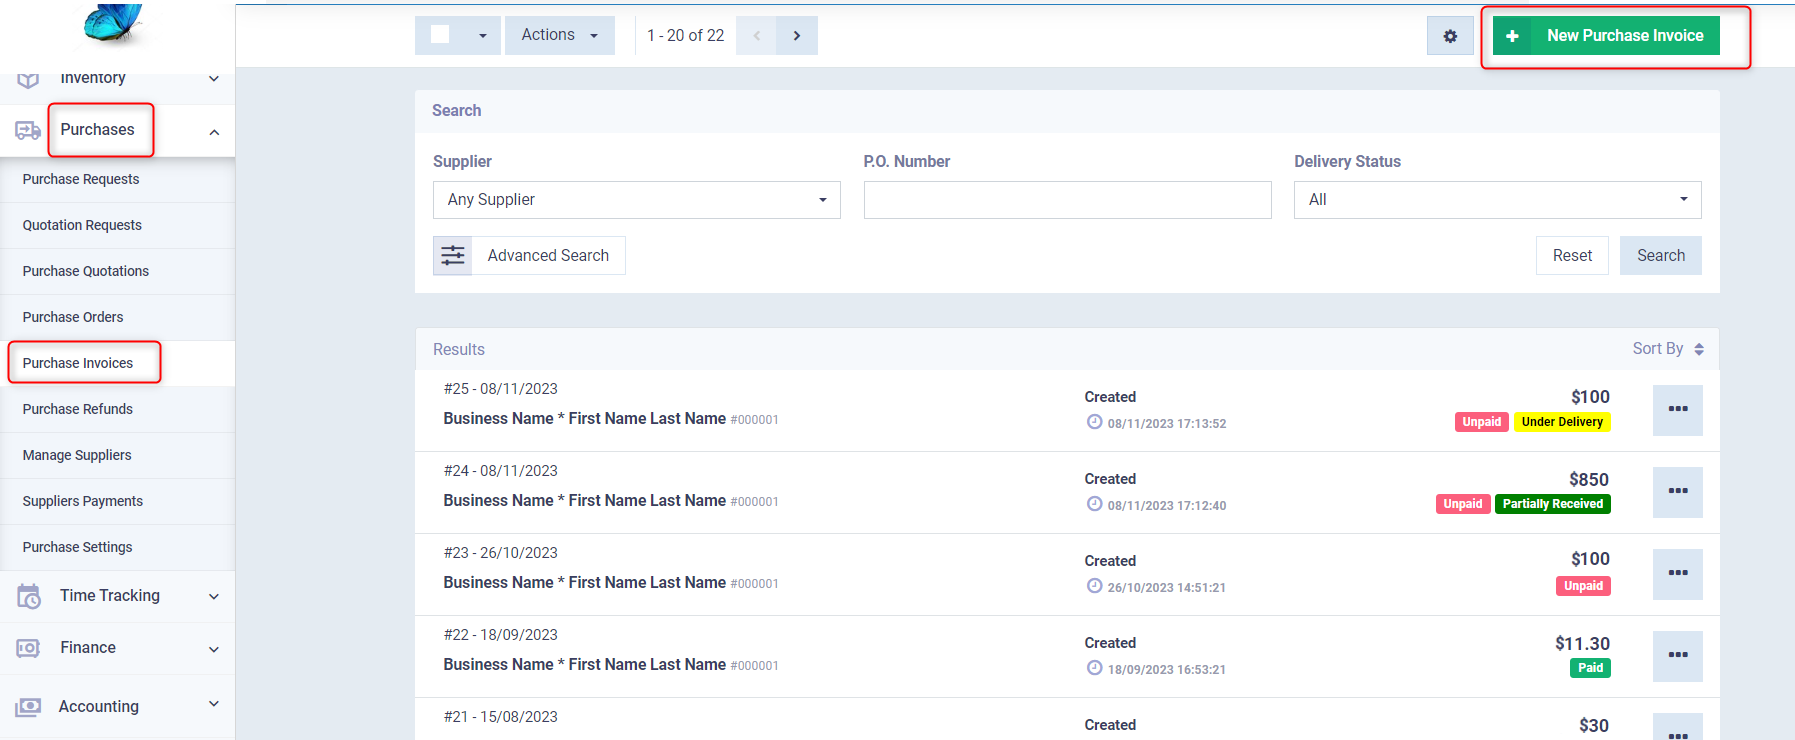
Purchase Invoices
This stage marks the end of the purchasing cycle. We can directly convert a “Purchase Order” into a “Purchase Invoice,” or create a new purchase invoice by clicking on “Purchases” from the main menu, then “Purchase Invoice” and then “New Purchase Invoice“.
We begin filling in the invoice details, which are somewhat more extensive than those of a purchase order:
- Payment Terms: In this field, we specify the period within which the invoice is due for payment.
- Already Paid: Here we specify whether the purchase amount has already been paid to the supplier, and if so, we include the payment details (payment method, reference number, treasury).
- Received: In this field, we indicate whether the goods have been received or not, and if received, we specify the date of receipt.
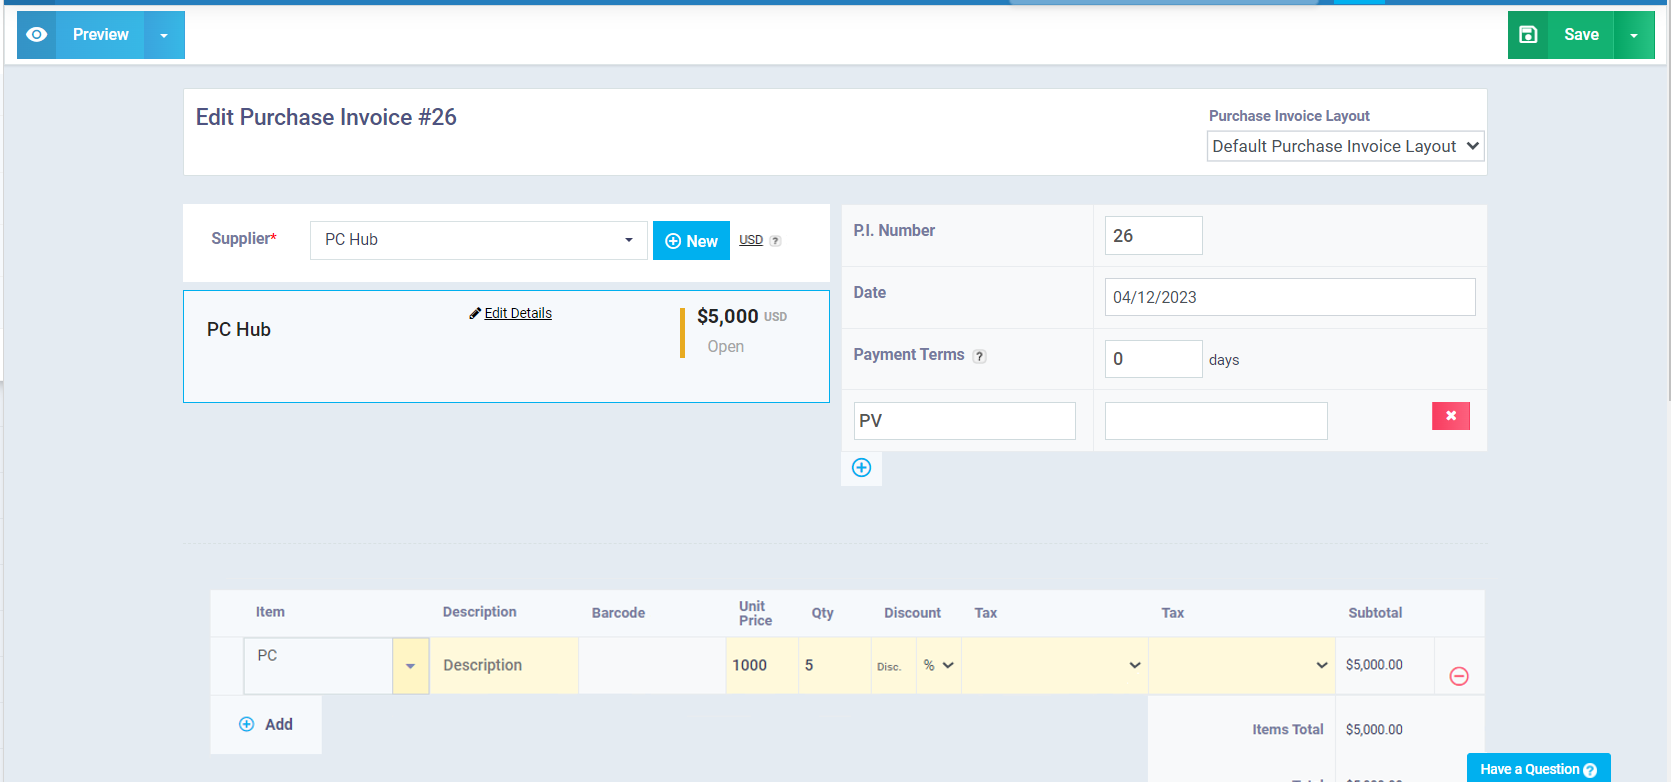
After completing all the invoice details, we can save it only, or save and send it via email, or save and print it. We can also download a PDF copy after saving it.
Thus, the purchasing cycle is complete, starting with the purchase request, moving through quotation requests, purchase quotations, purchase orders, and concluding with the purchase invoice.