Adding a Custom Field to one of the Purchase Invoices Layouts
In addition to the basic layouts for purchase cycle documents such as purchase invoices, returns, estimates, and purchase orders, there are other ready-made layouts that you can use according to your preferred design. The customization feature allows you to modify this layout and add fixed fields that appear in the template design every time you use it.
How to Add a New Temporary Field to One of the Purchase Cycle Documents
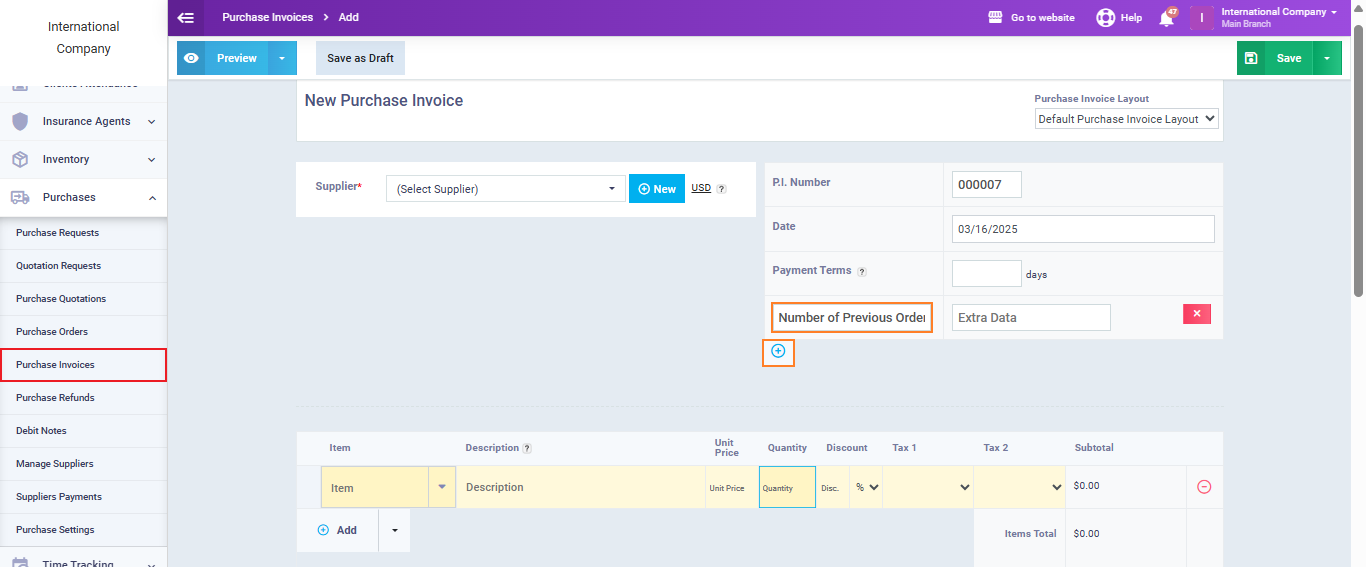
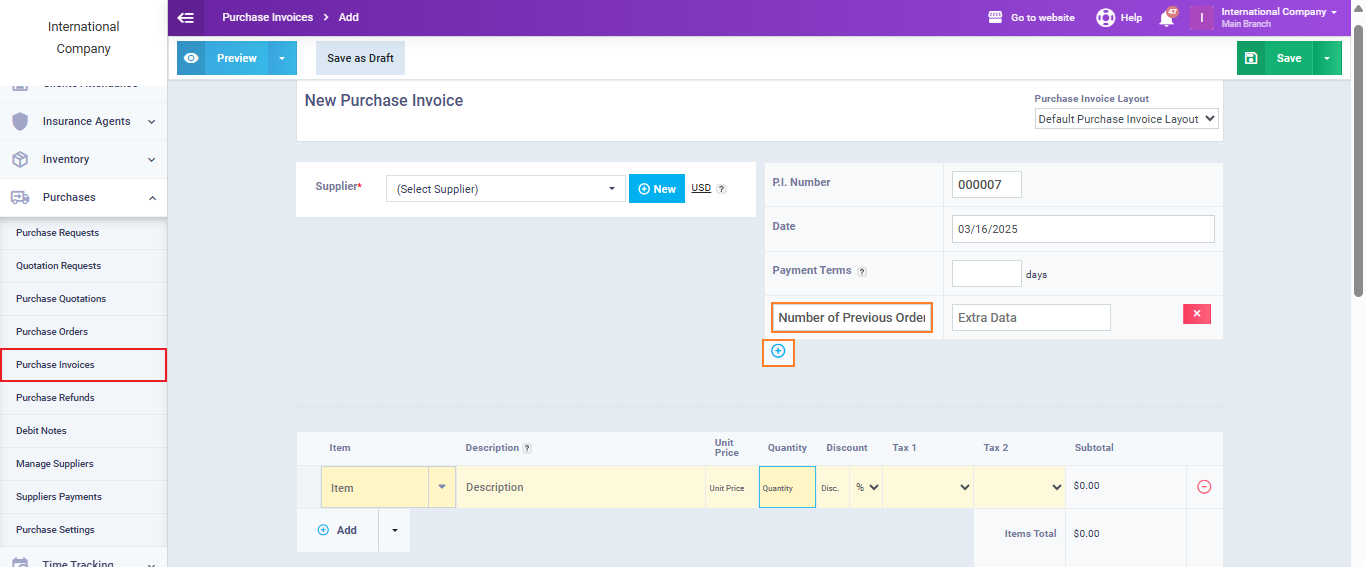
When creating a new purchase invoice, you can work with the default template or choose a different template from the drop-down menu under the ‘Purchase Invoice Layout‘ field.
Whether you are using the default layout or any other template, you can manually add a new field if the existing fields on the invoice do not cover everything you need.
To add the field, click on the (+) sign next to the invoice details, and enter the field name and its value.
For example, you can add a field like ‘Number of Previous Orders from this Supplier,‘ where the value is a number representing the count of previous supplies from the supplier.
How to add an additional field for one of the purchase cycle documents
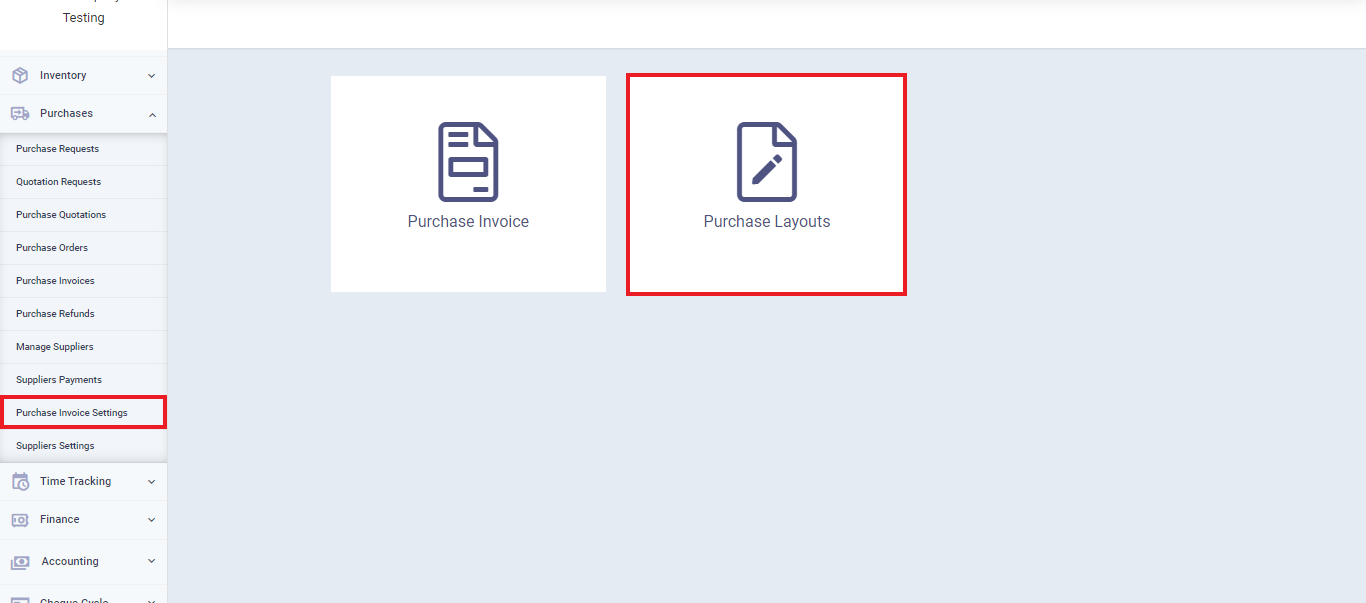
If you want to add a field to appear automatically on every purchase invoice or document using the layout to which you added the field, follow these steps.
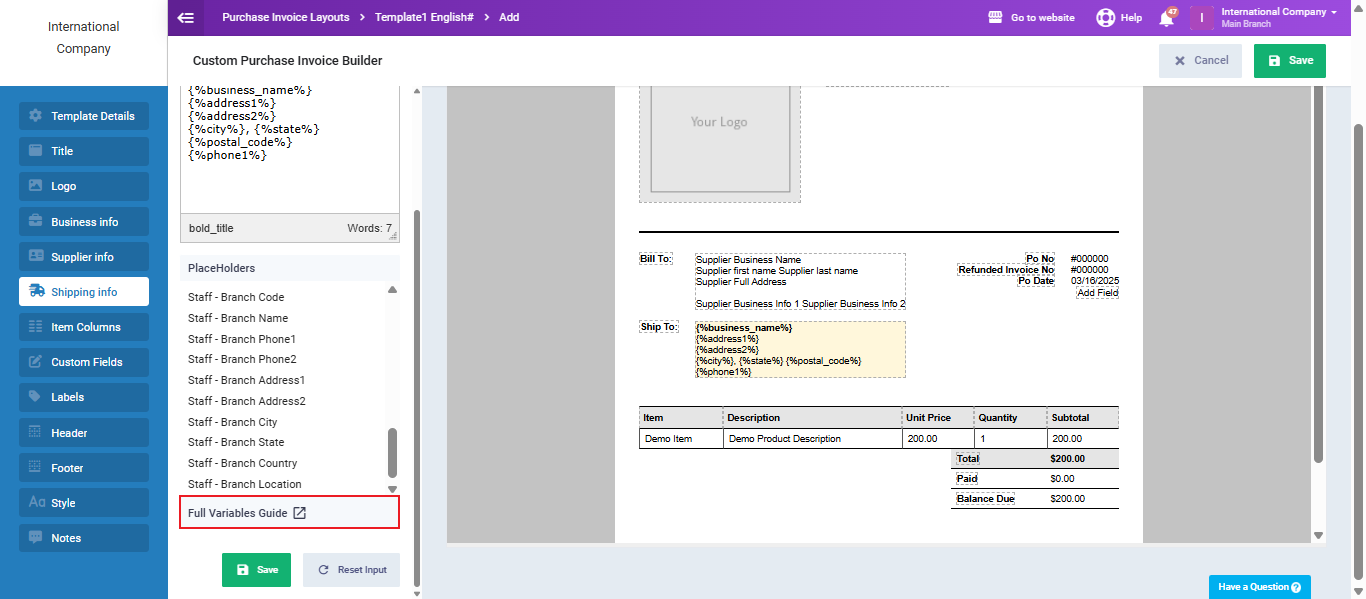
Click on ‘Purchase Invoice Settings‘ under ‘Purchases‘ in the main menu, and click on ‘Purchase Layouts.'”
Click on the “New Layout” button.
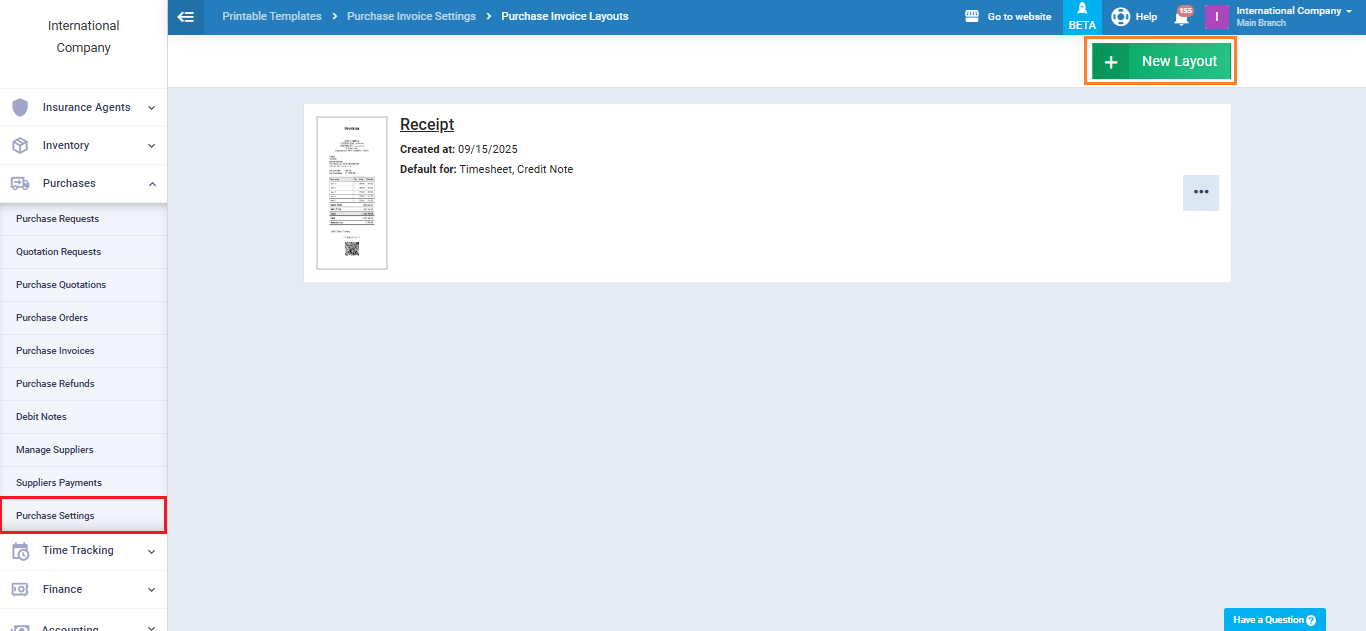
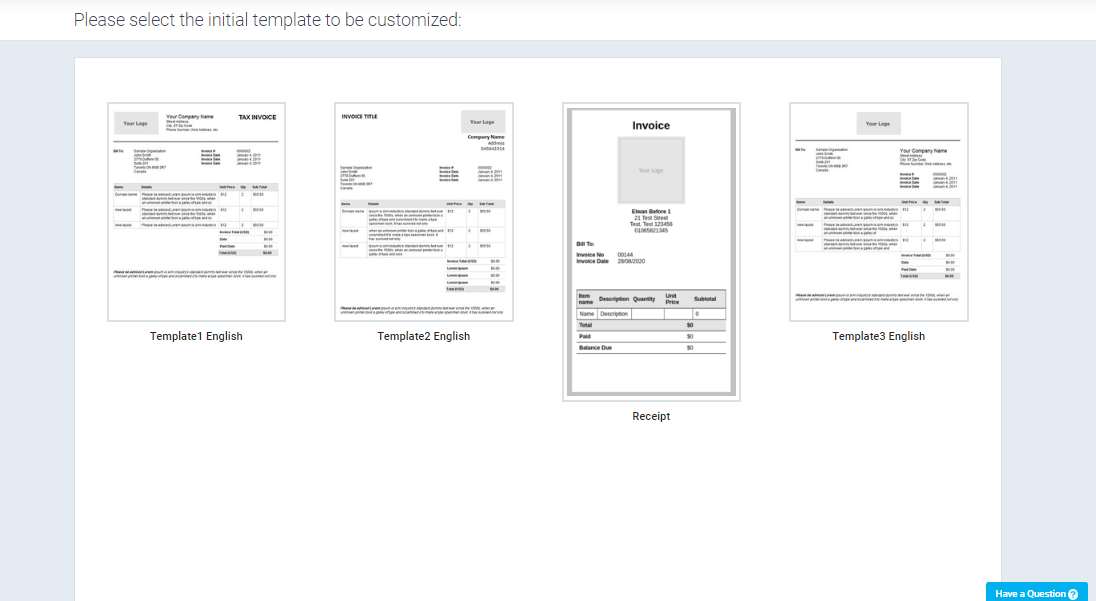
Click on the layout design to which you want to add the field.
Click on ‘Custom Fields‘ from the menu to add a new field and press the ‘Add More Fields‘ button.
Choose from the suggested fields that correspond to the new field you want to add, or click on ‘Custom Field‘ and enter the name of the field.
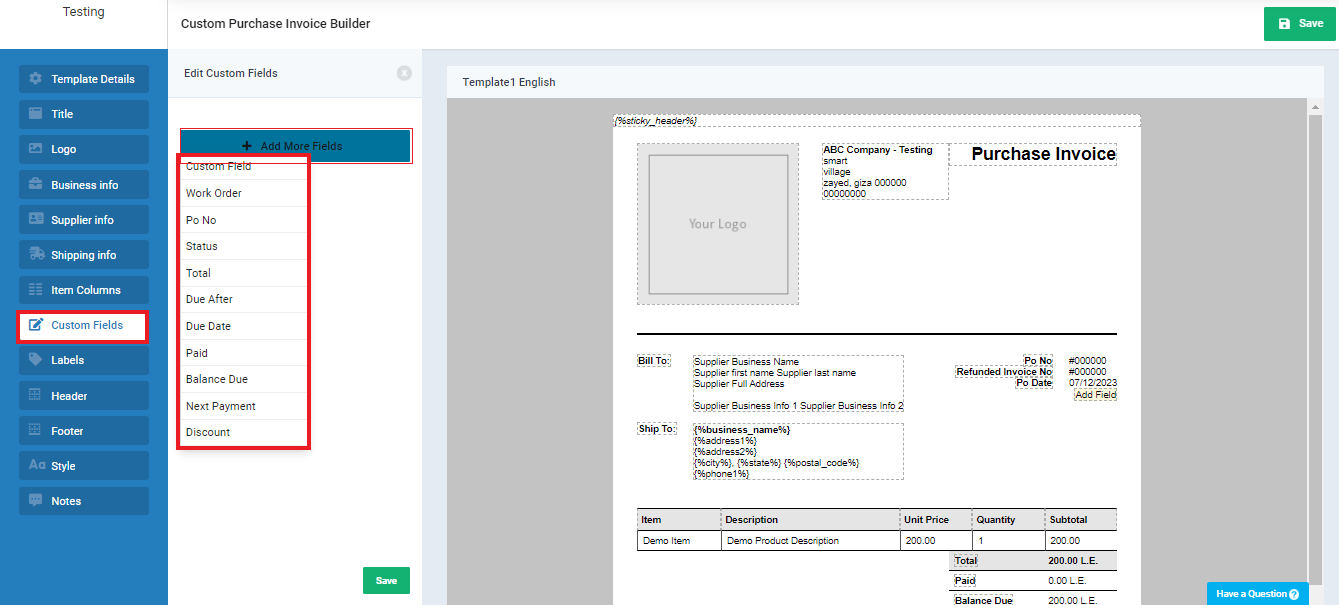
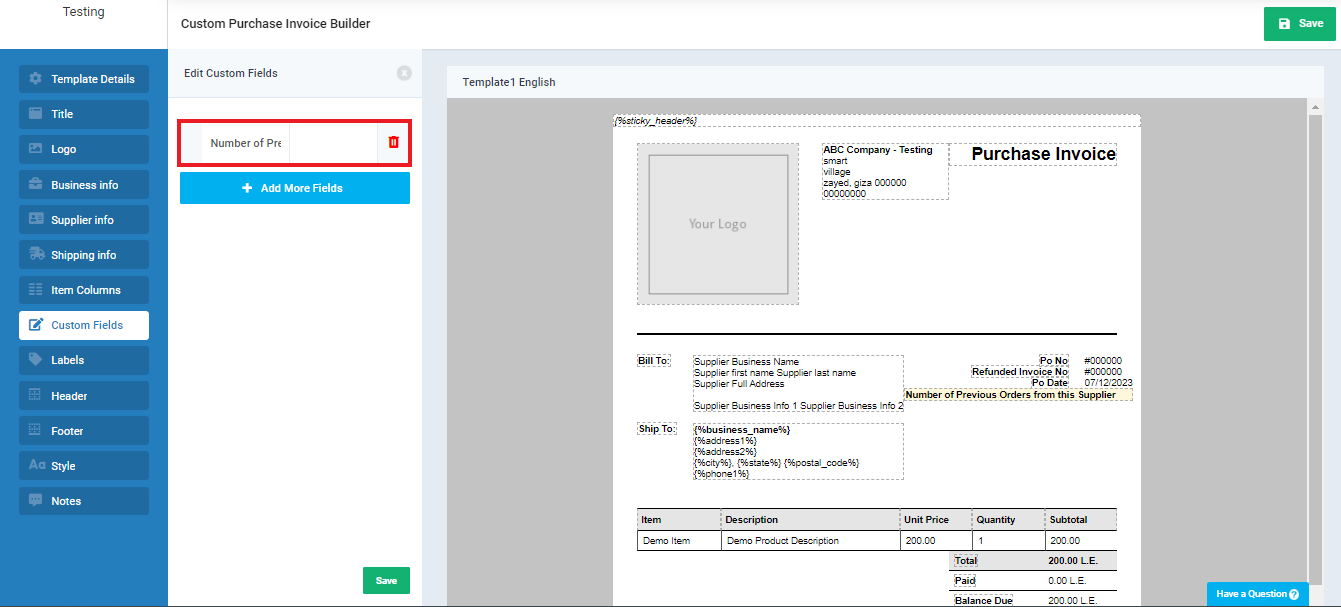
Enter the name of the new field, for example, ‘Number of Previous Orders from this Supplier,’ and click ‘Save.’
The field will automatically appear in the designated space for custom fields.
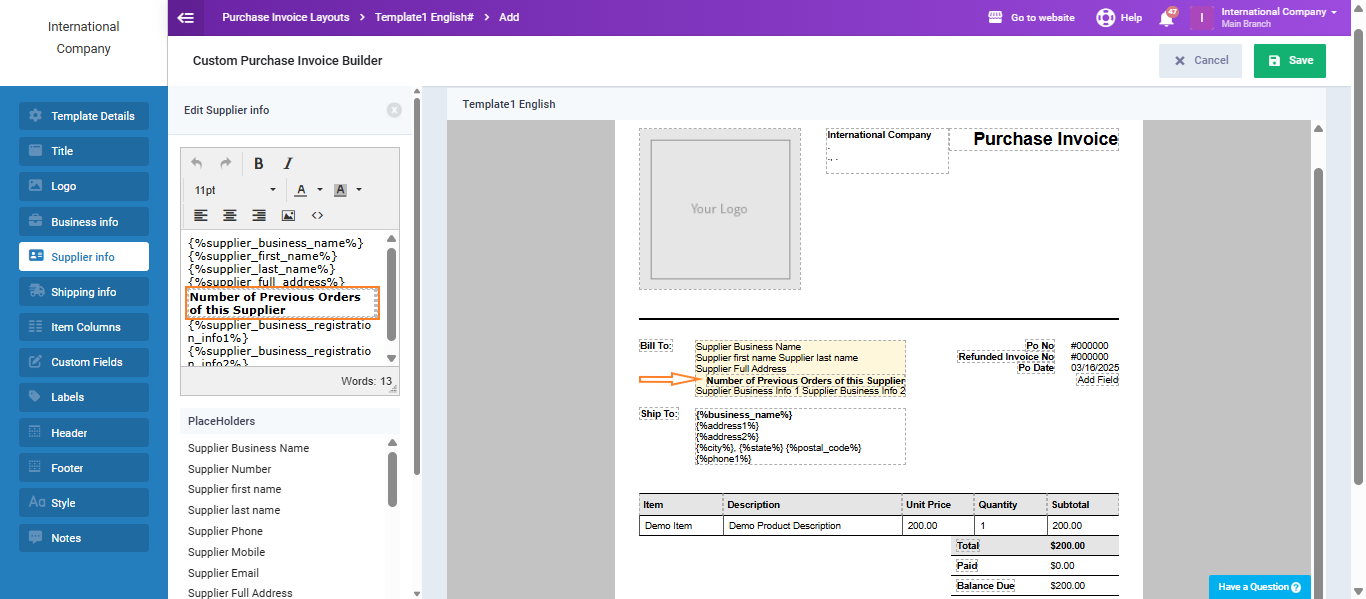
If you want to change the placement of the new field:
- Copy the text of the field or the corresponding code.
- Click on the paragraph or the section where you want to add the new field in the invoice or from the sidebar.
- Paste the field in the appropriate location.
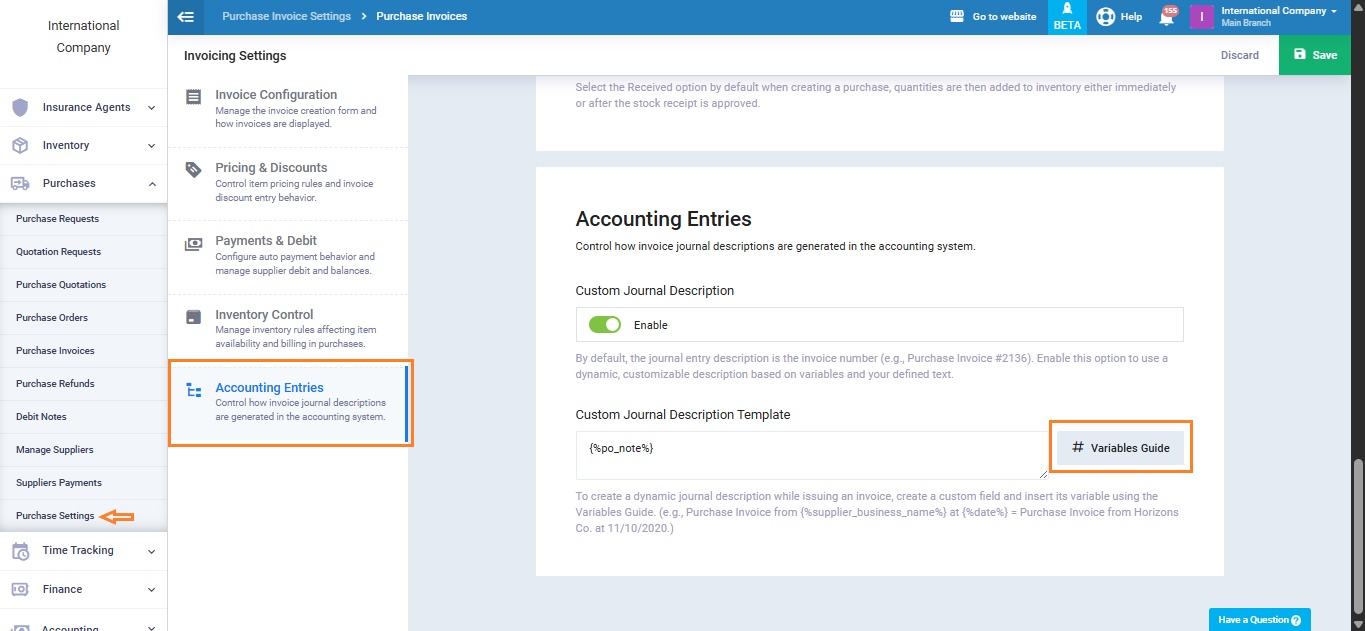
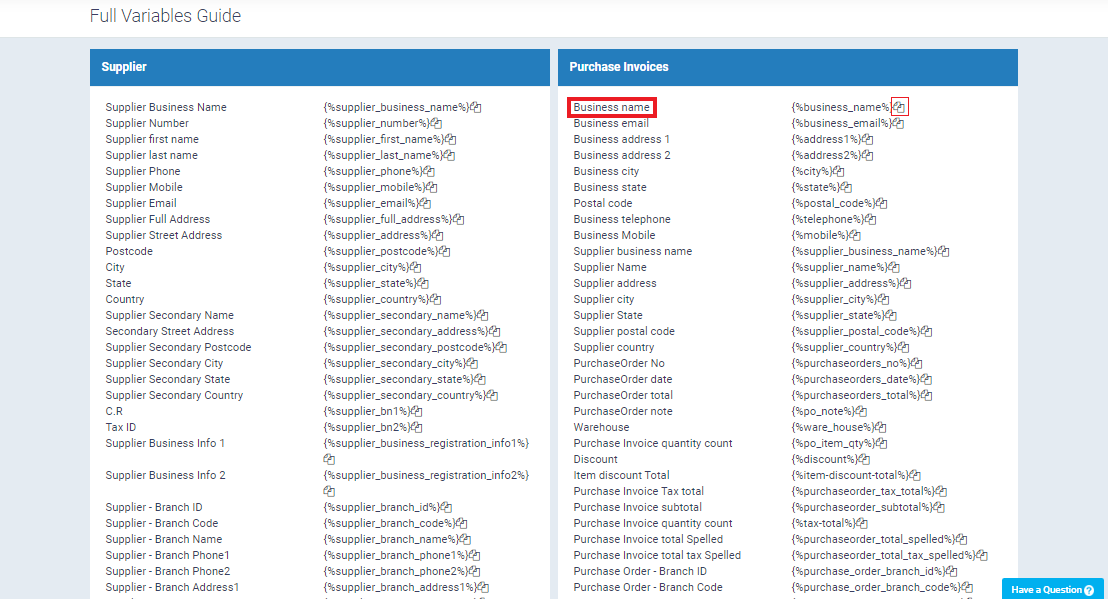
Adding a New Field from the Full Variables Guide in the System
The Full Variables Guide allows you to add flexibility to all your documents in the ledger, such as invoices and email messages.
The guide includes:
- Codes related to certain fields, such as “Supplier City” or “Warehouse.”
- Properties like “Total Invoice Amount in Words” to display the total invoice amount in words or “Branch Location” to show the geographic location of the branch on the map in the invoice.
Or by clicking on it from within the layout itself.
Click on the copy symbol ? next to the code of the field you want to add.
Then, paste the field into the purchase invoice document where you intend to install it, as we explained in the previous steps from the purchasing layout.
The custom field will automatically appear when selecting the template in invoices or any of the purchasing document types.
Keep in mind that some properties, like those we added to the template from the Full Variables Guide, are not considered fields that require additional data. Instead, they are activated after saving the invoice and are automatically adjusted, such as spelling out the total invoice amount.