


Booking Calendar — Complete Guide
The system’s booking calendar allows you to manage all your bookings in a visually organized layout. You can navigate between days, weeks, and months, add new bookings with a single click on any time slot, track waiting and unassigned bookings, and drag and drop bookings between employees and time slots with ease.
Opening the Booking Calendar
- From the main menu, click “Bookings“.
- Click “Manage Bookings“.
- Click “Switch to Beta Version“.
- The calendar opens directly on the last view used.
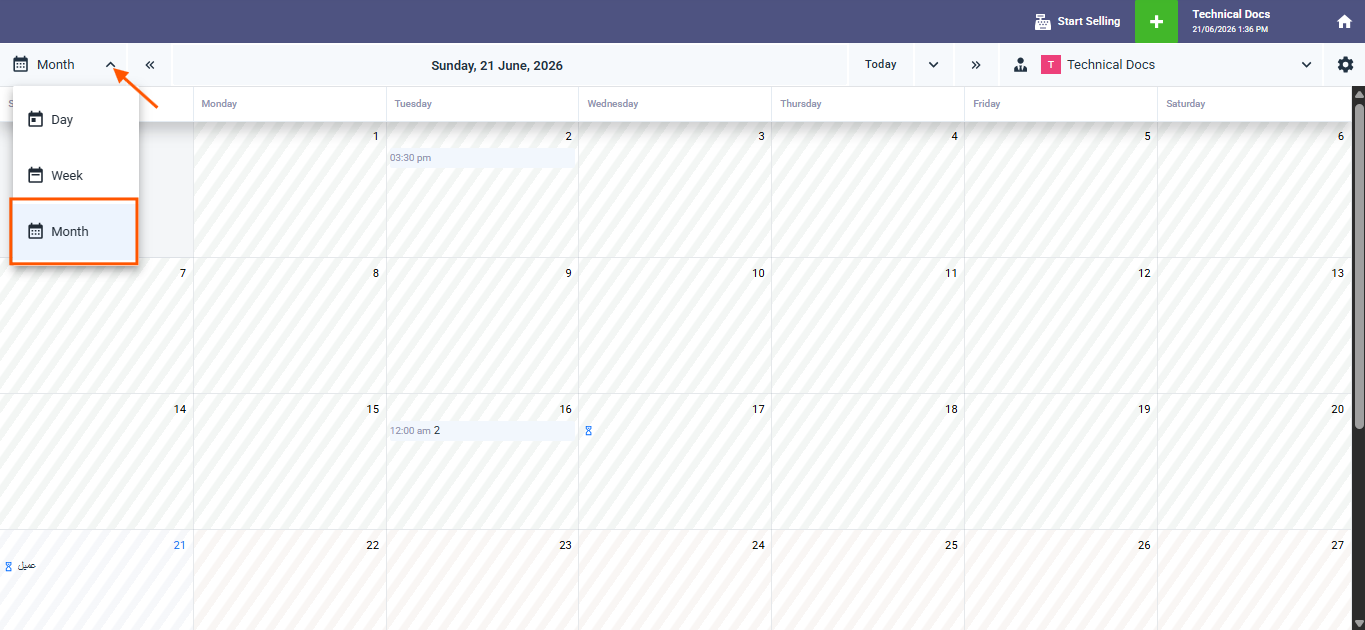
A dropdown at the top right of the screen lets you choose the view mode. Click it and select the appropriate view:
Month View
- Displays all days of the month in a weekly grid.
- A scheduled booking appears with its start time and client name — for example: 12:00 AM — Client.
- A waiting booking appears with an hourglass icon and the client name with no time.
- The current day is highlighted with a distinct color.
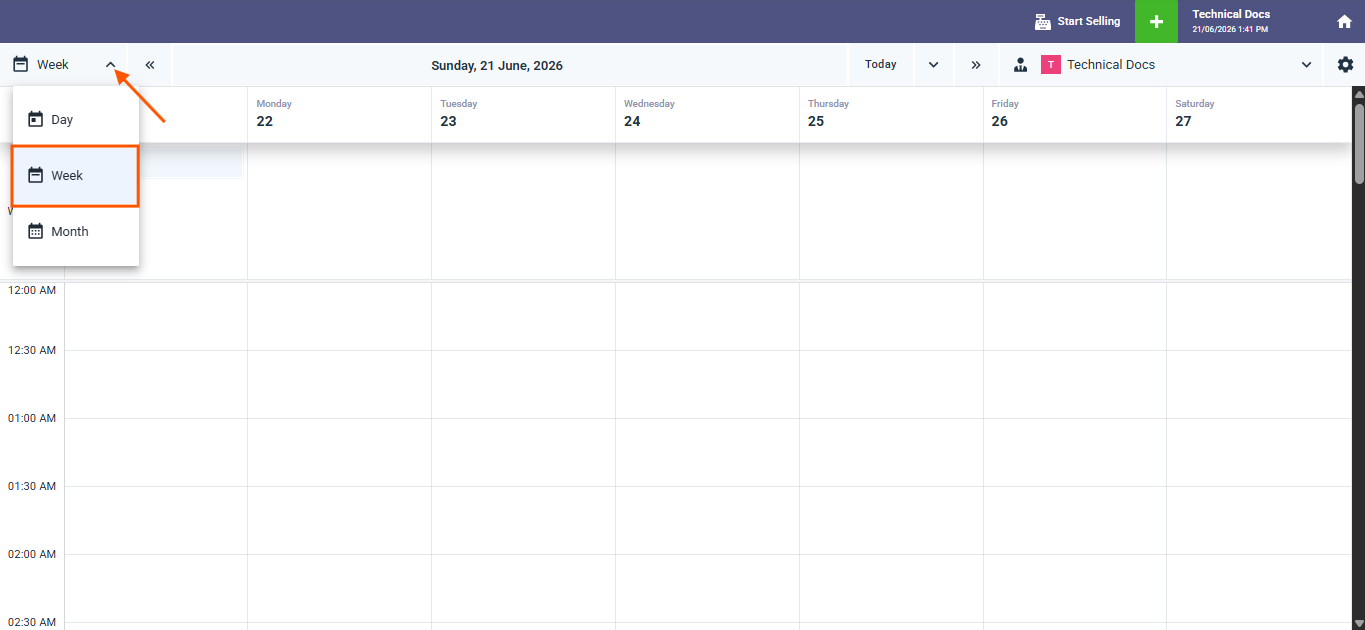
Week View
- Displays the seven days of the week in side-by-side columns with a time axis on the left.
- The current day appears with its name and number highlighted in blue.
- You can scroll down to access later times.
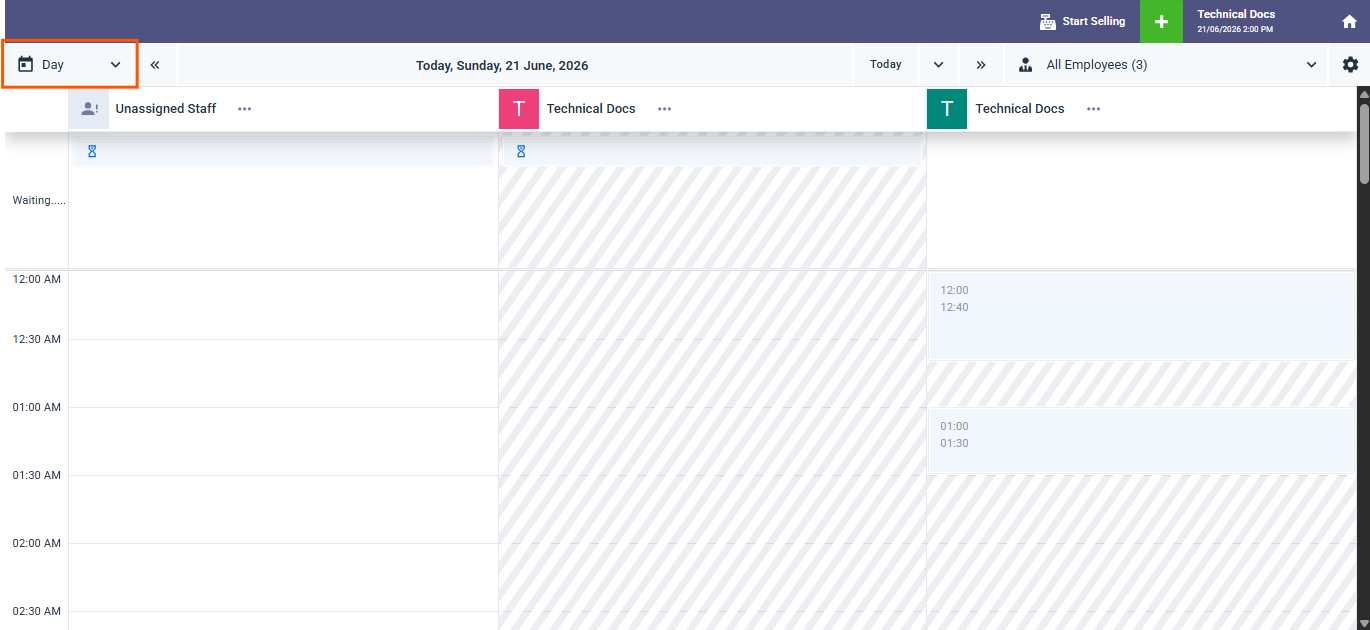
Day View
- Displays a single day with a detailed time axis on the left divided into 30-minute intervals.
- Best suited for managing a specific day’s bookings precisely and adding bookings in empty time slots.
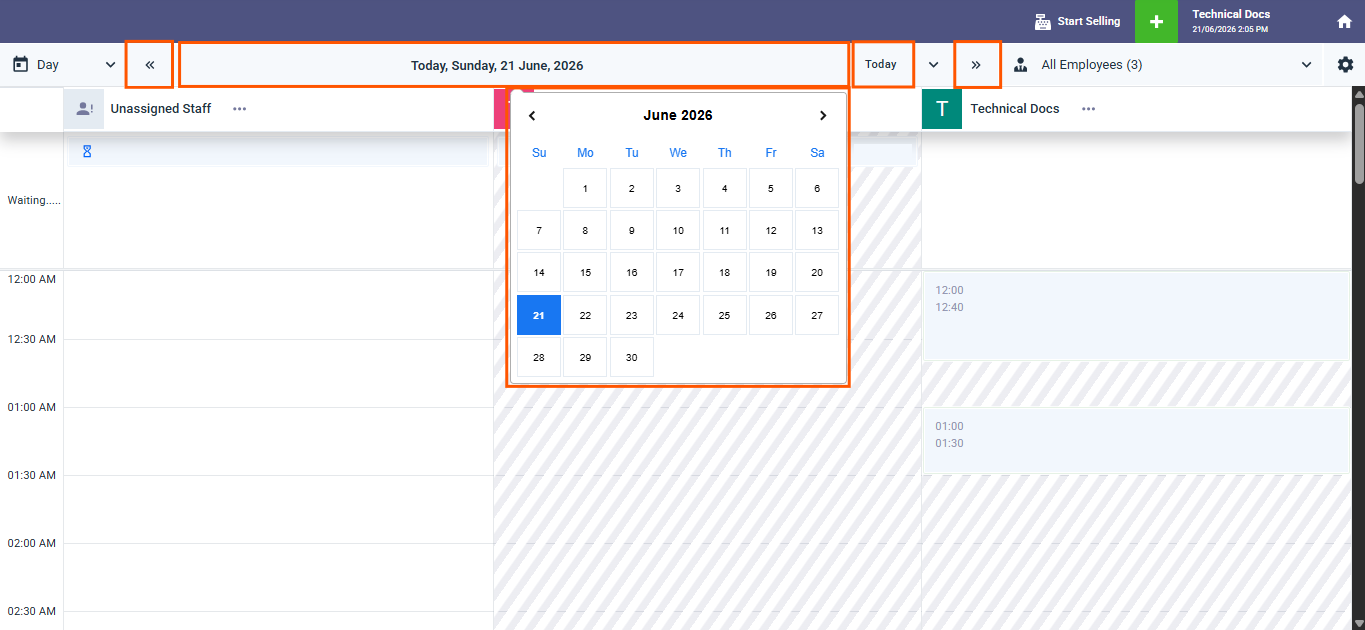
Navigating Between Dates
In the top navigation bar:
- «« (Previous) button: Takes you to the previous month, week, or day depending on the current view.
- »» (Next) button: Takes you to the next month, week, or day depending on the current view.
- Today button: Returns you to the current date immediately at any time.
- Date field in the center: Click it and type or select a specific date to jump to it directly.
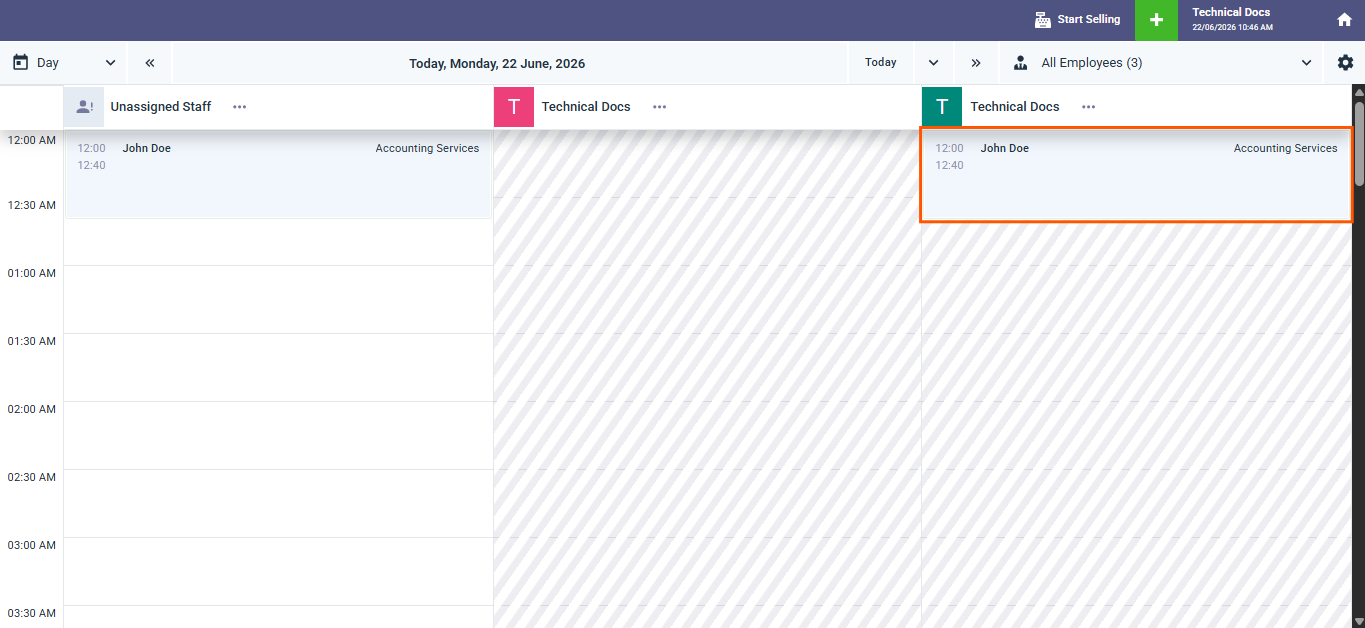
Reading Bookings on the Calendar
Bookings appear on the calendar in two easily distinguishable forms:
- Scheduled booking: Appears with the start time and client name — for example: 12:00 AM — John Doe. Sorted in ascending order by start time.
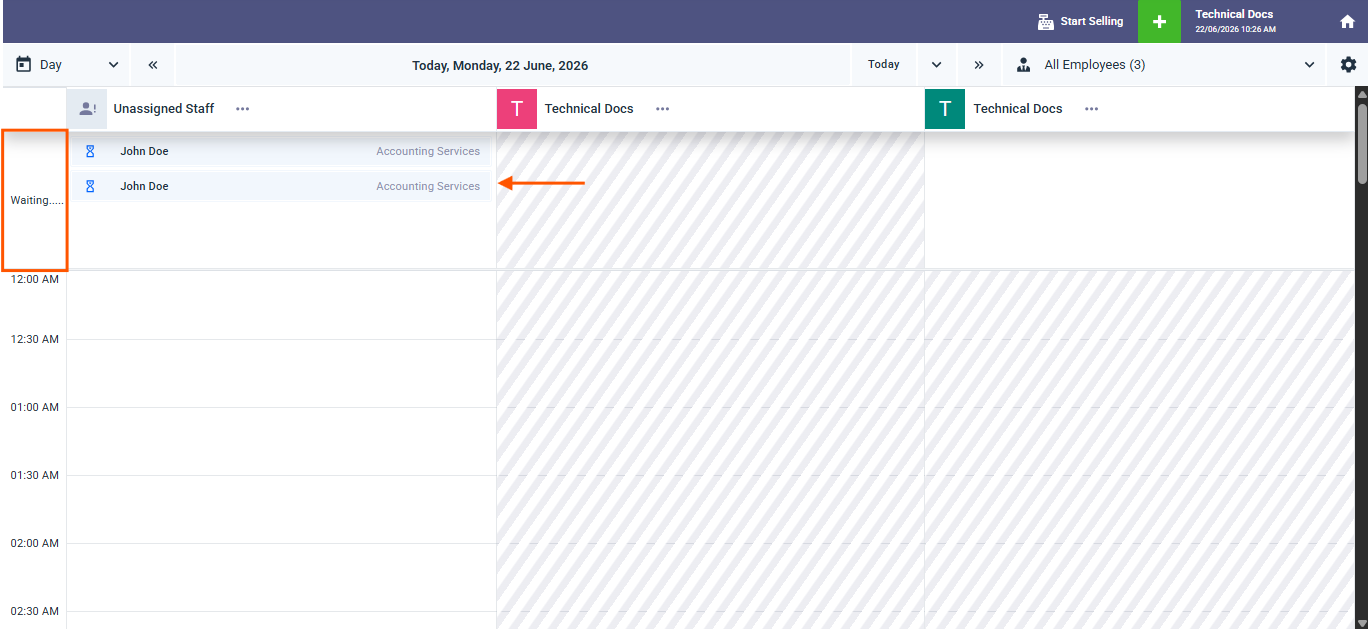
- Waiting booking: Appears with an hourglass icon instead of a time and the client name — no fixed start time. Always appears at the top of the column before all scheduled bookings.
In the monthly view bookings appear in abbreviated form — switch to the daily or weekly view to see more details.

Adding a New Booking from the Calendar
- Click on any empty time slot in the calendar.
- A side panel opens with the date and time pre-filled from the slot you clicked.
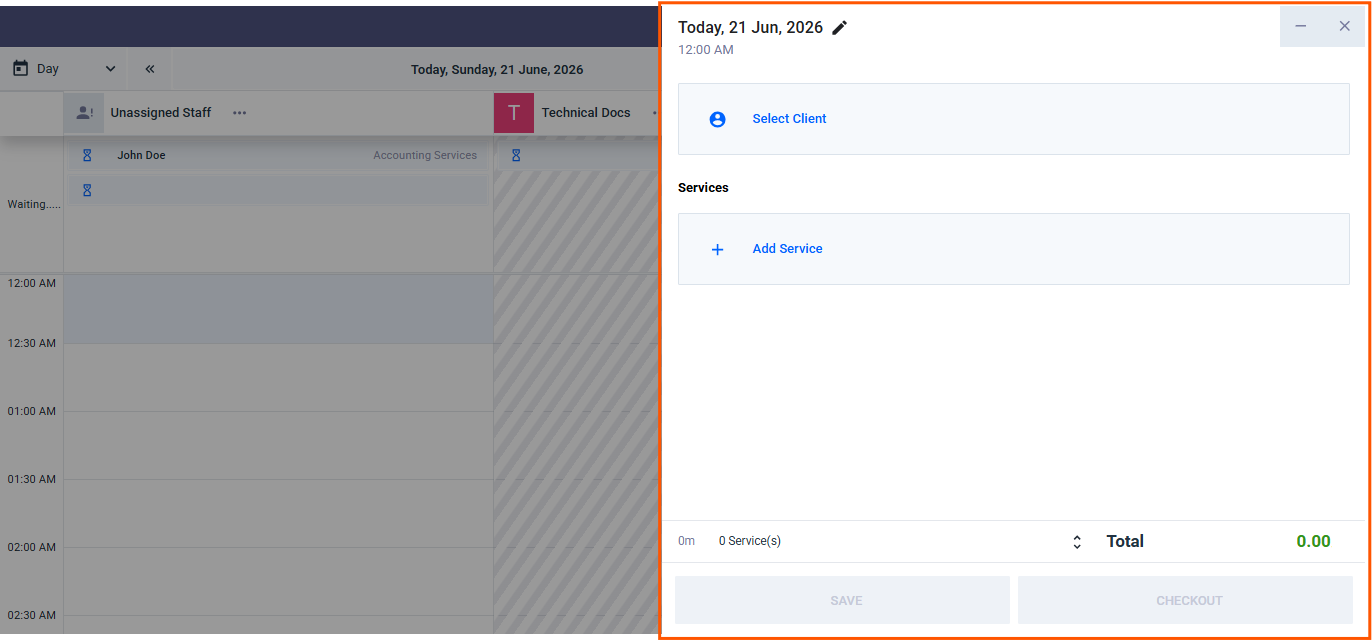
- Search for and select the client by name or number. (Required)
- Click “+Add Service” to add the required service. (Required)
- You can edit the date and time by clicking the pencil icon at the top of the panel.
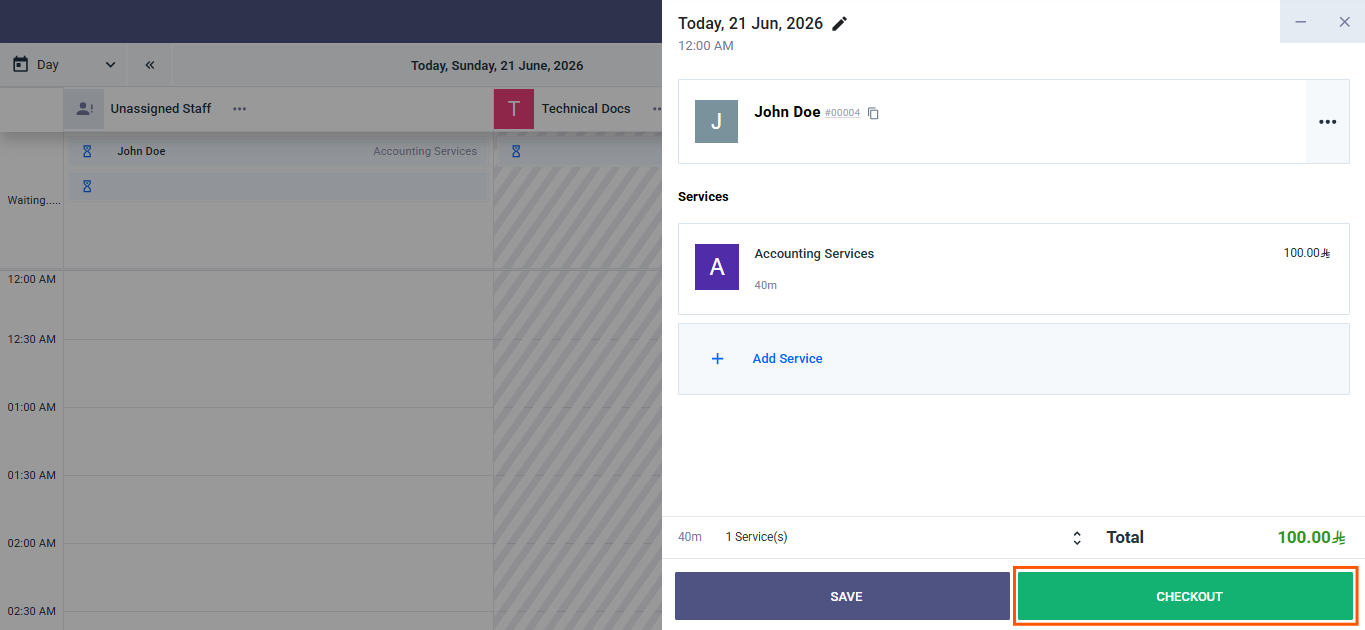
- You can add more than one service to the same booking by clicking “+Add Service” again.
- Click “Save” to save the booking and add it to the calendar, or click “Checkout” to navigate to the POS payment screen and generate an invoice immediately.
Adding a Waiting Booking
A waiting booking does not require a fixed start time and always appears at the top of the calendar column before all scheduled bookings.
Prerequisite
Make sure the “Allow adding services without a fixed start time” setting is enabled under Booking Settings → Booking Workflow.
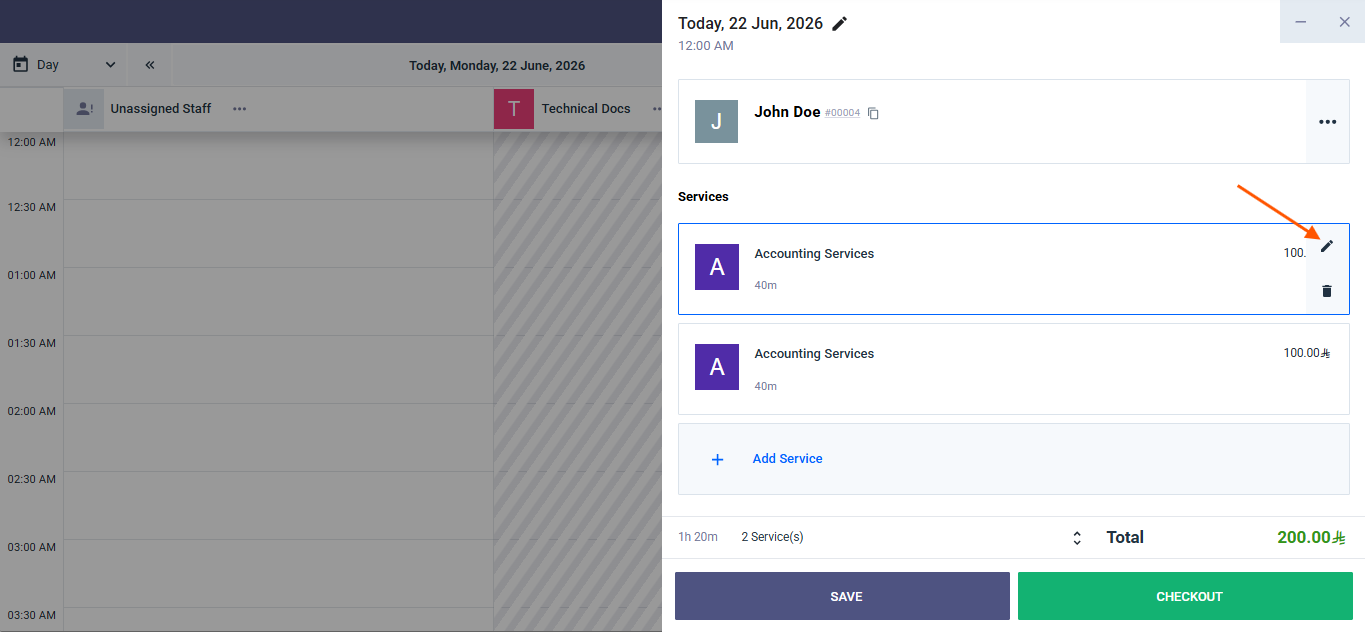
Steps to Add a Waiting Booking
- Click on any time slot in the calendar.
- Select the client and service.
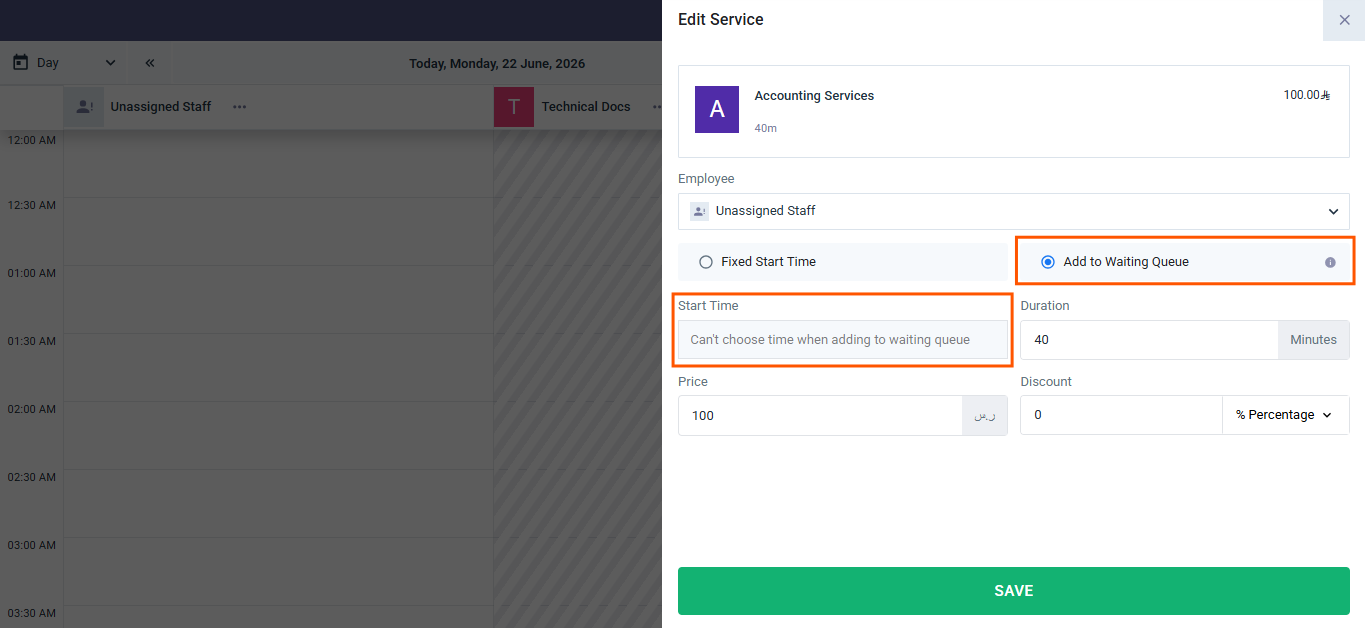
- When setting the service start time via the “Edit” button check the “Add to Waiting List” checkbox.
- After enabling the checkbox no start time is required — leave it empty.
- Click “Save” to complete the booking.
- After saving the booking appears at the top of the assigned employee’s column with an hourglass icon instead of a time.
Moving Bookings Between Employees and Time Slots
You can move any booking to a different time or a different employee directly from the calendar by dragging and dropping without opening and editing the booking.
Moving a Booking to a Different Time
- In the day or week view press and hold on the booking you want to move.
- Drag it up or down within the same column to the desired time.
- Drop it in the new time slot.
- A confirmation message appears showing the changes made to the booking time — click “Confirm” to complete the action.
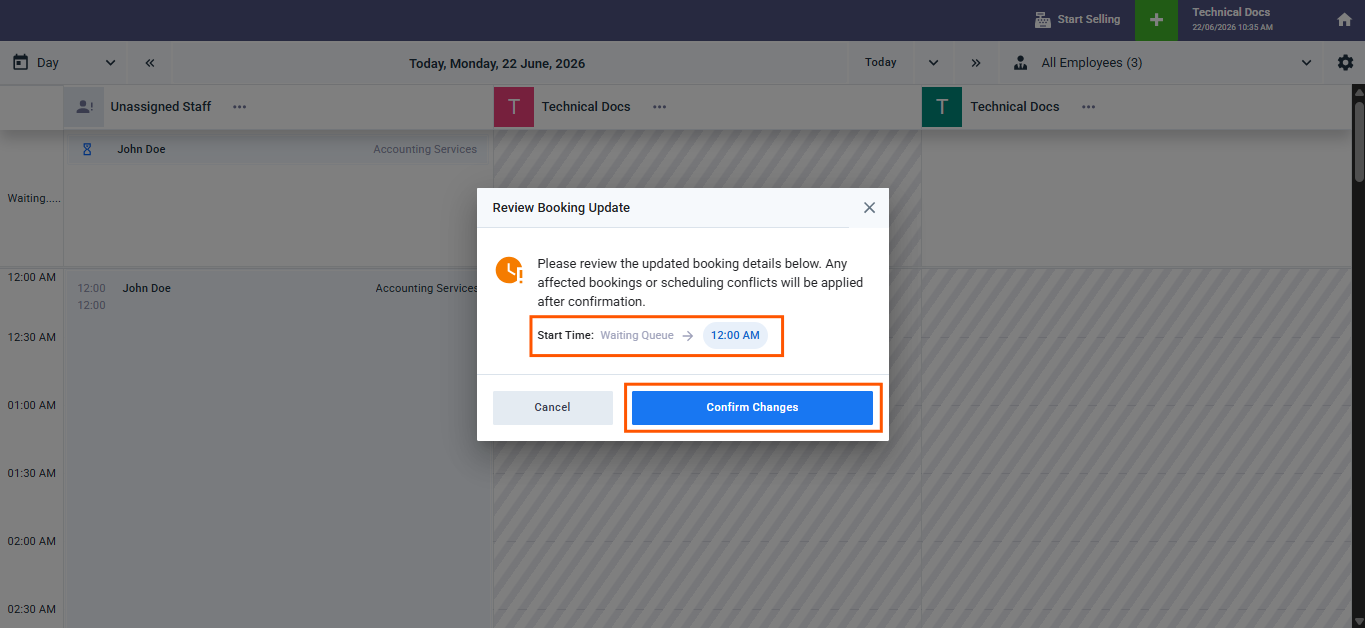
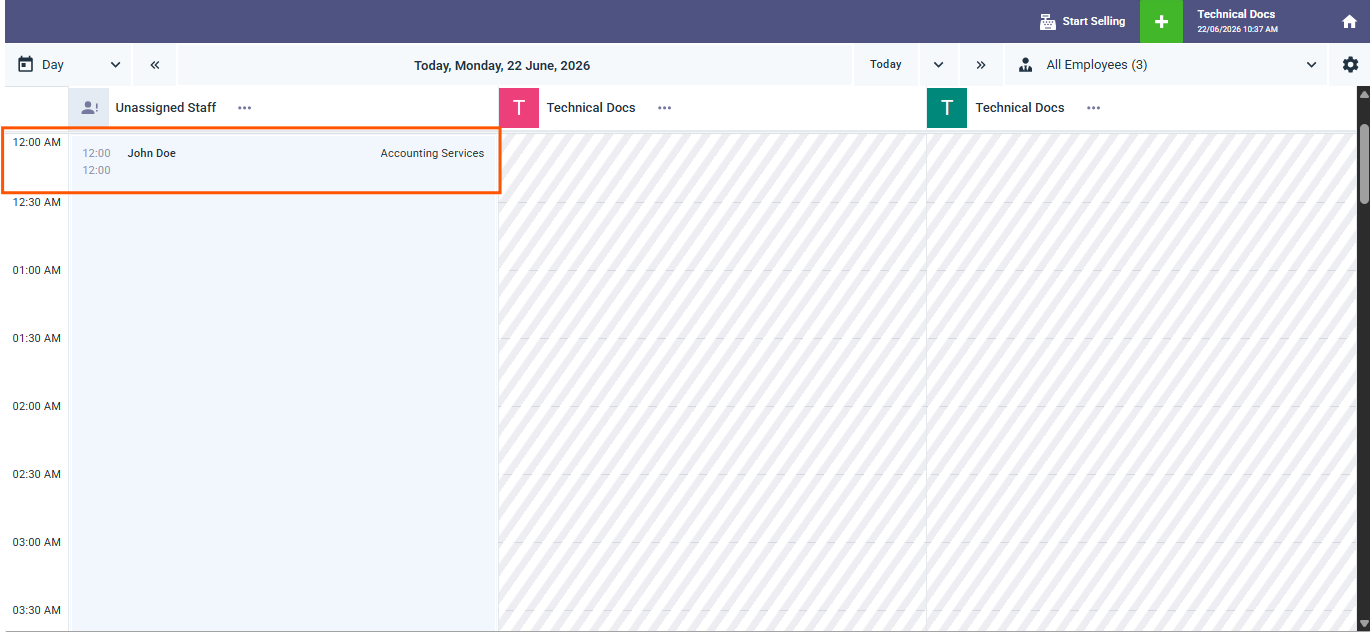
- The booking time updates automatically and appears in its new position on the calendar.
Moving a Booking to a Different Employee
- In the day or week view press and hold on the booking you want to move.
- Drag it horizontally toward the desired employee’s column.
- Drop it in the required time slot under the new employee’s column.
- A confirmation message appears showing the changes made to the assigned employee or booking time — click “Confirm” to complete the action.
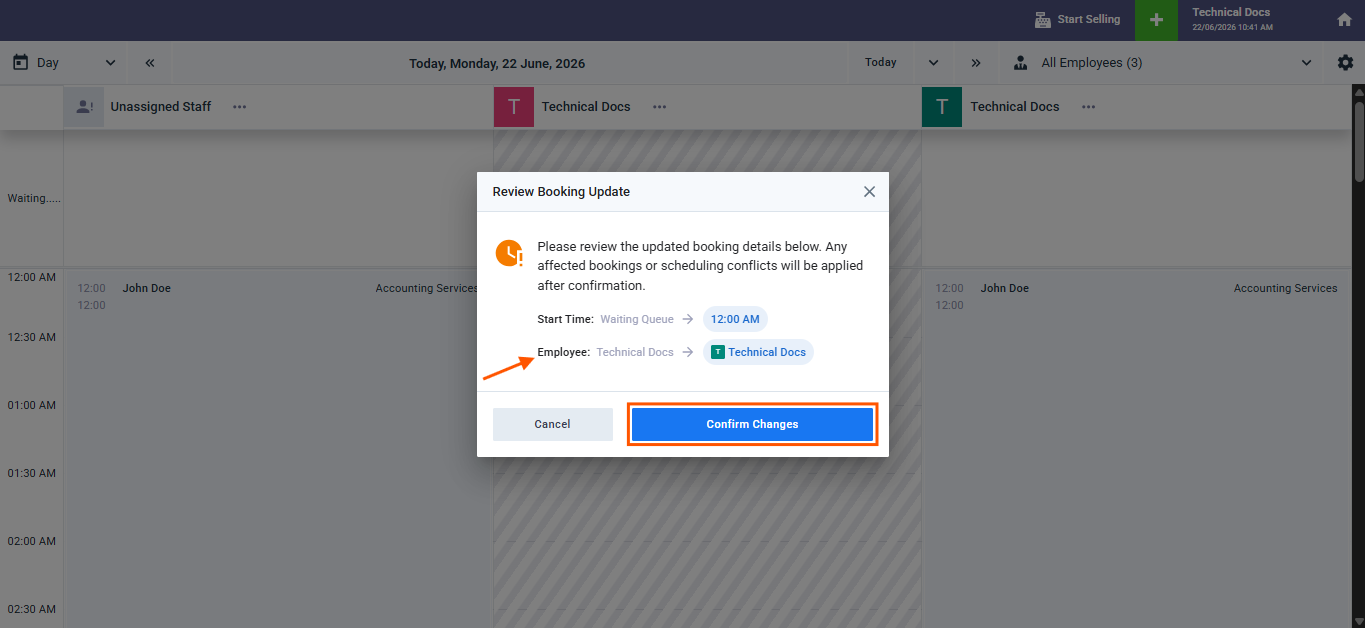
- The assigned employee and time update automatically and the booking appears in the new employee’s column.
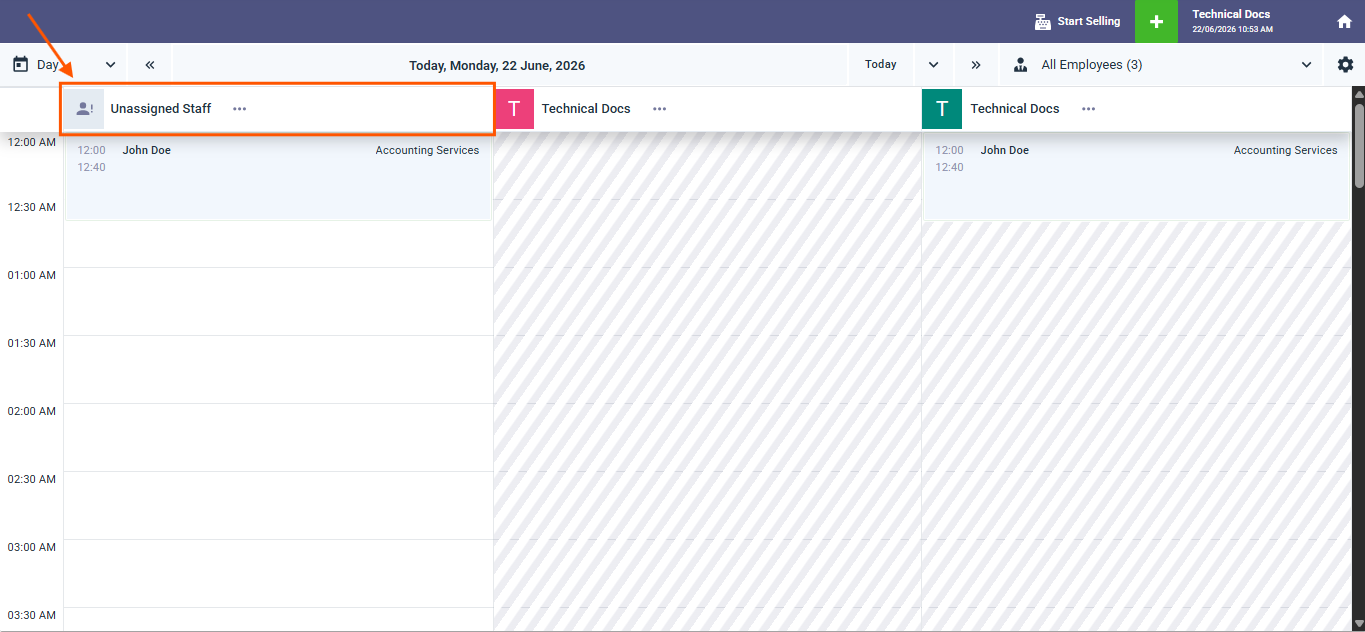
The Unassigned Booking Column
If the Allow Unassigned Bookings setting is enabled:
- Select “Unassigned Employee” from the staff dropdown at the top of the calendar.
- A new column named “Unassigned Employee” appears at the beginning of the calendar collecting all bookings not assigned to any employee.
- Waiting bookings appear at the top of this column as well before scheduled bookings.
- You can drag any booking from the “Unassigned Employee” column and drop it into a specific employee’s column to assign it directly.
Design Settings and Session Details
Design Settings
-
Click the gear icon ⚙ at the top left of the calendar to access view customization settings such as booking colors and display preferences.
Session Details
-
The current branch name and the current date and time are always displayed at the top left of the screen.
-
Click “Session Details” to view the current sales session information and track related invoices.