
Guide to Creating a Bid and Building the Bill of Quantities
A bid lets you record client requirements, and estimate the cost of a potential project by building a hierarchical item tree (Bill of Quantities). In this article, we explain the steps to create a new bid, and how to build its Bill of Quantities.
Steps to Creating a Bid and Building the Bill of Quantities
First: Accessing the Add Bid Screen
Step 1: Opening the Creation Screen
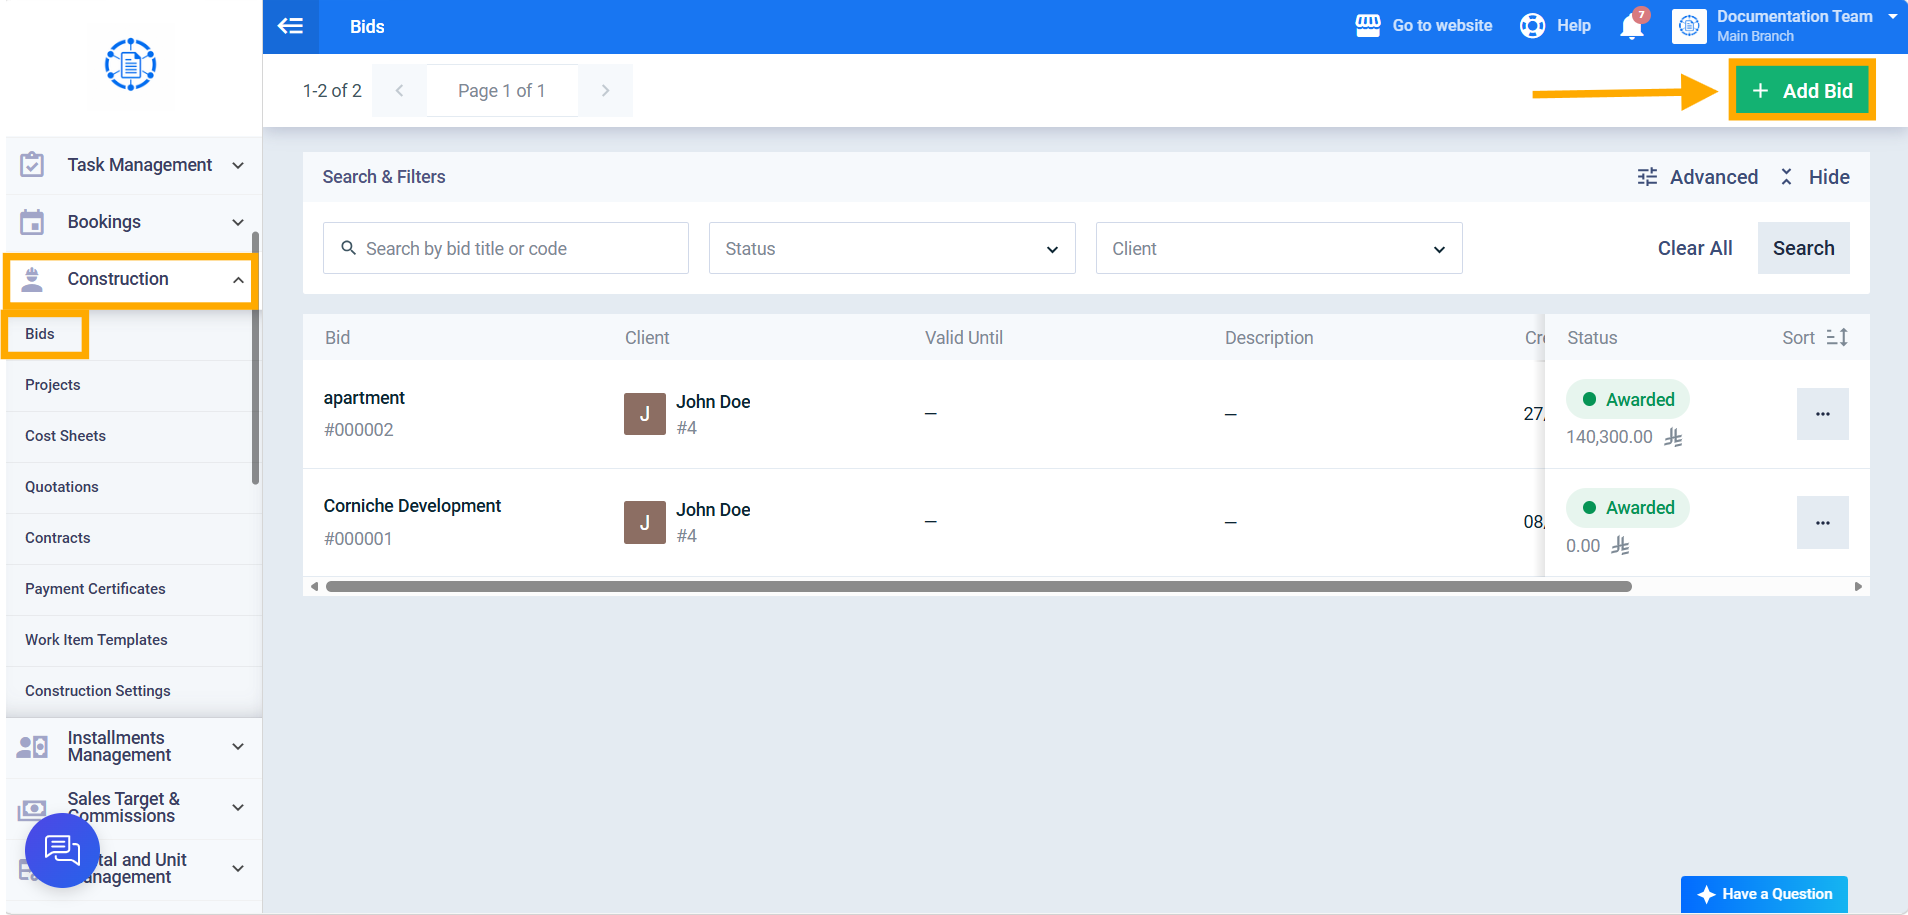
From the sidebar menu, click on “Construction,” then go to “Bids,” and click the “Add Bid” button.
Second: Filling In the Bid Information
Step 2: Filling In the Basic Data
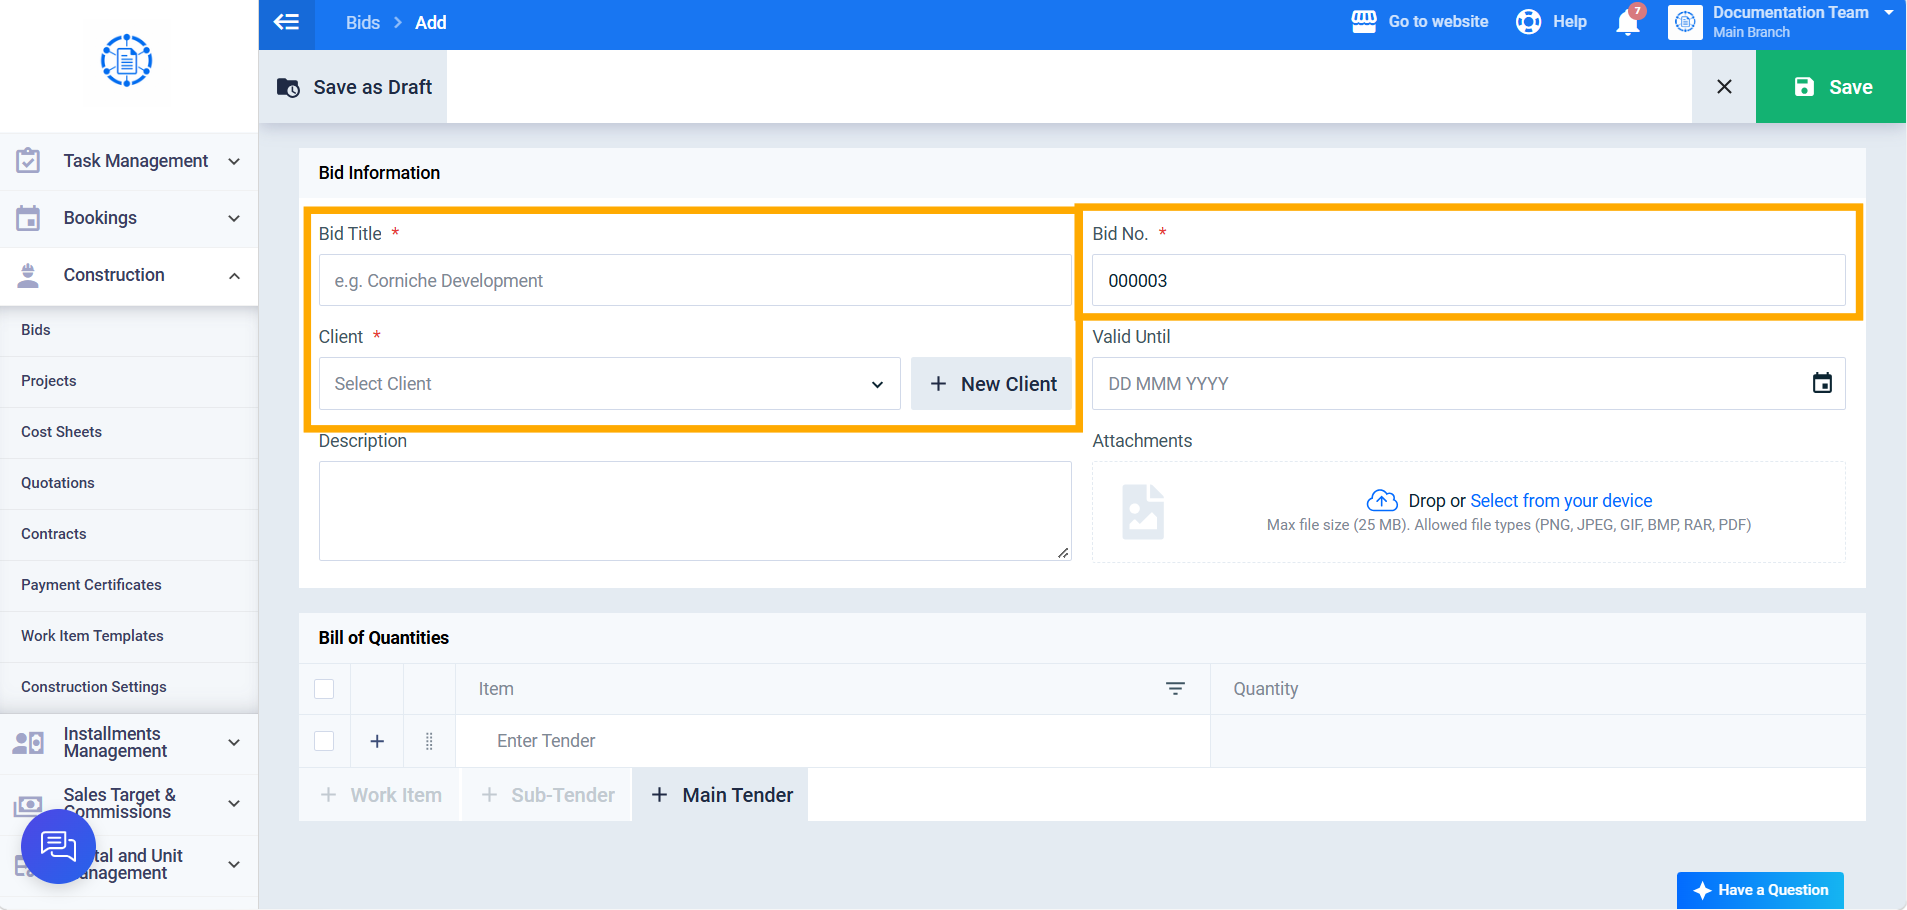
Enter the “Bid Title” (required). The “Bid No.” appears automatically. Select the “Client” (required) from the list, with the ability to search by name, code, email, or mobile number (only “Active” clients appear).
Step 3: Completing the Optional Data
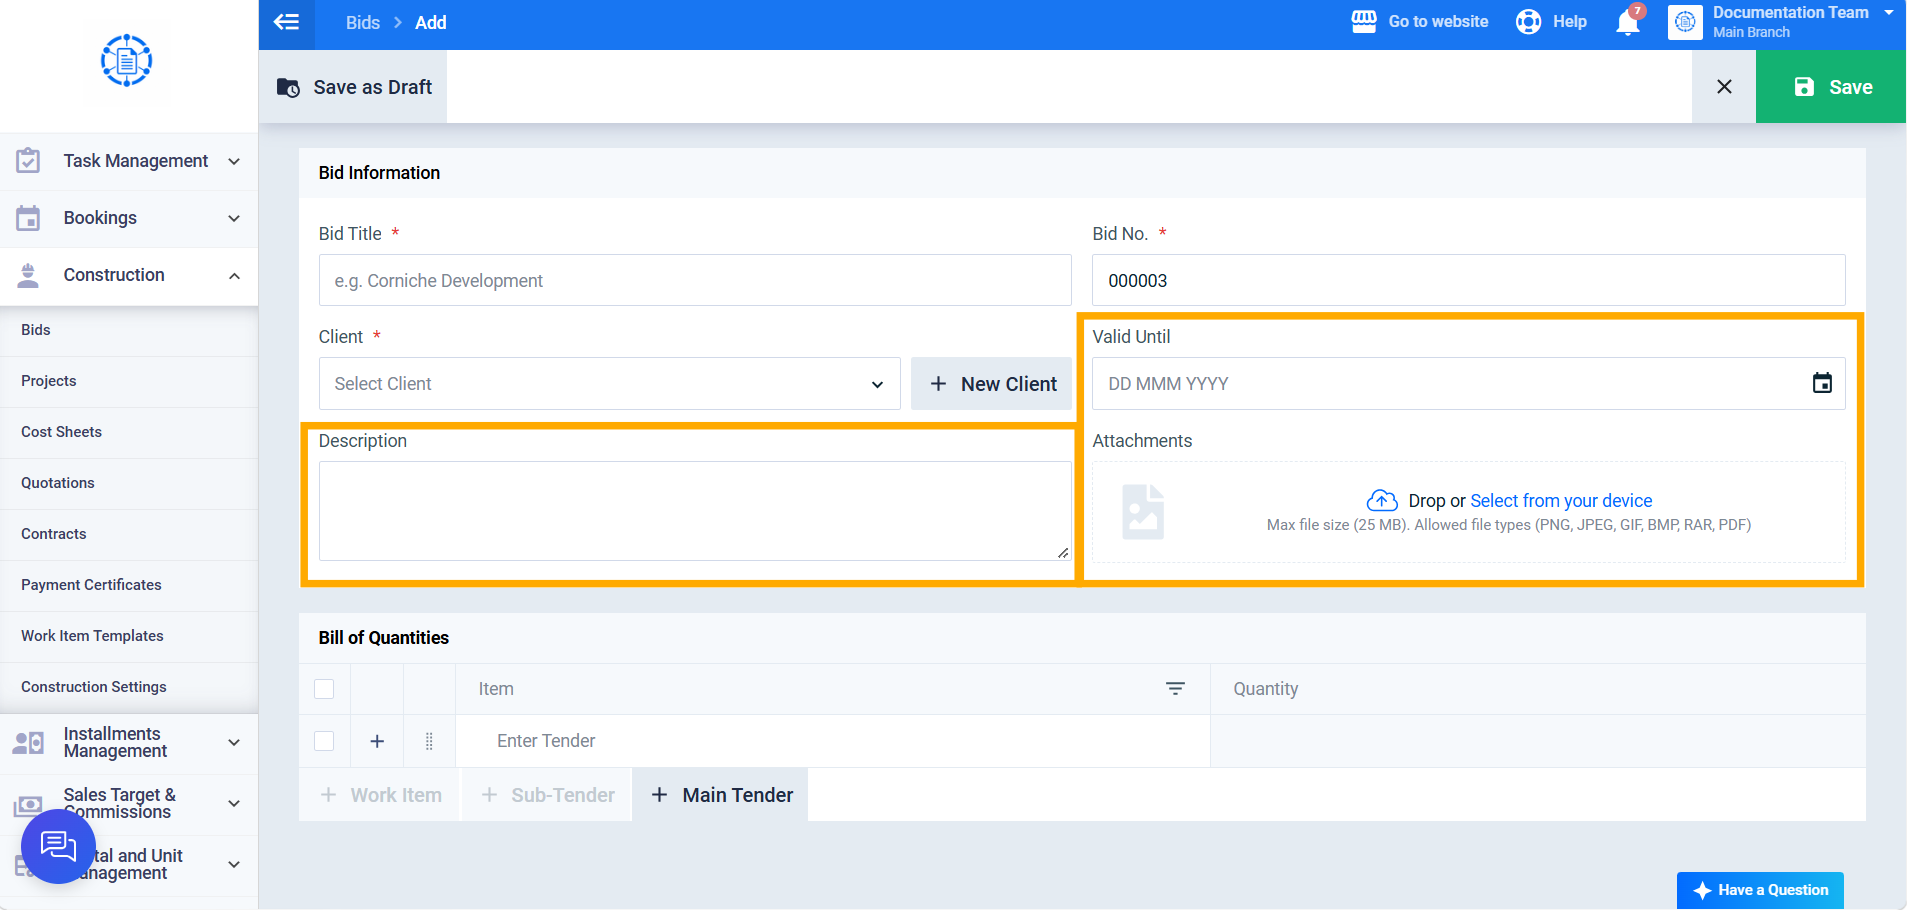
Specify “Valid Until” (optional), and add the “Description” and “Attachments” (optional) as needed.
Third: Building the Bill of Quantities
Step 4: Adding the First Main Tender
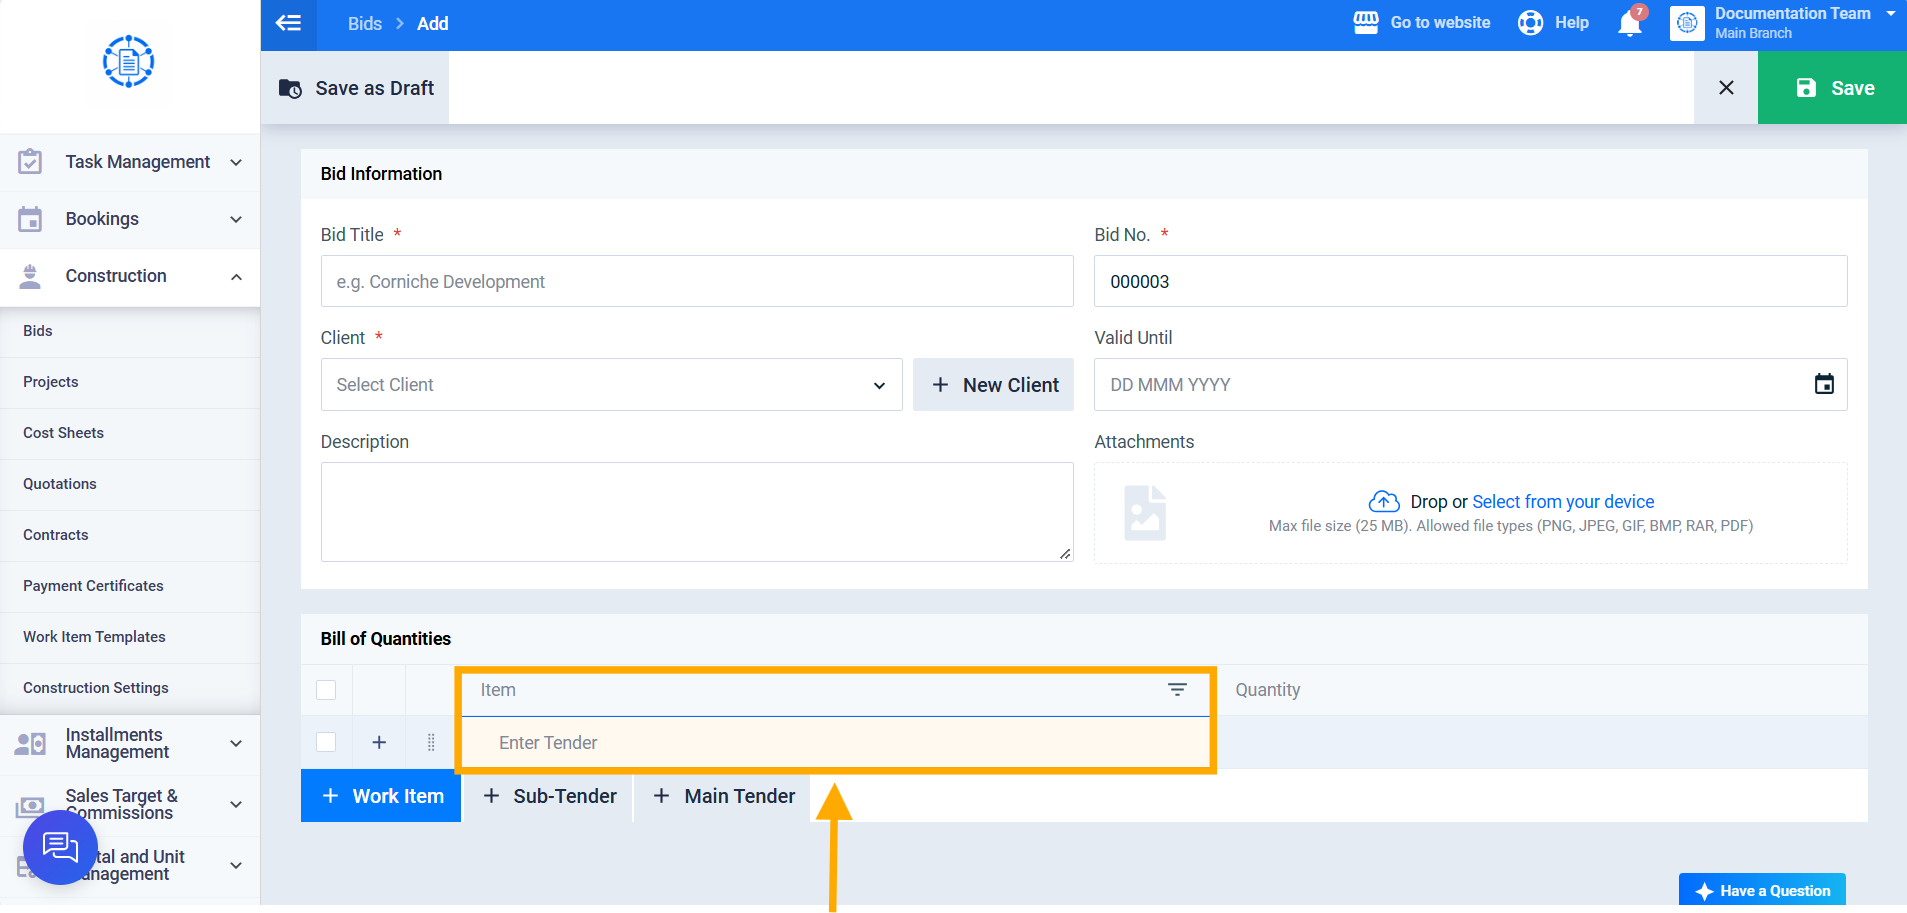
One line for a main tender appears automatically when the creation form opens. Enter the item’s title in the “Item” field (required, must be unique among main tenders at the same level and parent).
Step 5: Adding Sub-Tenders or Work Items
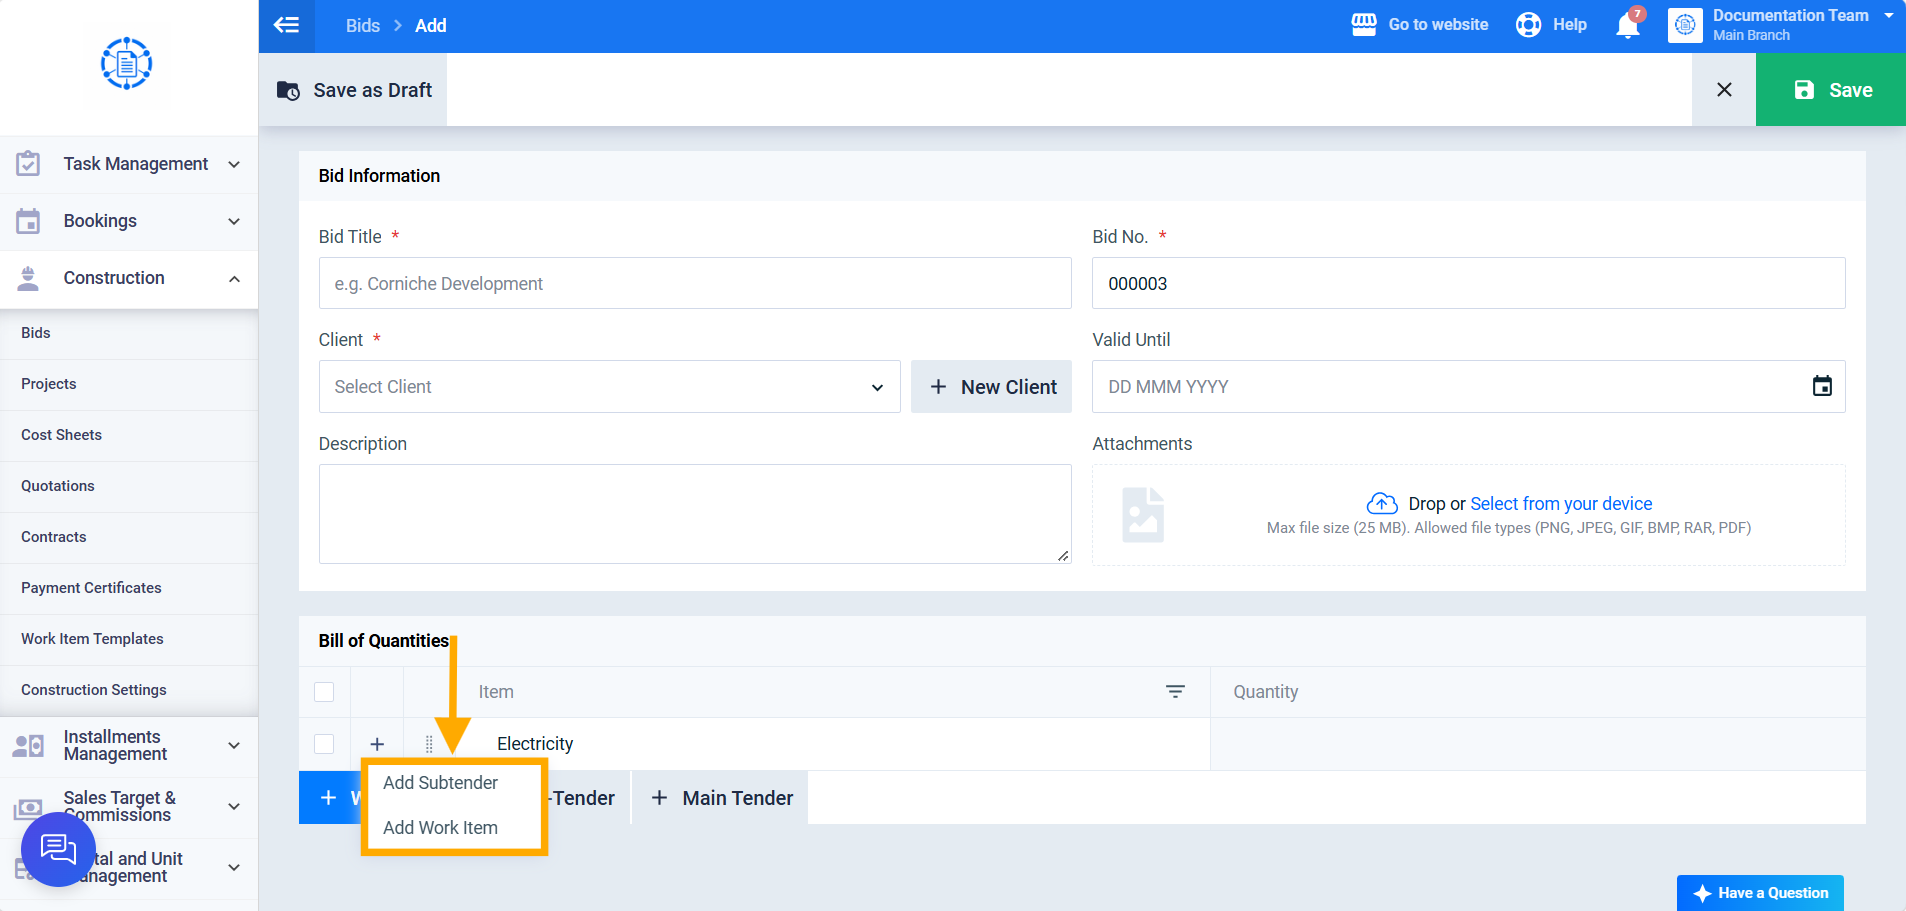
Click the “Add” icon next to the main tender to add a “Sub Tender” (up to 3 sub-levels maximum under the same main tender), or a “Work Item” — with the work item only addable under the last level in the tree (whether that’s a main tender or a sub-tender).
Step 6: Specifying the Work Item, Quantity, and Unit
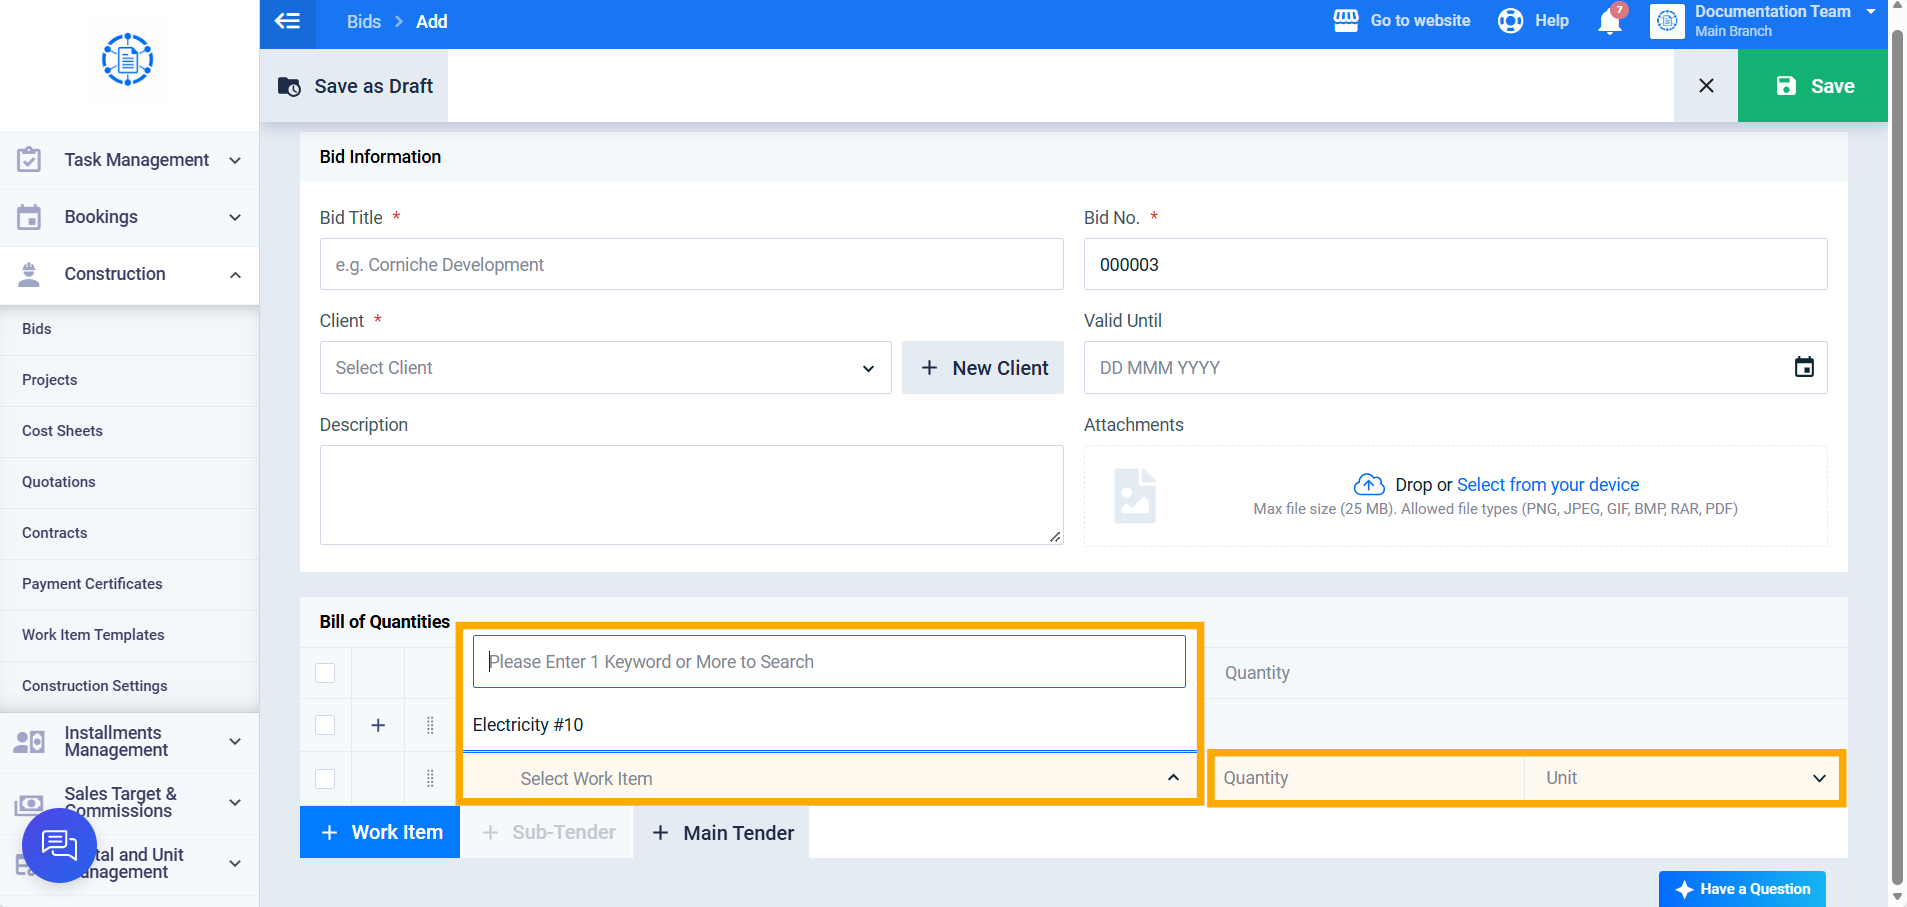
For a work item, select the item (required) from a dropdown displaying “Active” work items defined in inventory (searchable by item title). Enter the “Quantity” (required), and select the “Unit” (required) from the list of unit templates defined in the system.
Fourth: Saving the Bid
Step 7: Saving
Click “Save” to save the bid with “Issued” status, or “Save as Draft” to save it with “Draft” status (in which case it receives a temporary number in the format “#ID” instead of the final sequential number).
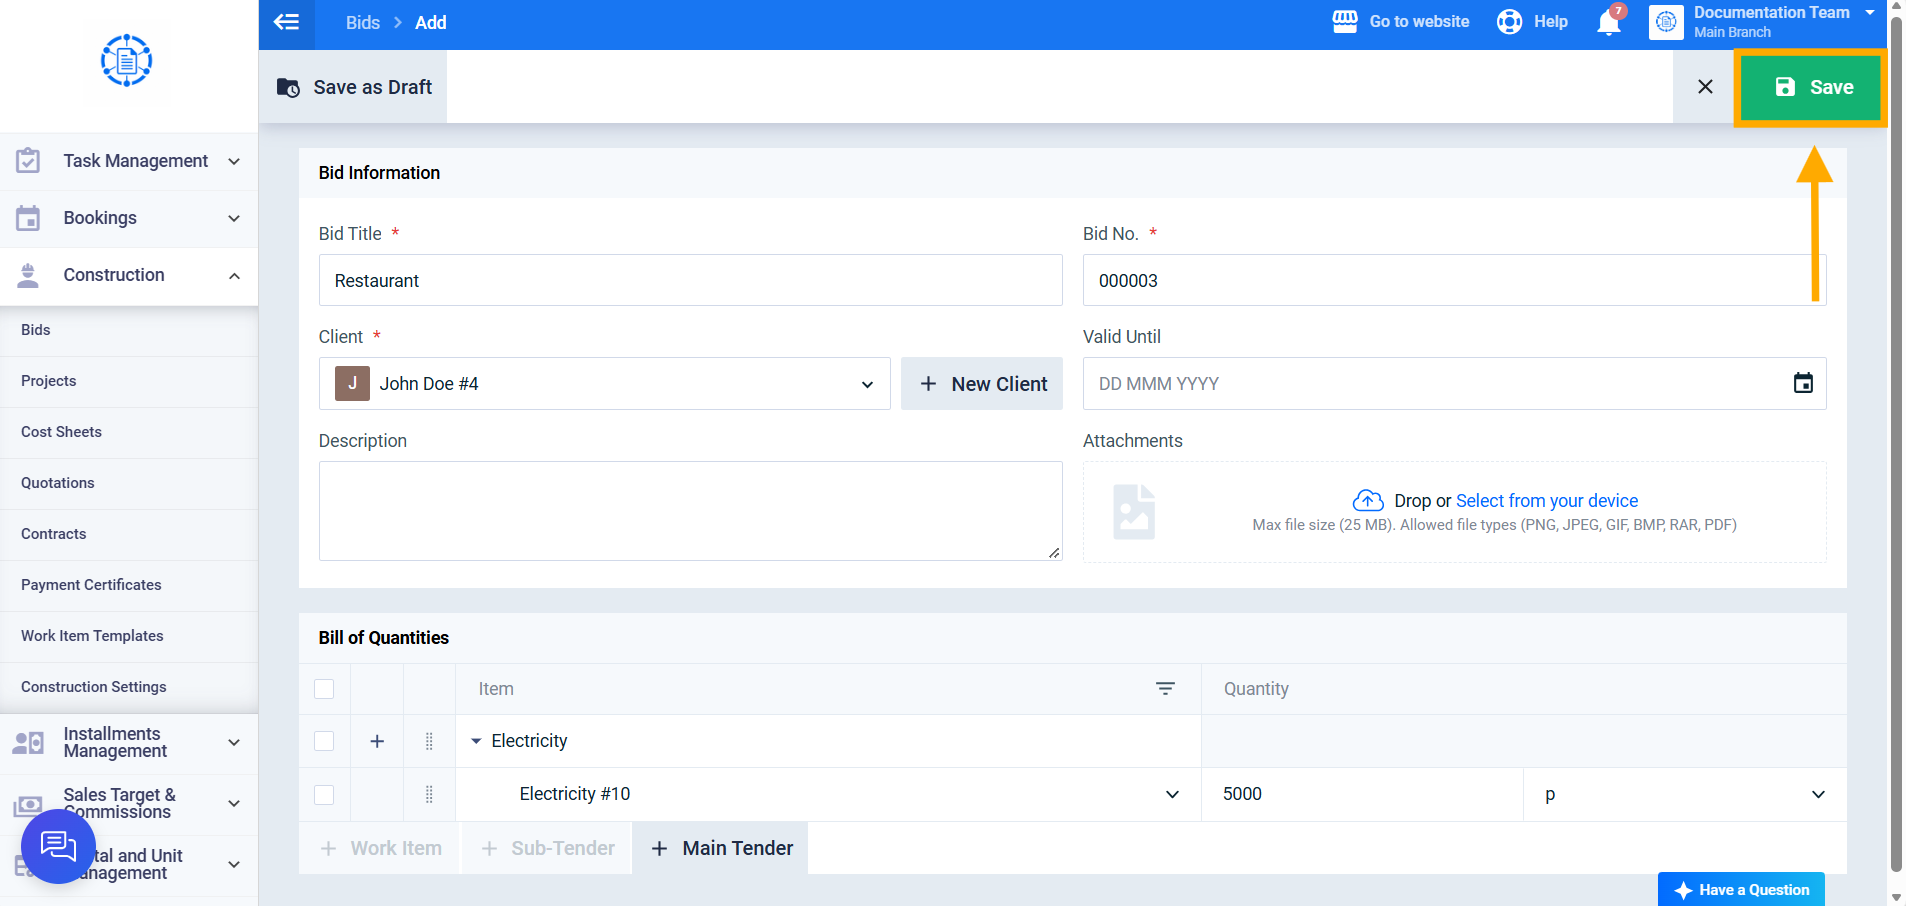
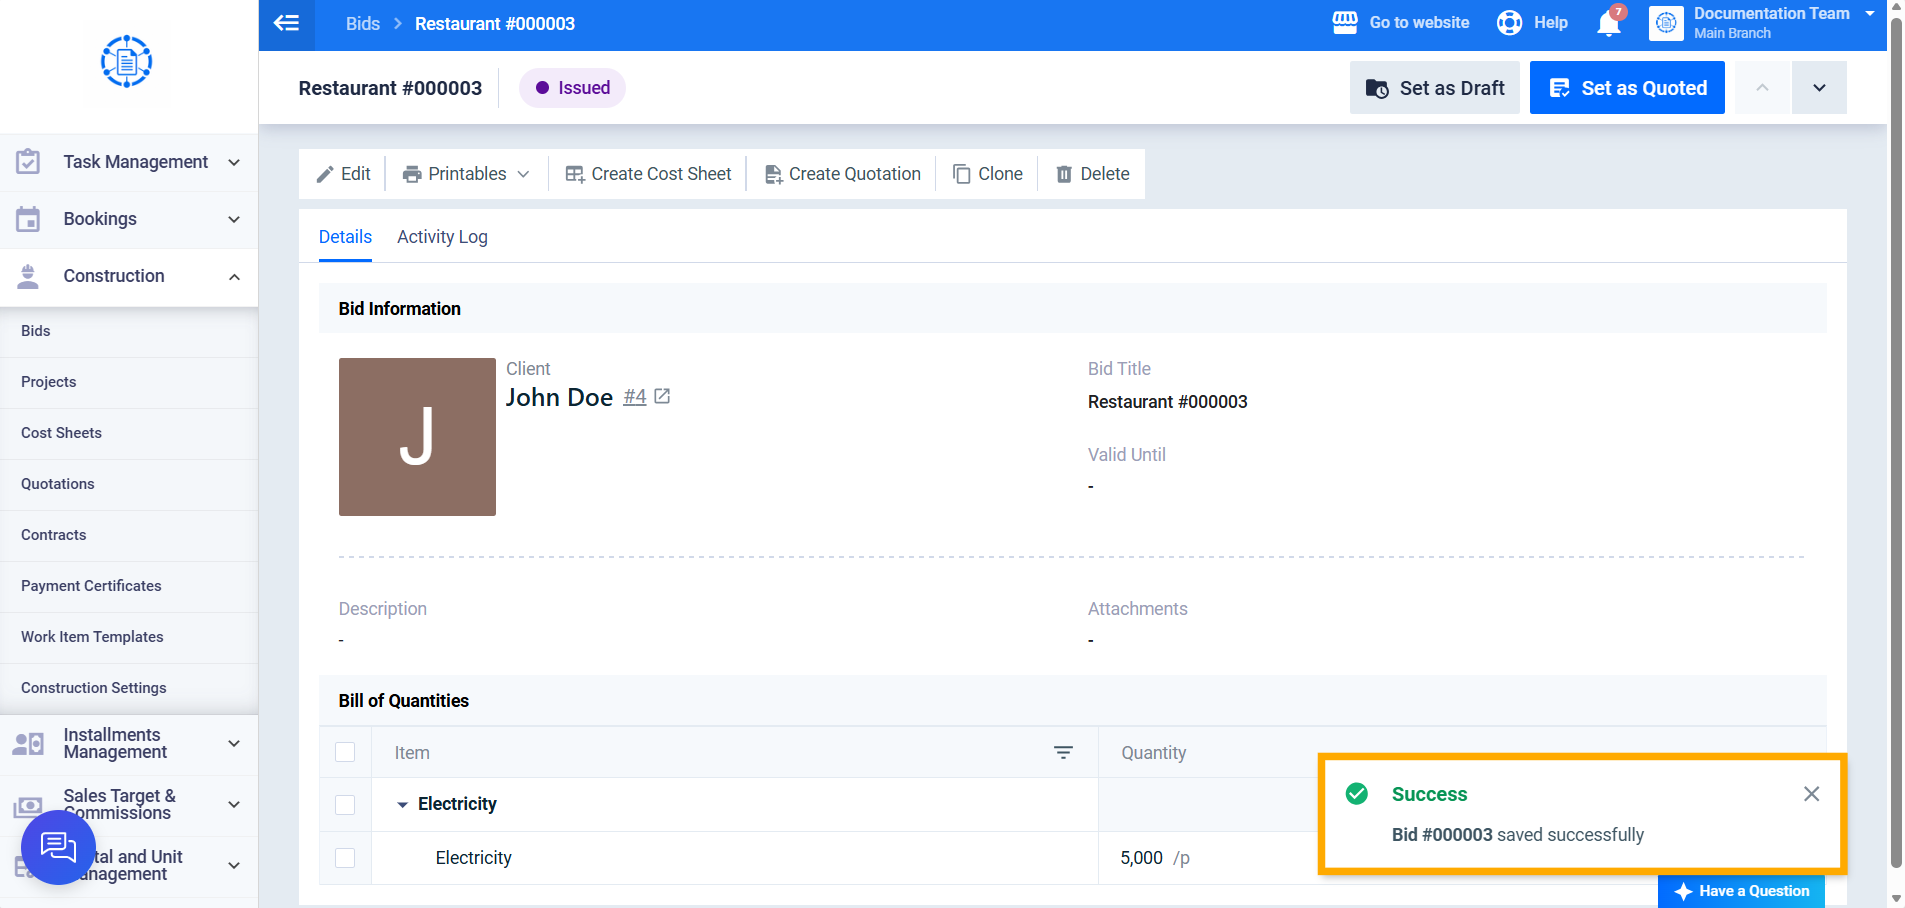
The message “Bid #(ID) Saved Successfully” appears, and you’re redirected to the bid’s view screen.