




Password-Protected POS Actions Application
You can lock sensitive actions in POS, such as updating an item’s price or quantity, deleting items, and applying discounts, so the cashier can perform them only after entering a password or scanning a barcode. This gives you full control over high-risk operations, with the option to authorize trusted employees to perform some or all of these actions. This tutorial explains how to configure the master settings, print the barcode, grant and copy permissions for employees, and unlock an action during a sales session.
Before you start
- The Password-Protected POS Actions app is installed and activated from the Apps Manager.
- You are logged in with the account owner account, because the master settings and employee permissions are configured from it.
- The employees you will grant permissions to are added to the system as users.
Steps to enable password-protected actions
First: Configure the master settings
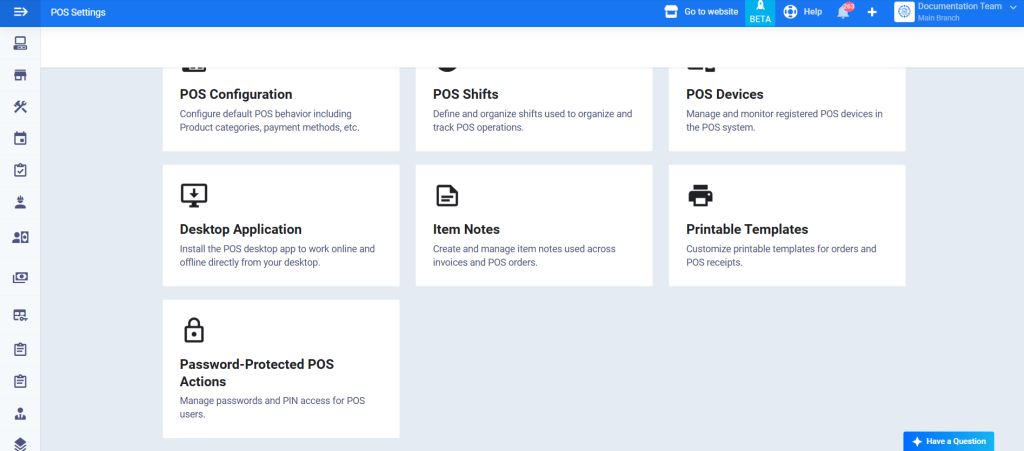
- Go to POS, then POS Settings, and click the Password Protected POS Action card (Manage passwords and access permissions (PIN) for POS device users).
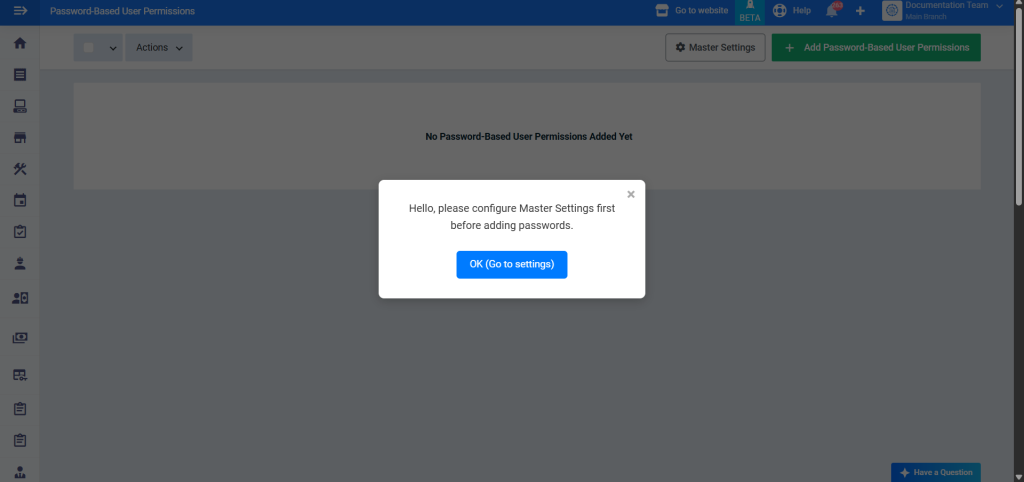
- The first time you open it, the message Hello, please configure the Master Settings first before adding passwords. appears. Click OK (Go to Settings).
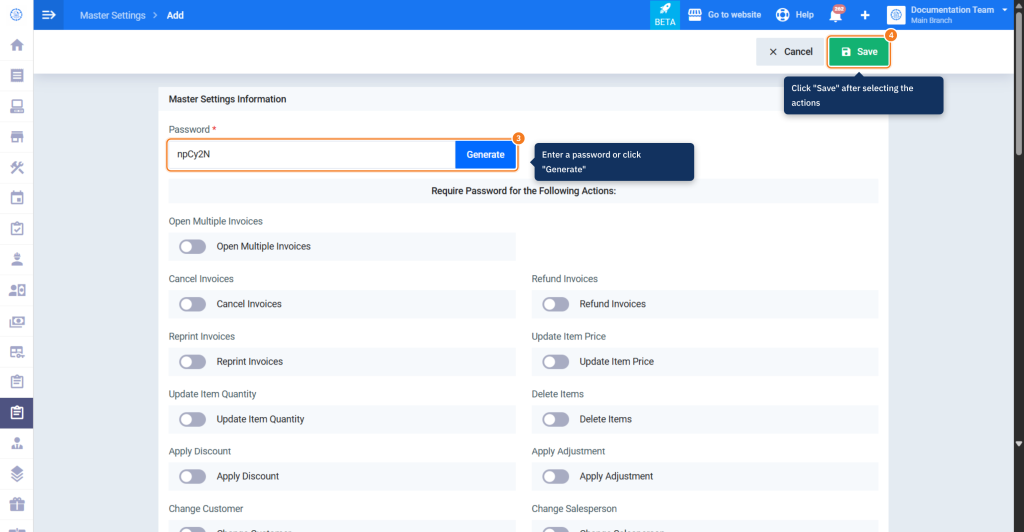
- In the Password field, enter your master password, or click Generate to create a password automatically.
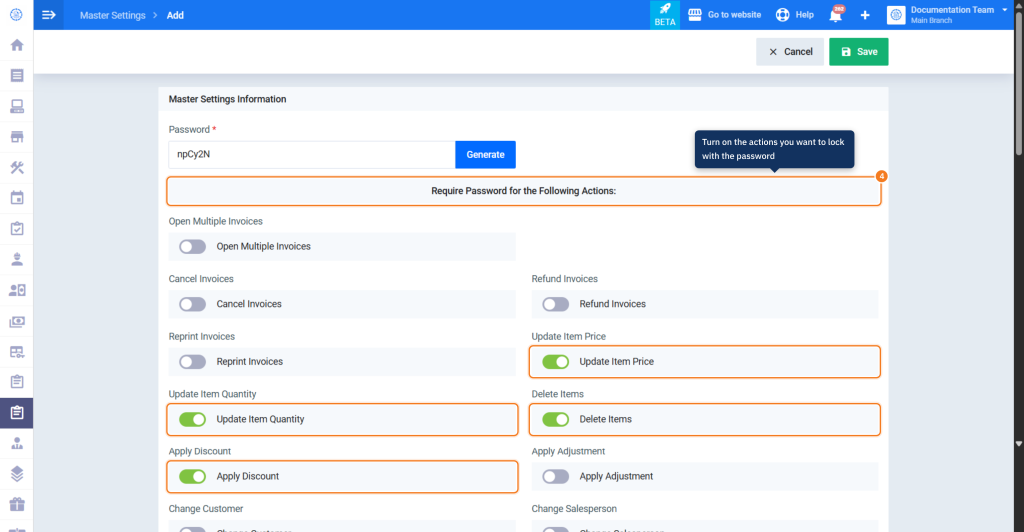
- From the Require Password for the Following Actions: section, turn on the actions you want to lock, then click Save. The available actions are:
- Open Multiple Invoices
- Cancel Invoices
- Refund Invoices
- Reprint Invoices
- Update Item Price
- Update Item Quantity
- Delete Items
- Apply Discount
- Apply Adjustment
- Change Customer
- Change Salesperson
- A success message appears, and the page shows the password and the status of each action (Yes for a locked action and No for an unlocked one).
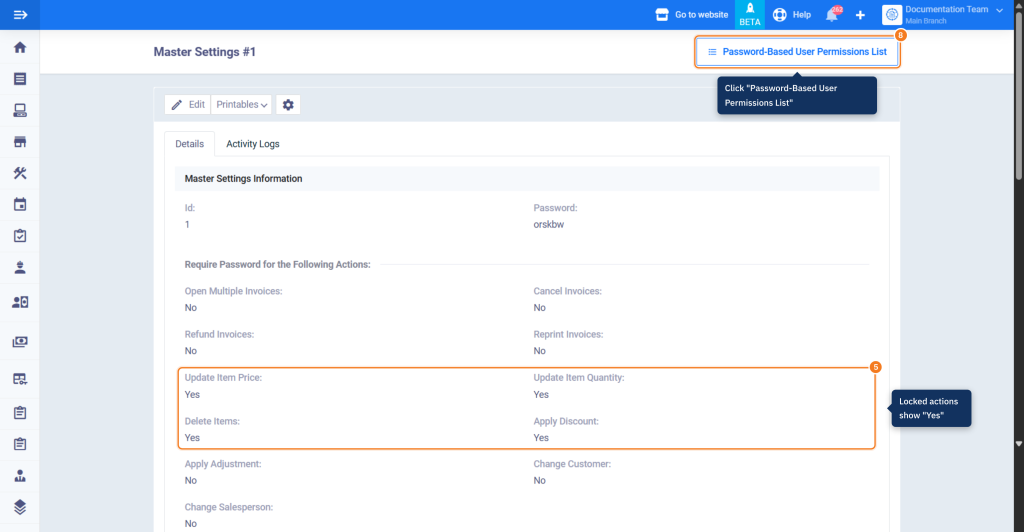
Second: Print the password barcode
- To print a barcode that replaces typing the password manually, click Printables, then select Password Settings Template #. The barcode appears, and you can print or download it.
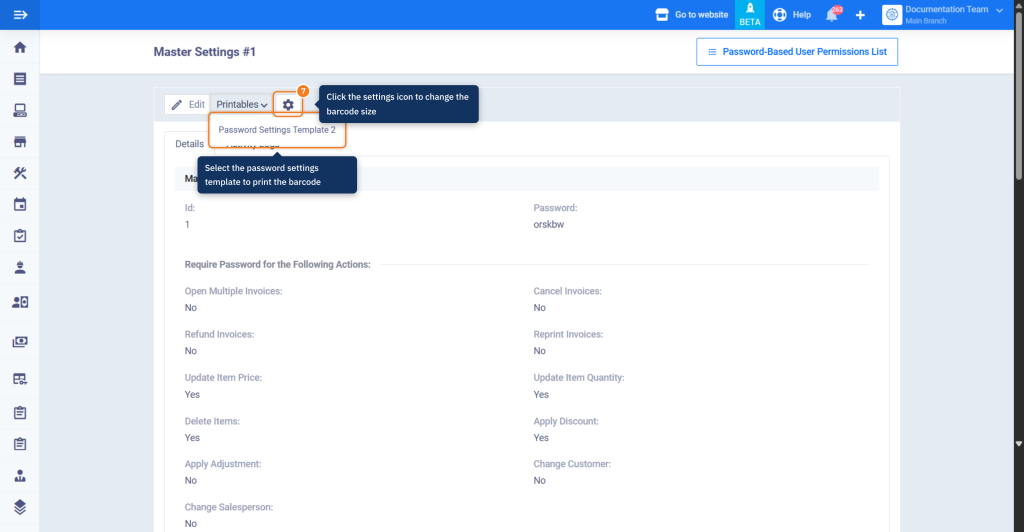
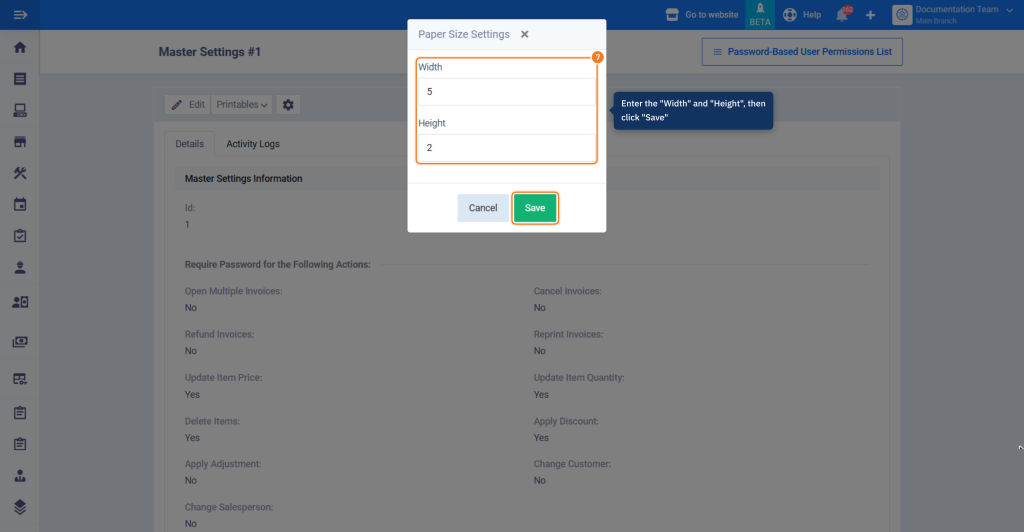
- To change the barcode size, click the settings icon next to Printables, and the Paper Size Settings window appears. Enter the required Width and Height, then click Save.
Third: Grant a permission to an employee
- From the Password-Based User Permissions page, click Add Password-Based User Permissions.
- Fill in the permission details:
- Password: Enter a password for the employee, or click Generate.
- Authorized User: Select the employee you want to grant the permission to.
- Allow Change Password: Turn it on if you want the employee to be able to change their own password.
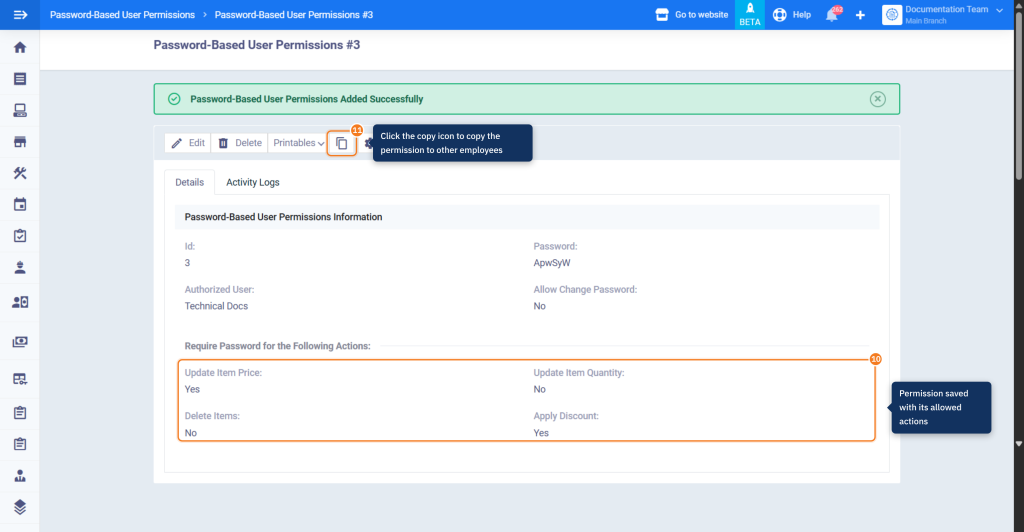
- Require Password for the Following Actions:: Turn on the actions the employee is allowed to unlock with their own password.
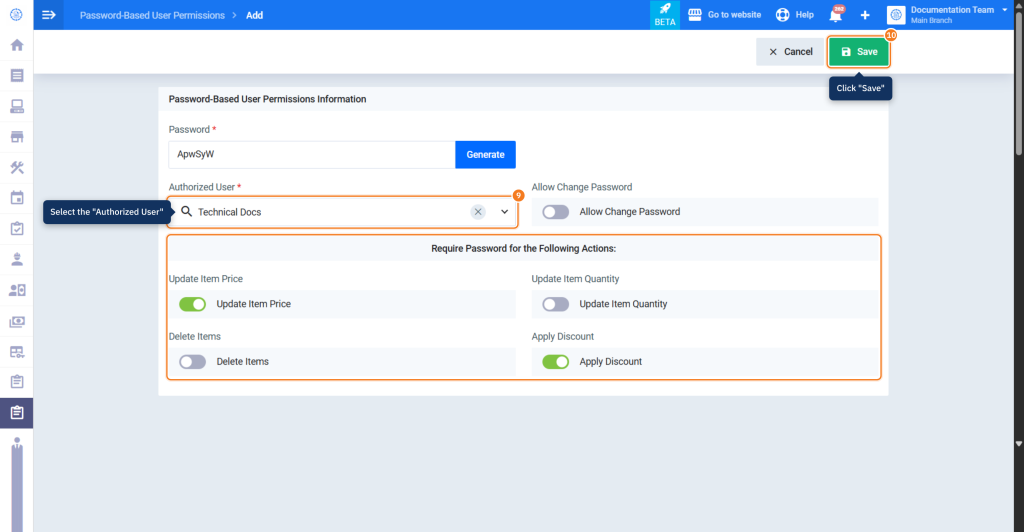
- Click Save, and a success message appears. Each permission has its own barcode that you can print and resize the same way as in steps 6 and 7.
Fourth: Copy the permission to other employees
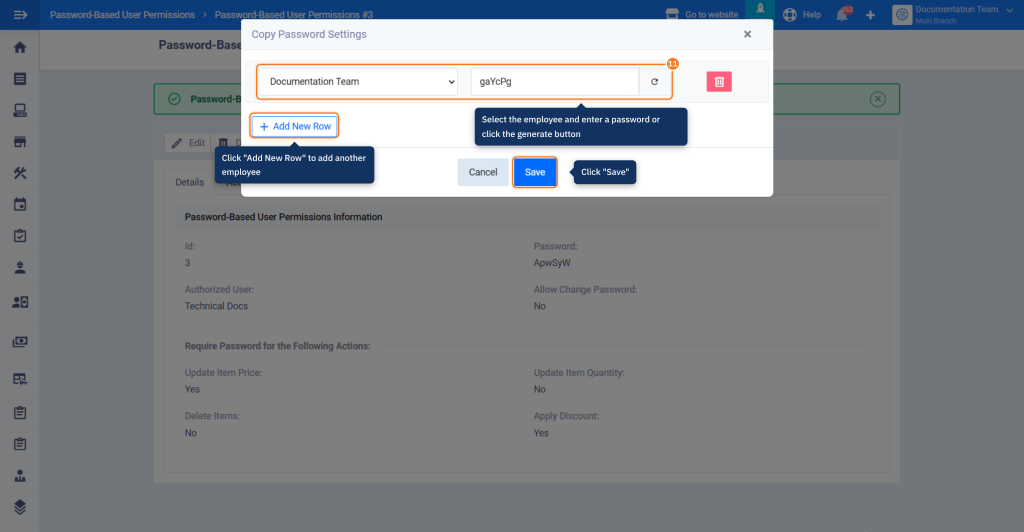
- To grant the same permissions to more than one employee without repeating the steps, open the permission and click the copy icon, and the Copy Password Settings window appears. Select the employee from Select Employee…, and enter the password or click the generate button next to the field. To add another employee, click Add New Row, then click Save.
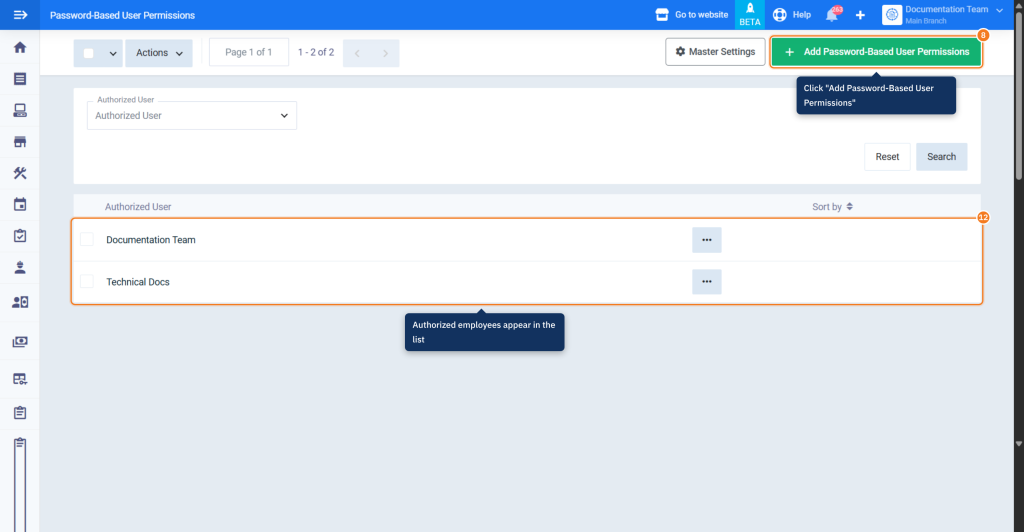
- After saving, the employees appear in the Password-Based User Permissions list, each with their own password and the same allowed actions.
Fifth: Unlock an action during a sales session
- When the cashier tries to perform a locked action in a POS session, such as updating an item quantity, a window appears asking for the password. Scan the barcode with a barcode scanner, or type the password manually, then click Confirm.
- After confirming, the action can be performed on the current item. The action stays unlocked for one minute, or until moving to another item, after which the password is required again.
How the lock works in POS
| Case | What happens |
|---|---|
| A session opened with the account owner account. | All actions are unlocked, and no password is required. |
| A session opened with an employee account, and the action is locked in the master settings. | A password is required before performing the action. |
| Entering the master password or scanning its barcode. | Any locked action is unlocked. |
| Entering an authorized employee’s password or scanning their barcode. | Only the actions turned on in that employee’s permission are unlocked. |
| One minute passes after unlocking, or moving to another item. | The action is locked again, and the password is required again. |
FAQs
Why am I not asked for the password when I test the lock?
Because you are using the account owner account, and locks don’t apply to it. Open a sales session with an employee account to test the lock.
Why doesn't a certain action appear in the employee permission form?
Because the action isn’t turned on in the master settings. Turn it on first from Master Settings, and it will appear in the employee permission form.
Can I unlock an action without typing the password?
Yes; print the password barcode from Printables, then scan it with a barcode scanner when the password window appears.
How long does the unlock last?
One minute, or until moving to another item, after which the password is required again.
How do I quickly grant the same permissions to several employees?
Open an employee’s permission, click the copy icon, then add the other employees with a password for each and click Save.