
Comprehensive Guide to Configuring and Applying an Offer
The “Offers” app allows you to create and manage various promotional campaigns from a single unified screen, from product discounts to free shipping and new customer welcome offers, applying them automatically to invoices, sales orders, and estimates using the same logic across all platforms. In this article, we explain the steps to configure each offer type and its application mechanism in detail.
Comprehensive Guide to Configuring and Applying an Offer
First: Accessing the Add Offer Screen
Step 1: Open the Add Offer Screen
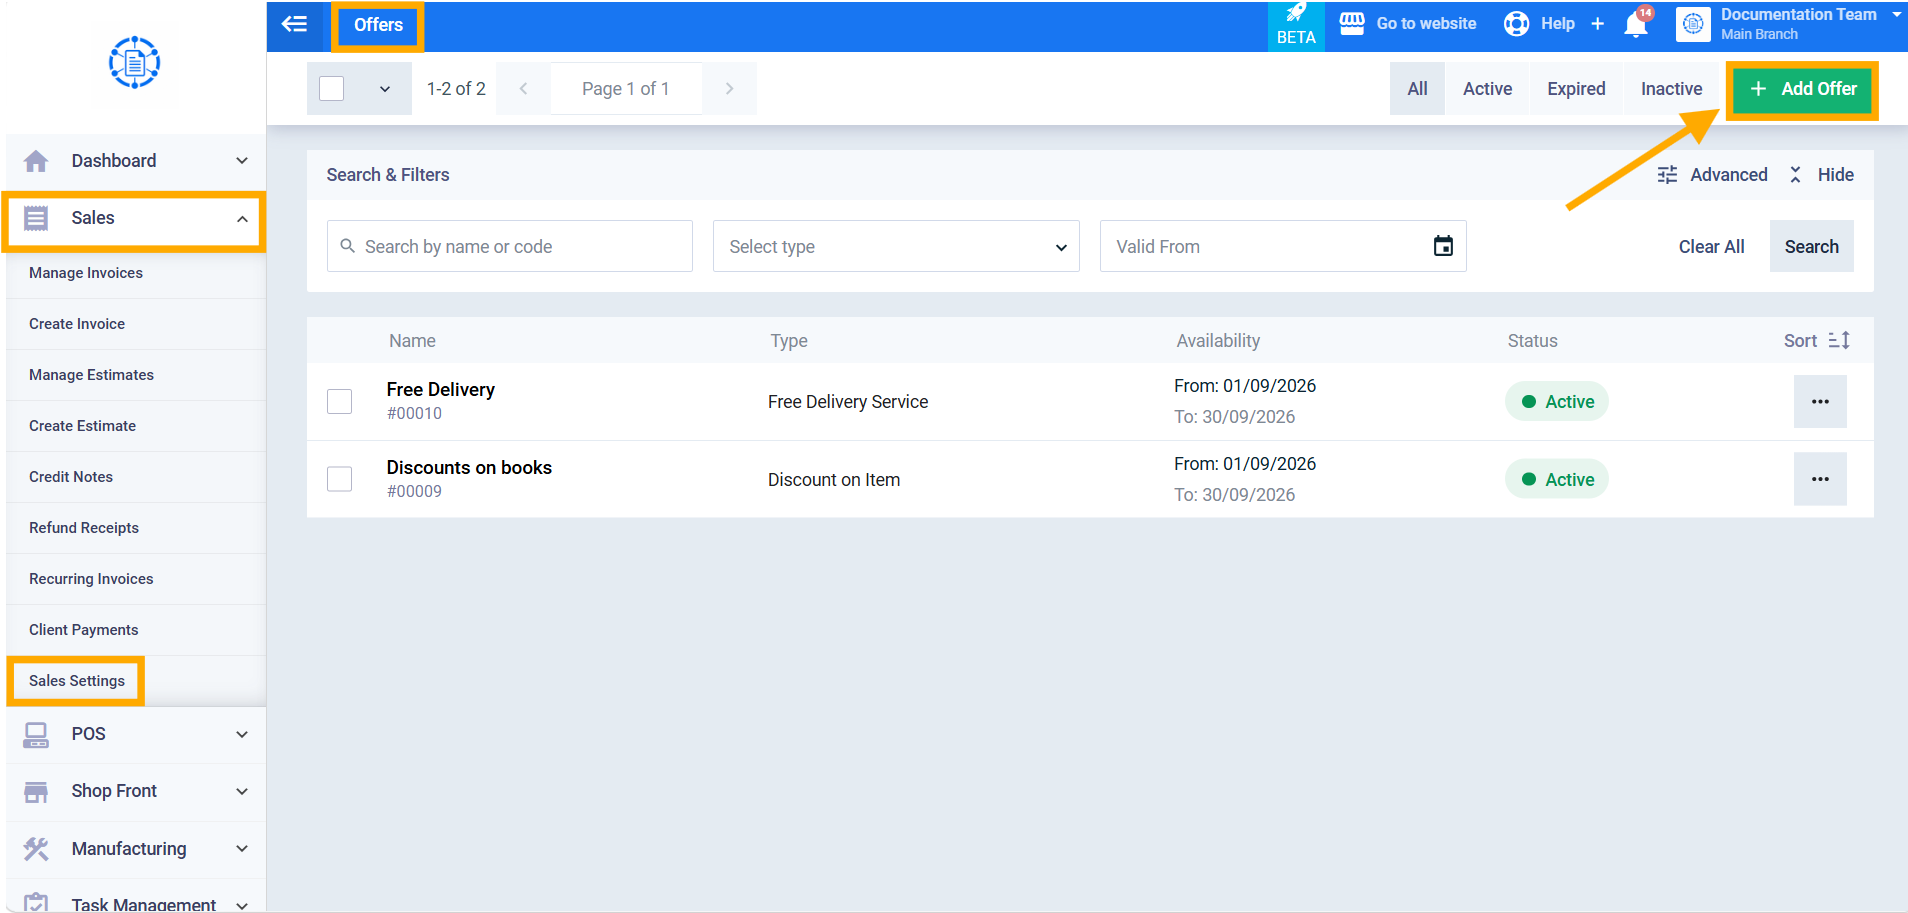
From the sidebar menu, click on “Sales,” then go to “Sales Settings,” click on the “Offers” card, then click the “Add Offer” button.
Second: Filling In the Offer Information
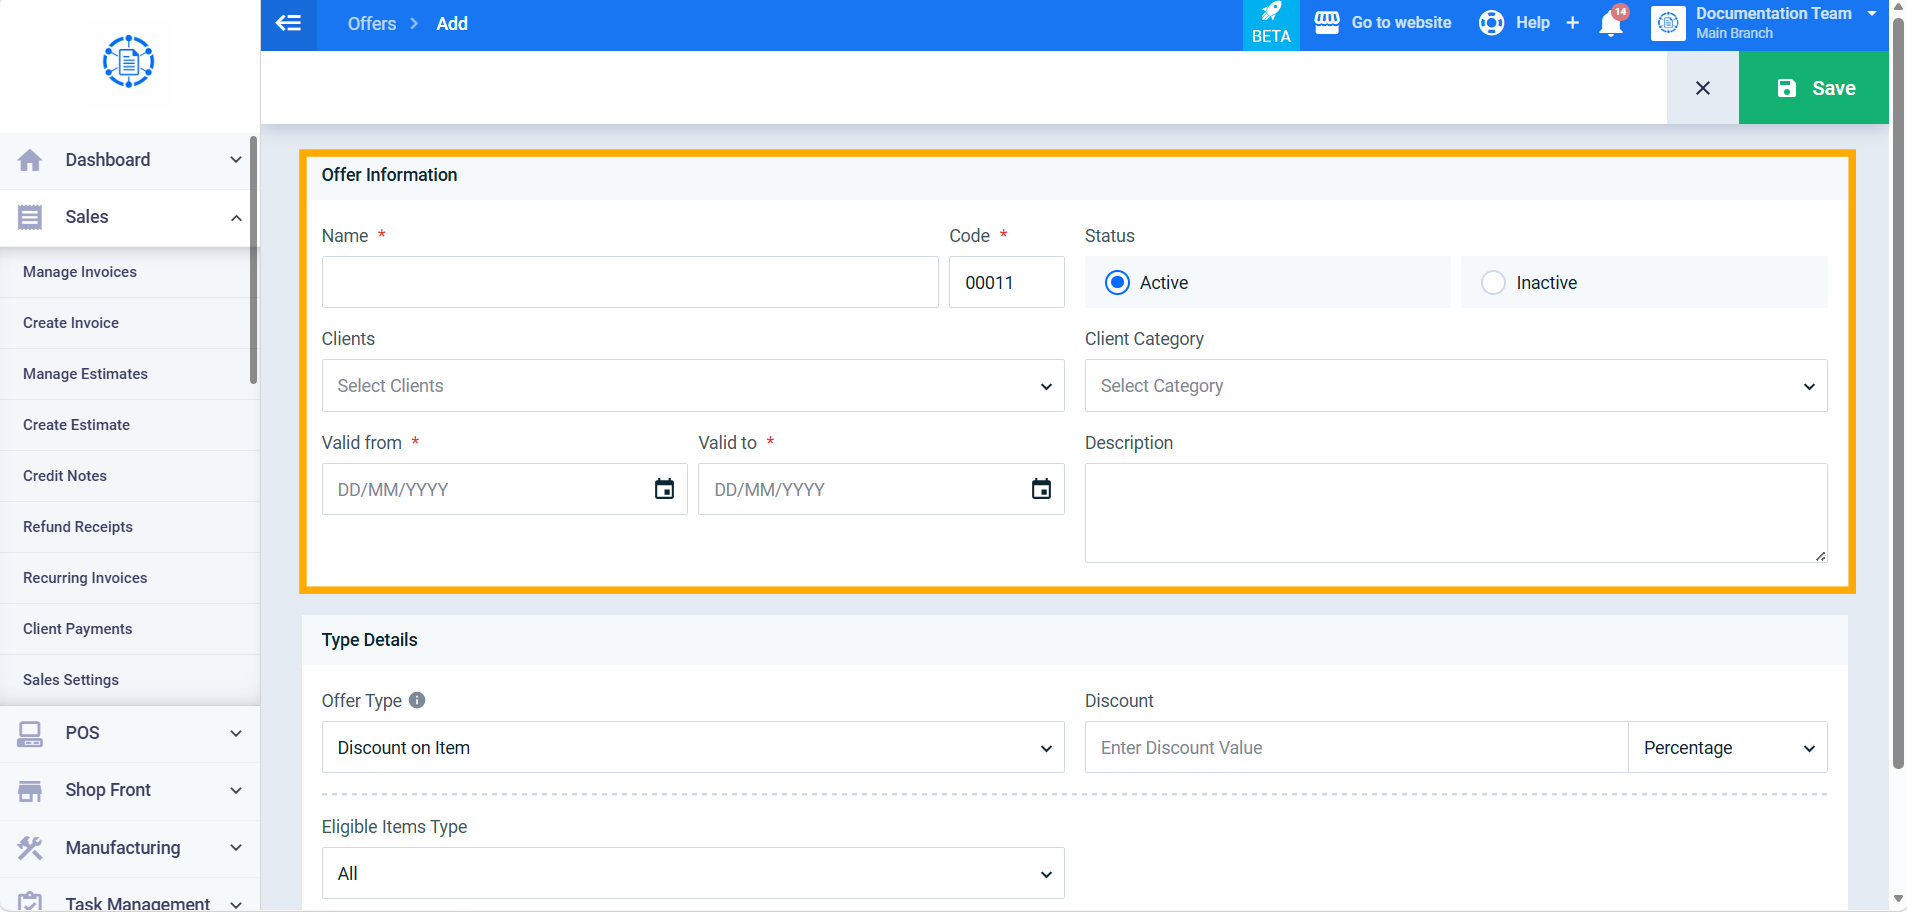
Step 2: Fill In the Offer Information Fields
- Offer Name (required).
- Offer Code (required): the system automatically generates it when opening the screen, and it can be edited manually before saving, provided it remains unique within the account.
- Status (required): two radio buttons: “Active” or “Inactive” (default: Active).
- Clients (optional): a multi-select list of specific clients.
- Client Category (optional): the category of clients targeted by the offer.
- Valid From / Valid To (required): the “Valid To” date cannot be earlier than the “Valid From” date.
- Description (optional): a text field to describe the offer.
Third: Selecting the Offer Type
Step 3: Determine the Offer Type
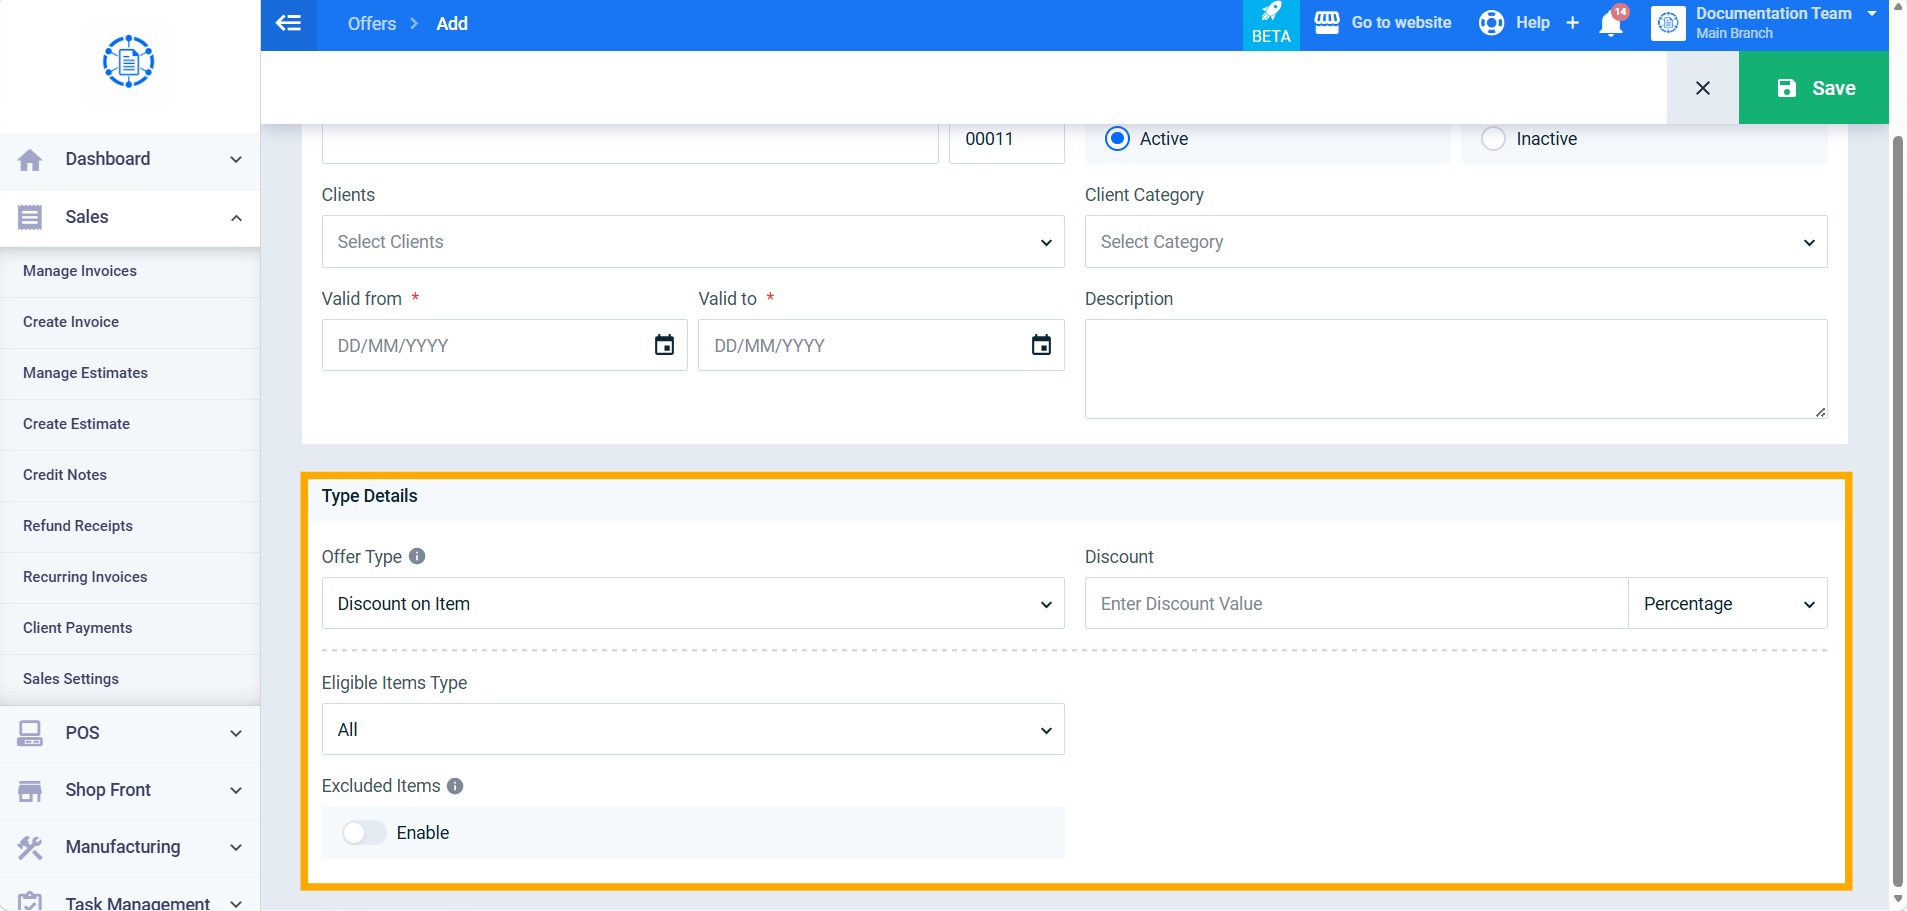
Select the “Offer Type” (required field) from the dropdown list. A tooltip icon appears beside it, explaining how each type works once selected. Supported types:
- Discount on Item
- Buy N Get Discount on Cheapest Item
- Buy One Get One / Mix & Match
- Quantity-Based Discount
- Tiered Spending Discount
- New Customer Welcome Offer
- Free Delivery Service
The fields in the “Type Details” section change automatically without reloading the page, depending on the selected type; fields that don’t apply to the selected type disappear completely and are not saved.
Fourth: Configuring Each Offer Type
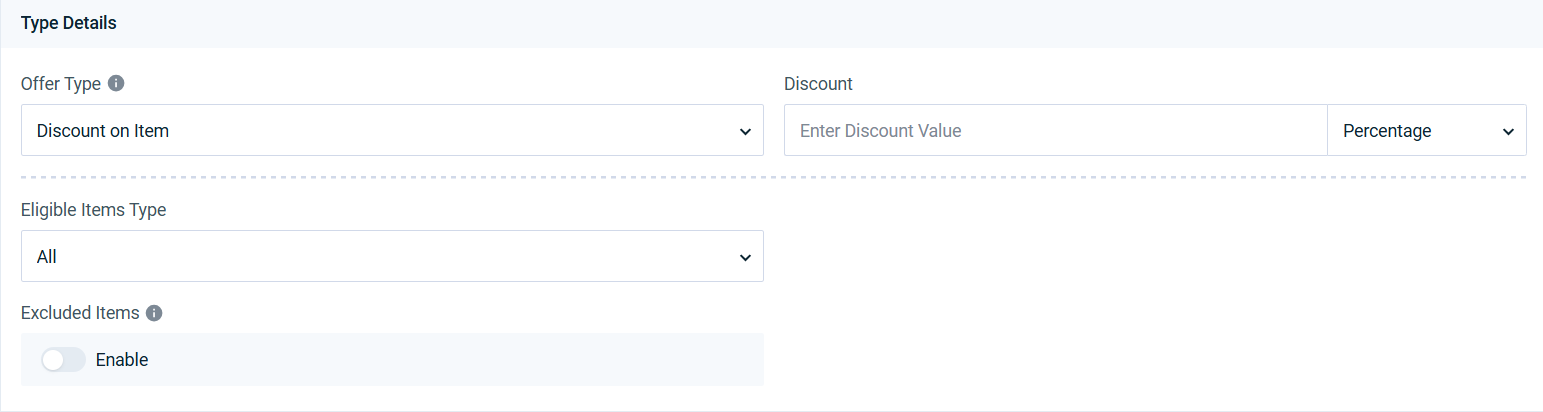
1. Discount on Item
Applies a fixed or percentage discount to specific products, categories, or all products when an invoice is created. Specify:
- Discount (required): a combined field that includes the discount type (percentage or fixed amount) and its value together.
- Eligible Items Type (required): All, Category, Product, or Item Group.
- Items (conditional): appears only if the type isn’t “All.”
- Excluded Items (optional): a separate enable toggle; once enabled, fields for specifying the exclusion type and items appear.
2. Buy N Get Discount on Cheapest Item
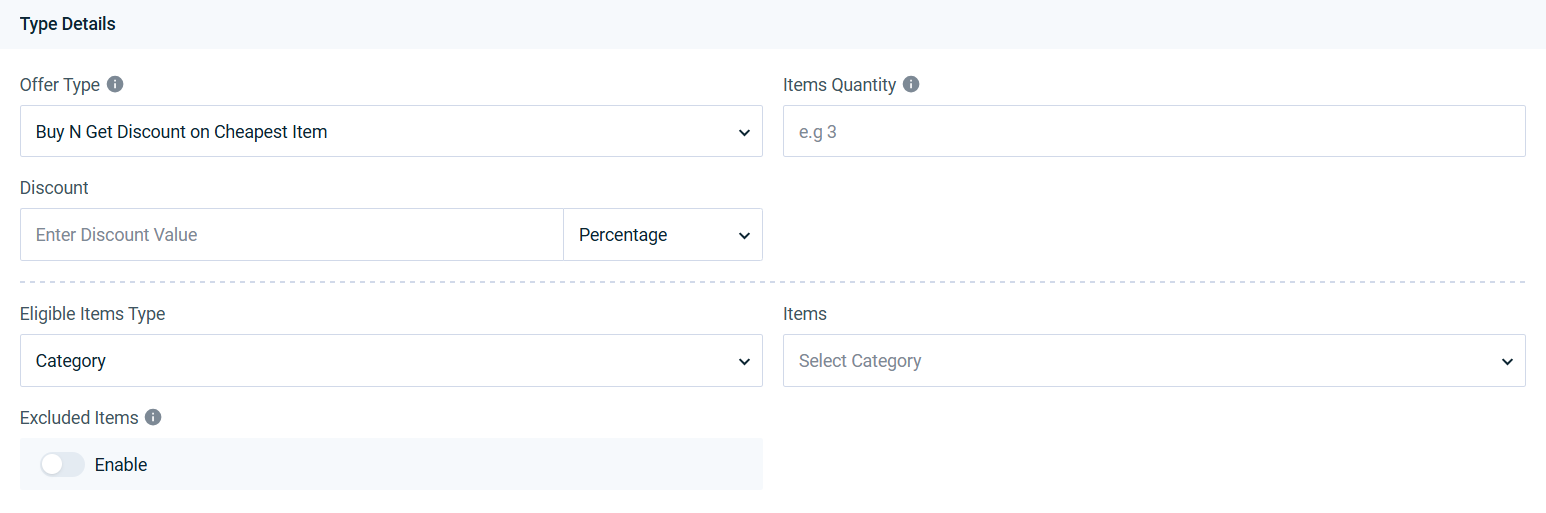
The customer buys a minimum number of qualifying products, and the cheapest product within the group receives the discount. Specify:
- Items Quantity (required): the minimum quantity required before the discount is applied (example: if it’s 3, the customer must buy 3 qualifying products for the discount to apply to the next cheapest product among them).
- Discount (required): a combined field (discount type: percentage or fixed amount + the value).
- Eligible Items Type (required): All, Category, Product, or Item Group.
- Items (conditional): appears only if the type isn’t “All.”
- Excluded Items (optional): a separate enable toggle; once enabled, fields for specifying the exclusion type and items appear.
3. Buy One Get One / Mix & Match
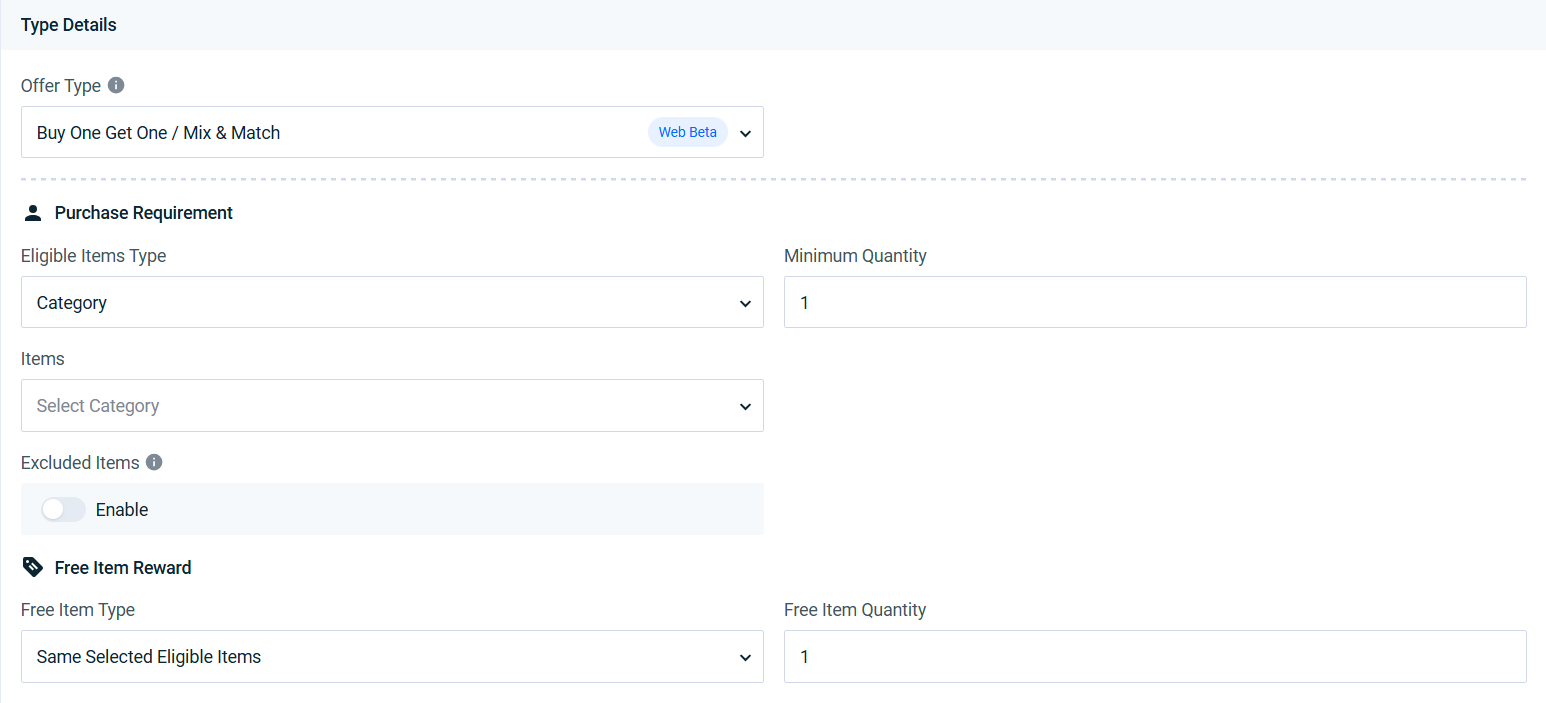
The customer buys qualifying products and automatically receives a free product based on the specified free product type. Specify:
- Purchase Requirements:
- Eligible Items Type (required): All, Category, Product, or Item Group.
- Items (conditional): appears only if the type isn’t “All.”
- Minimum Quantity (required): a number specifying the required quantity before the free product is earned (default value: 1).
- Excluded Items (optional): a separate enable toggle; once enabled, fields for specifying the exclusion type and items appear.
- Free Item Reward:
- Free Item Type (required): same selected eligible items, Category, Product, or Item Group.
- Free Item Quantity (required): a number specifying the number of free units granted (default value: 1).
4. Quantity-Based Discount
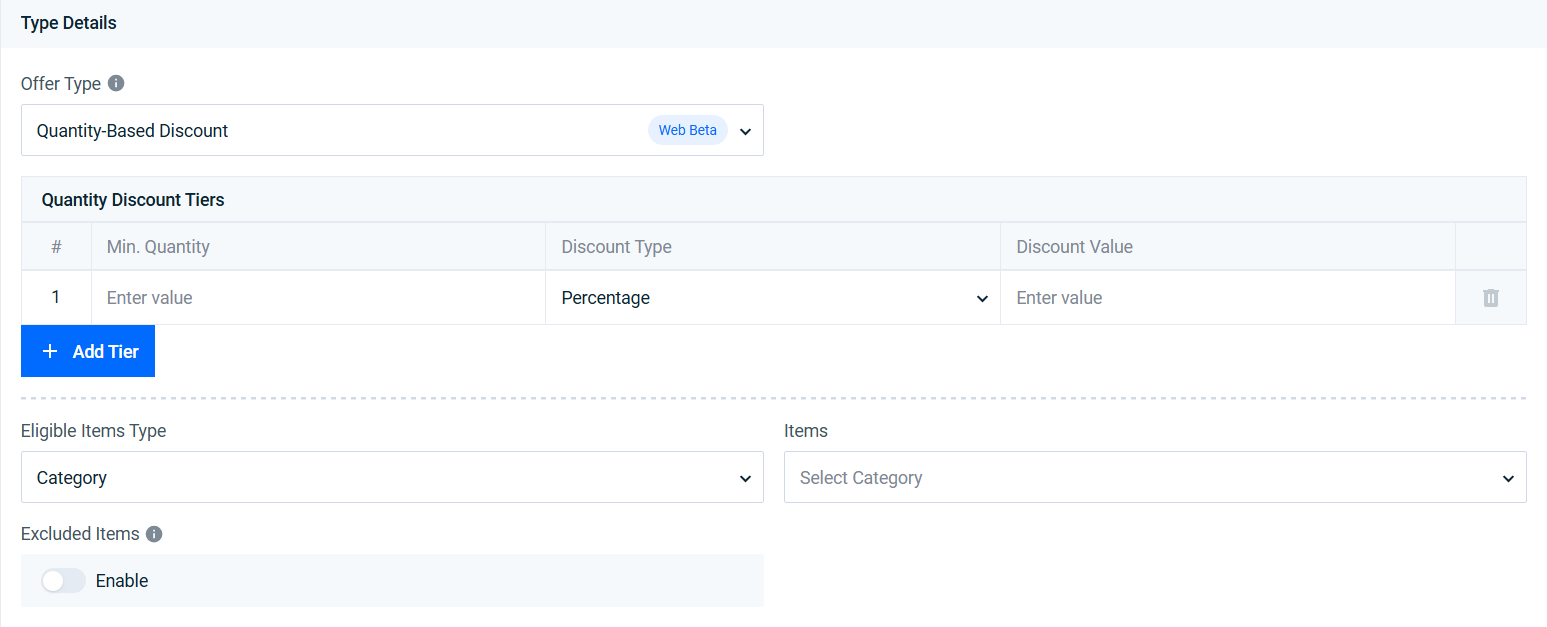
Automatically applies discounts when purchased quantities reach configured thresholds, with support for a single or multiple quantity tiers. Specify:
- Quantity Discount Tiers (required): a dynamic table that includes for each tier: the tier number (automatic), the minimum quantity, the discount type (percentage or fixed amount), and the discount value. Click “Add Tier” to add new tiers; at least one tier is required, and the quantity values for each tier must be unique.
- Eligible Items Type (required): Category, Product, or Item Group.
- Items (conditional): appears only if the type isn’t “All.”
- Excluded Items (optional): a separate enable toggle; once enabled, fields for specifying the exclusion type and items appear.
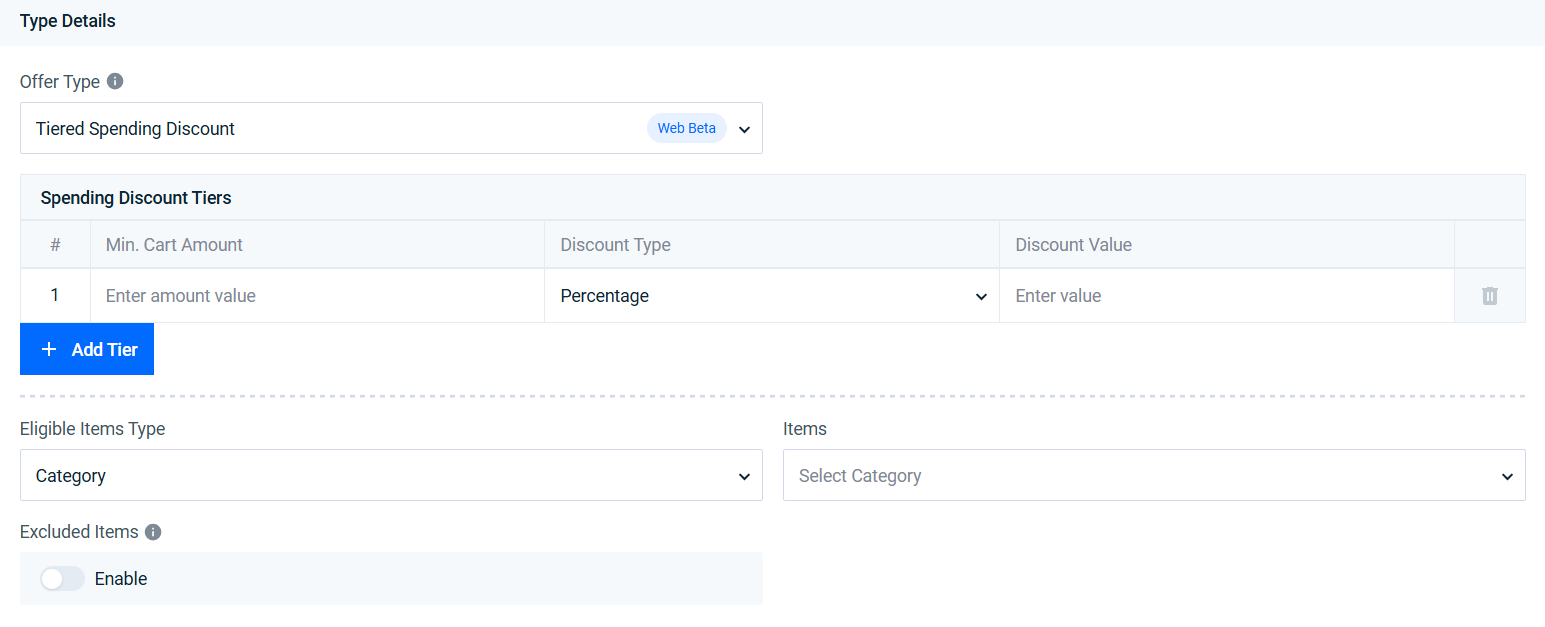
5. Tiered Spending Discount
Automatically applies discounts when specified spending thresholds on the invoice are reached, with support for a single or multiple tiers. Specify:
- Spending Discount Tiers (required): a dynamic table that includes for each tier: the tier number (automatic), the minimum cart amount, the discount type (percentage or fixed amount), and the discount value.
- Eligible Items Type (required): All, Category, Product, or Item Group.
- Items (conditional): appears only if the type isn’t “All.”
- Excluded Items (optional): a separate enable toggle; once enabled, fields for specifying the exclusion type and items appear.
6. New Customer Welcome Offer
Automatically applies a discount to the first invoice for a customer with no previous invoice history. Specify:
- Discount Type and Value (required): percentage or fixed amount.

7. Free Delivery Service
A message appears indicating that the invoice is eligible for free delivery when the eligibility conditions are met. No item selector or exclusion rules appear for this type. Specify:
- Minimum Cart Amount (required): a numeric value greater than 0 (example: 500); once the invoice total reaches or exceeds this amount, delivery becomes free.

Fifth: Excluded Items
Step 4: Add Excluded Items (Optional)
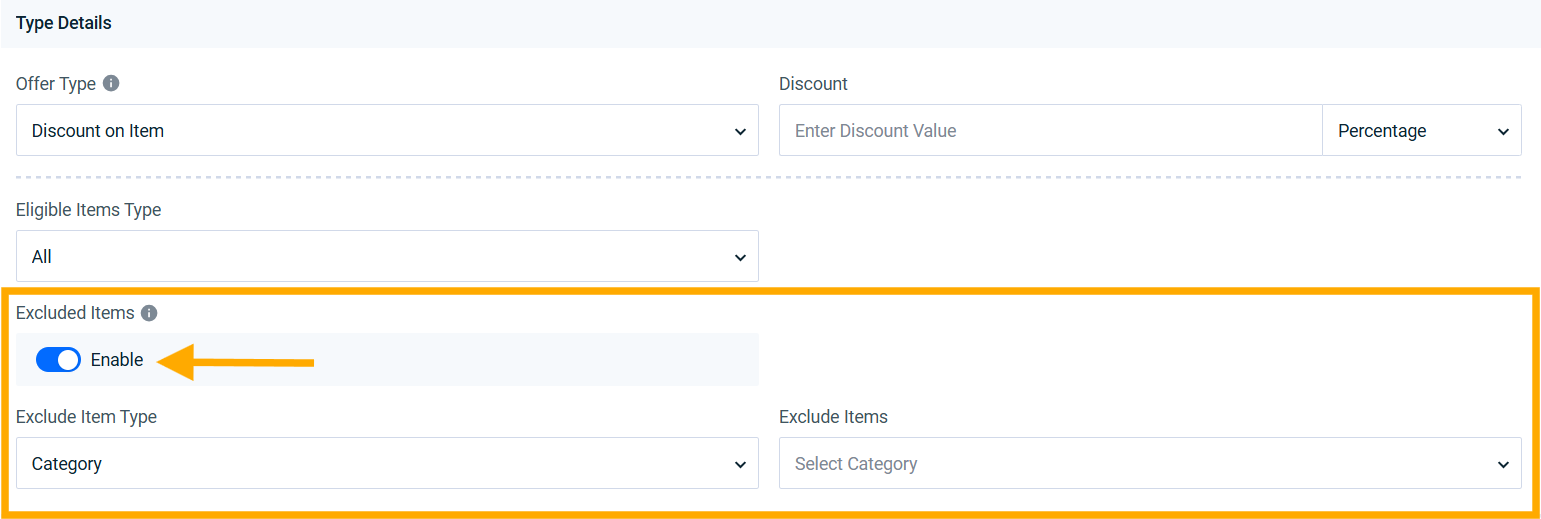
The Excluded Items feature is available for most offer types that support item targeting (except for “New Customer Welcome Offer” and “Free Delivery Service”). To add it:
- Enable the “Excluded Items” toggle, to display the configuration fields.
- Select the “Excluded Item Type” (Category, Product, or Item Group) — this can differ from the offer’s main item type.
- Select the “Excluded Items” matching the chosen type; a “Paste from Sheet” button appears next to the field when “Product” is selected, to speed up entering multiple items at once.
Sixth: Importing Products by Pasting from an External File
Step 5: Import Products Quickly (Optional)
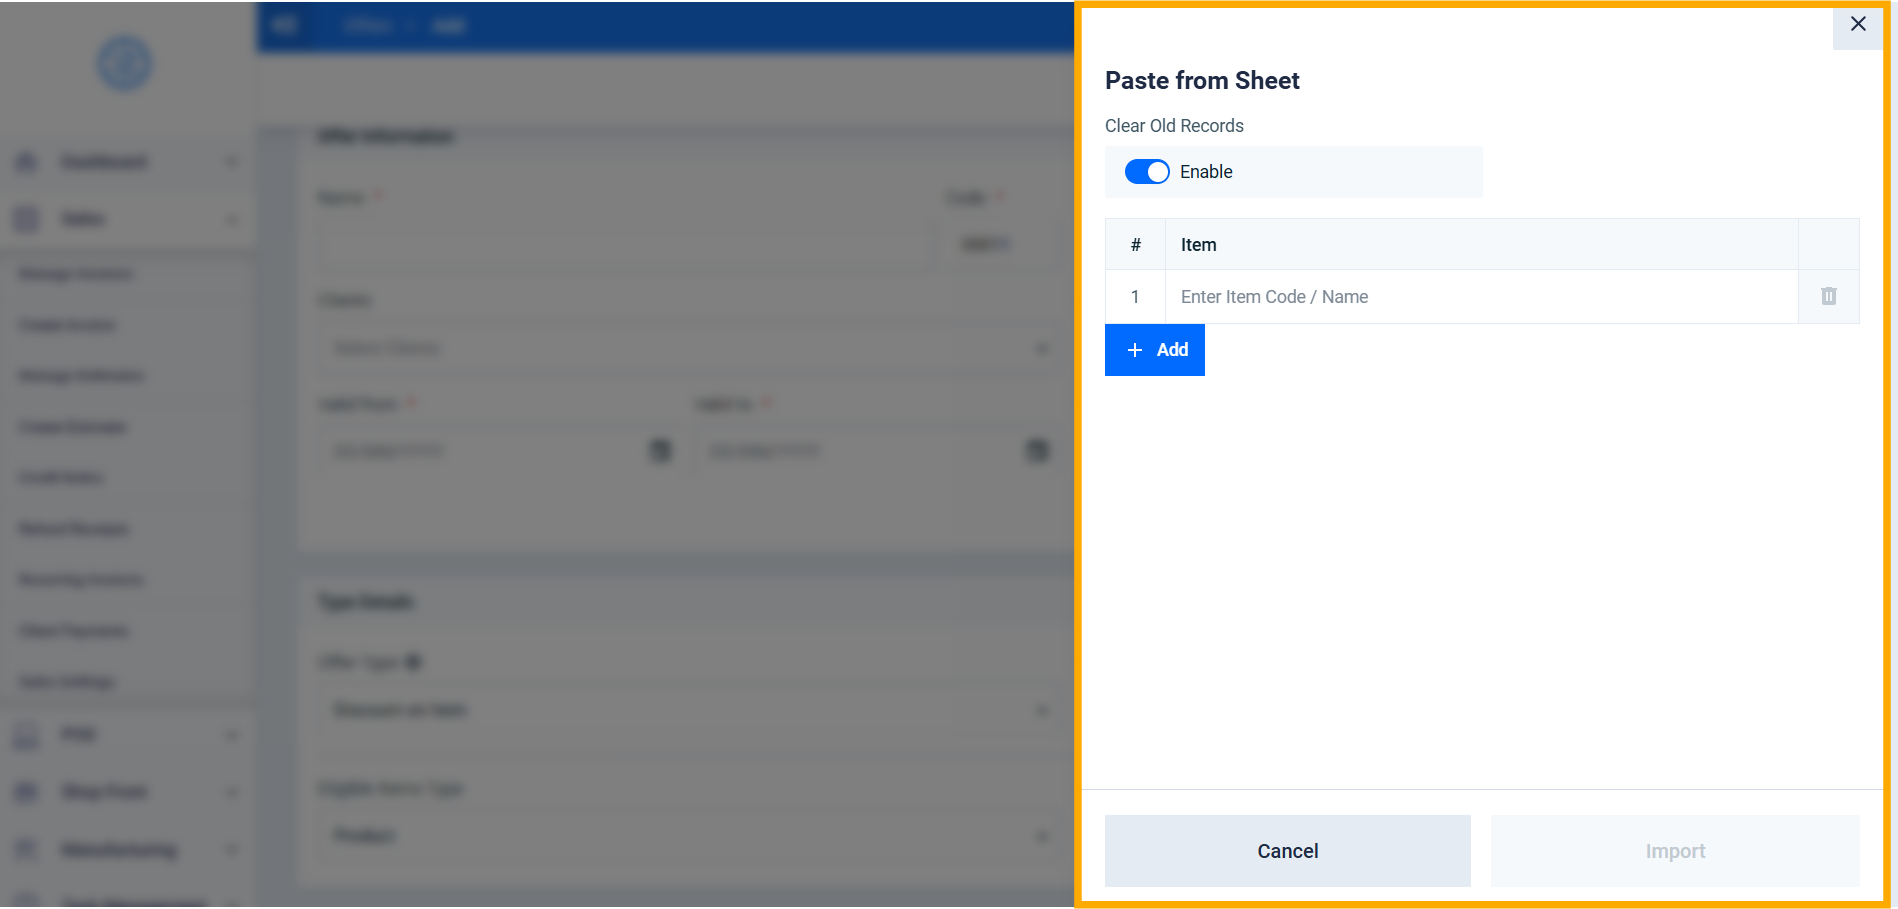
To speed up setting up large offers, next to any products selector (Products, Excluded Products, or Free Products), click the “Paste from Sheet” button (only appears when “Product” is selected as the item type), then:
- Type product codes or names manually, or copy multiple rows directly from Excel and paste them into the grid using Ctrl + V.
- Enable “Clear Old Records” to completely replace the current selection, or leave it disabled to add the new products to the current selection.
- Click “Import” to complete the process.
For more details, see the “Adding Products to an Offer by Copying from an External File” article.
Seventh: Saving and Managing the Offer
Step 6: Save the Offer
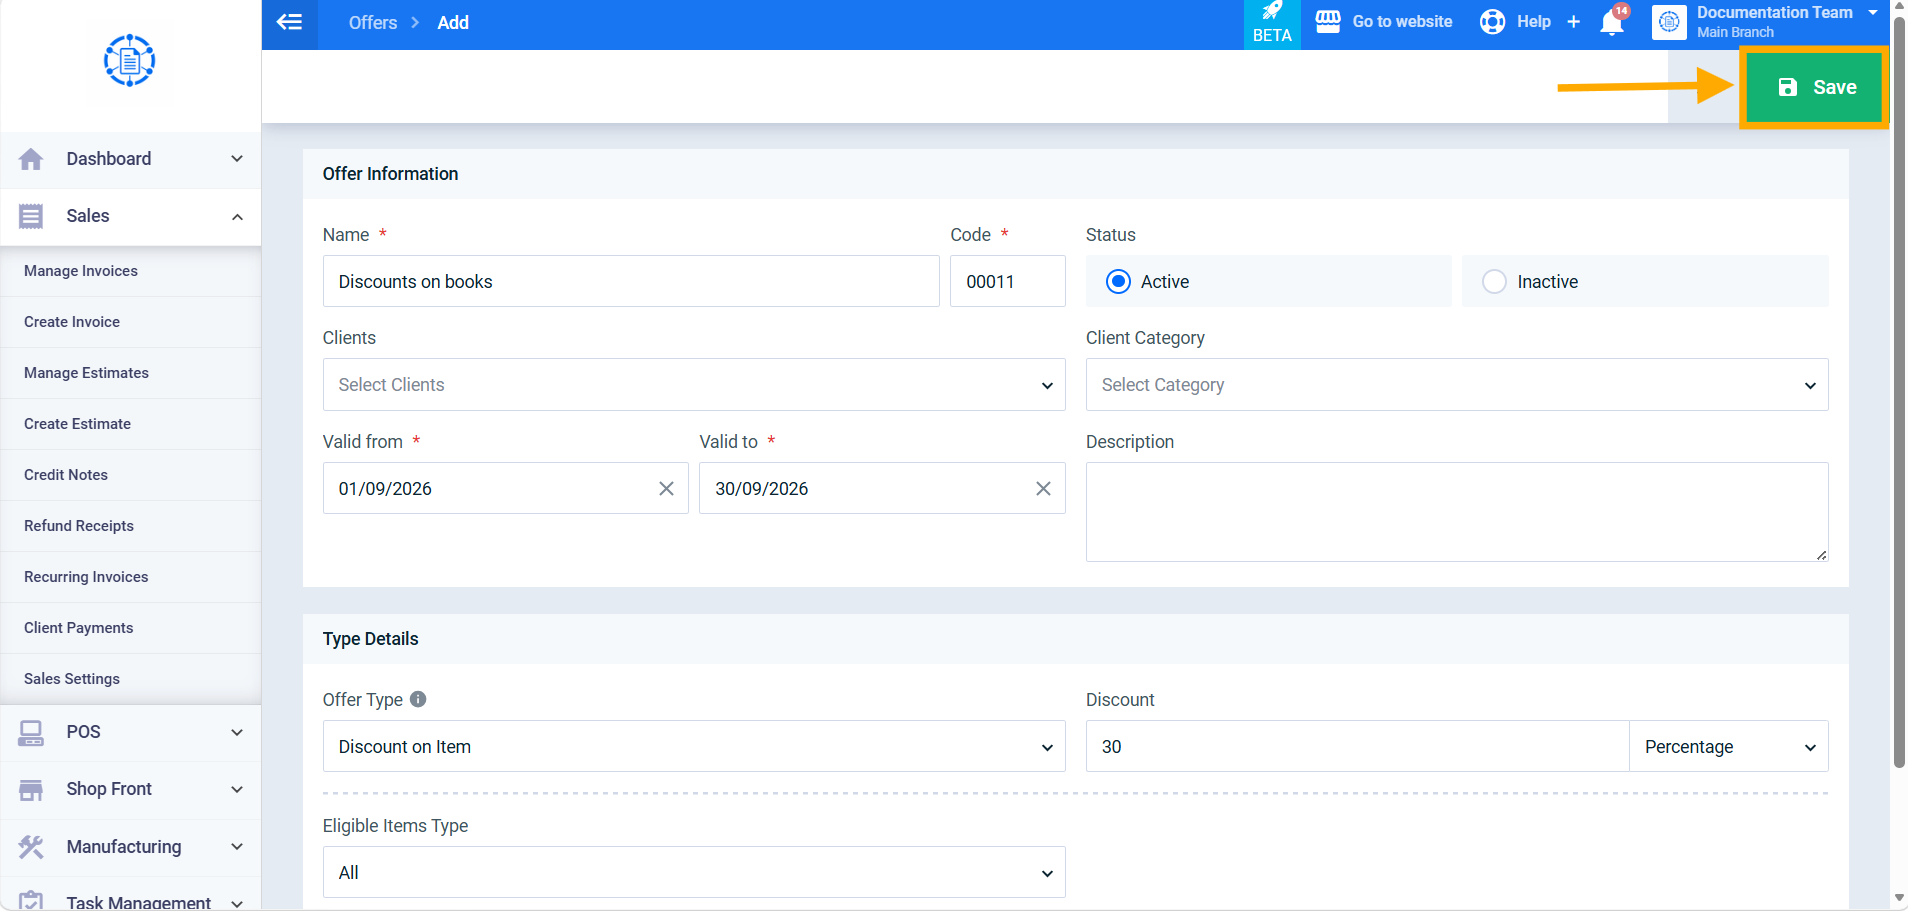
After filling in all required fields, click “Save” — the message “Offer has been saved successfully” appears.
Eighth: How Offers Are Applied to Invoices
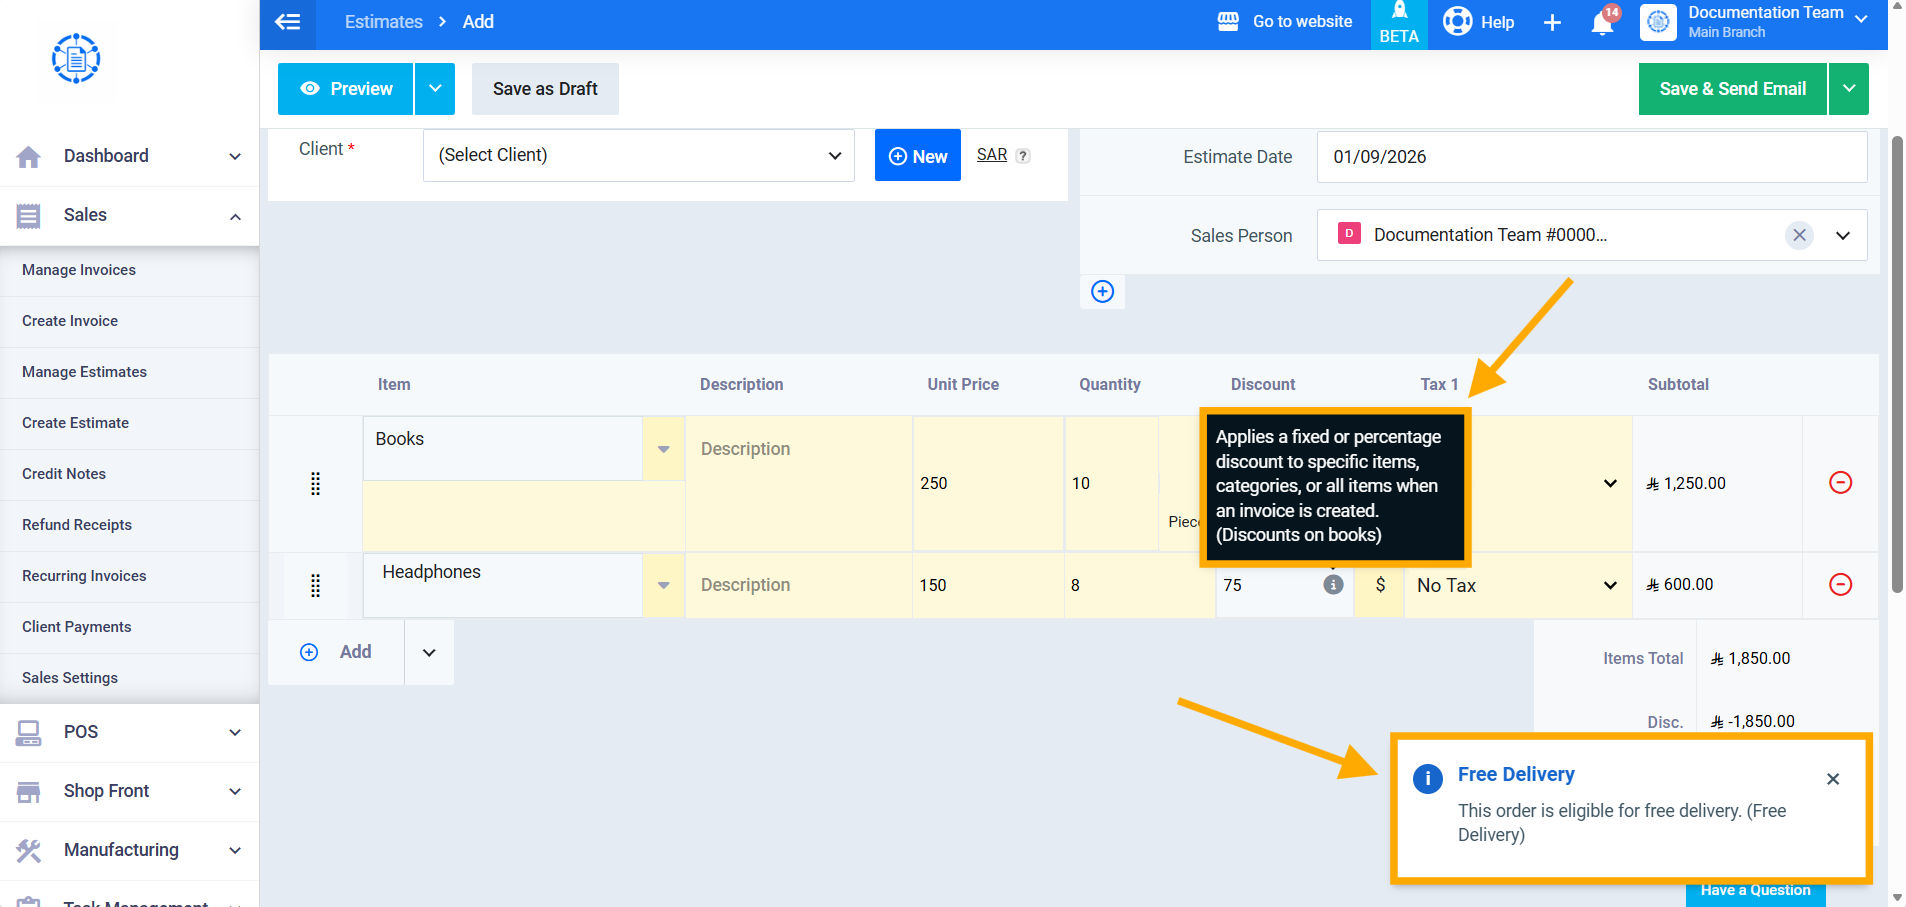
When creating or editing an invoice (or a sales order or estimate), the system automatically evaluates all active and eligible offers, and applies whichever ones apply, while displaying a notification on the invoice screen indicating the customer’s eligibility for the discount. Two indicators appear for each applied offer:
- An information icon next to the discount field on the affected line item; hovering over it shows a small window explaining how the offer type works, followed by the specific offer’s name in parentheses.
- A separate alert card at the bottom left of the invoice screen, showing the offer’s name and a brief description of the invoice’s eligibility for it (e.g., the offer’s name followed by a description of its eligibility in parentheses), with the option to close it using the “×” button.
- Compatible offers: more than one offer can be applied to the same invoice if they don’t conflict (example: a discount on beverages + a separate discount on desserts, or free delivery + a discount on a product — because they affect different components of the invoice).
- Conflicting offers: when two or more offers compete for the same item or the same discount scope, only one offer is applied — the oldest by creation date (based on the offer’s creation date in the system) — and the rest are completely ignored for that specific item, without affecting the total or appearing as an applied offer.
- If one of the conflicting offers has a broader scope (such as a discount on “all products”) and the other is narrower (a discount on a specific product), the narrower offer is applied to that specific product, while the broader offer remains in effect on the rest of the eligible products not affected by the narrower offer.
- Applied offers are automatically recalculated every time line items are added, removed, or edited on the invoice.