




A Complete Guide to Multiple Printers in the POS Mobile App
In restaurants, cafes, and multi-department businesses, printing everything on a single printer creates chaos — kitchen tickets get mixed with receipts and bar orders queue up at the cashier. With the Multiple Printers feature in the POS app, the system distributes printing automatically: kitchen items go to the kitchen printer, drinks go to the bar printer, and the invoice receipt always prints at the cashier.
This guide walks you through a complete restaurant scenario step by step: from adding printers, to creating groups and linking categories, all the way to the first order that distributes automatically.
Before You Begin
- Printer groups are managed online only — make sure your device is connected to the internet before starting setup.
- If the Branch feature is enabled, settings are independent per branch, and any change from the app or the web dashboard syncs on both sides.
- Prepare your product categories in advance (e.g., Food, Drinks) — they are the foundation of print routing.
The Scenario: A Restaurant with a Kitchen, Bar, and Cashier
We will apply this guide to a sample restaurant that needs three print destinations:
- Kitchen printer: Prints tickets for items in the “Food” category.
- Bar printer: Prints tickets for the “Drinks” category.
- Cashier printer: Prints customer receipts for all orders.
The goal: When an order containing a meal and a drink is placed, the meal ticket prints in the kitchen, the drink ticket prints at the bar, and the receipt prints at the cashier — automatically, with no manual selection from the cashier.
Step 1: Adding the Three Printers
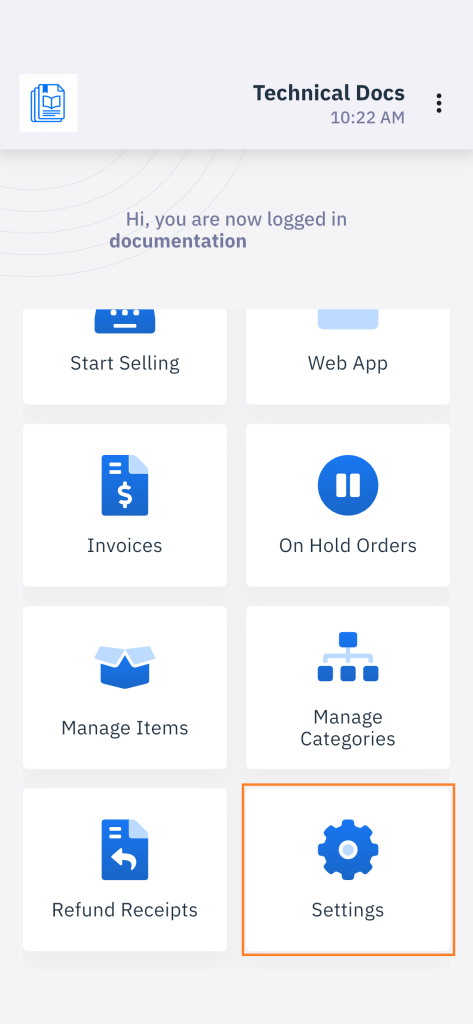
- From the app’s control panel, tap the “Settings” card.
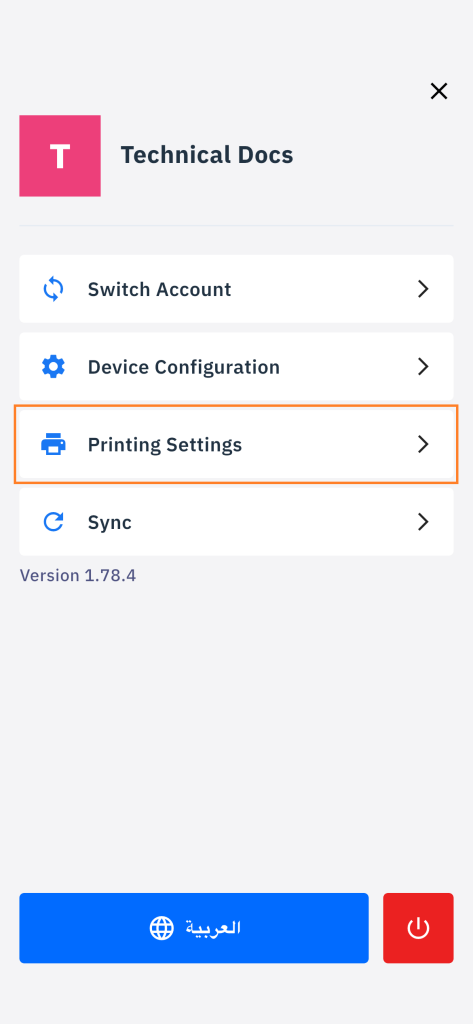
- Tap “Printer Settings“.
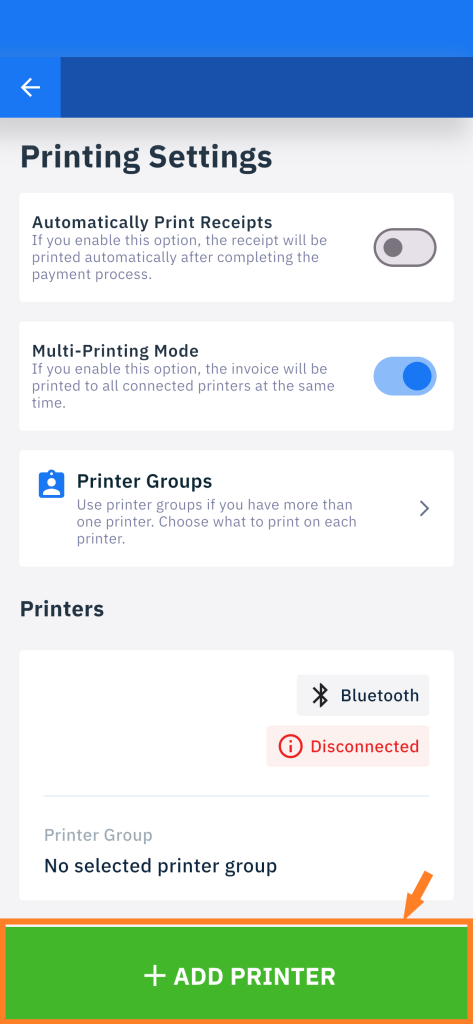
 Tap the “Add Printer” button.
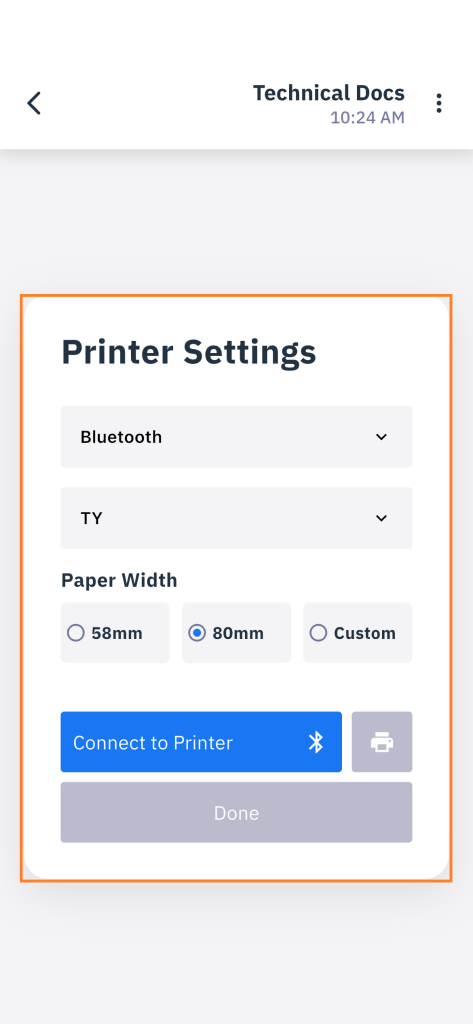
- Select the printer model from the “Printer Model” list, then select the connection method — Bluetooth, Internet/Wi-Fi, or Wi-Fi Printing — and complete the connection.
- Once connected, the app automatically detects the model and fills in the “Paper Width” field with the standard default for that model (80mm or 58mm). You can change it manually to any value: 80mm, 58mm, or a custom width.
- Repeat the steps for all three printers: Kitchen, Bar, and Cashier.
Automatic paper width detection supports models from: Epson, Bixolon, Star Micronics, Sunmi, and Rongta.
Step 2: Creating Printer Groups
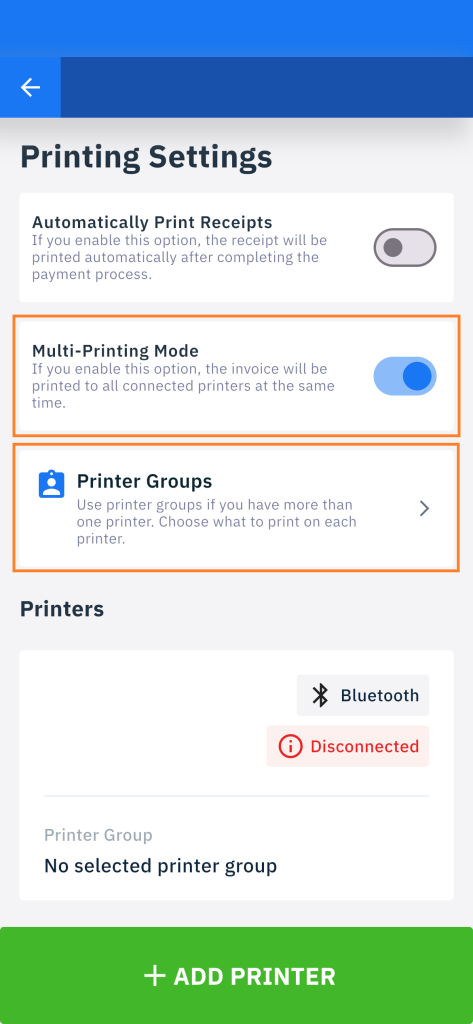
- From the printers list, tap “Manage Printer Groups.”
- You will find the Receipts (Cashier) group already present — it is a protected group that covers all categories and cannot be deleted. The only change available is its name. Name it, for example: “Cashier.”
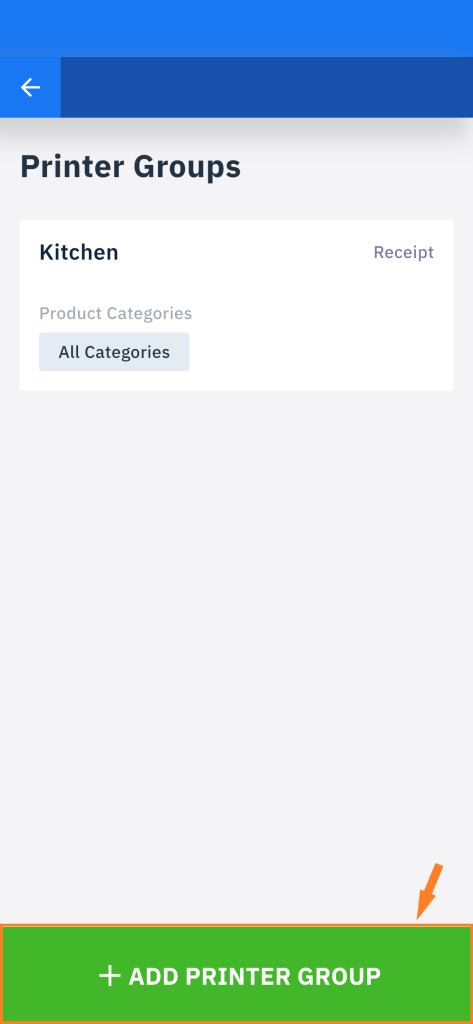
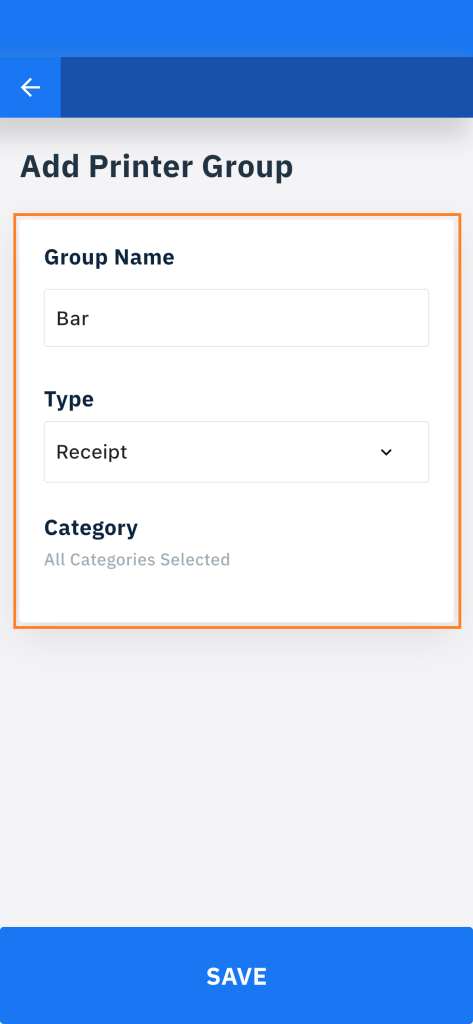
- Create the “Kitchen” group: enter the name, set the type to “Order”, and link it to the “Food” category.
- Create the “Bar” group: in the same way, link it to the “Drinks” category.
The group name must be unique within the branch, and an “Order” type group cannot be saved without at least one category assigned. You can create any number of additional groups — all their tickets print in order format.
Step 3: Linking Printers to Groups
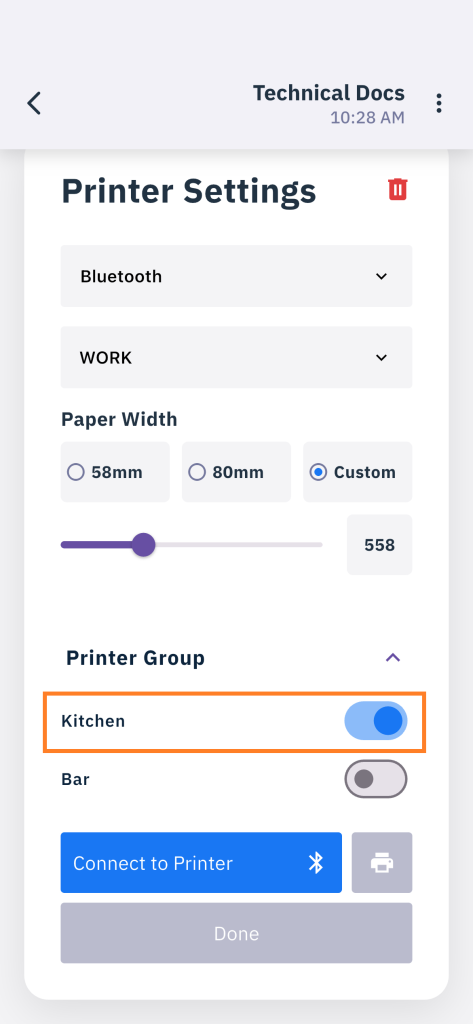
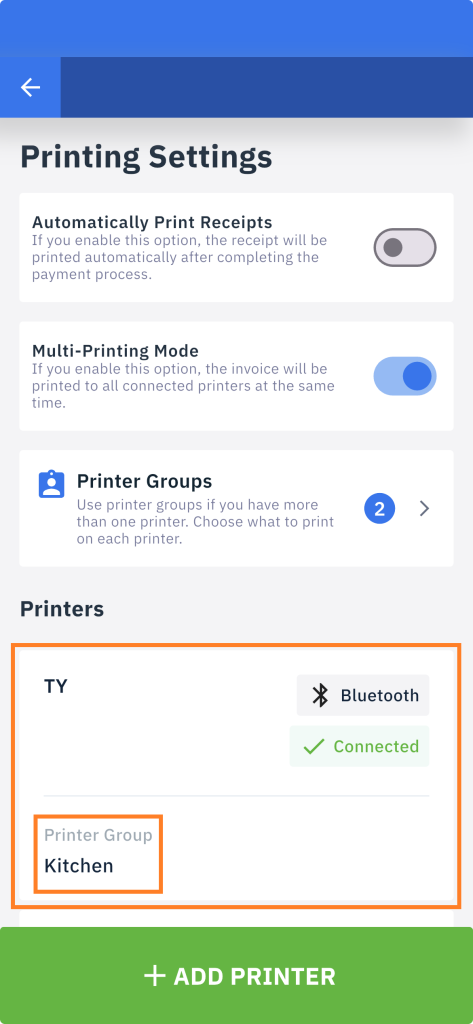
From each printer’s settings, assign its groups: Kitchen printer → “Kitchen” group, Bar printer → “Bar” group, Cashier printer → “Cashier” group. The Receipts group must always remain linked to at least one printer to ensure a receipt is always printed at least once.
A single printer can also be linked to more than one group — such as a small printer serving both the cashier and the bar. If one of its groups is the Receipts group, the invoice prints first followed by the remaining groups’ tickets in assignment order.
Step 4: Test Your First Distributed Order
Place a test order containing two items: a meal (Food category) and a drink (Drinks category). When the order is completed:
- The system automatically splits the order based on its item categories.
- The meal ticket prints on the kitchen printer and the drink ticket prints on the bar printer — each station sees only what concerns it.
- The customer invoice receipt prints on the cashier printer.
If one of the printers is disconnected during printing, an error message appears on the POS screen with the option to reprint manually after resolving the issue — no ticket is lost.
Printing an Invoice to Specific Groups
When tapping “Print” from the invoice view screen:
- Single group in the account: Printing proceeds directly using the standard behavior.
- More than one group: A popup appears with two options: “Standard Print” (default) using the standard print method, or selecting one or more groups to have the invoice automatically printed on all printers linked to the selected groups.