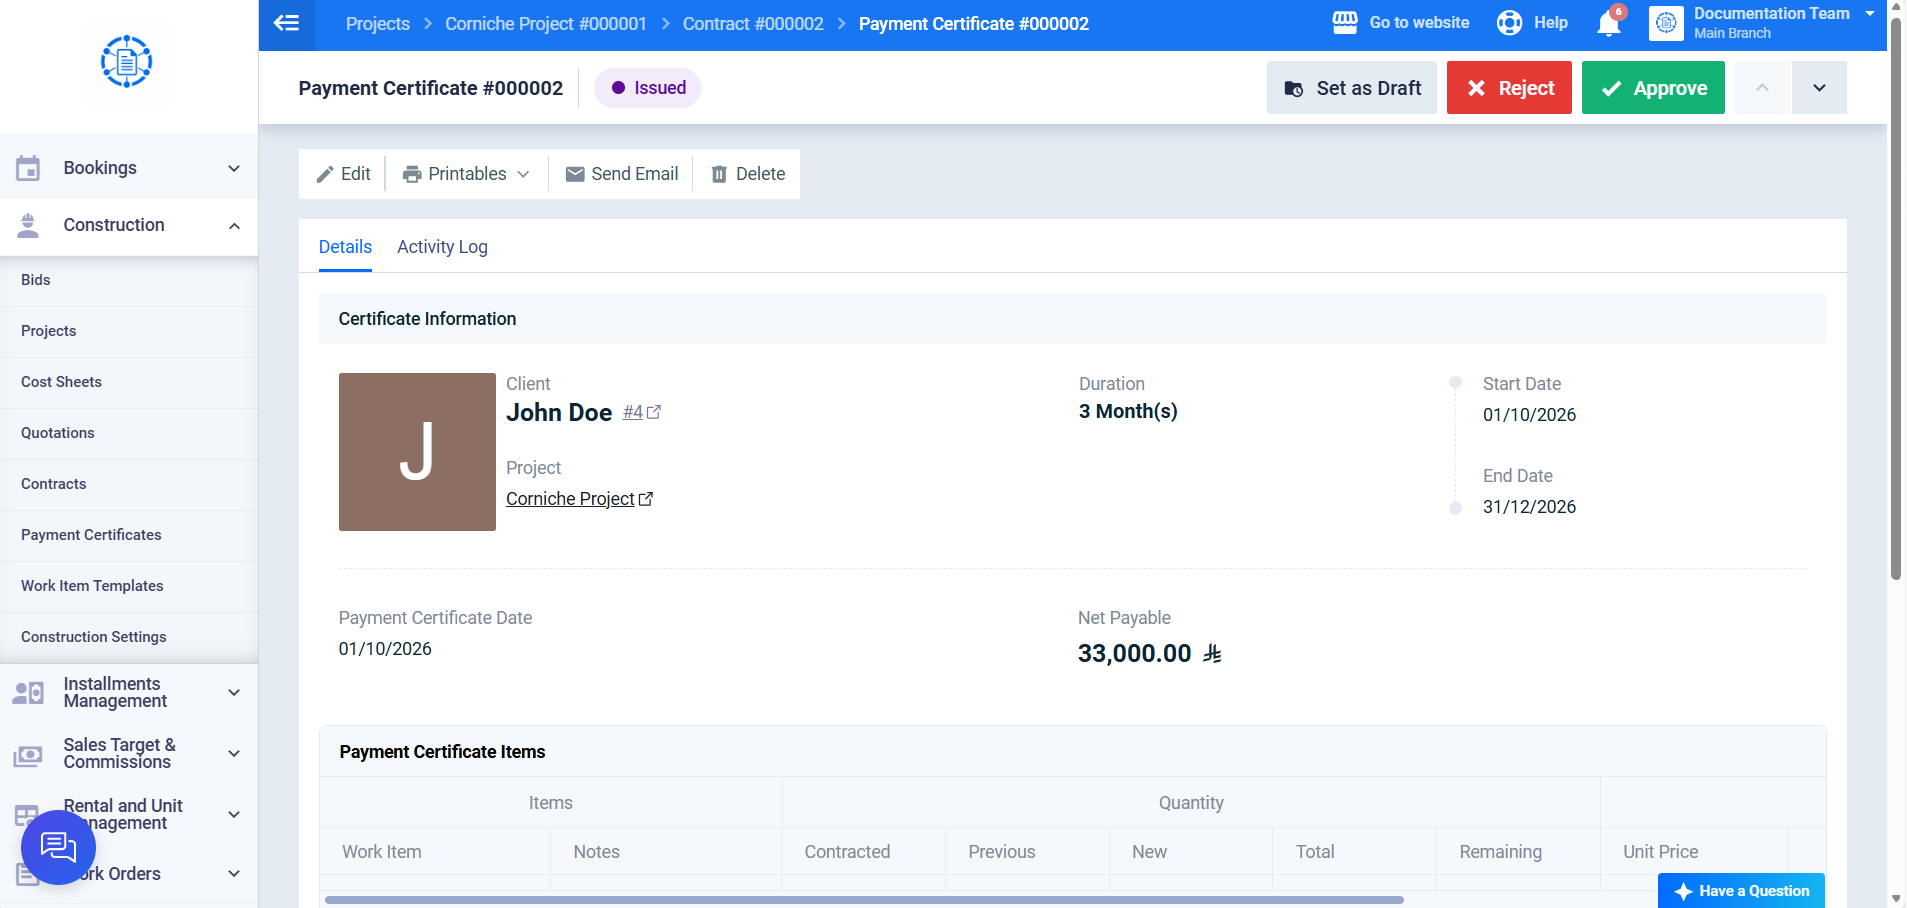

Guide to Creating a New Payment Certificate
A payment certificate lets you specify the quantities actually executed for the contract’s work items, and calculate the net amount payable for the current work done. This article explains the steps to create a new payment certificate, and details how its value is calculated.
Steps to Creating a New Payment Certificate
First: Accessing the Add Payment Certificate Screen
Step 1: Open the Project
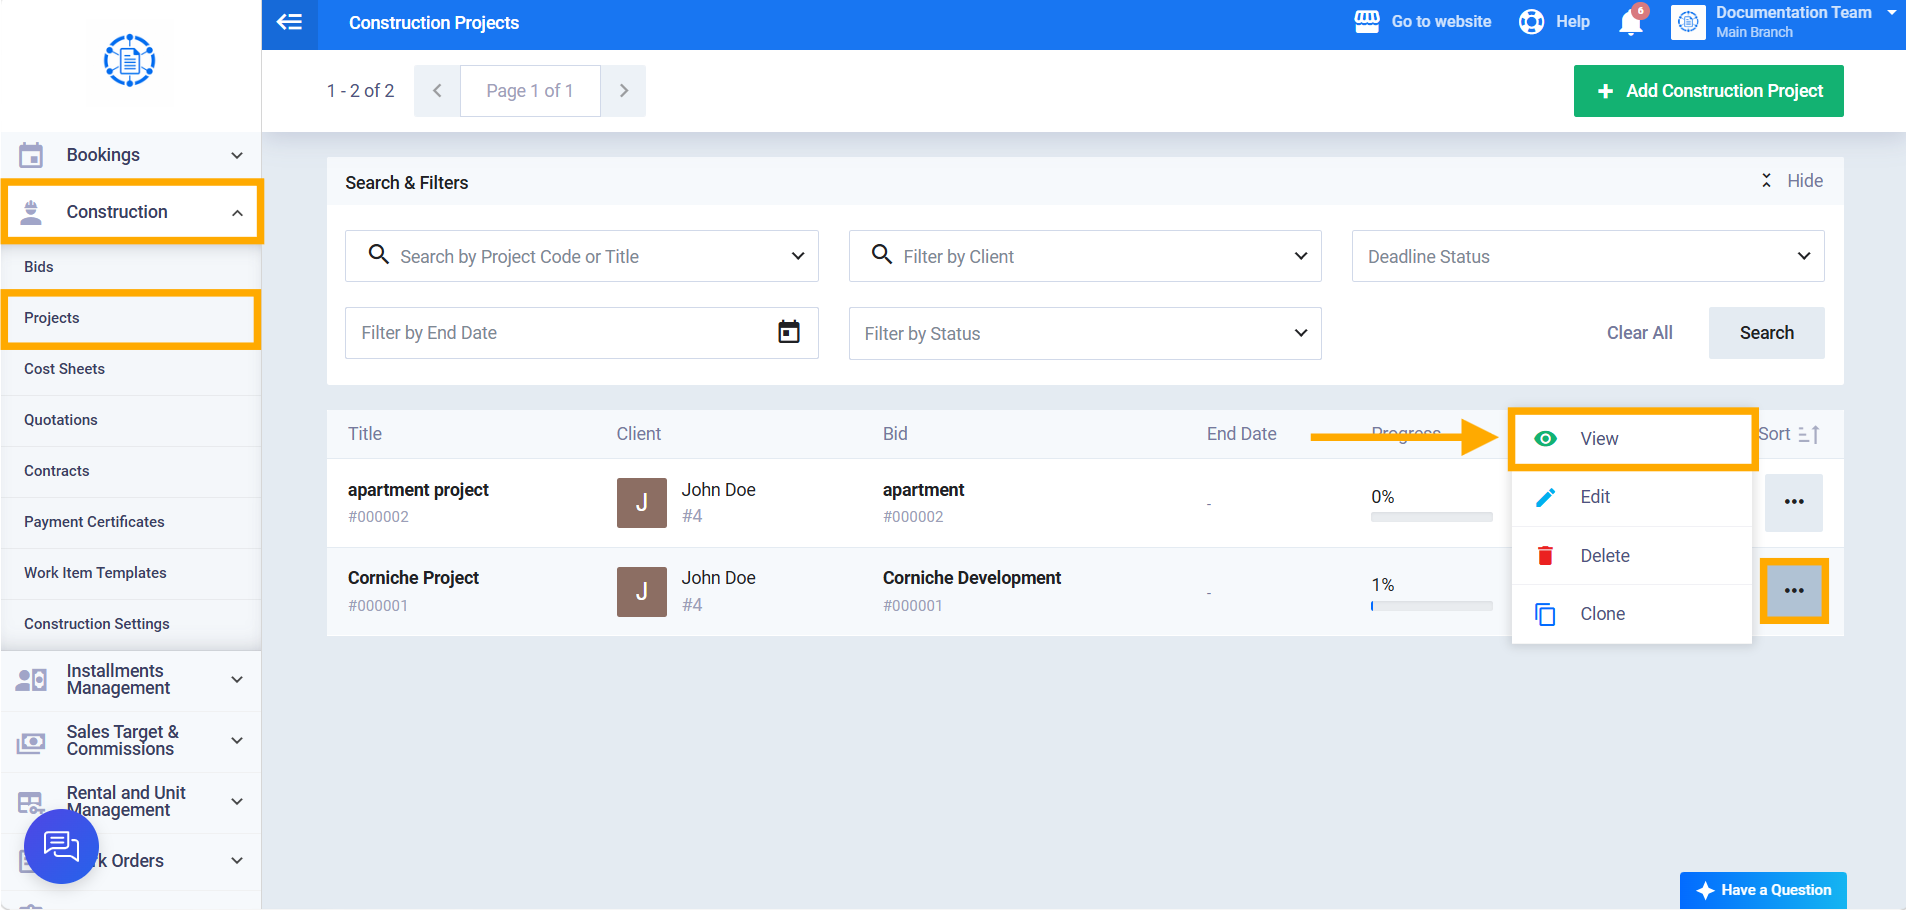
From the sidebar menu, click on “Construction,” then go to “Projects,” and click the “View” button for any project that has a contract with “Active” status.
Step 2: Add a Payment Certificate
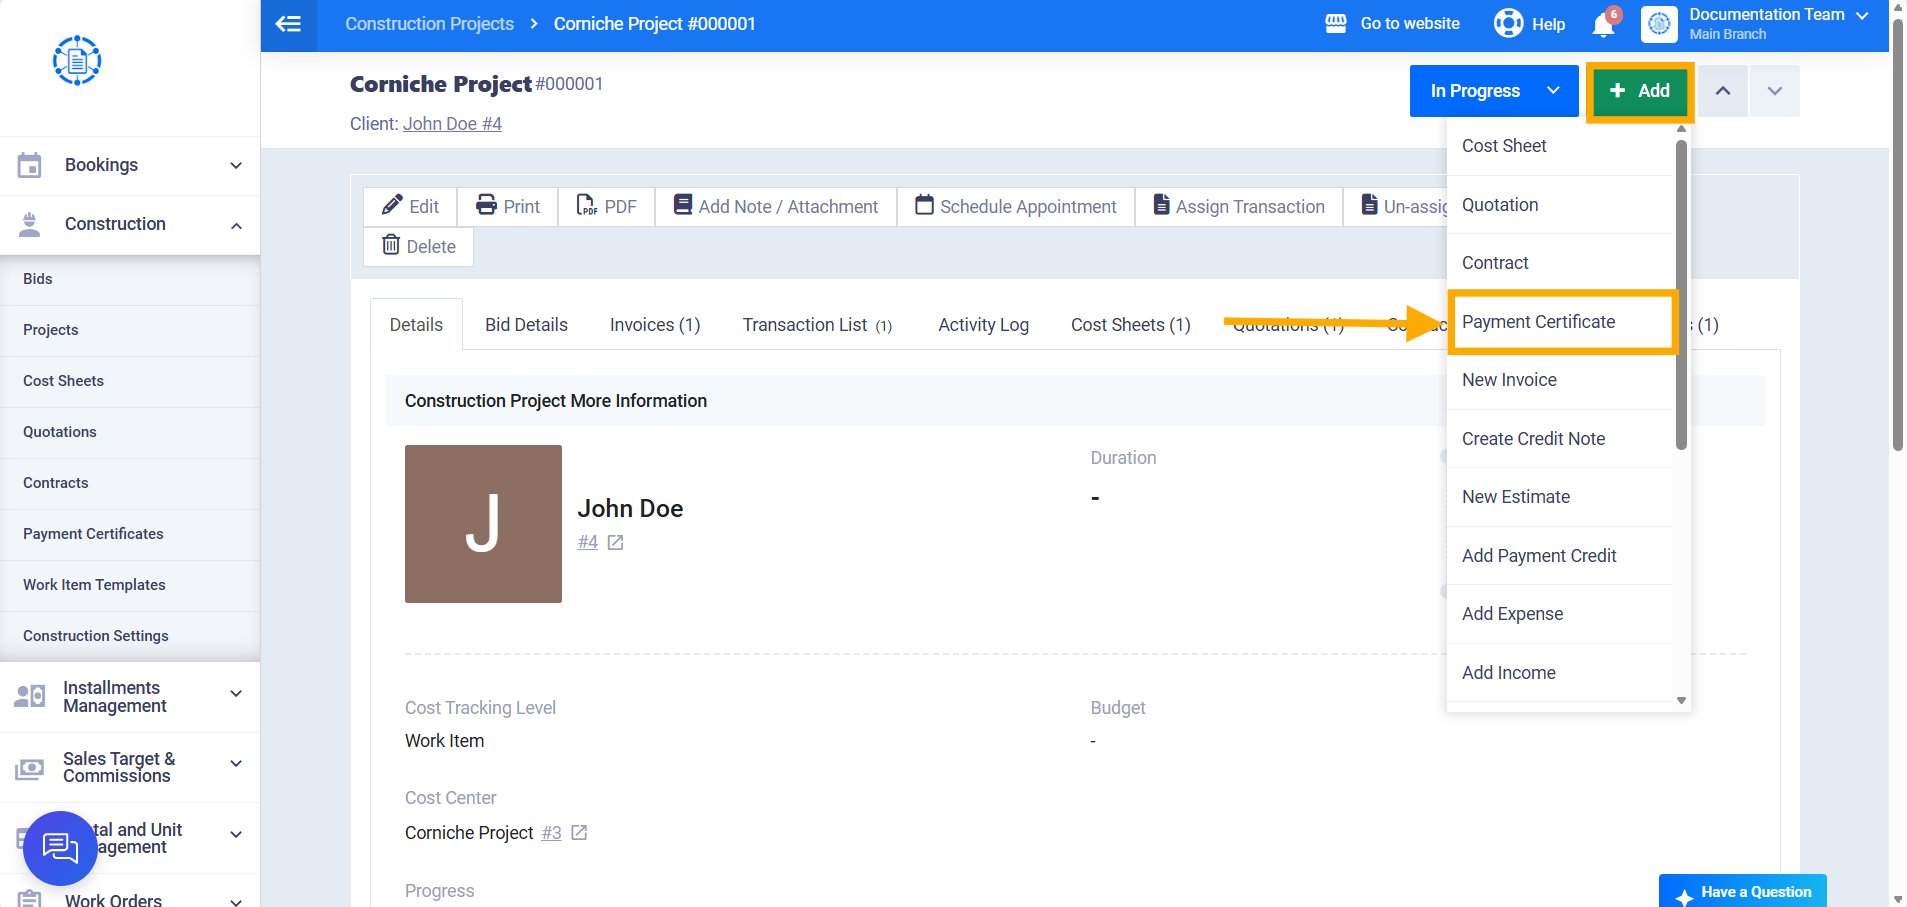
Click the “Add” button at the top of the screen, then select “Payment Certificate” from the list.
Second: Filling In the Payment Certificate Information
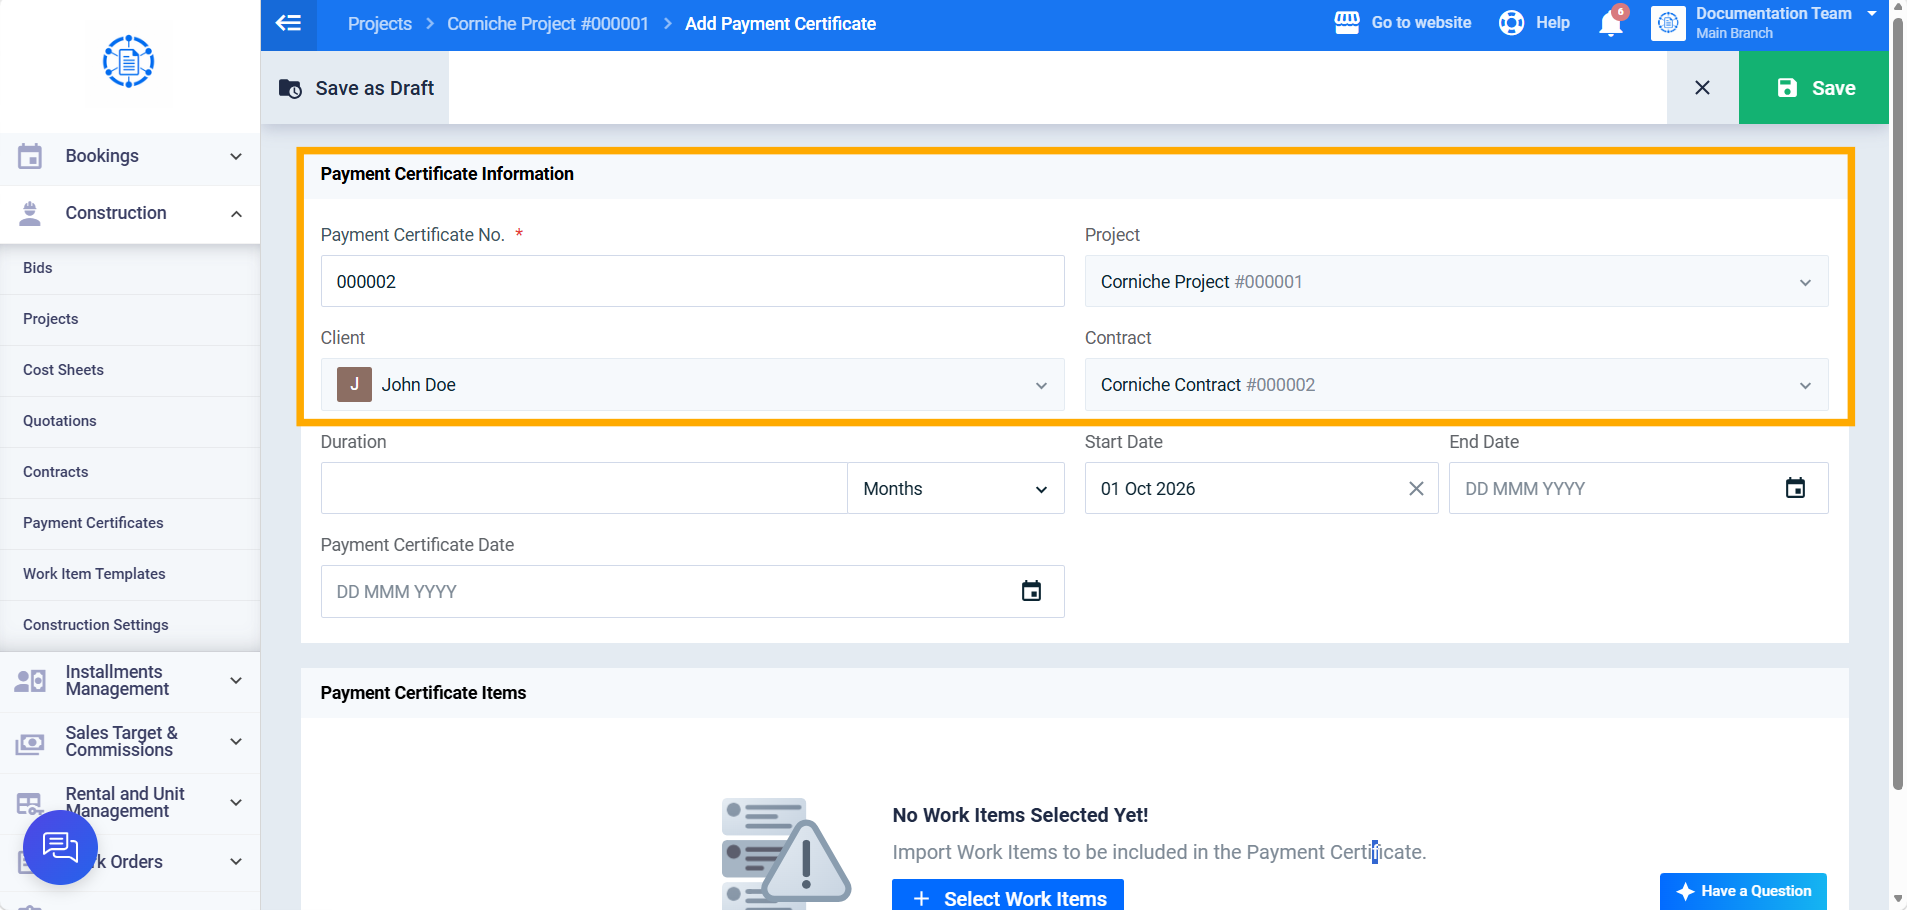
Step 3: Reviewing the Basic Data
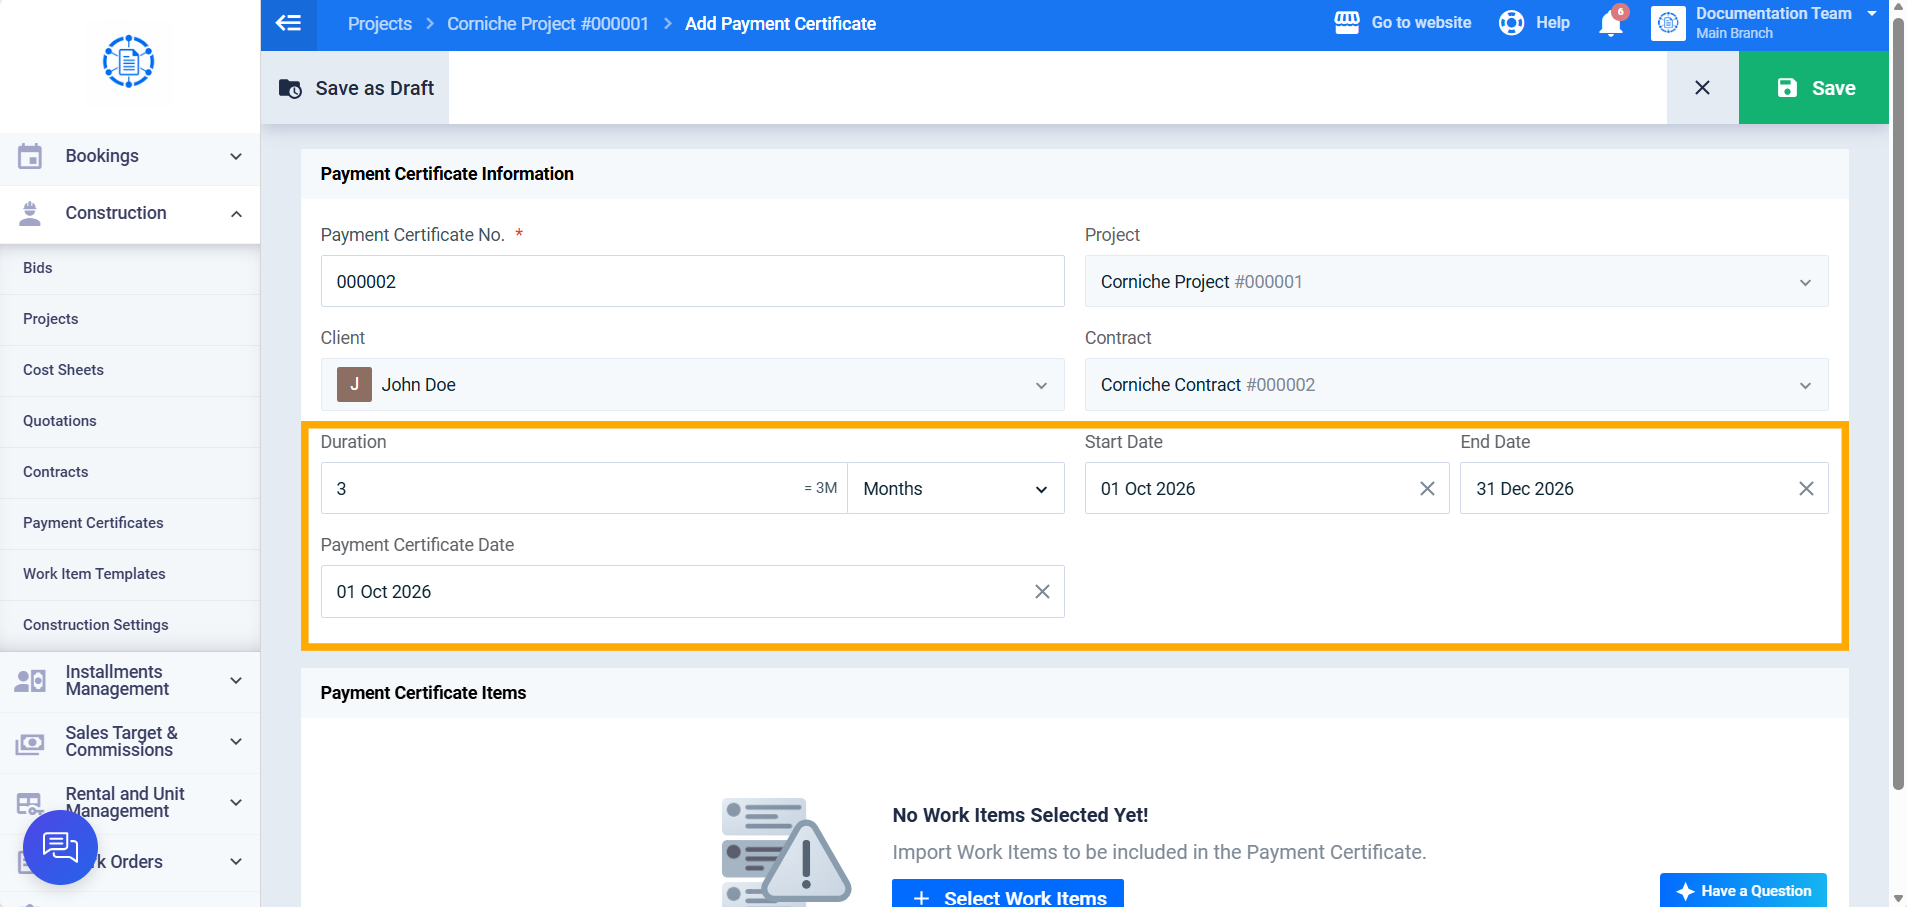
The “Payment Certificate No.” appears automatically. The “Project” and “Client” fields are read-only, and are automatically filled in from the current project. The “Contract” field is automatically selected (since there’s usually only one active contract), and is disabled for editing.
Step 4: Specifying the Duration and Dates
Enter the “Duration” (optional) and select its unit (days or months), or specify the “Start Date” and “End Date” directly (both required). Any field is calculated automatically if the other two are filled in. The start date must not be after the end date, and must not overlap with the period of a previous payment certificate for the same work item.
You can also specify the “Payment Certificate Date” (optional) independently.
Step 5: Selecting the Items
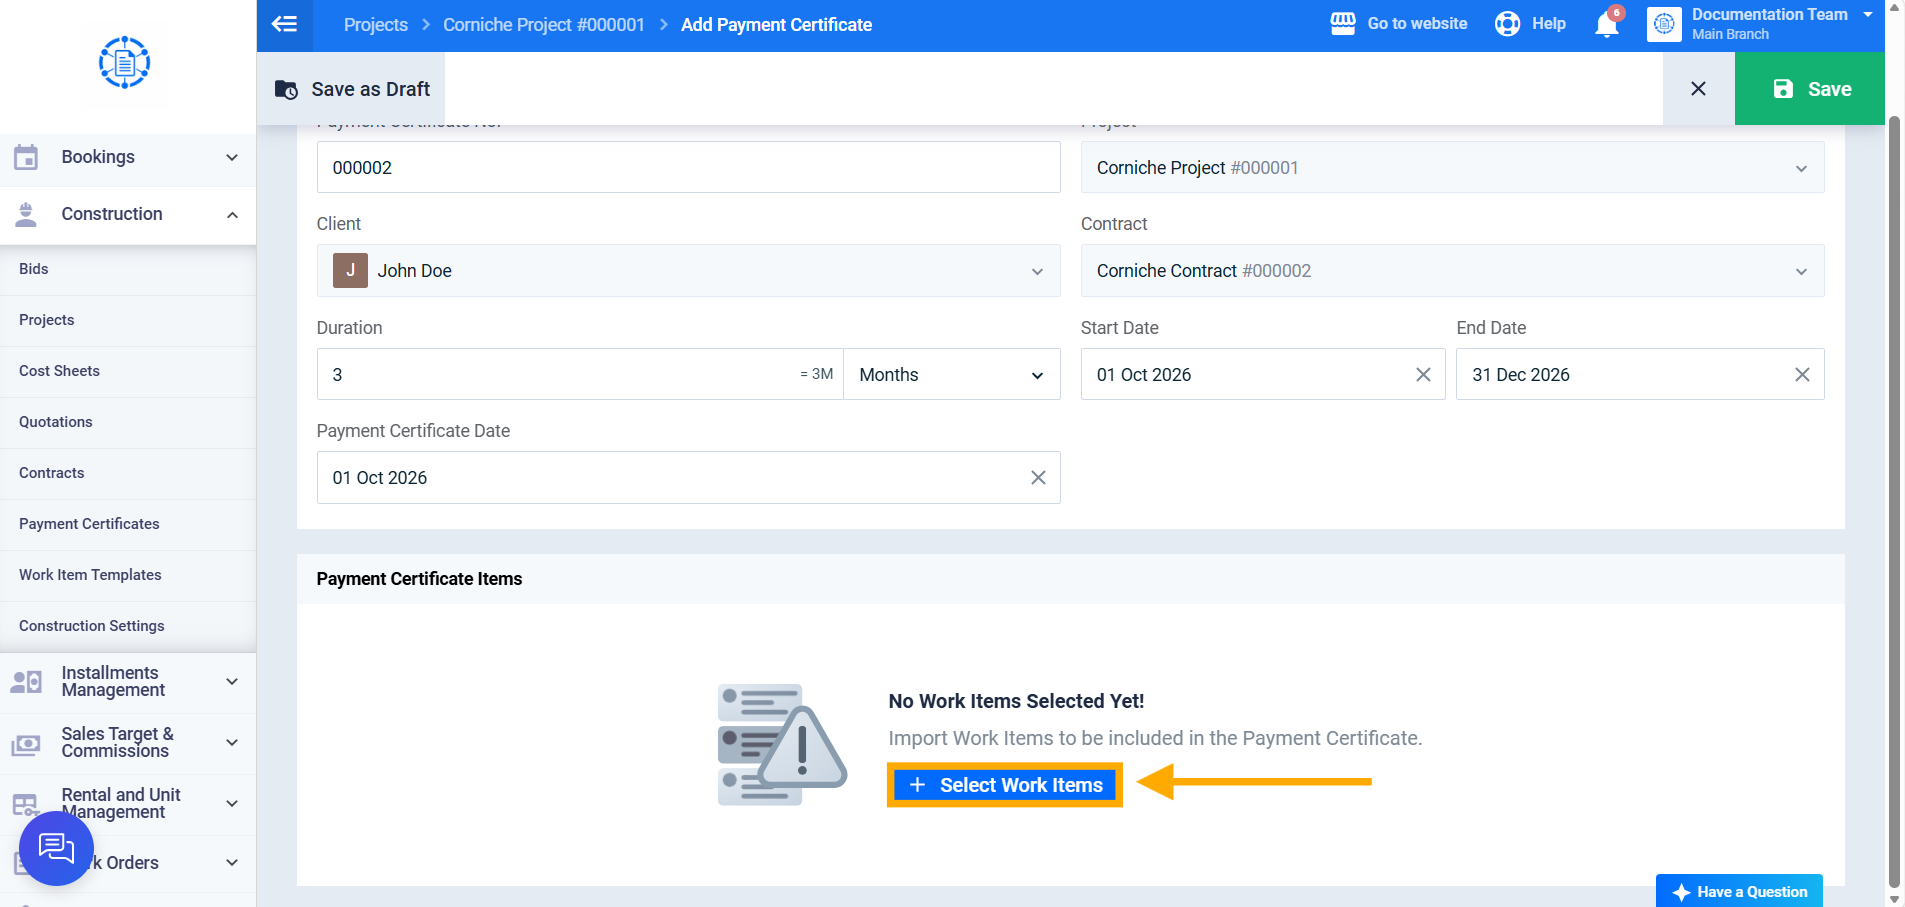
Click the “Select Work Items” button (required) in the payment certificate items section.
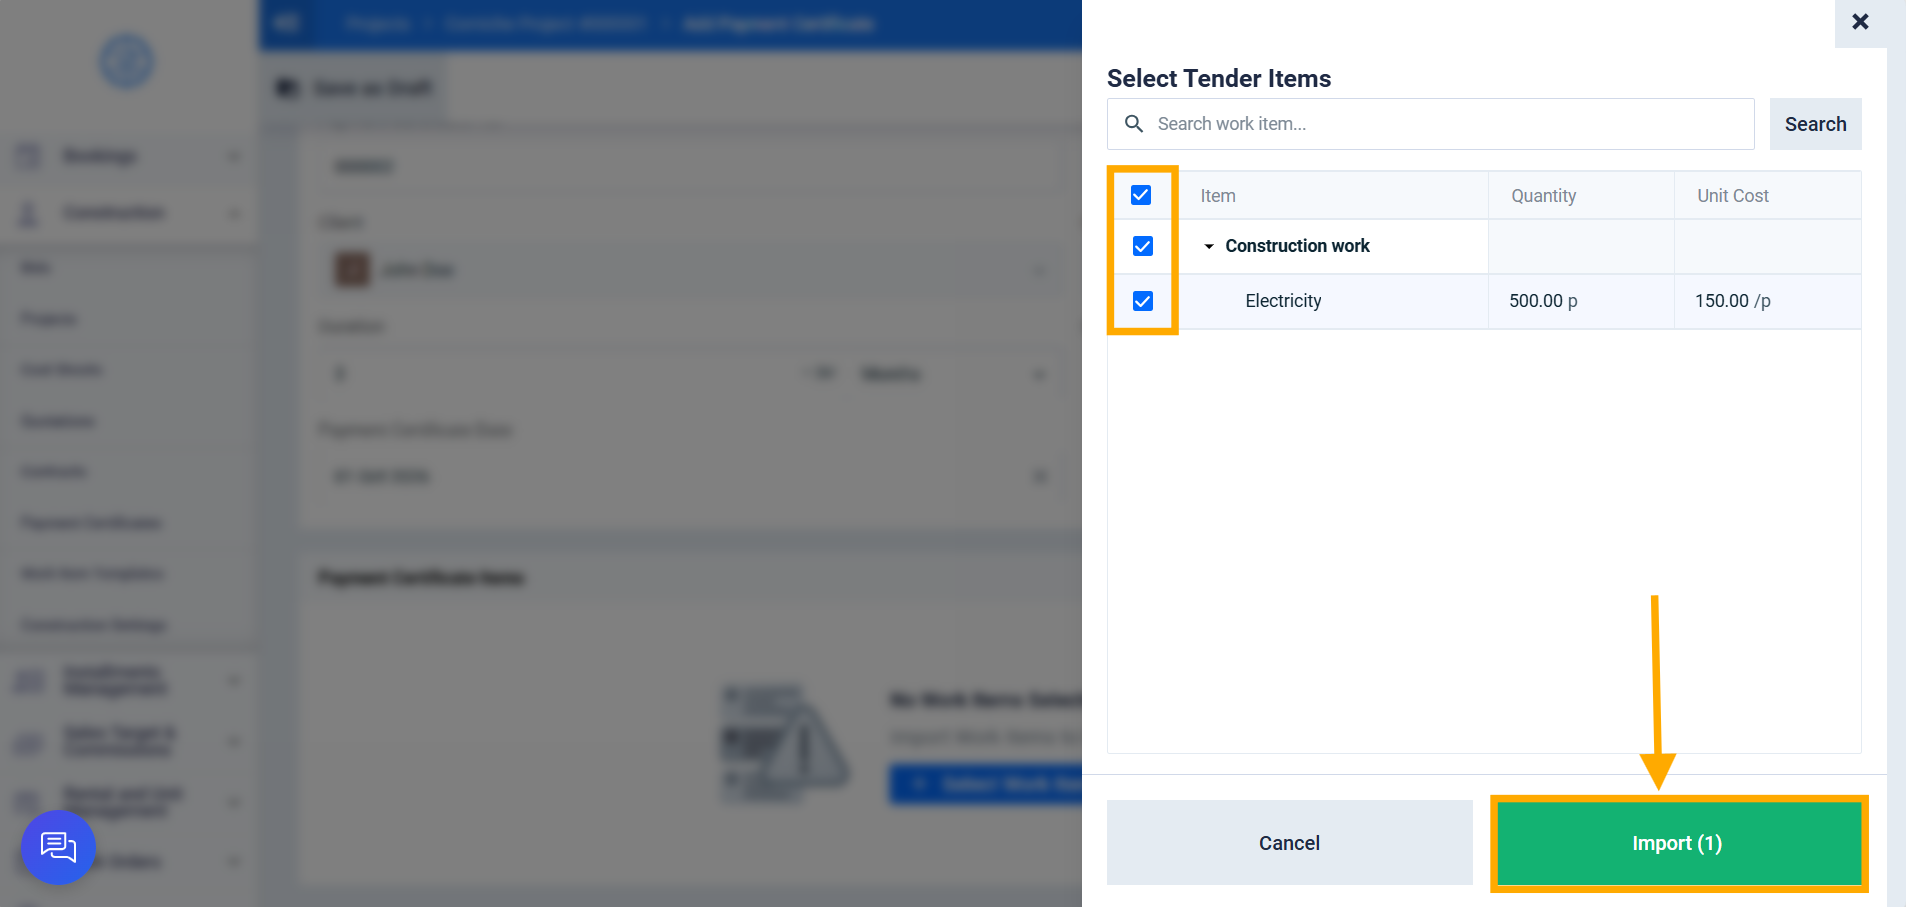
A side panel opens showing the contract’s work item tree, with the ability to search by the main tender, sub-tender, or work item title. Select the required items, then click the “Import” button to generate the payment certificate table.
Third: Filling In the Payment Certificate Items
Step 6: Entering the Executed Quantities
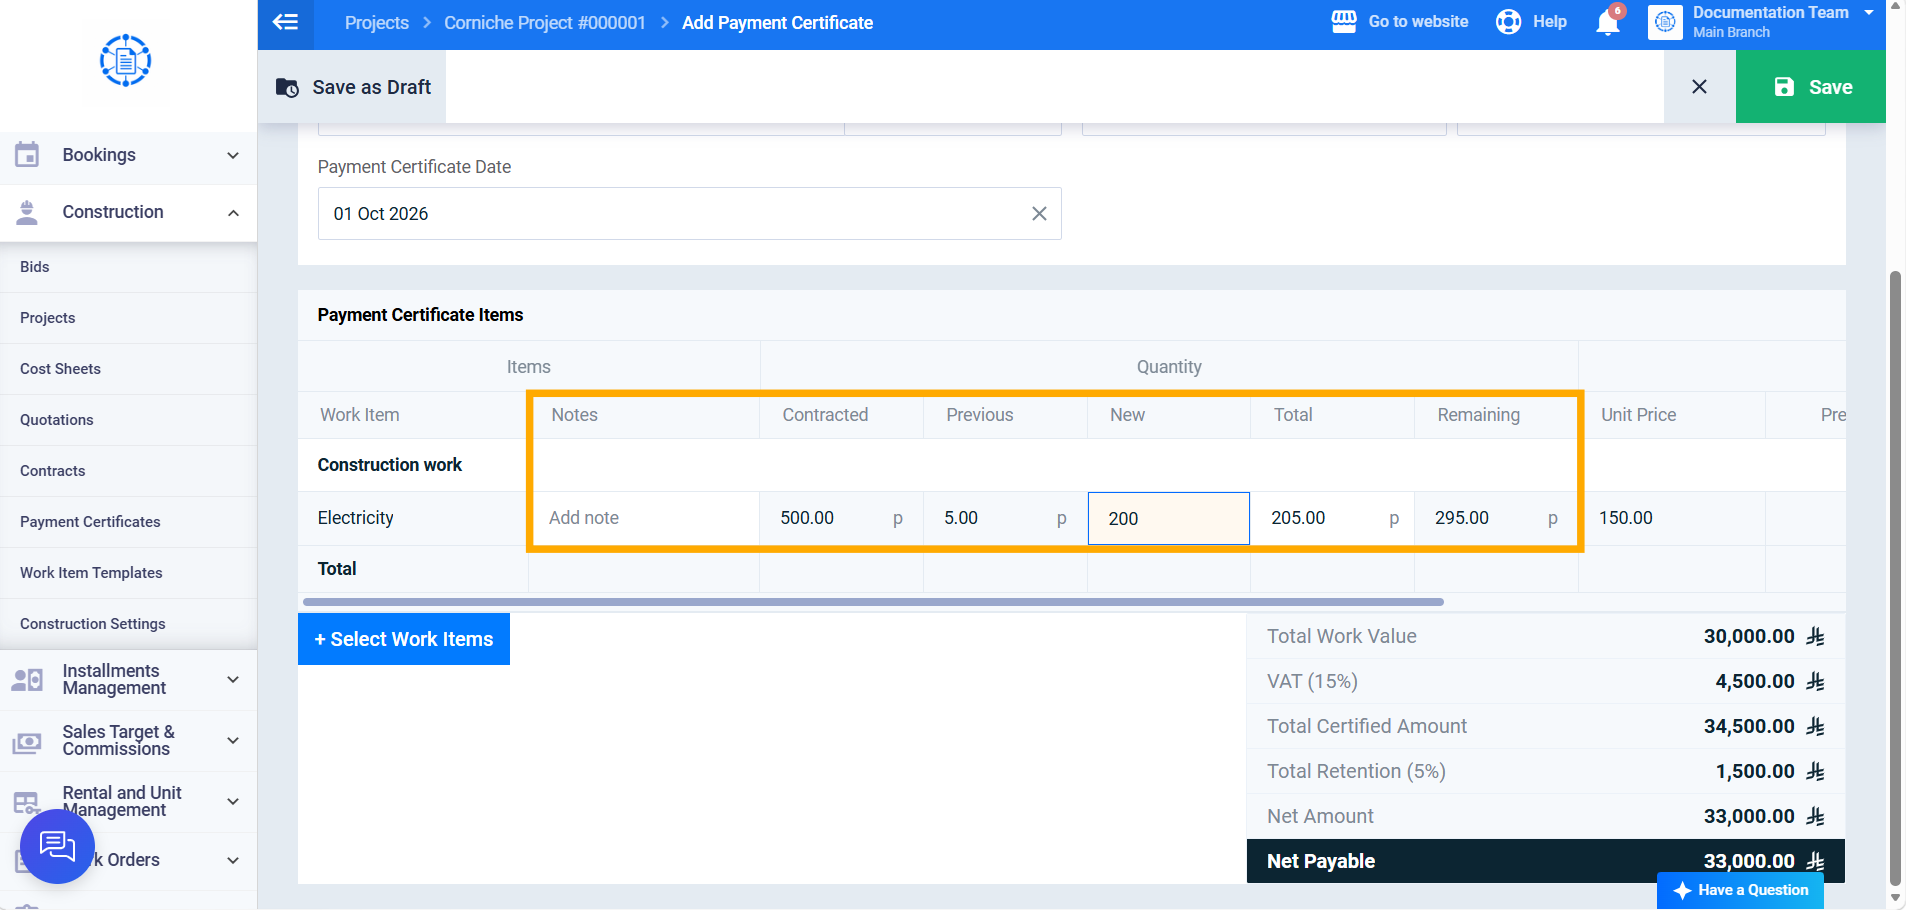
For each work item in the table, enter the currently executed quantity in the “New” field — the rest of the fields are calculated automatically:
- Contracted: the total quantity contracted on the contract.
- Previous: the quantities previously executed from “Approved” payment certificates.
- Total: New + Previous.
- Remaining: Contracted − Total.
You can also add “Notes” (optional) for each item.
Step 7: Reviewing the Price Values
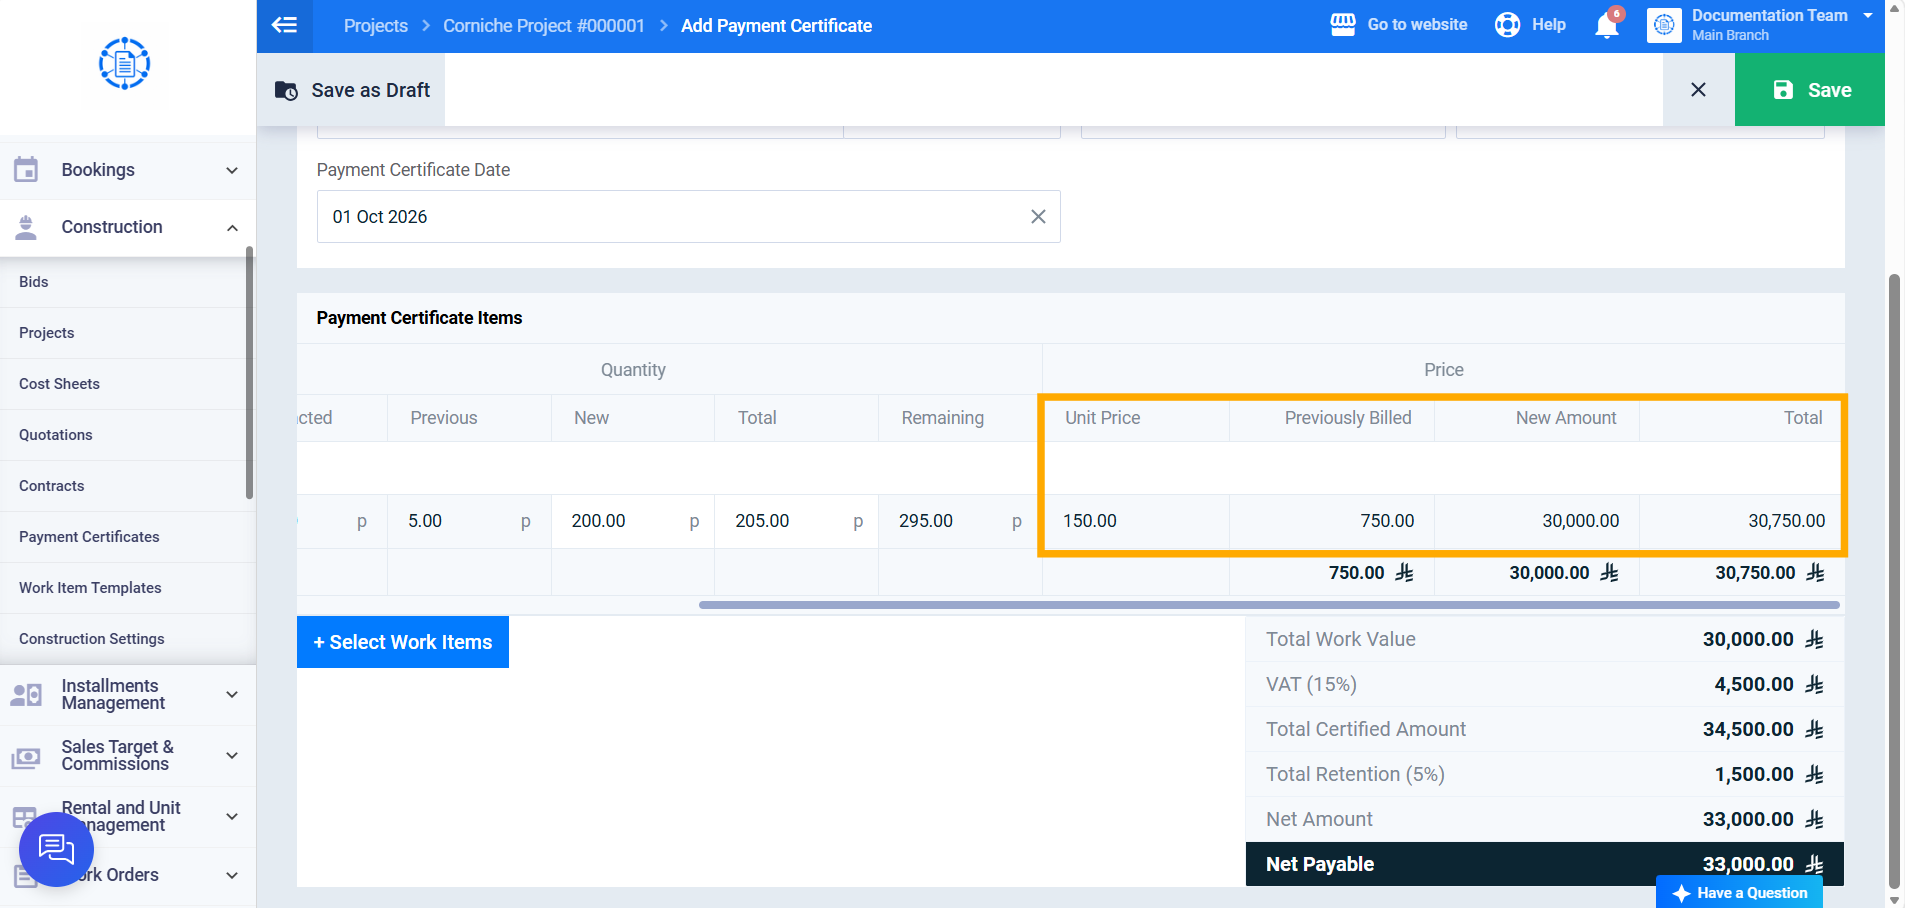
The “Unit Price” column shows the work item’s sale rate from the contract, and “Previously Billed” shows the amount previously billed on earlier payment certificates, while “New Amount” (new quantity × unit price) and “Total” are calculated automatically.
Fourth: Reviewing the Payment Certificate Summary
Step 8: Reviewing the Totals and Retention
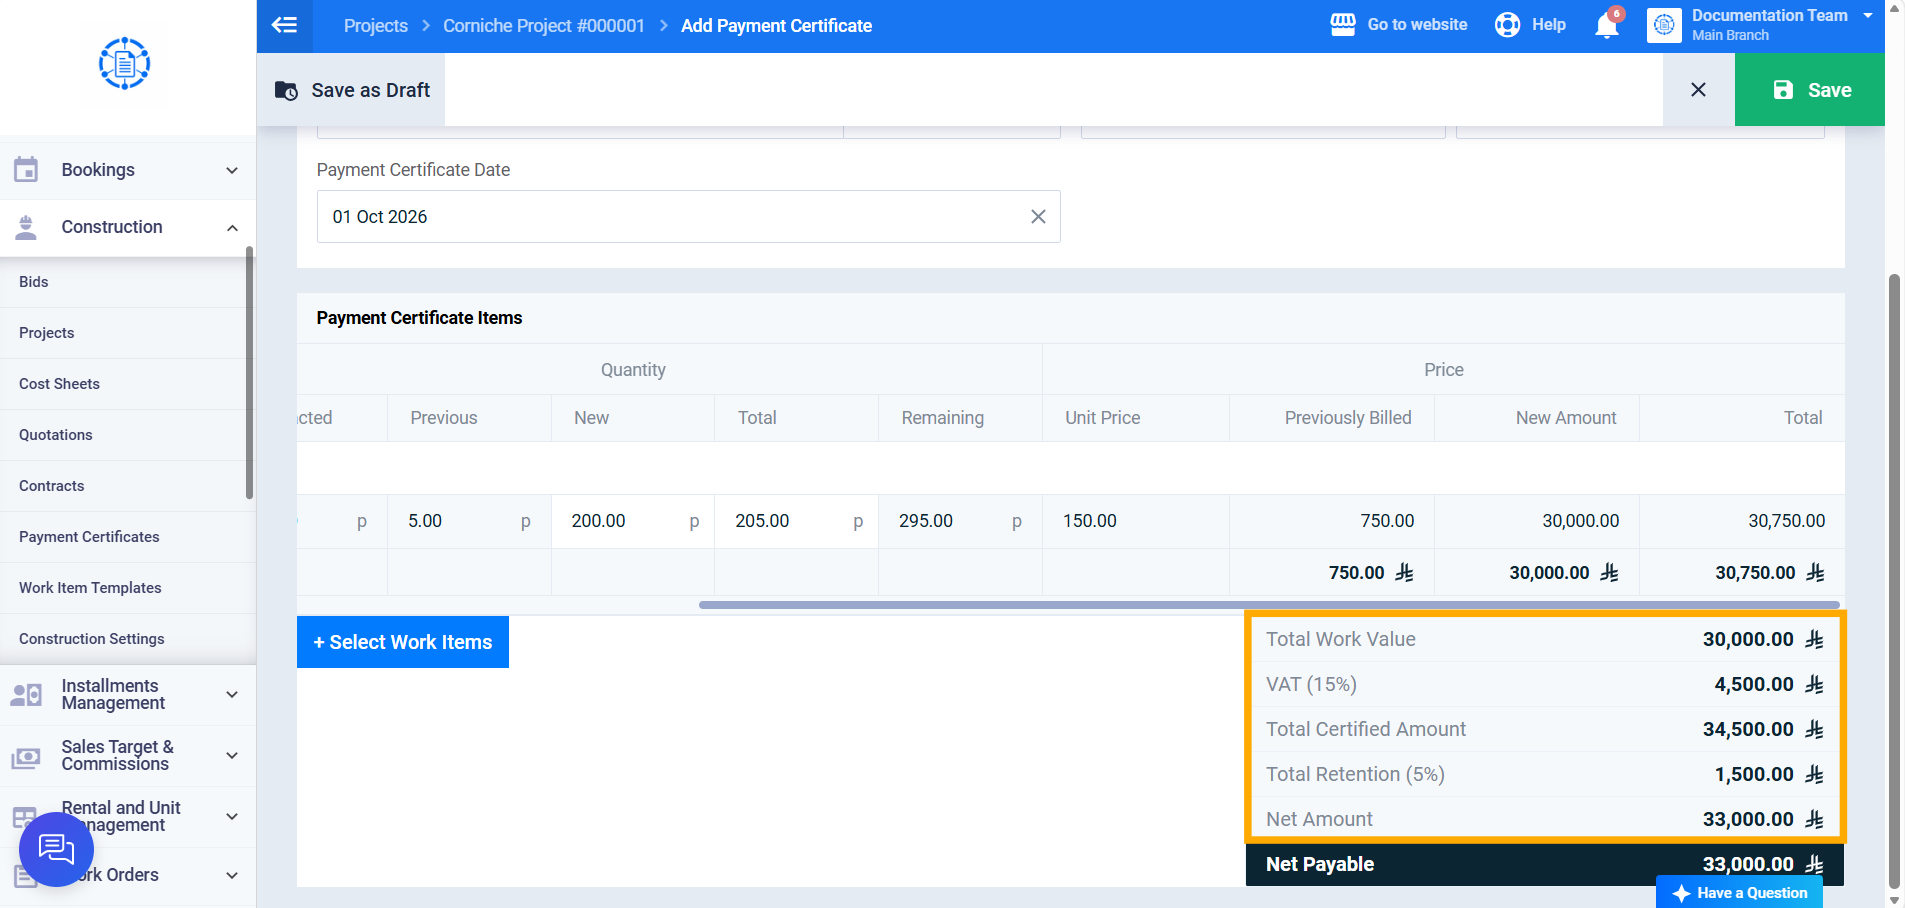
A summary appears below the table, including:
- Total Work Value: the sum of “New Amount” for all items.
- VAT (Tax): calculated based on the tax rates linked to the work items, and summed to appear as a single total value.
- Total Certified Amount: Total Work Value + tax amount.
- Total Retention: calculated as a single percentage of the Total Work Value (the percentage is shown in the field’s name, example: “Total Retention (5%)”).
- Net Amount: Total Approved Amount − Total Retention.
Step 9: Reviewing the Advance Payment Recovery
If the contract has an advance payment recovery plan, the recovery amount is deducted from the total according to the plan type:
- Percentage plan: recovery value = Total × plan percentage.
- Installment plan: a fixed installment amount (advance payment value ÷ number of installments) is deducted from each payment certificate until the advance payment is fully settled; if the installment amount exceeds the payment certificate’s value, only an amount equal to its value is deducted, and the remaining portion is carried over to the next payment certificate.
“Net Payable” appears below the summary, which is the total after deducting the advance payment recovery value.
Fifth: Saving the Payment Certificate
Step 10: Saving
Click “Save” to save the payment certificate with “Issued” status, or “Set as Draft” to save it with “Draft” status. The message “Payment Certificate #[code] created successfully” appears, and you’re redirected to the payment certificate’s view screen.