




Create a Dine-in Order and Select a Table
When you select “Dine-in” as the order type, you can select the appropriate table from a live view of all tables in the dining area, with the option to add a new table if it does not already exist. In this article, we explain the steps for creating a Dine-in order and selecting a table.
Steps to Create a Dine-in Order and Select a Table
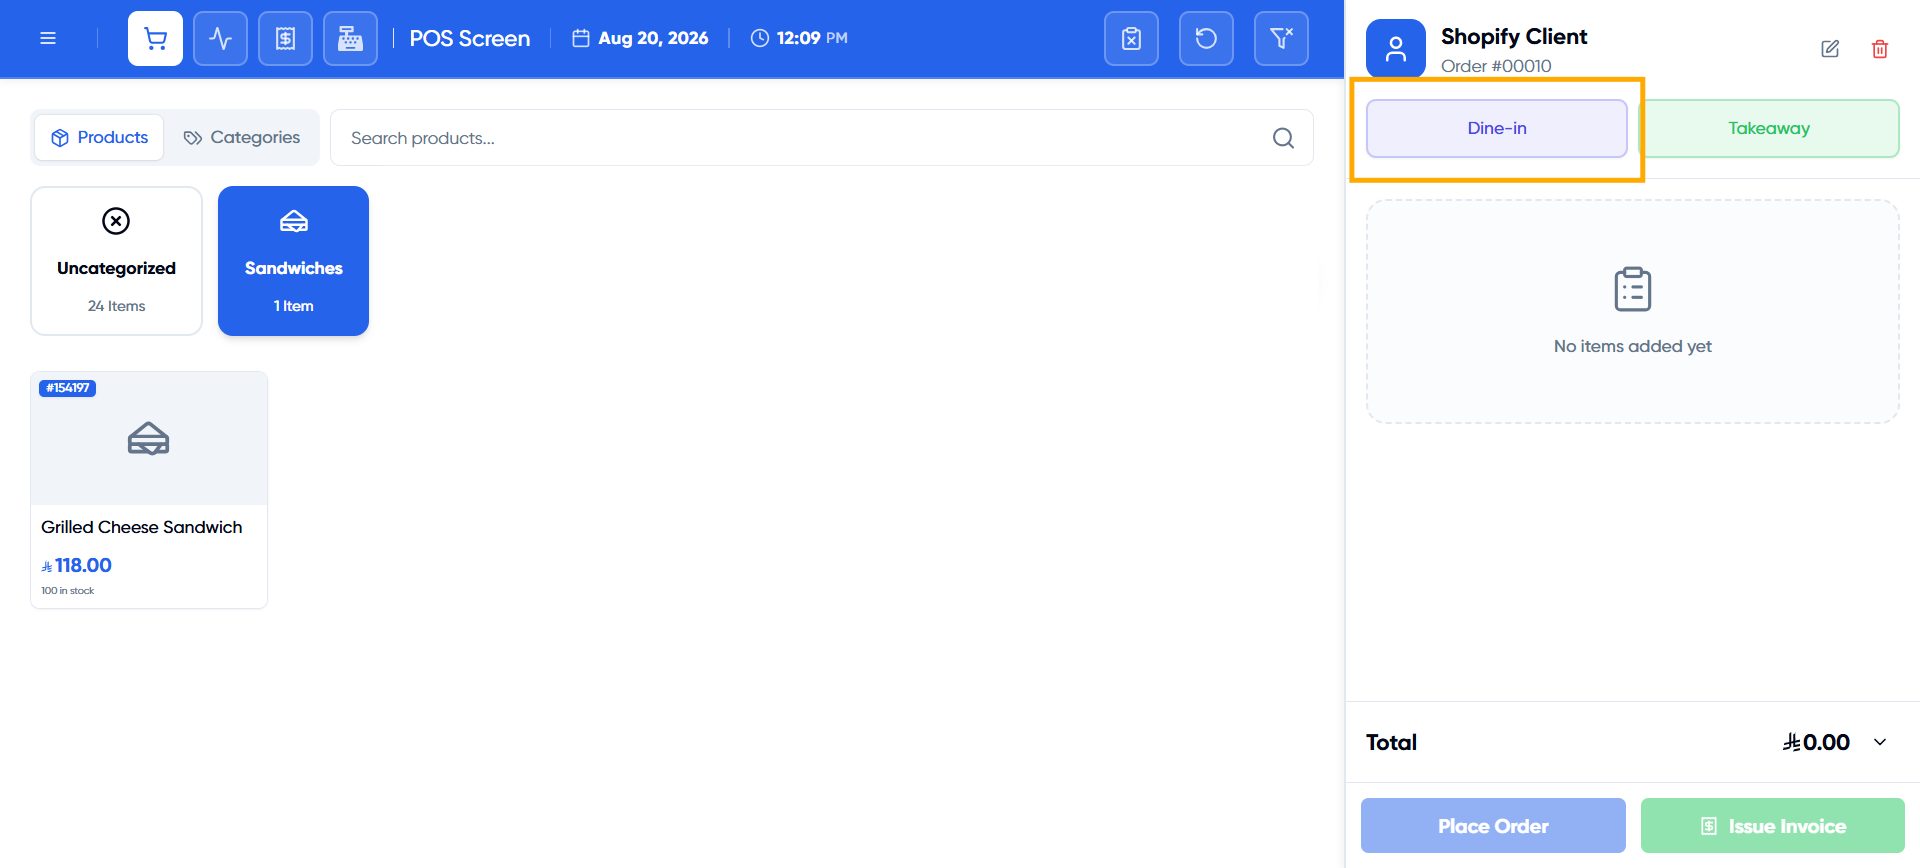
Step 1: Select the “Dine-in” Order Type
From the order panel, select “Dine-in” from the order type selector (Dine-in / Takeaway).
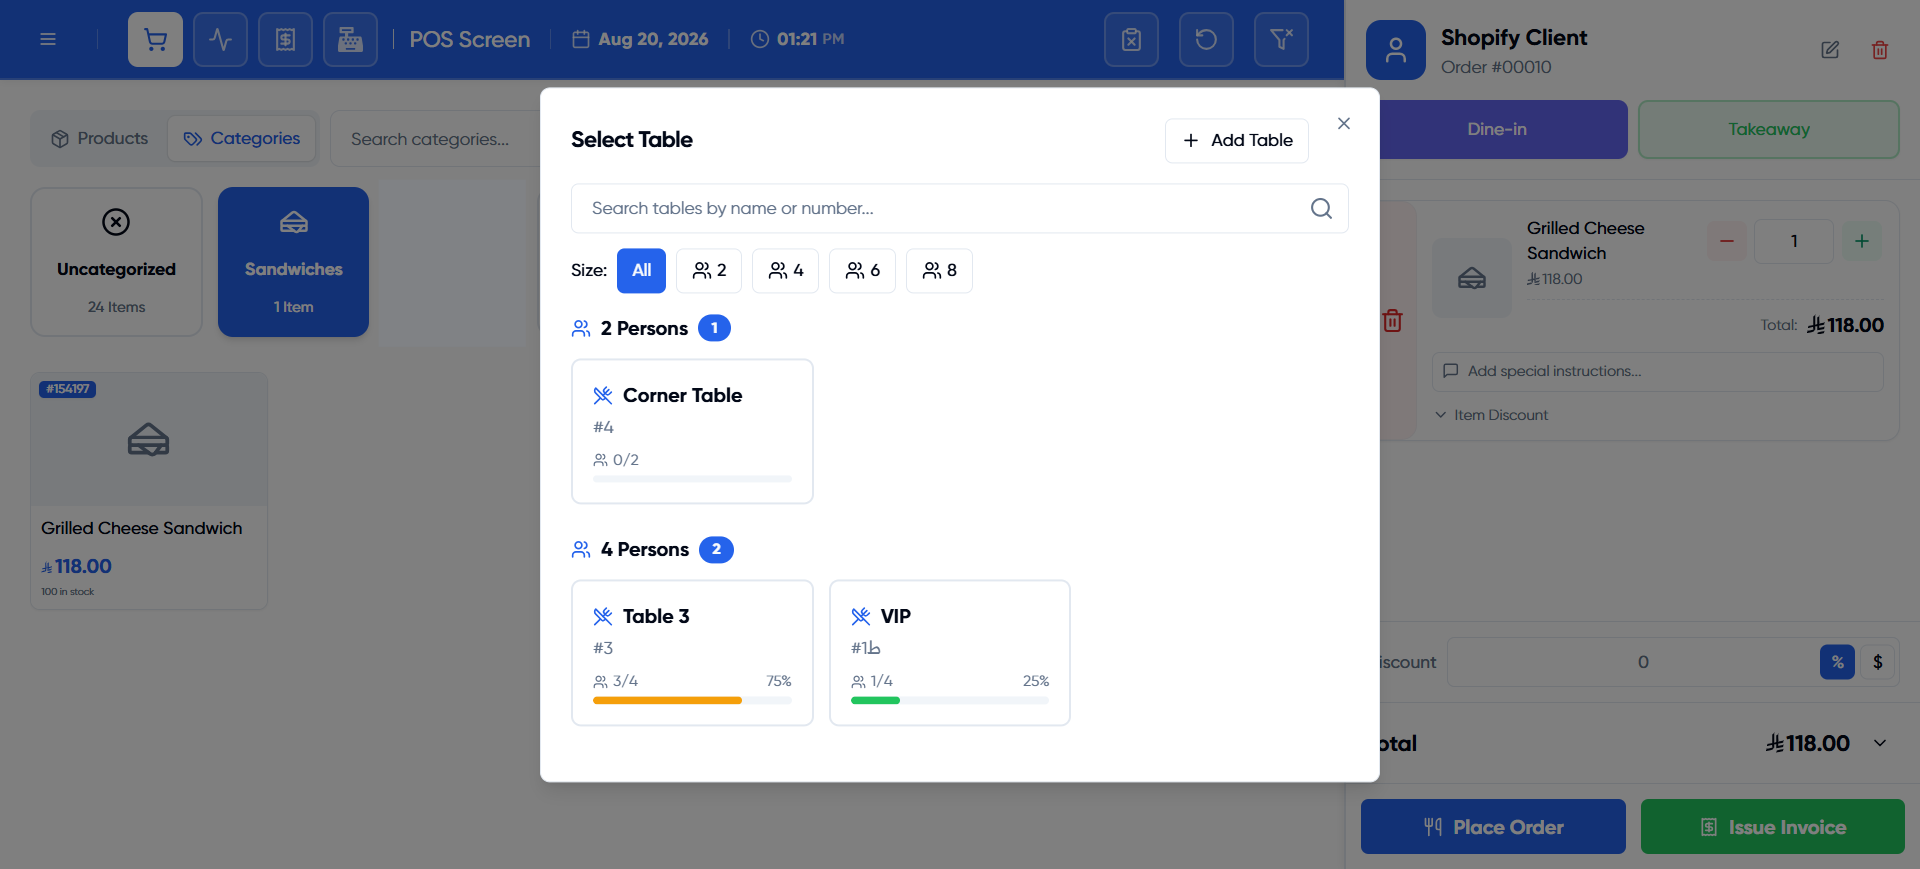
Step 2: Open the Table Selection Window
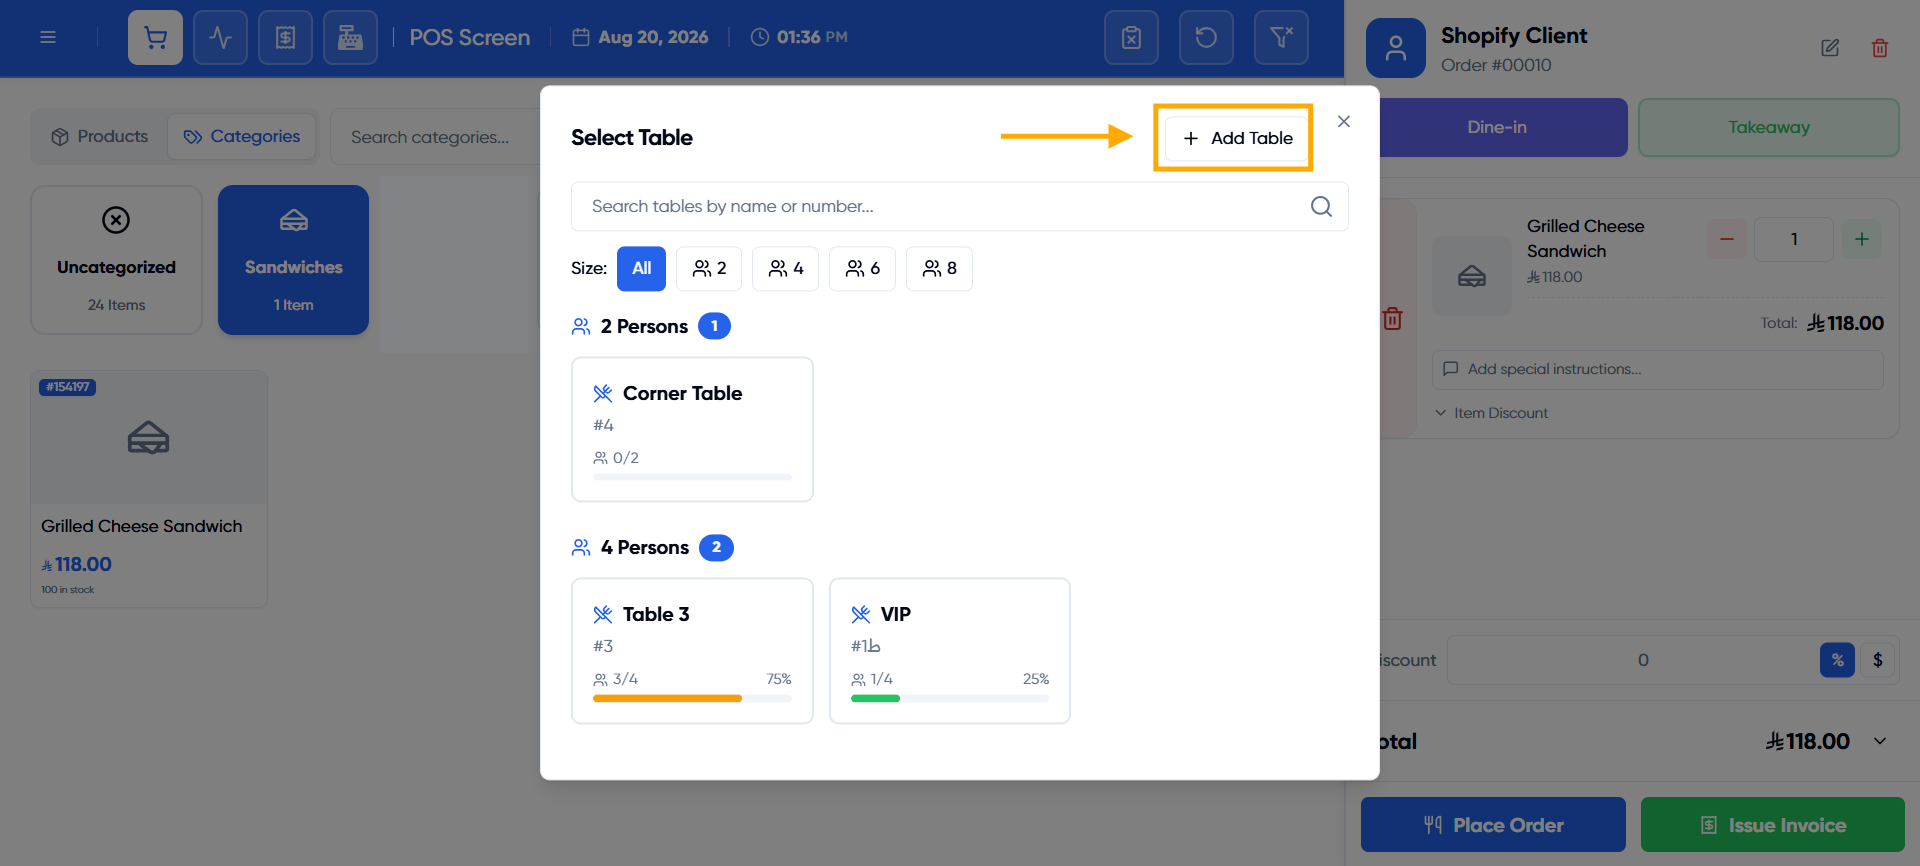
Click the Place Order field to open the “Select Table” window, which displays all tables grouped by capacity.
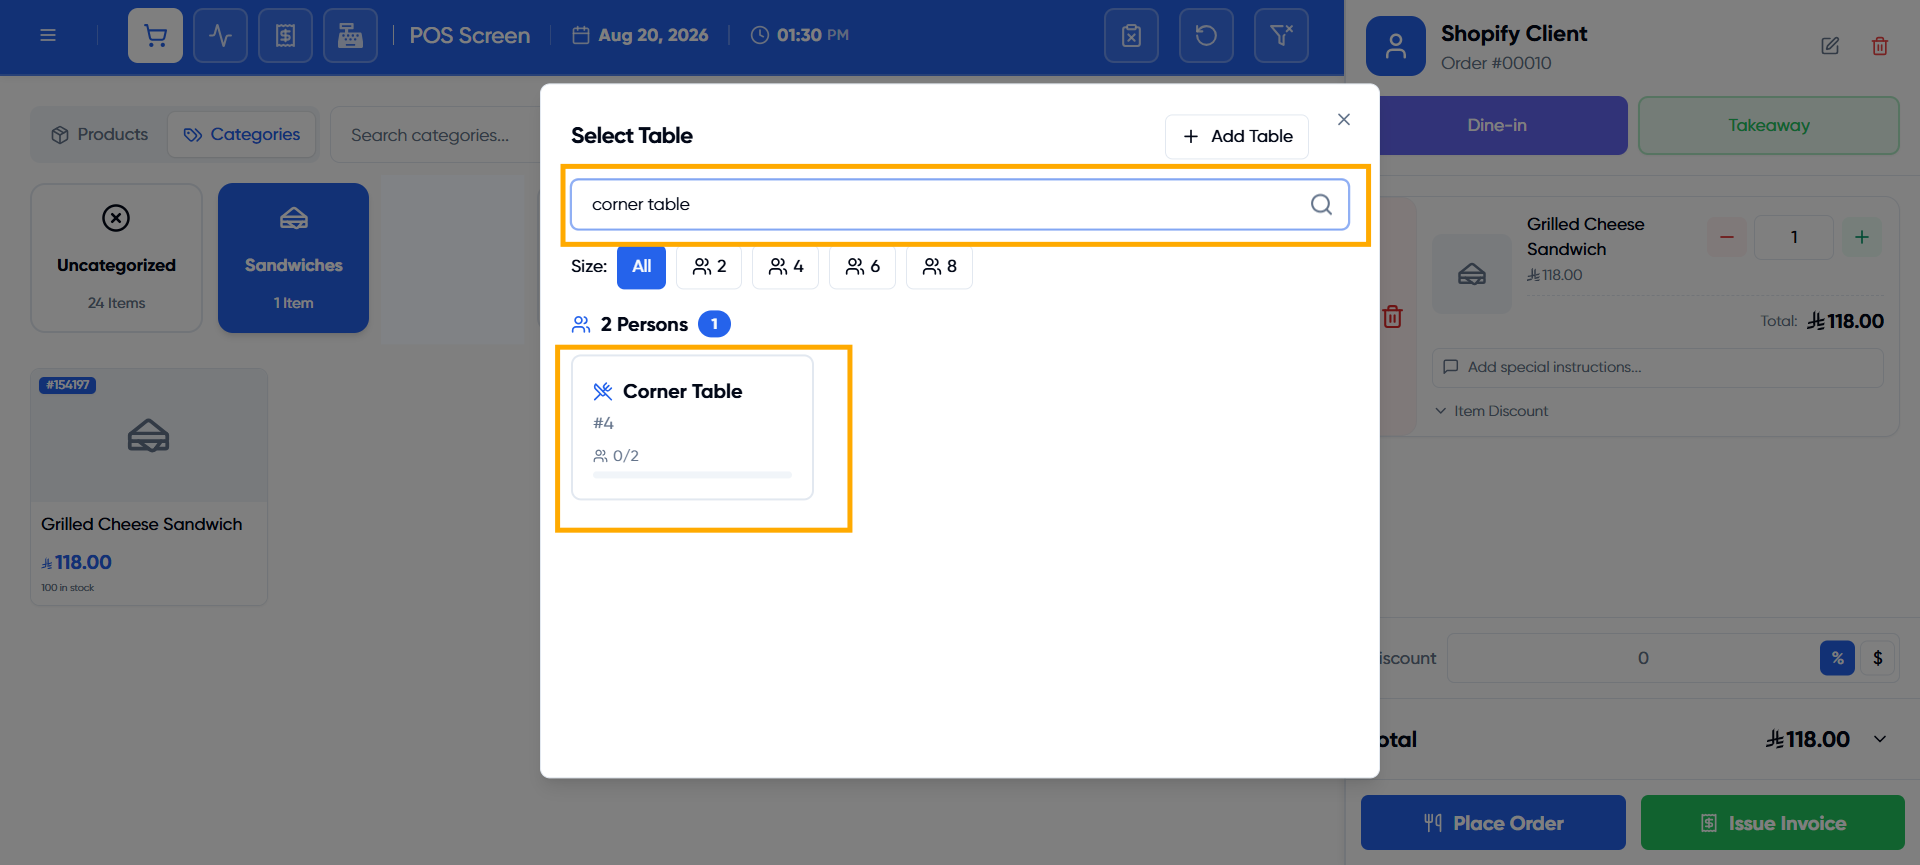
Step 3: Search or Filter to Find the Required Table
Use the search field to find a table by name or number, or use the quick capacity filters: All / 2 / 4 / 6 / 8 people.
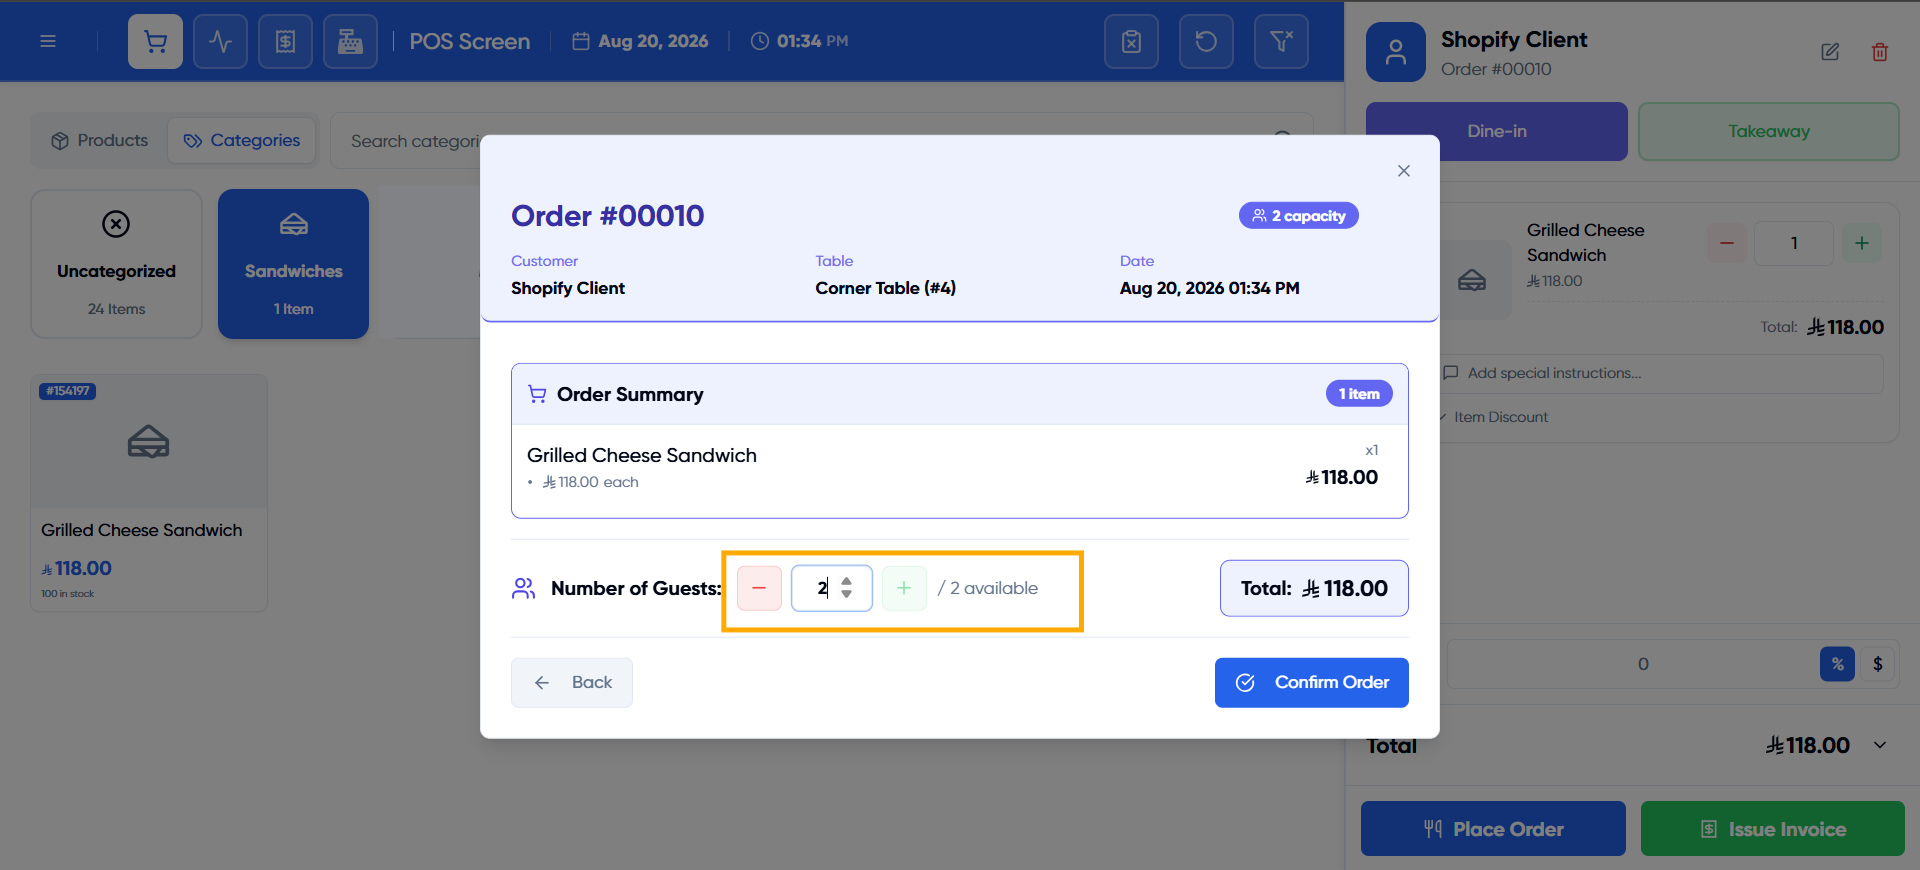
Step 4: Select a Table
Click the required table card from the available tables — you can specify the number of guests for the selected table.
Step 5: Add a New Table (If It Does Not Exist)
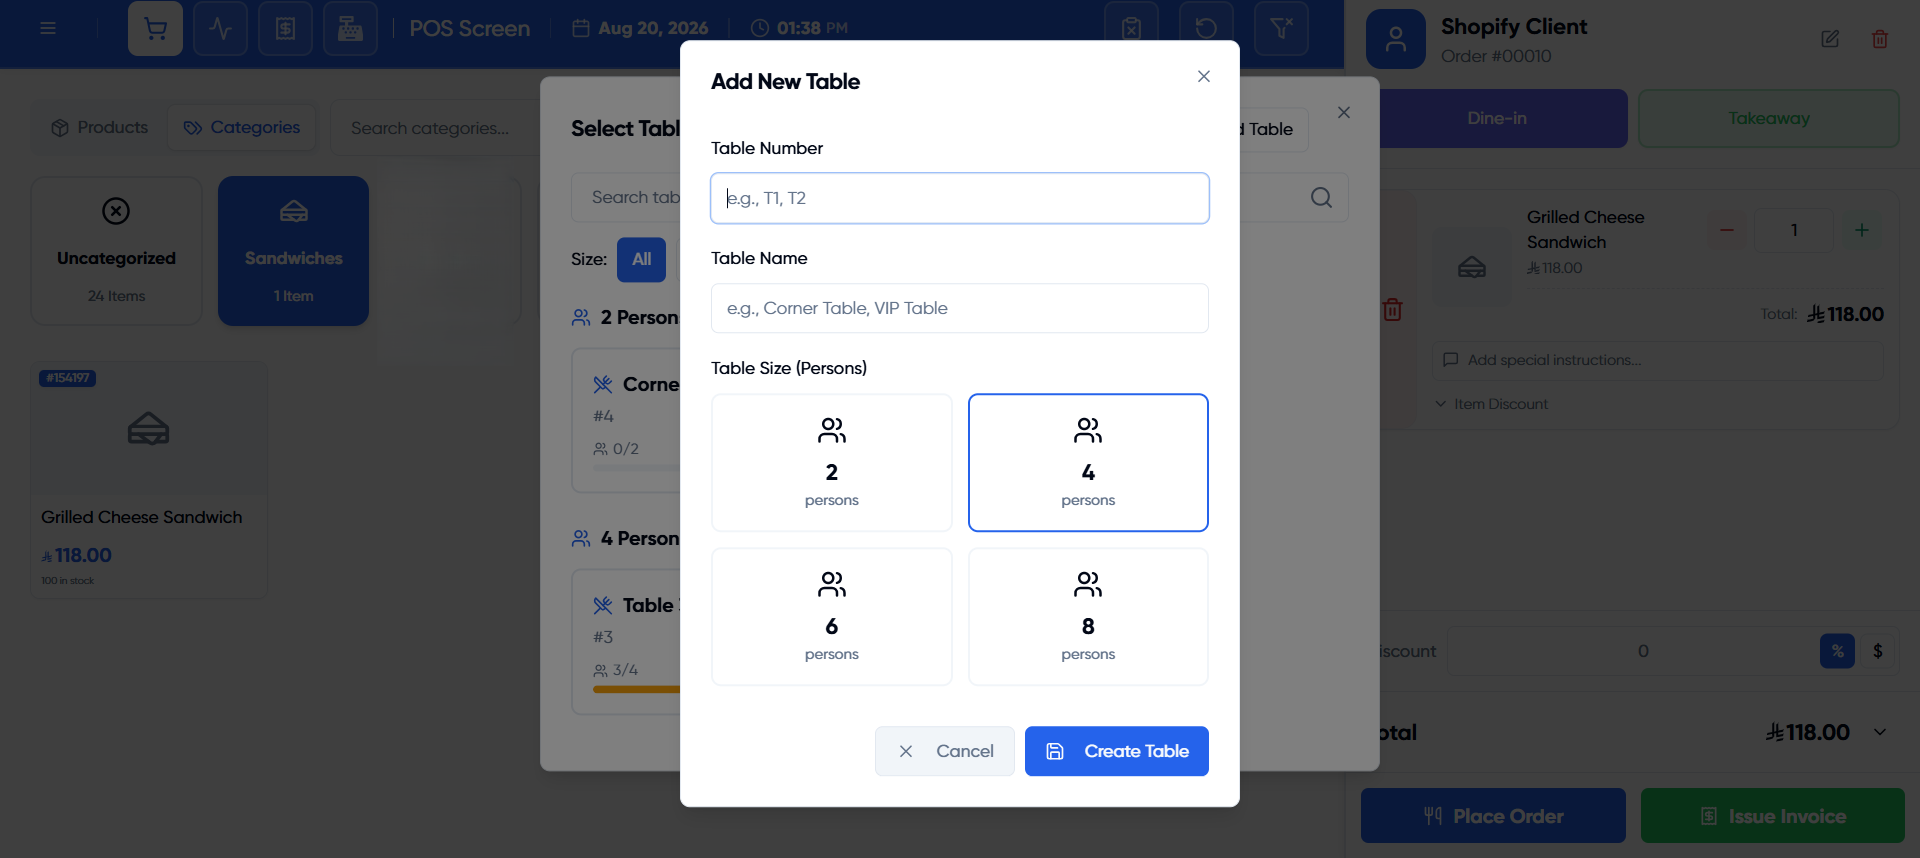
If you cannot find the required table, click “Add Table” at the top of the window, enter the table number, name (optional), and capacity in people, then click “Create Table” to make it immediately available for selection.
Step 6: Continue Requesting the Order
After selecting the table, you can continue adding products to the order as usual, then place the order or issue its invoice.