
Guide to Recording an Advance Payment and Linking It to a Contract
The system allows you to record an advance payment from a client and link it to a construction contract, to track and settle it later via payment certificates. In this article, we explain three ways to record an advance payment and link it to a contract, depending on the stage you’re at.
Steps to Recording an Advance Payment and Linking It to a Contract
First: Creating an Advance Payment While Creating the Contract
Step 1: Open the Contract Creation Form
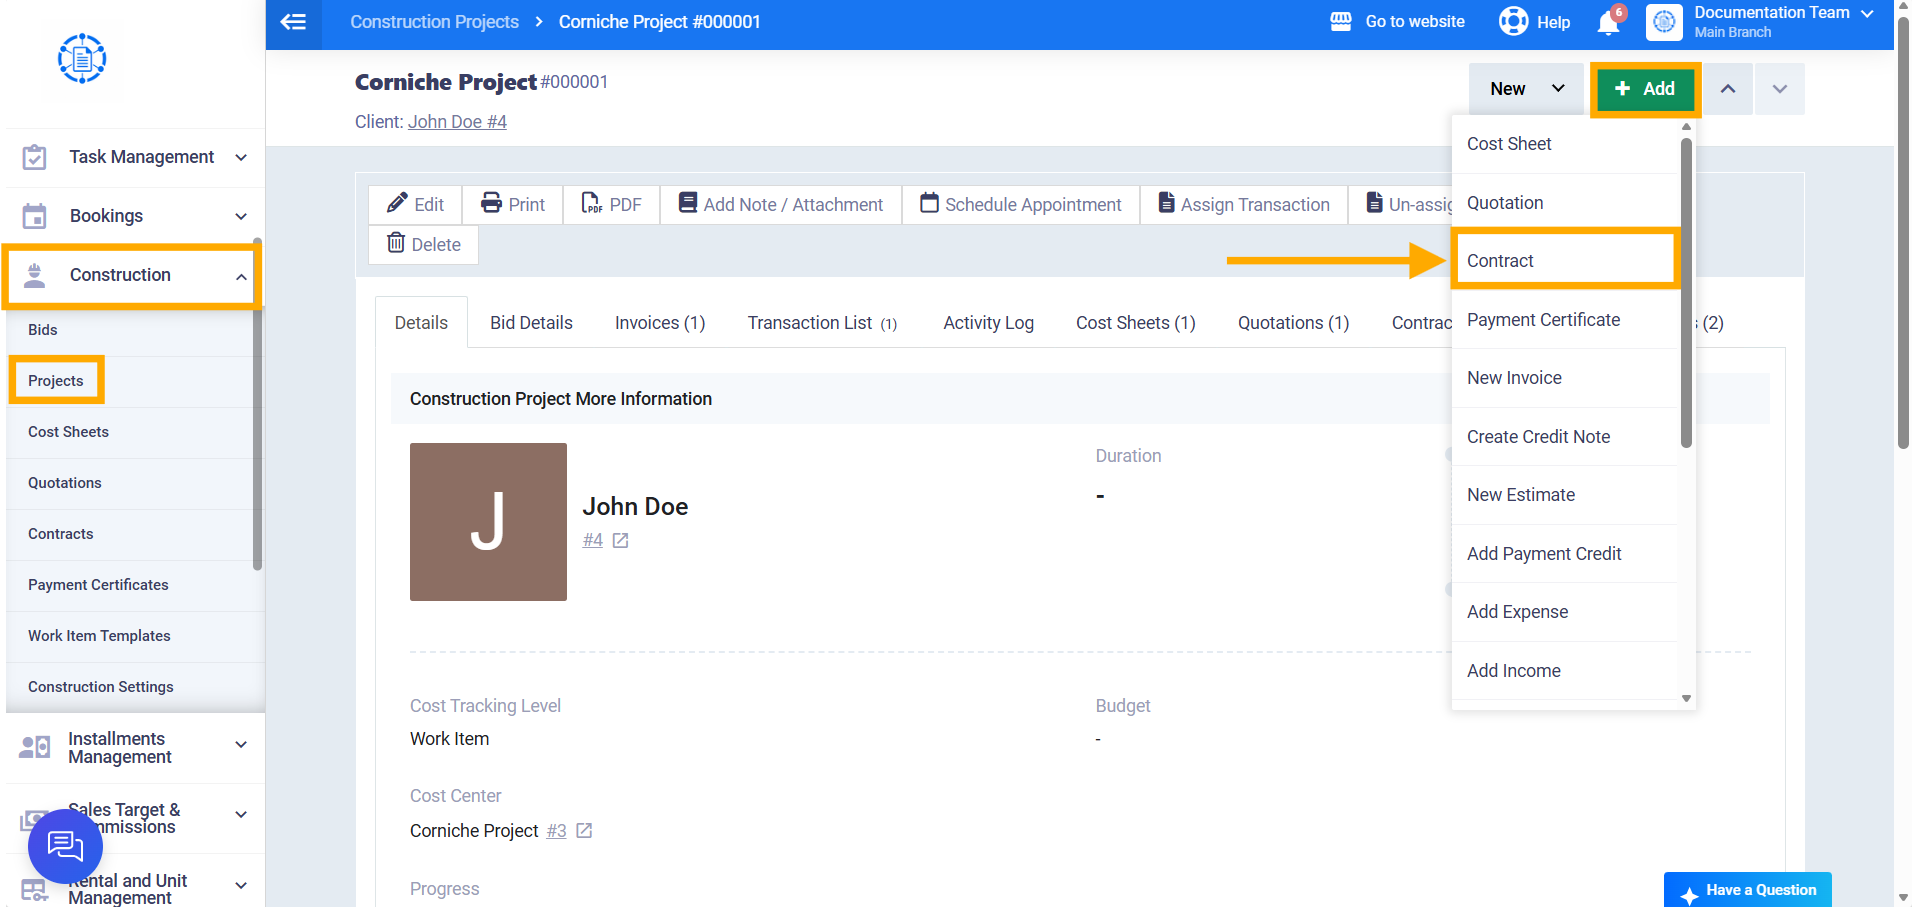
From within the project, click the “Add” button at the top of the screen, then select “Contract,” and fill in the contract’s data.
Step 2: Selecting an Existing Advance Payment, or Creating a New One
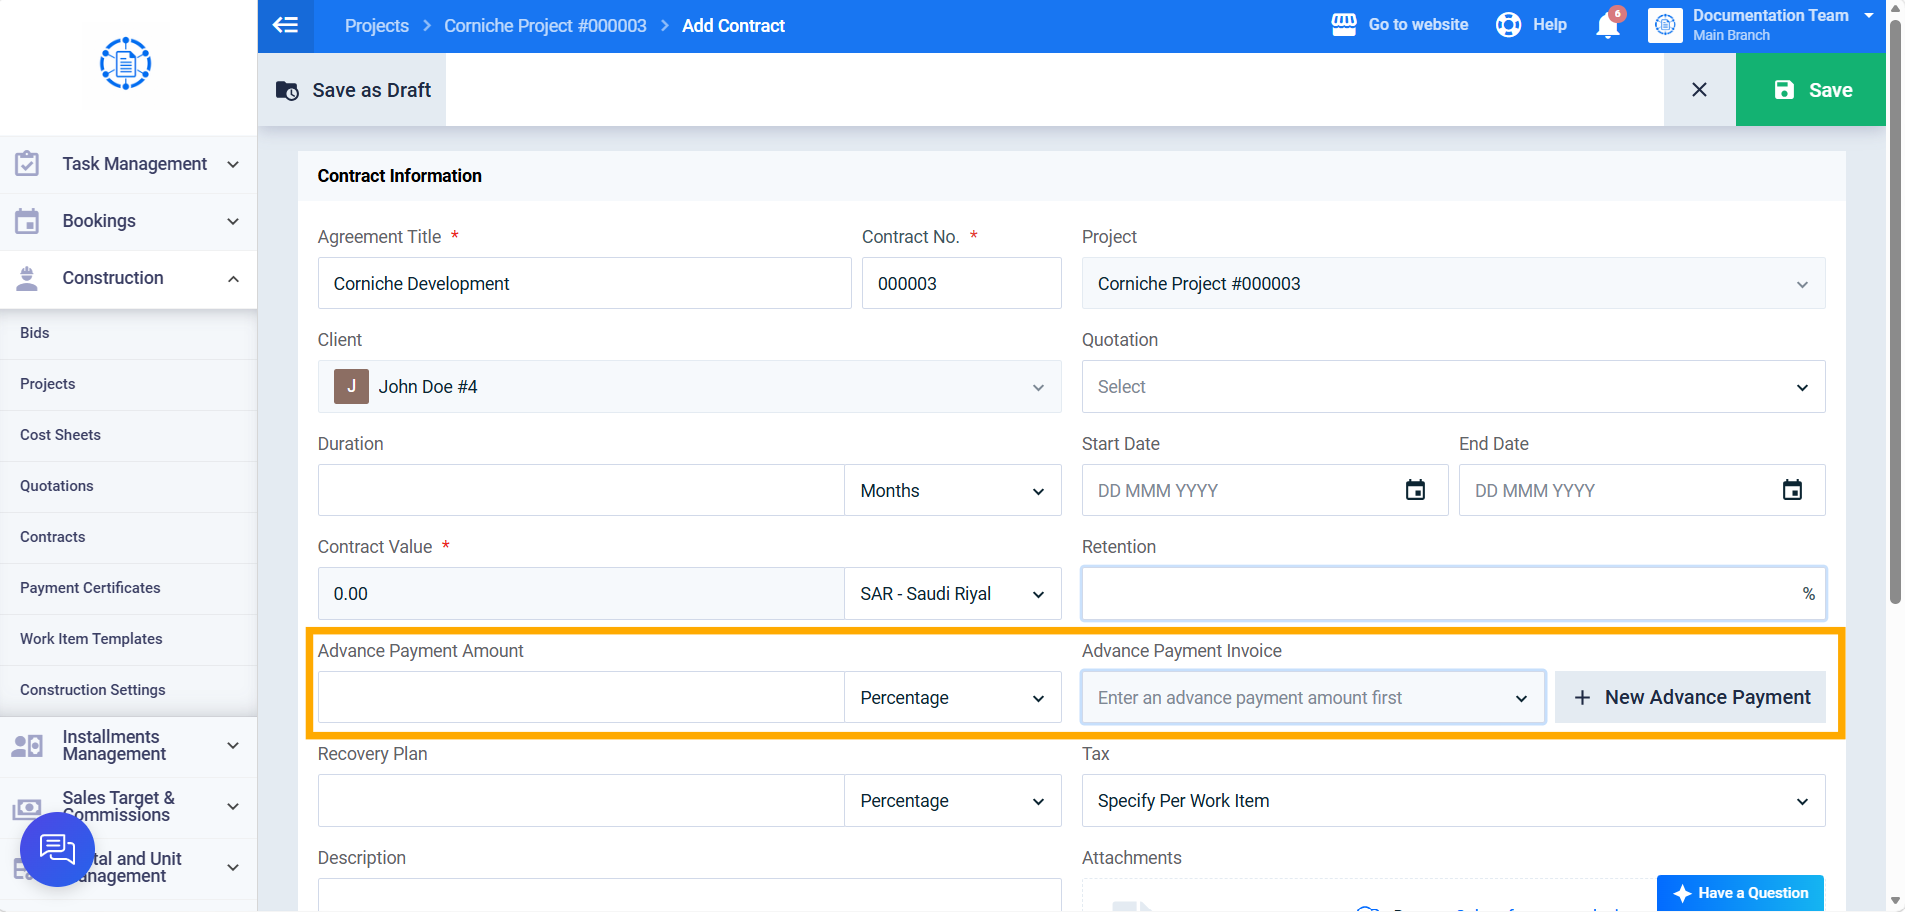
In the “Advance Payment Invoice” field, select an existing advance payment invoice from the dropdown, or click the “New Advance Payment” button to create a new one. The list only displays advance payment invoices whose: unsettled balance is greater than zero, client and currency match the contract’s, and that aren’t already linked to the same contract.
Step 3: Filling In the New Invoice’s Data (If “New Advance Payment” Is Selected)
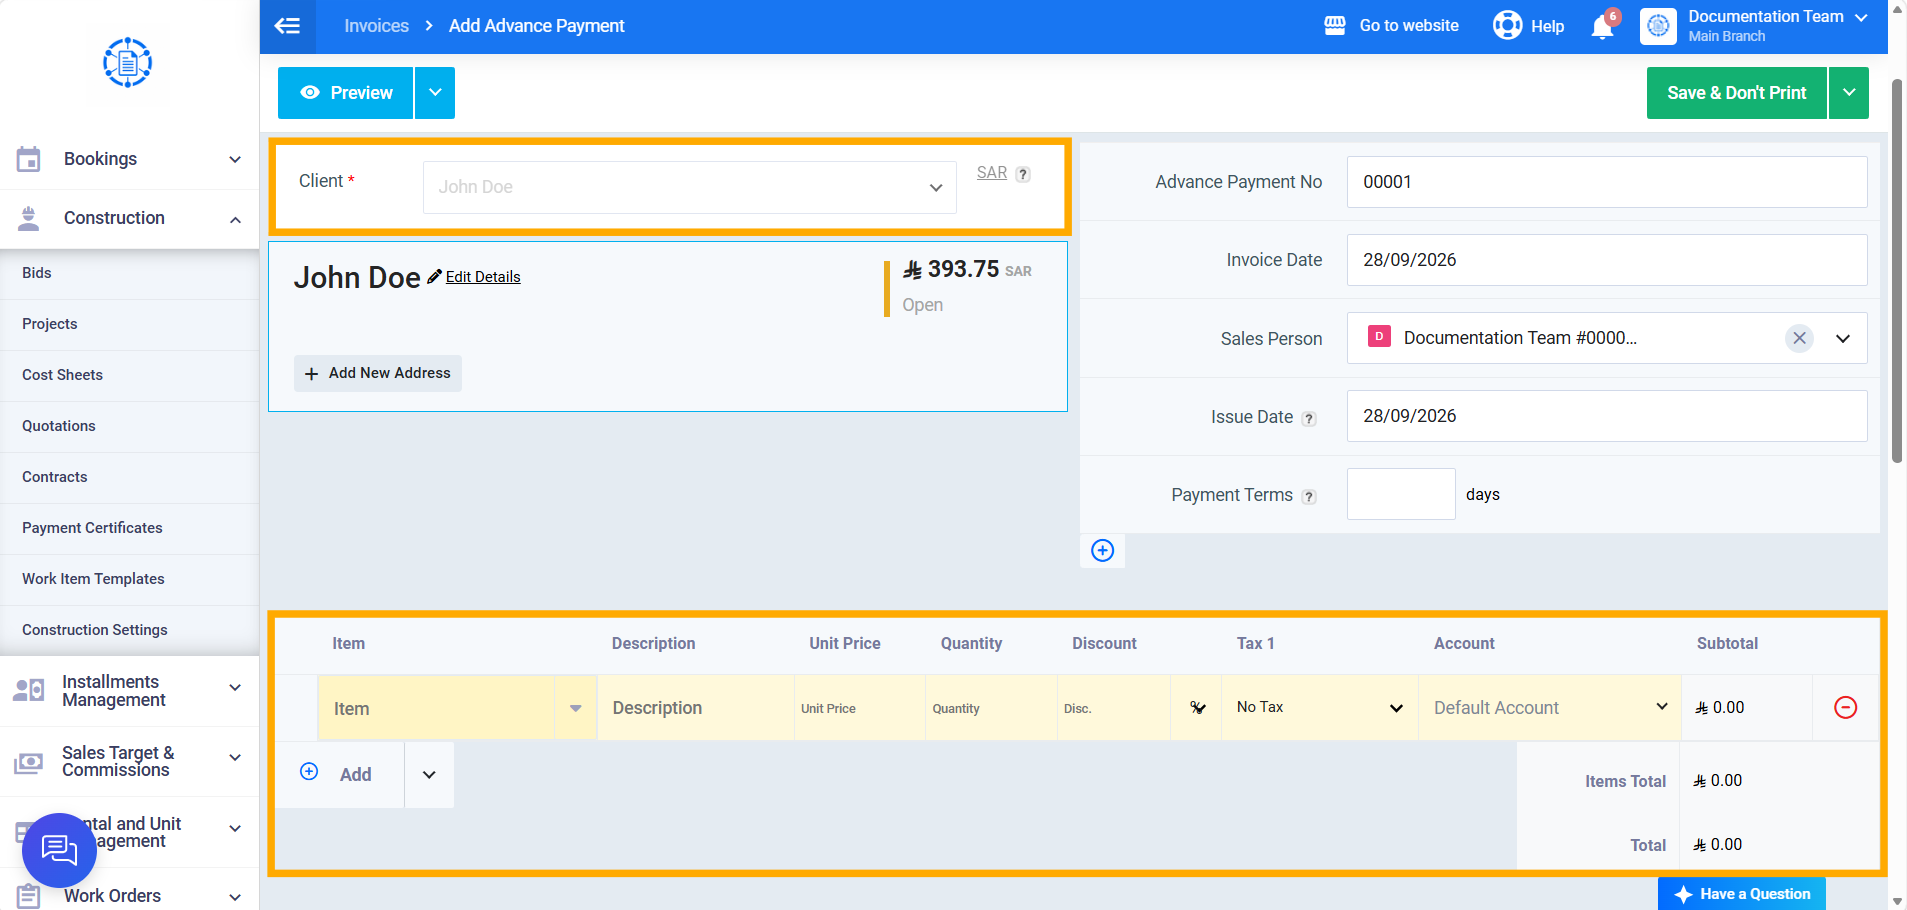
When clicking “New Advance Payment,” the advance payment invoice creation screen opens in a separate tab, with the client and currency automatically filled in from the contract’s data (disabled for editing). Fill in the rest of the invoice’s data, then save it.
Step 4: Automatic Return to the Contract Form
After saving the invoice, you’re automatically redirected to the contract creation form, with all previously entered data retained, and the new advance payment automatically selected in the “Advance Payment Invoice” field.
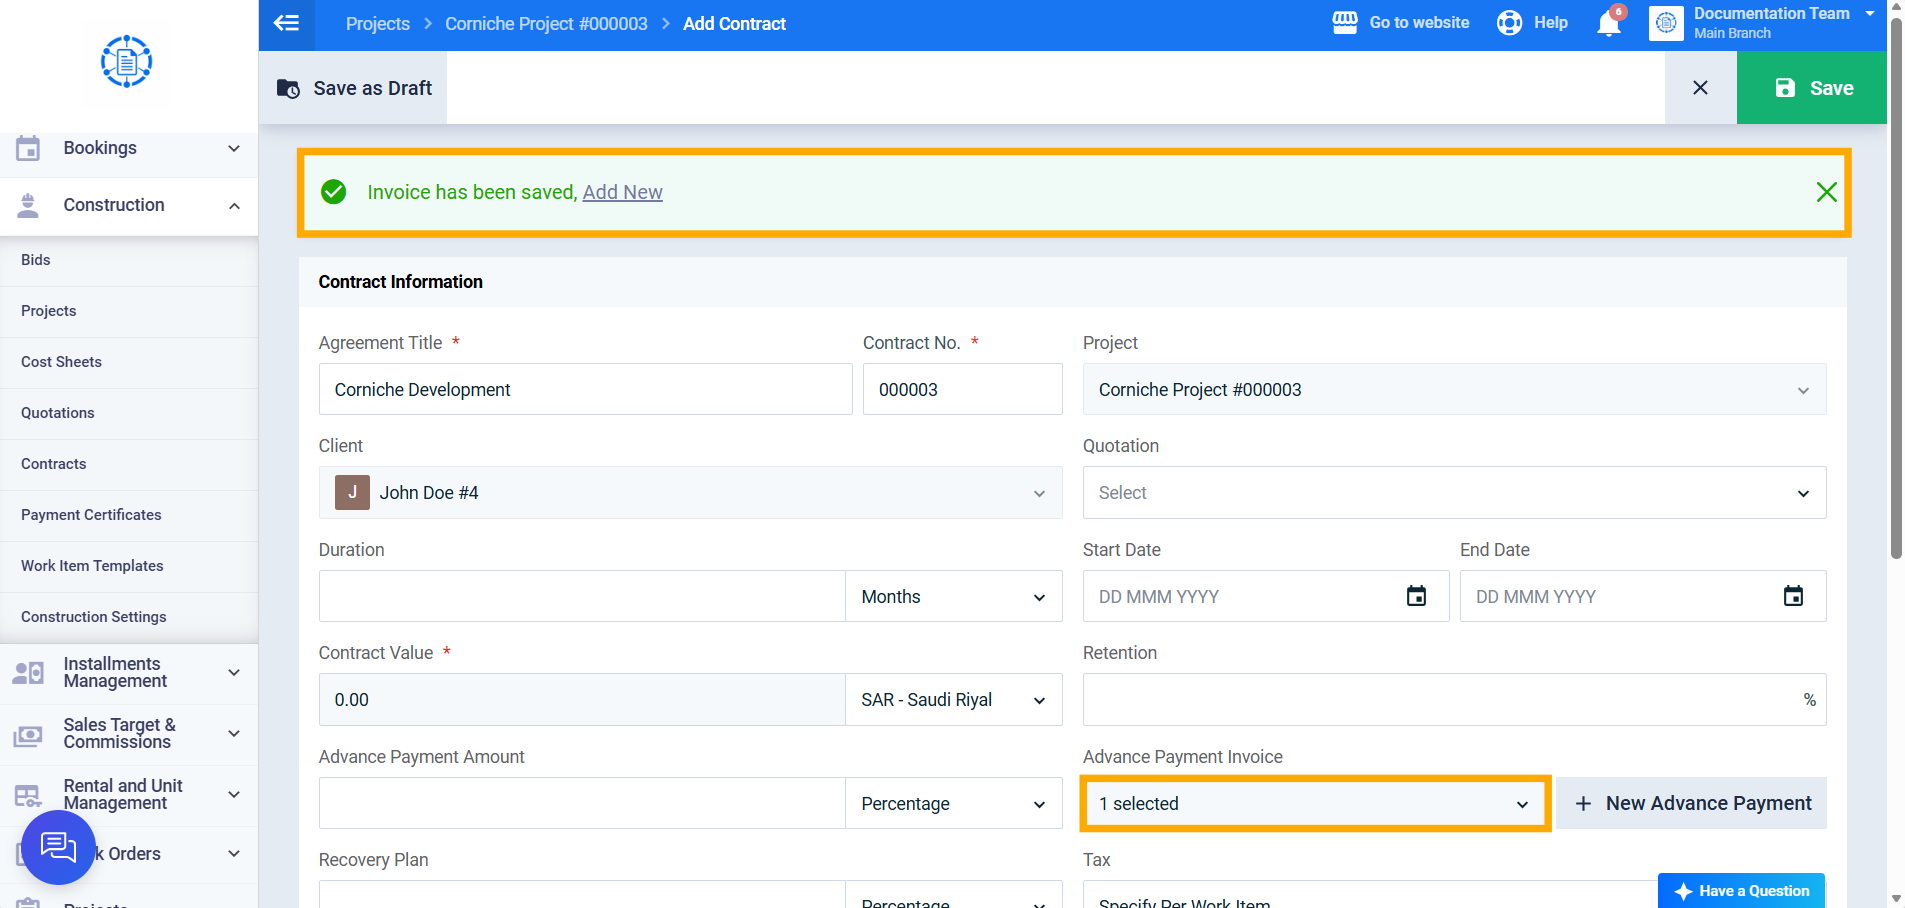
Step 5: Specifying the Advance Payment Amount
Next to the “Advance Payment” field, enter the “Advance Payment Amount” (required) manually, and select its type from the adjacent dropdown: “Amount” or “Percentage.”
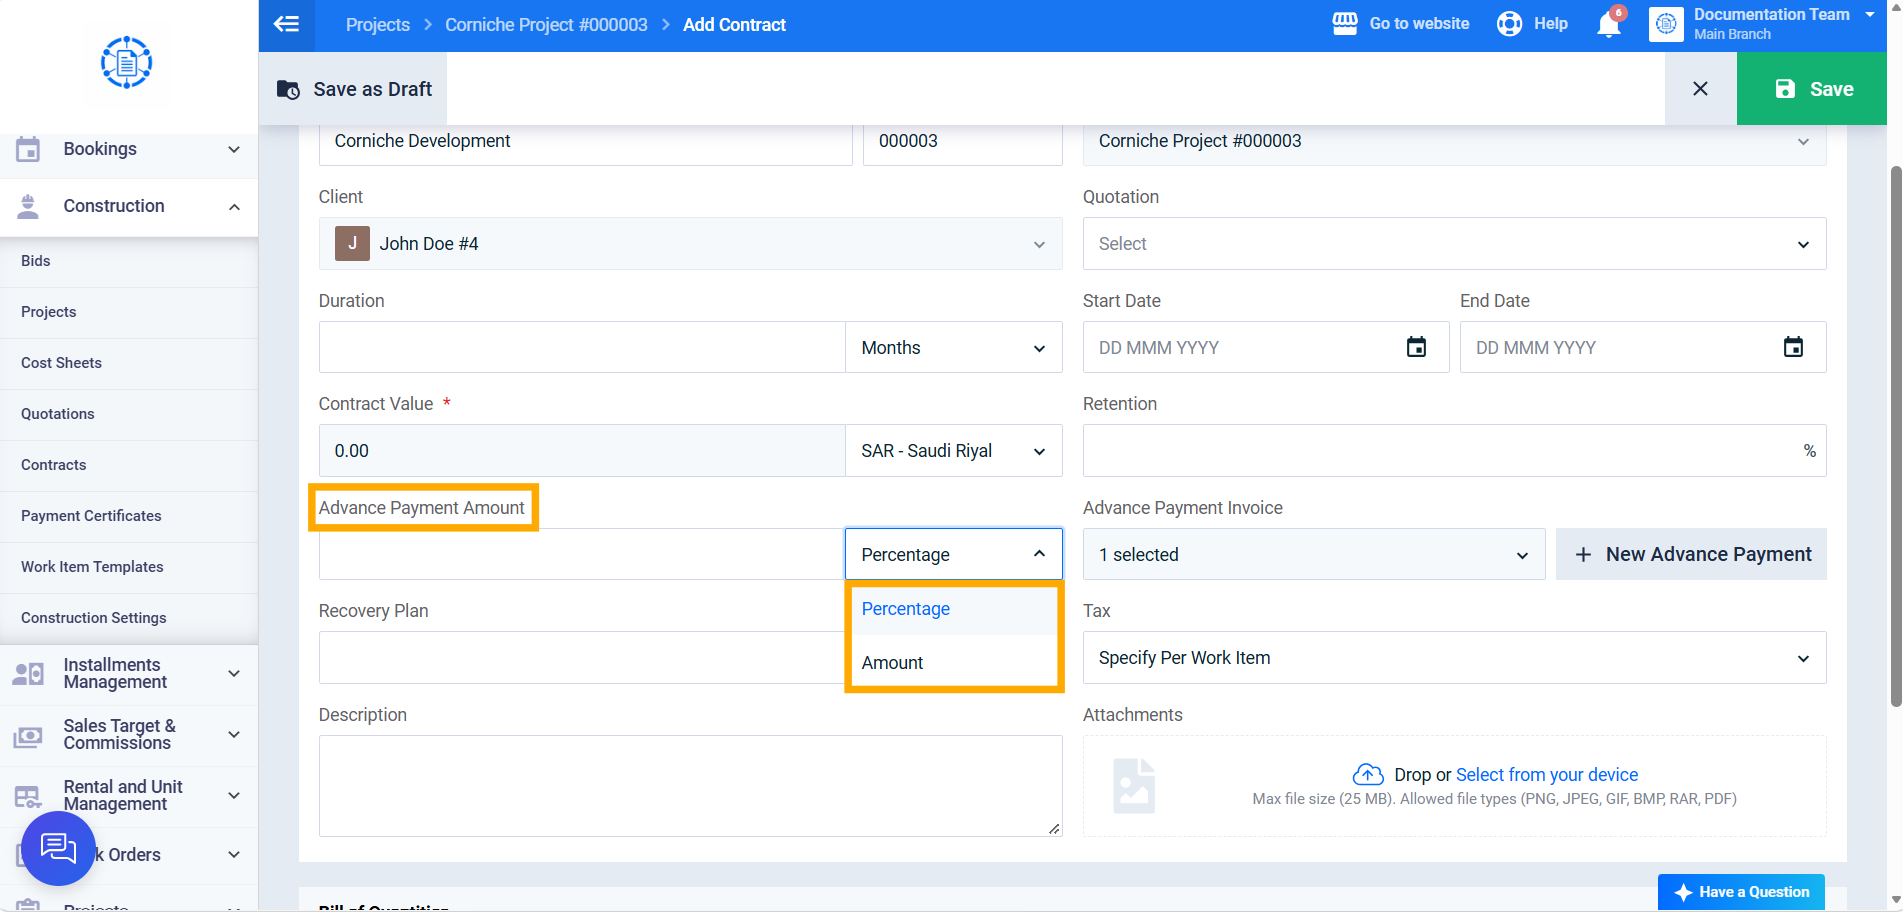
Second: Linking an Existing Advance Payment from the Contract View Screen
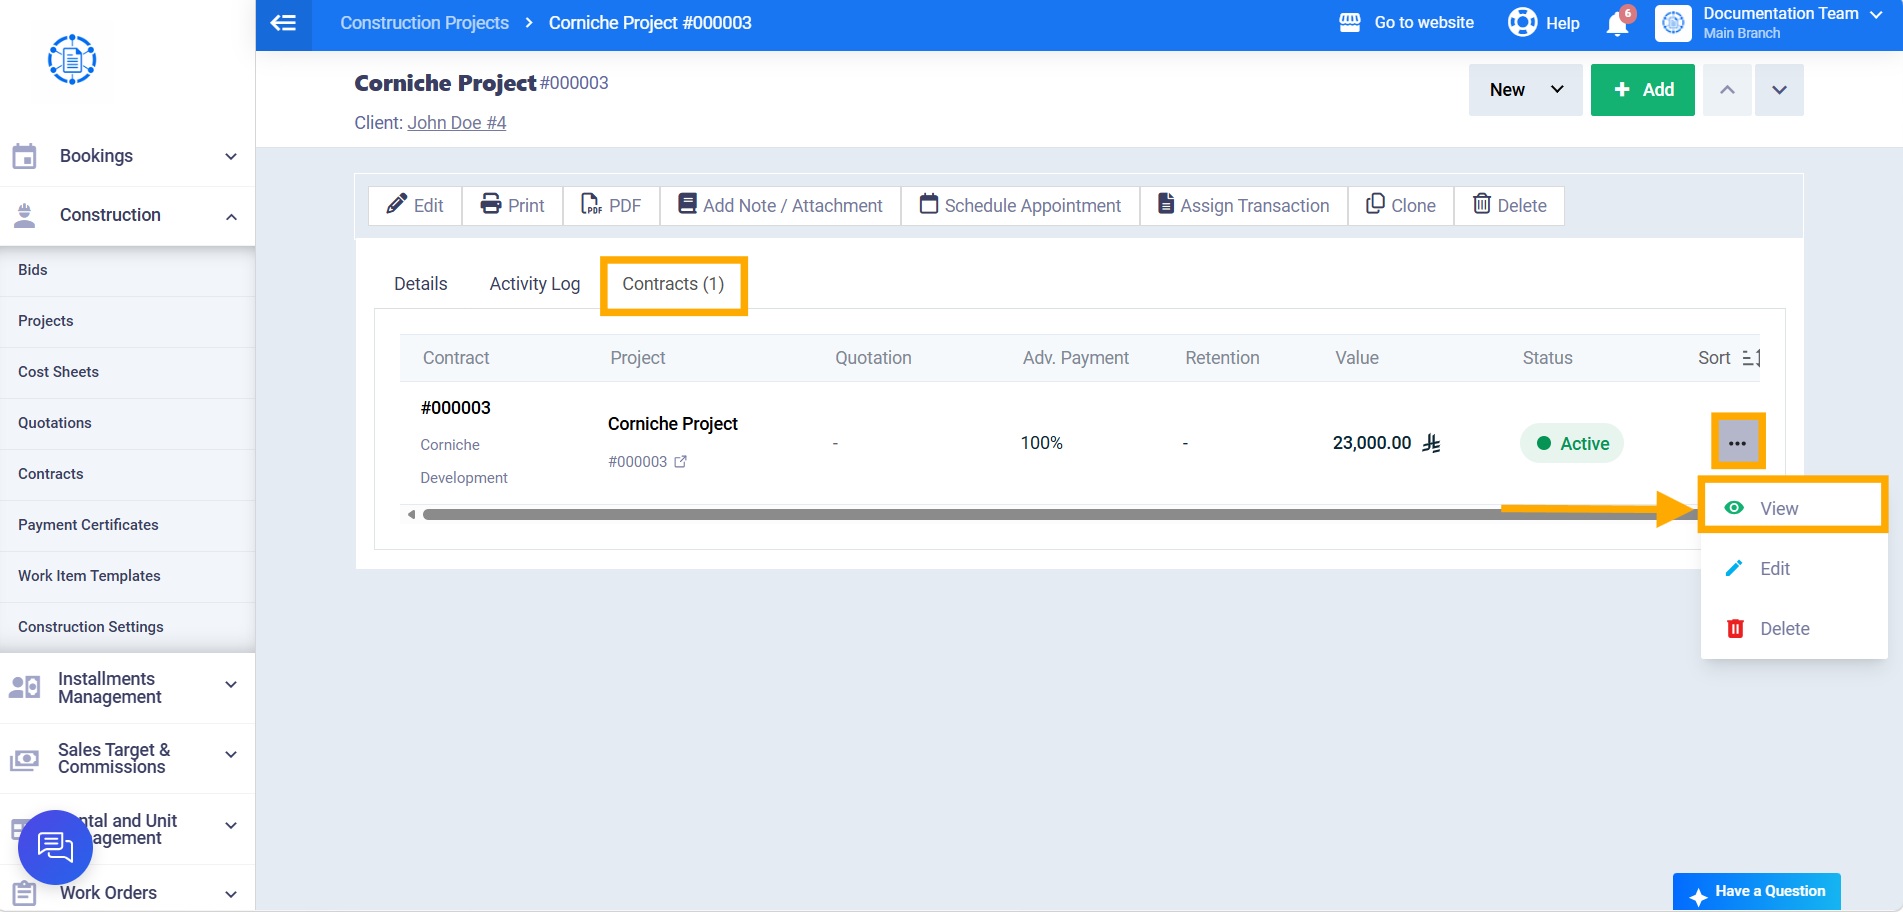
Step 6: Open the Contract View Screen
From within the project, open the “Contracts” tab, then click the “View” button for the required contract.
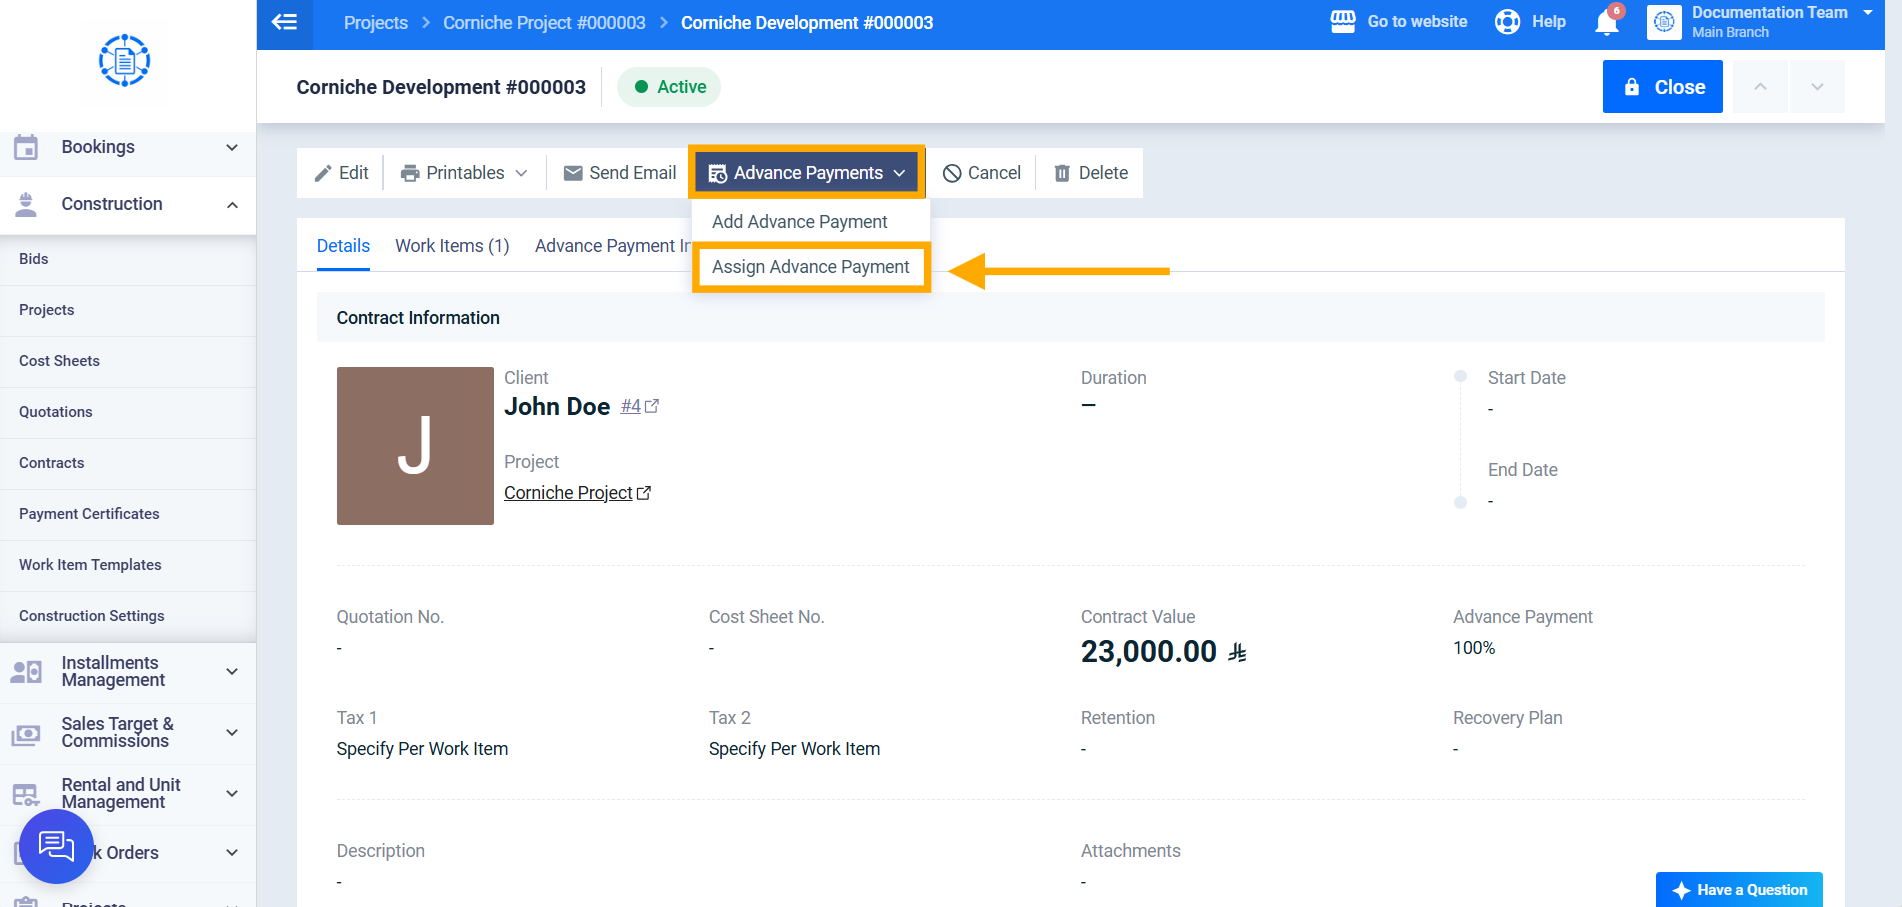
Step 7: Linking the Advance Payment
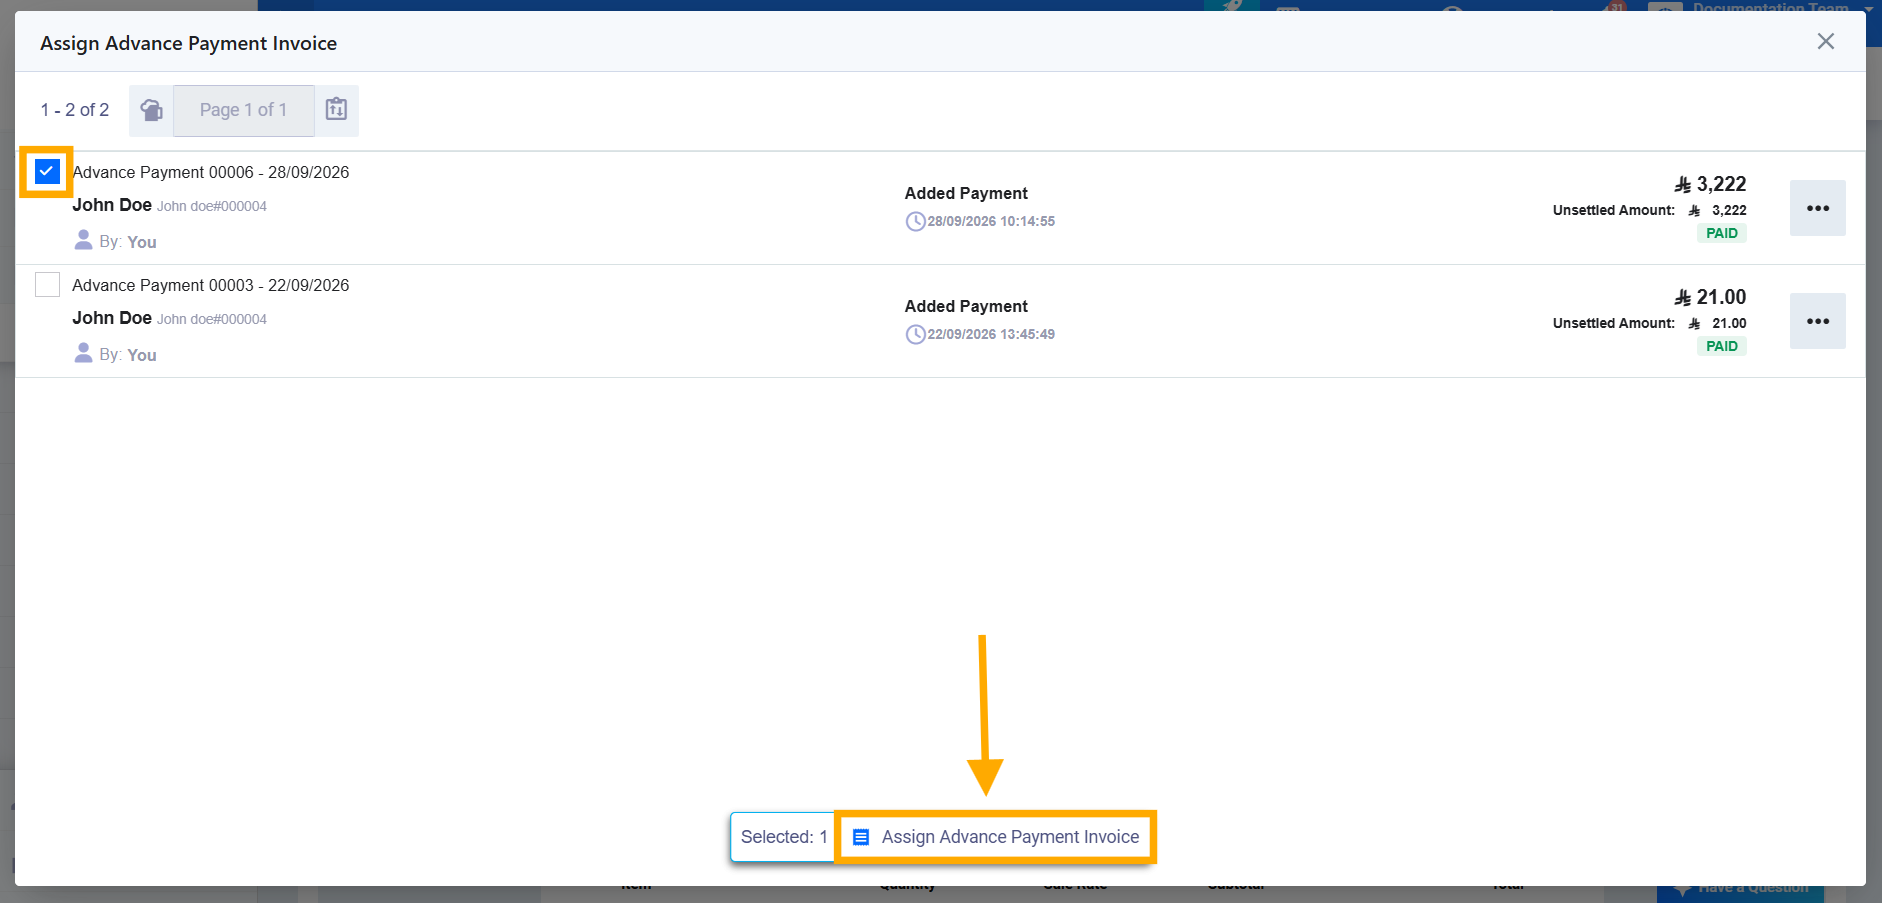
Click the “Advance Payments” button, then click “Assign Advance Payment.” A popup window appears with a list of advance payment invoices that share the same client and currency as the contract, have an unsettled balance greater than zero, and aren’t already linked to the same contract.
Step 8: Confirmation
Select the required advance payment invoice, then click the “Assign Advance Payment Invoice” button to link it to the contract.
Third: Creating a New Advance Payment from the Contract View Screen
Step 9: Creating a New Advance Payment
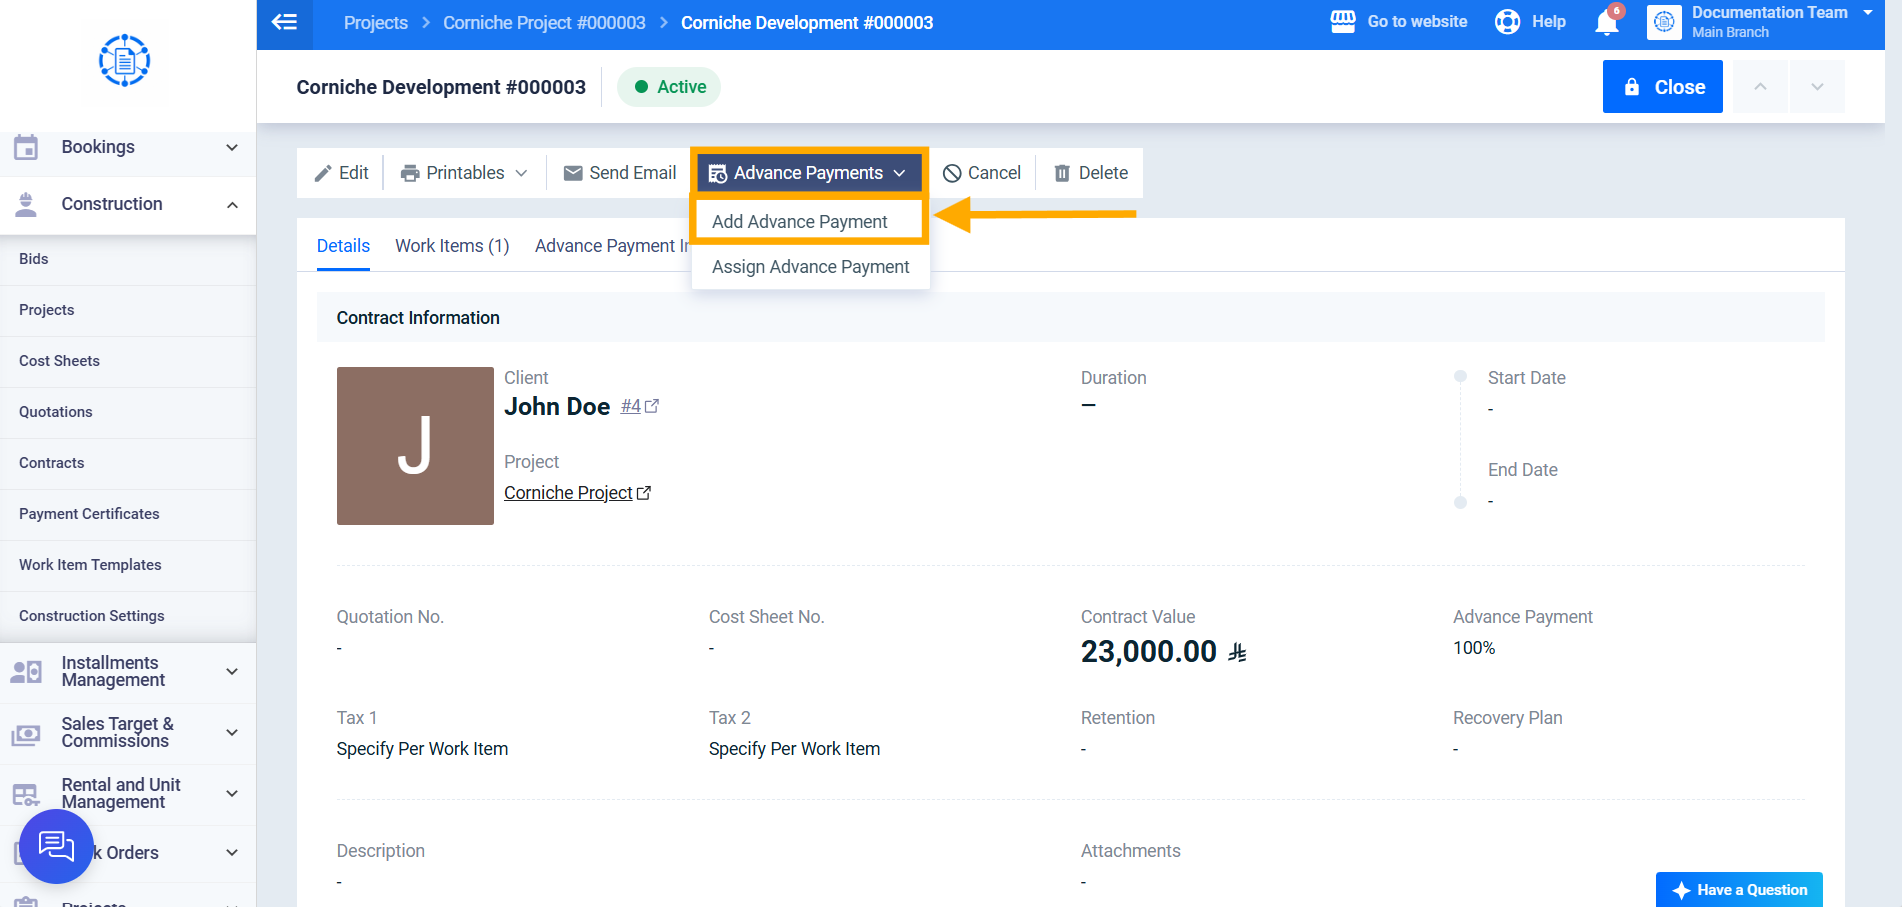
From the same contract view screen, click the “Add Advance Payment ” button, and fill in the invoice’s data. The client and currency fields are automatically filled in from the contract’s data and can’t be edited.
Step 10: Saving
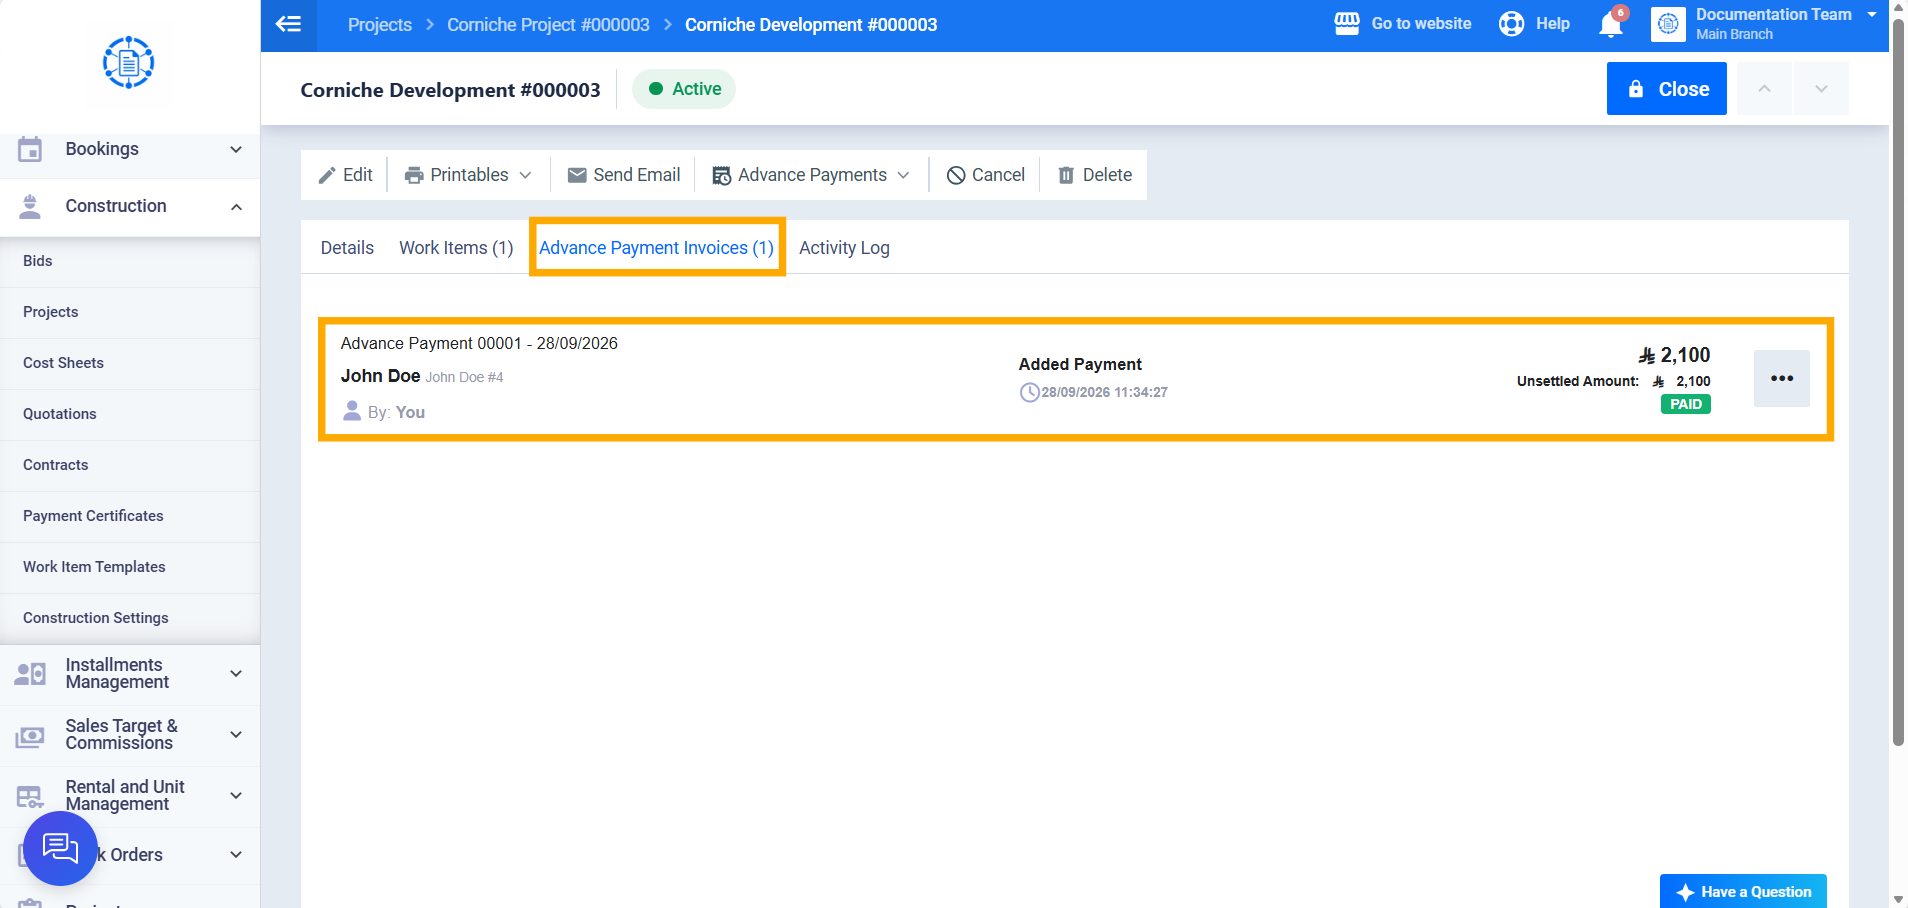
Click “Save” — you’re automatically redirected to the contract view screen, and the new advance payment invoice appears under the contract’s “Advance Payment Invoices” tab.