
A Complete Guide to AI Document Upload
Instead of entering your invoice and document data manually field by field, the system allows you to upload a scanned document and let the AI extract its data — items, quantities, prices, client or supplier, taxes, and dates — then pre-fill the entire transaction form for you to review and save in minutes. This guide covers the complete workflow from upload to saving, and the differences between the seven supported document types.
Before You Begin
- The feature requires a sufficient balance of AI Coins (AIC) — your balance is displayed on the upload screen.
- Access to the feature uses the same permission as creating the relevant form — a user with permission to create a sales invoice can upload sales invoices with AI, and so on.
- For better matching accuracy, make sure your clients, suppliers, products, and taxes are already registered in the account.
- Uploading a purchase order requires the Purchasing Cycle app to be activated on the account.
Supported Documents
AI upload supports seven document types covering both the sales and purchases cycles:
- Sales: Sales Invoice, Sales Order, Estimate, Credit Note.
- Purchases: Purchase Invoice, Purchase Order, Purchase Quotation, Debit Note.
The workflow is identical for all types — from the list of each type to its pre-filled form — and only the final form and the fields the AI attempts to detect differ.
Step 1: Uploading the Document
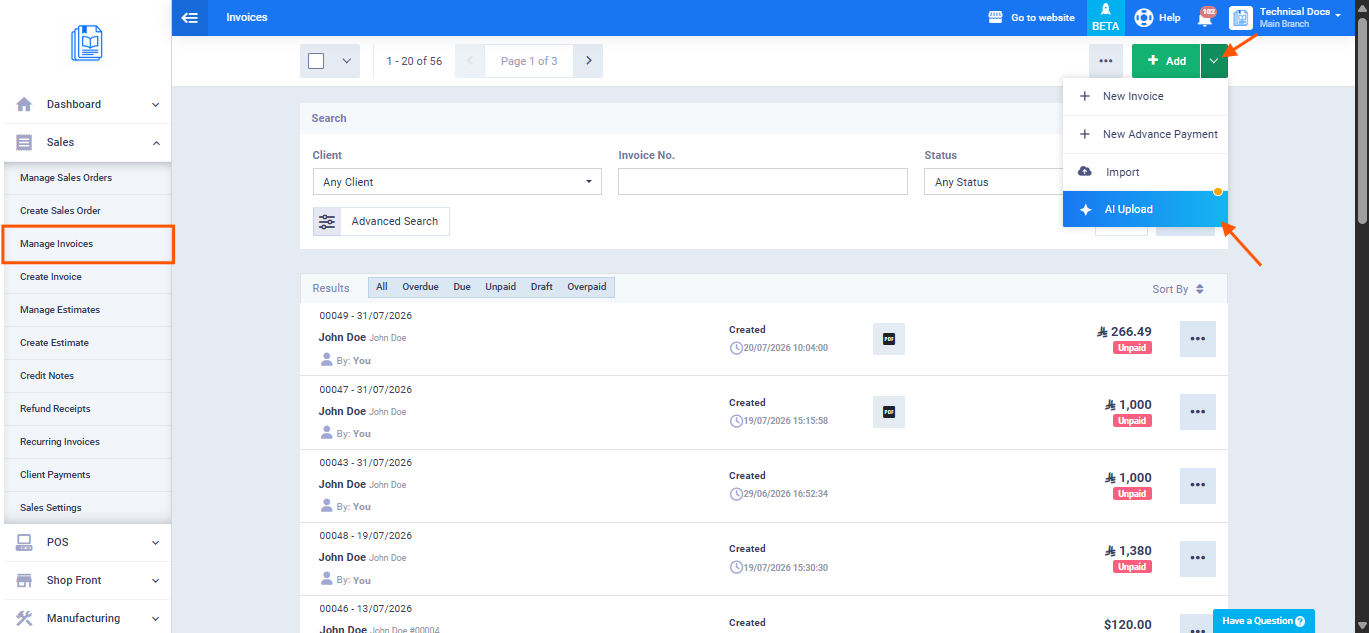
- Navigate to the list of the required document type — for example: “Sales” → “Manage Invoices” for a sales invoice, or “Purchases” → “Purchase Orders” for a purchase order.
- Click the AI upload option at the top of the list — your AIC balance is displayed on the screen.
- Upload the scanned document and start processing.
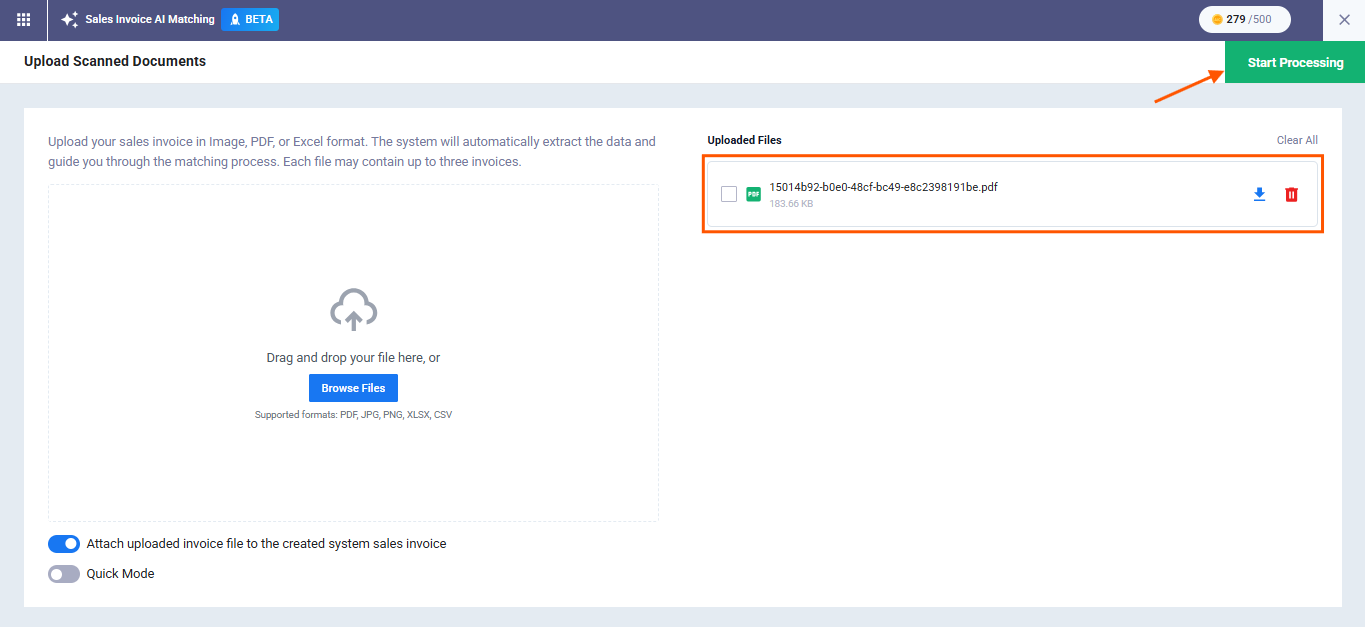
The system allows up to 5 active processing sessions per document type independently — sessions for sales invoices do not count toward sales order sessions. If the limit is reached, complete or close one of the open sessions first.
Step 2: Extraction and Matching
The AI extracts the document’s data and matches it against your account data:
- Items: Each item is matched against your registered products and services.
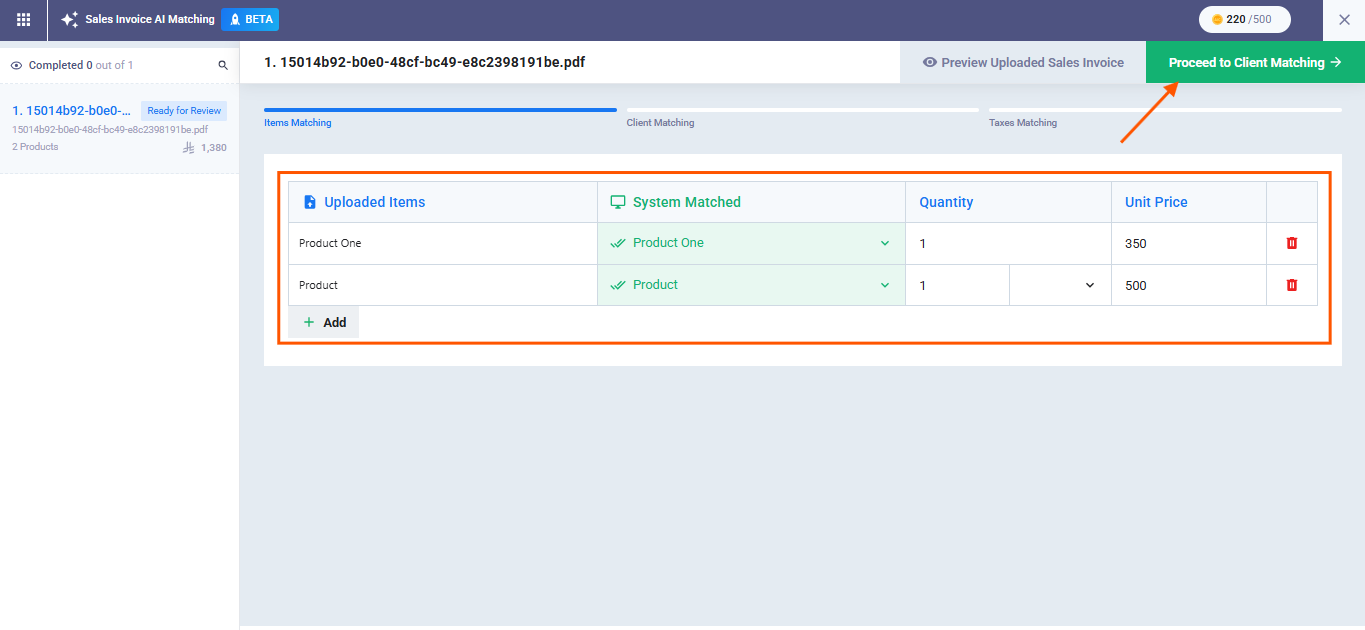
- Client or Supplier: The party name is matched against client records (sales documents) or supplier records (purchases documents).
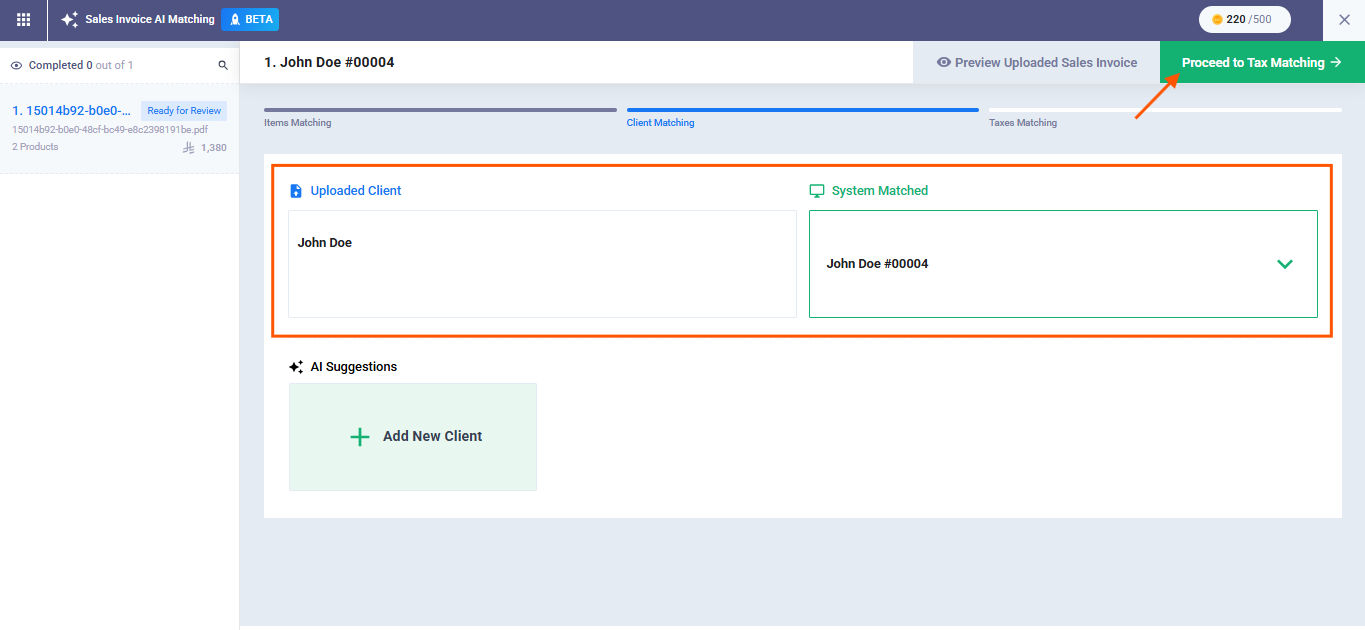
- Taxes: Applied taxes are detected and matched against your account’s taxes.
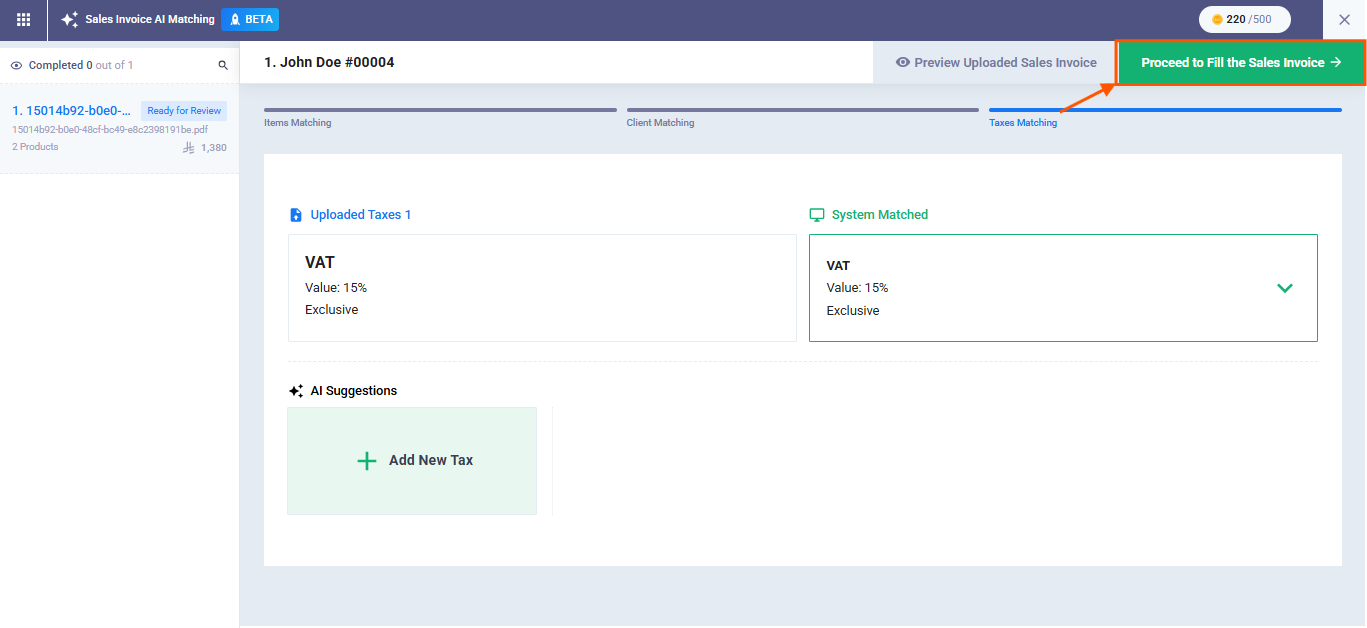
When needed, you can intervene manually without leaving the screen:
- Select the client or supplier manually if the AI did not recognize them or matched them incorrectly.
- Add a new product manually if the document contains an item not registered in your account.
- Adjust the matched tax for any line item.
Step 3: Reviewing the Pre-filled Form and Saving
The system takes you to the transaction form pre-filled with the extracted data. Review all fields, edit as needed, complete any fields left for manual entry, then click “Save” — the transaction is created like any regular transaction in the system, subject to the same numbering rules, accounting entries, taxes, and reports.
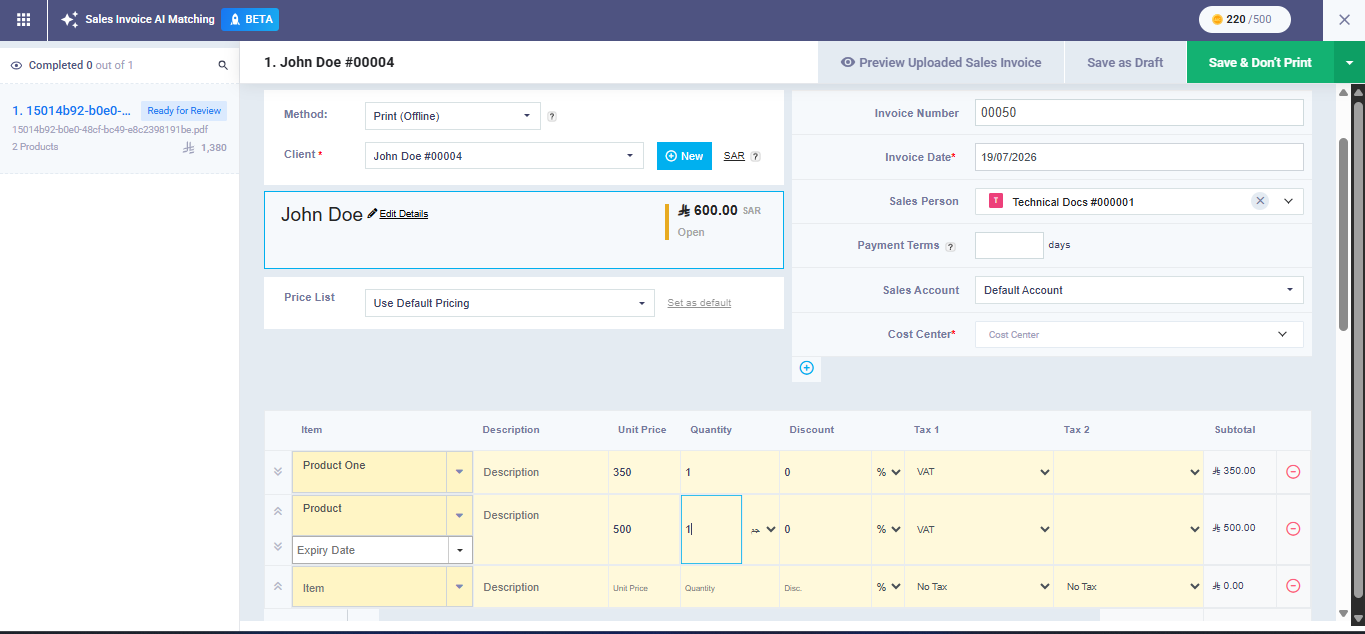
Saving only happens after your review and approval — the AI pre-fills, but the final decision is yours. Always review the client match, line items, and values before saving.
What Does the AI Fill In for Each Document Type?
For all types, the AI attempts to fill in: the client or supplier, the complete line items table (item, description, unit price, quantity, discount, tax 1 and tax 2), and the discount percentage. Additional fields differ by type:
- Sales Invoice: Detects invoice number, invoice date, issue date, payment terms, cost center at both invoice and line level, and custom fields. Intentionally left for manual entry: loyalty points, and the “Already Paid” and “Advance Payments” sections.
- Sales Order: Same scope as the sales invoice with the sales order form.
- Estimate: Detects the estimate number and date — the form does not include an “Already Paid” section. The “Apply Offers to Estimates” setting applies automatically to AI-created estimates the same way it does for manually created ones.
- Credit Note: Detects the credit note date, issue date, cost center at the line level, and custom fields. The note is standalone — not linked to the original invoice.
- Purchase Order and Purchase Quotation: Detects the date, the “Valid Until (days)” field, and account-defined custom fields — neither form includes a cost center or payment sections.
- Debit Note: Detects the debit note date, cost center at both header and line level, and custom fields — does not include a “Valid Until” field.
Undetected custom fields are left empty without error messages — complete them manually if required. Inline ad-hoc custom fields (added via the ➕ button inside purchase forms) are excluded from AI pre-fill because their labels vary freely from one document to another.
AI Coins and Consumption Tracking
- AI Coins are deducted upon processing completion, at the same deduction rate for all document types.
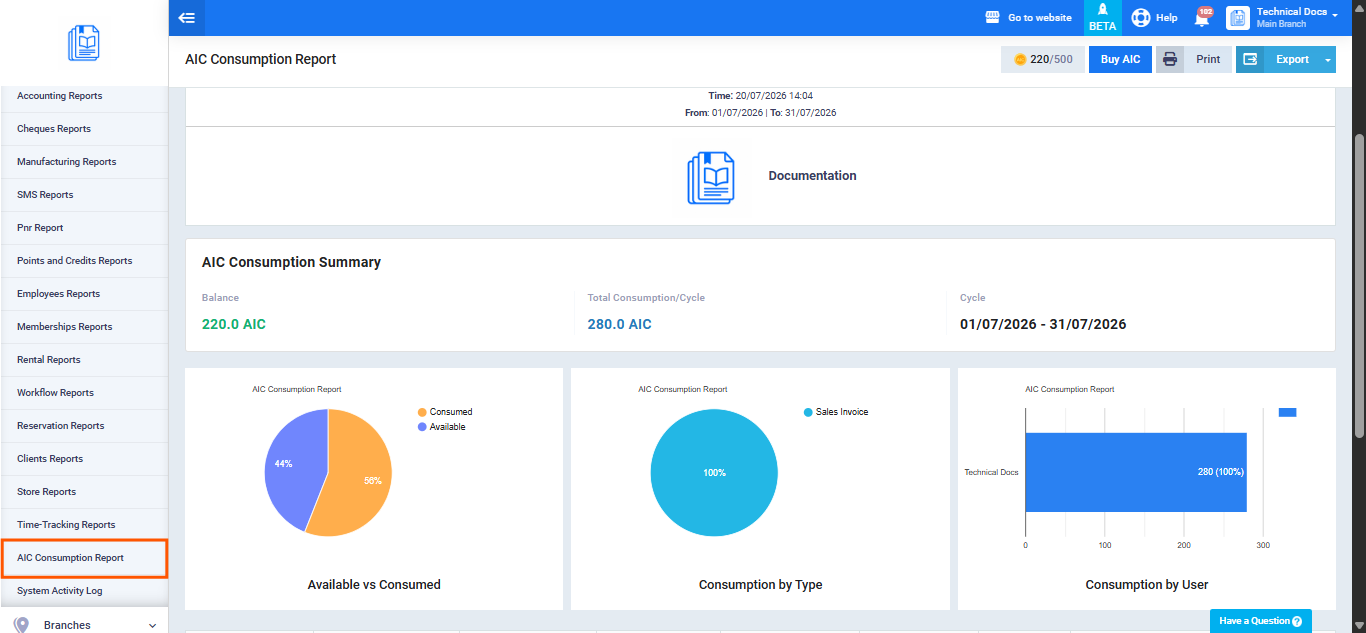
- To track consumption: from the “Reports” menu click “AI Coins Consumption Report” — it displays all consumption entries categorized by document type.
- Transactions created with AI appear with a distinctive indicator in their type’s list after saving.