
Guide to Setting Up a Work Item Template, Pricing It, and Using It in a Cost Sheet
A work item template allows you to define the materials and services required for a single unit of a specific work item once, and reuse them later within cost sheets without needing to re-enter them each time. In this article, we explain the steps to create the template, price it, and then use it within a cost sheet in detail.
Steps to Setting Up a Work Item Template, Pricing It, and Using It in a Cost Sheet
First: Creating a New Work Item Template
Step 1: Access the Add Template Screen
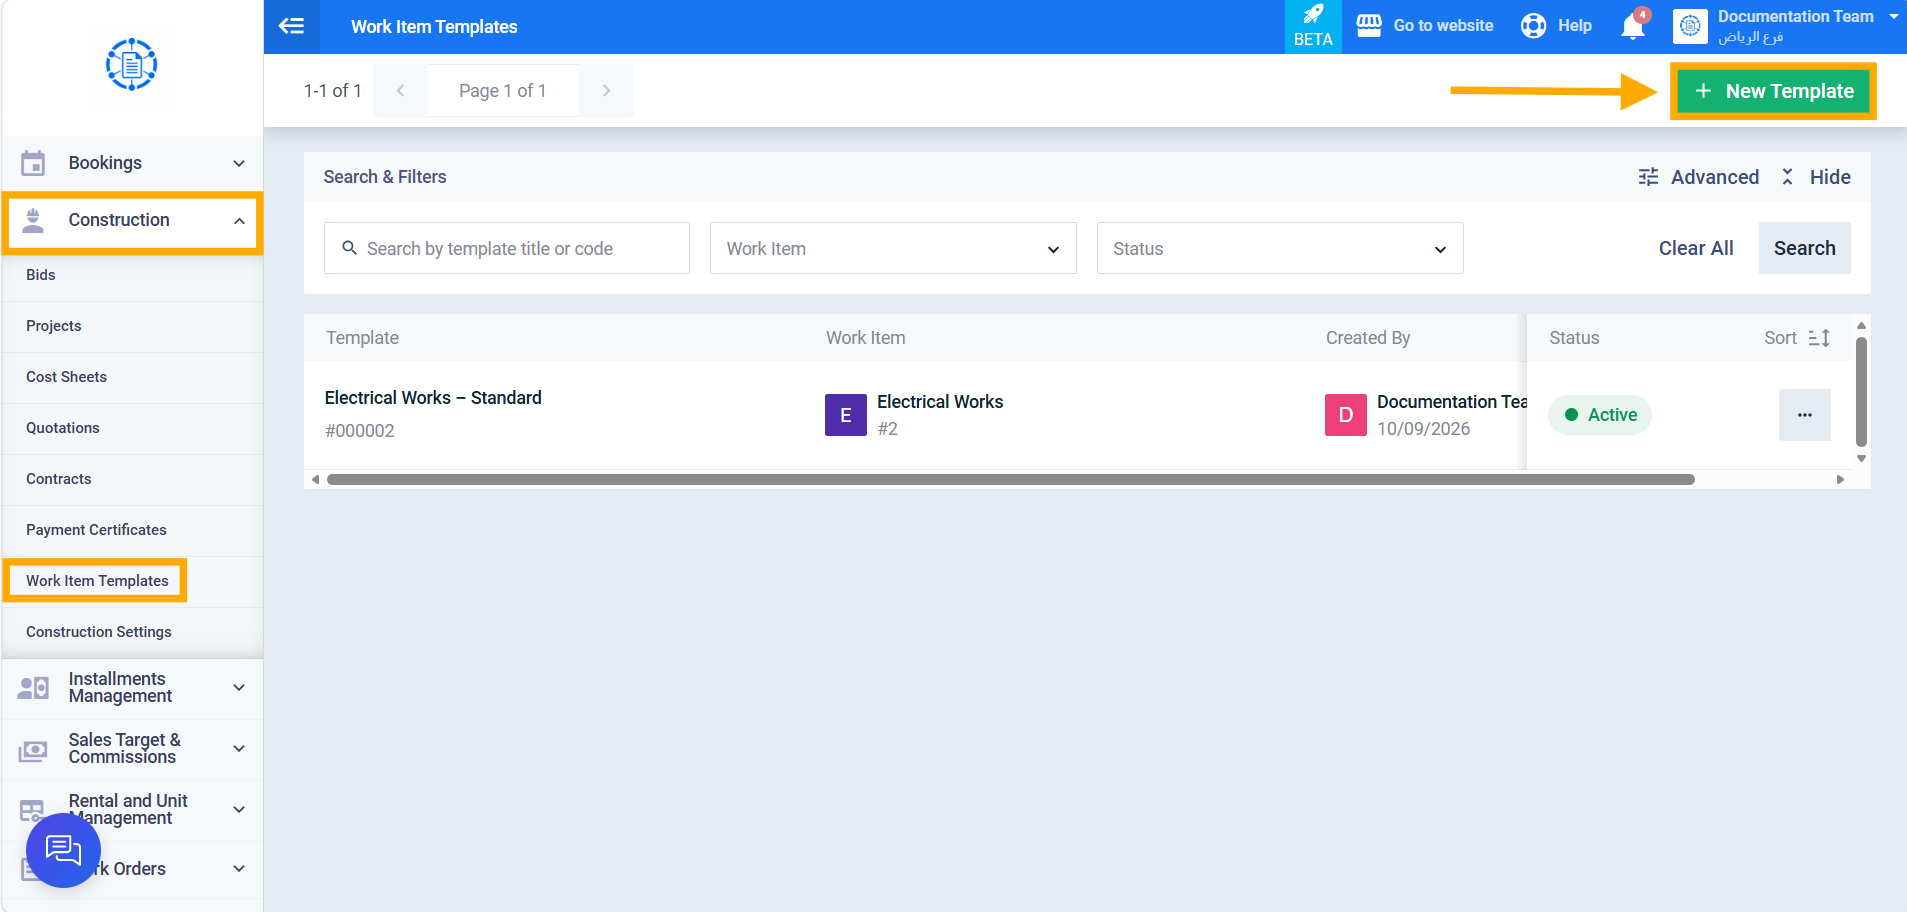
From the sidebar menu, click on “Construction,” then go to “Work Item Templates,” then click the “New Template” button.
Step 2: Fill In the Template Information
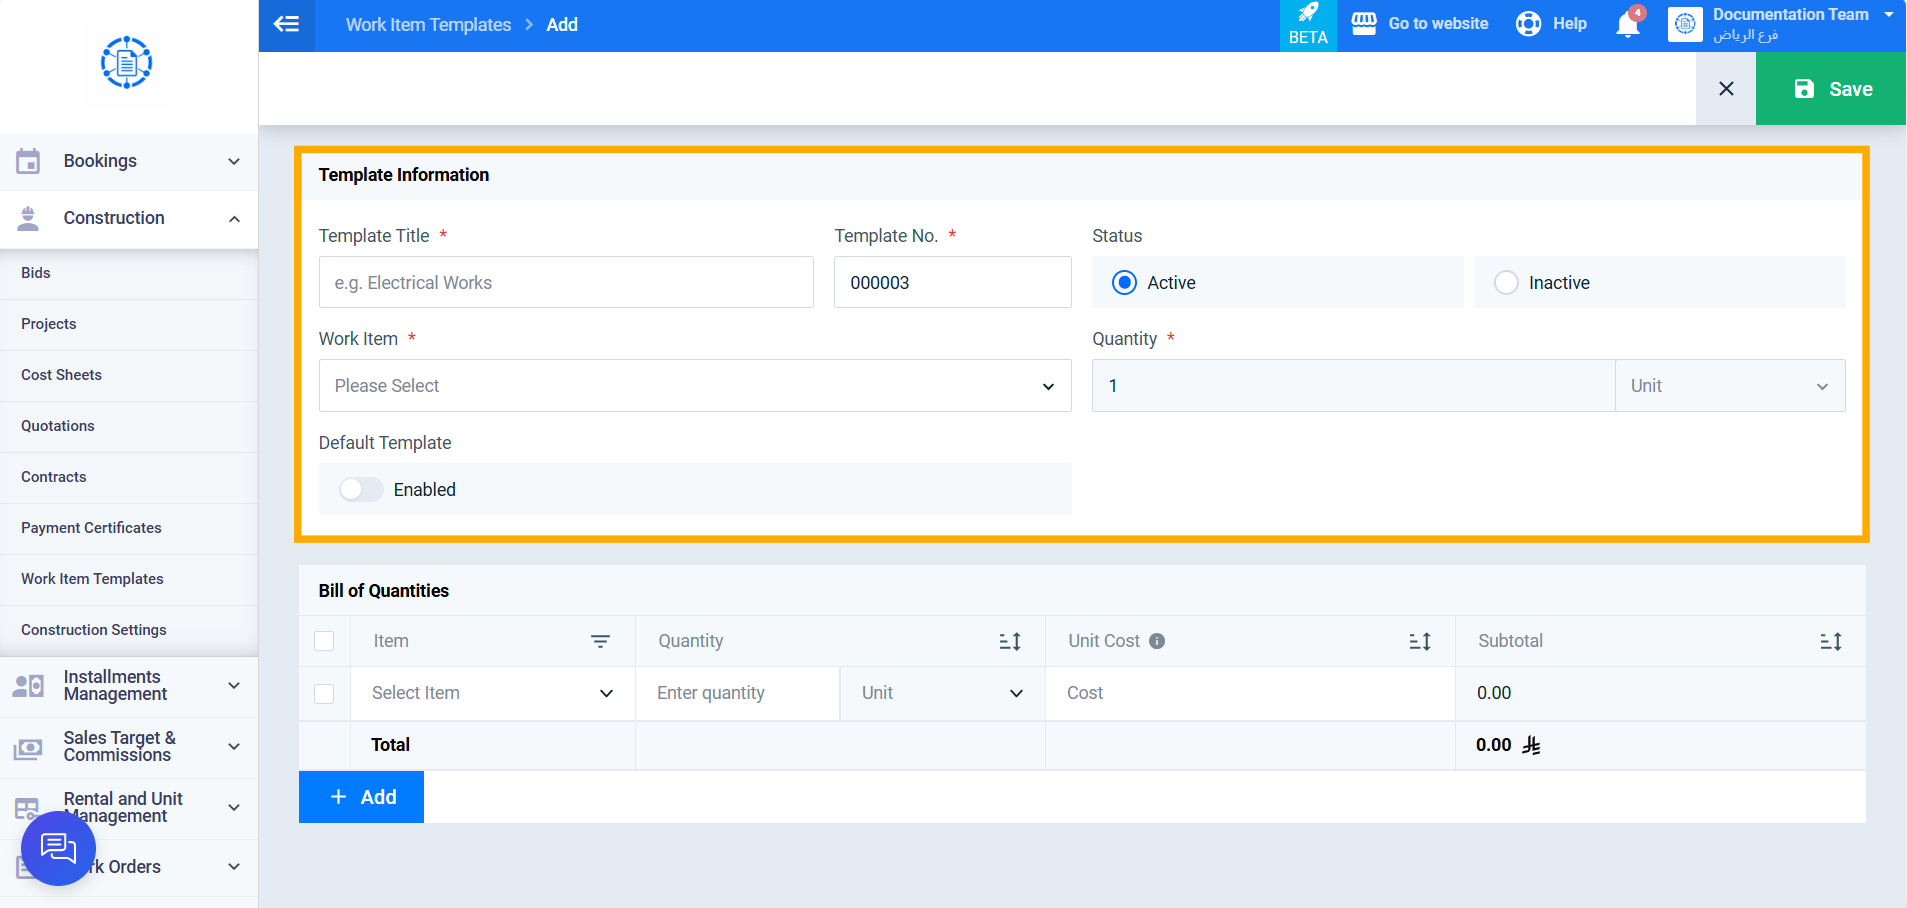
Once the “Add” screen for the work item template opens, a section titled “Template Information” appears, including the following fields to be filled in as follows:
- Template Title (required): enter a clear name that distinguishes the template from others, such as “Electrical Works.”
- Template No.: doesn’t require any input, as the system generates it automatically once the template is created.
- Status: choose between “Active” and “Inactive” using the available toggle buttons. The system sets the value to “Active” by default, with the option to change it as needed.
- Work Item (required): select the required work item from the dropdown list, which displays the active items stored in the system.
- Quantity: this field is for display only and cannot be edited, and it always shows the value “1,” taken from the specified unit.
- Unit (required): select the appropriate unit from the dropdown list. Note that if the selected work item is linked to a unit already defined in the system, this field is filled in automatically.
- Default Template: use the toggle switch to determine whether you want to make this template the default one or not. The default value upon creation is “Disabled.”
Second: Pricing the Template via the Bill of Quantities
Step 3: Add Materials and Services
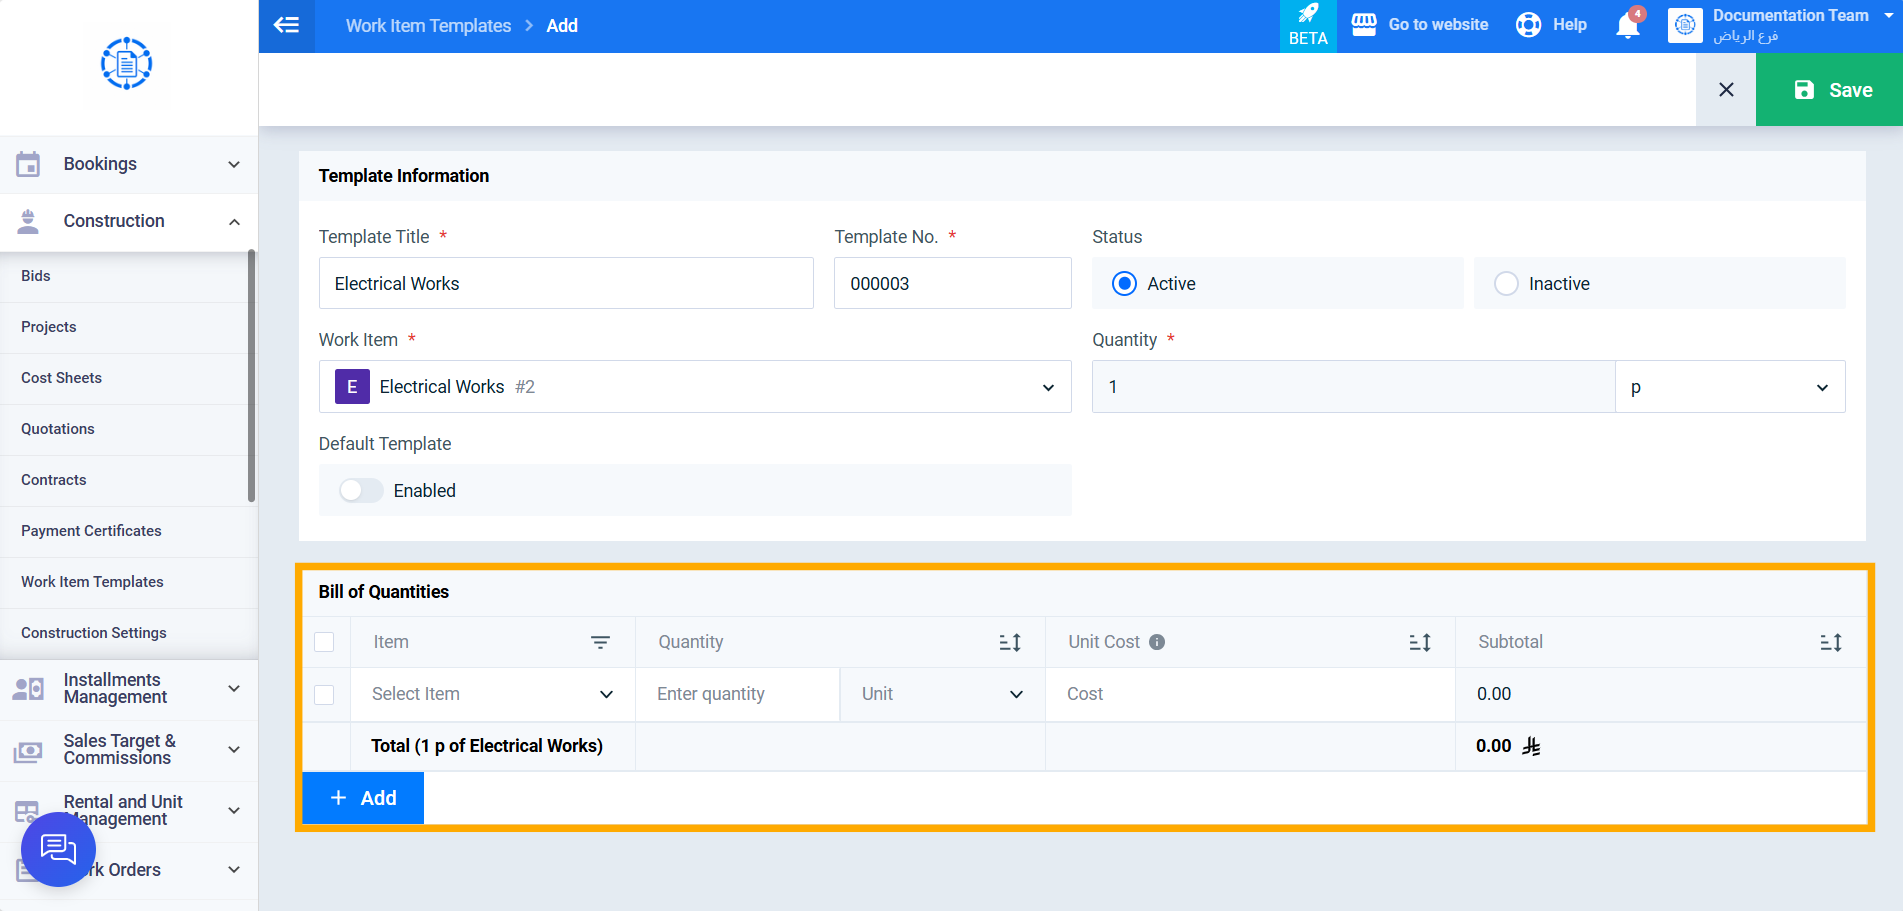
Under the “Bill of Quantities” section, click “Add” to add a new row, and specify for each row:
- Item (required): a dropdown list showing the materials and services defined in the system along with their SKU; you can search by name or code, or add a new material/service directly from the same list (a side panel opens for the addition form).
- Quantity (required): a numeric field.
- Unit (required): a dropdown list showing the unit templates defined in the system; you can search by name, or add a new unit directly by typing its name in the search field then clicking the “Create” option at the bottom of the list (the entered text is used as the base unit name, short name, and template name).
- Unit Cost: a numeric field, automatically filled in from either the average inventory cost or the last purchase order (based on the “Unit Price Calculation” setting in the construction settings), with a tip appearing to explain the calculation source.
- Subtotal: read-only, automatically calculated (Subtotal = Unit Cost × Quantity).
Step 4: Review the Summary and Save the Template
A summary appears below the table in the format “Total (1 [work item unit] of [work_item_title]).” After completing all the required fields, click “Save” — the message “Work item template added successfully” appears, and you’re redirected to the template’s view screen.
Third: Using the Template Within a Cost Sheet
Step 5: Open the Cost Sheet for a Bid
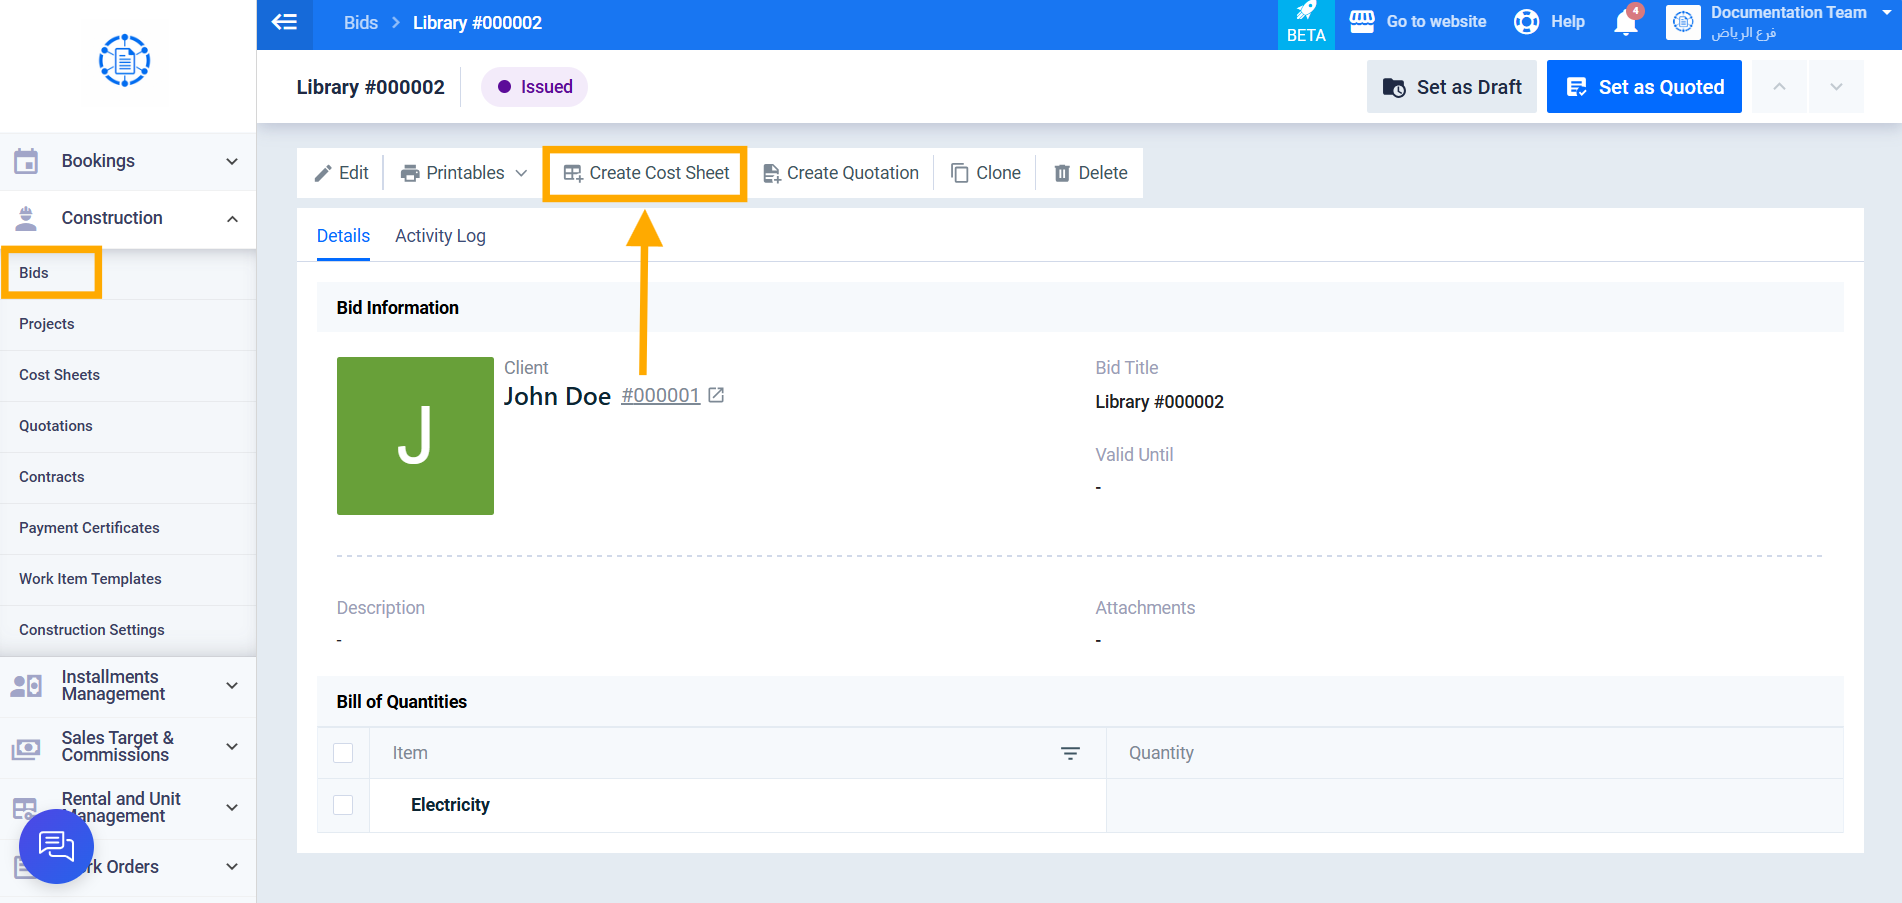
From the sidebar menu, click on “Bids,” open the required bid’s view screen, then click the “Create Cost Sheet” button.
Step 6: Select “Import Work Items”
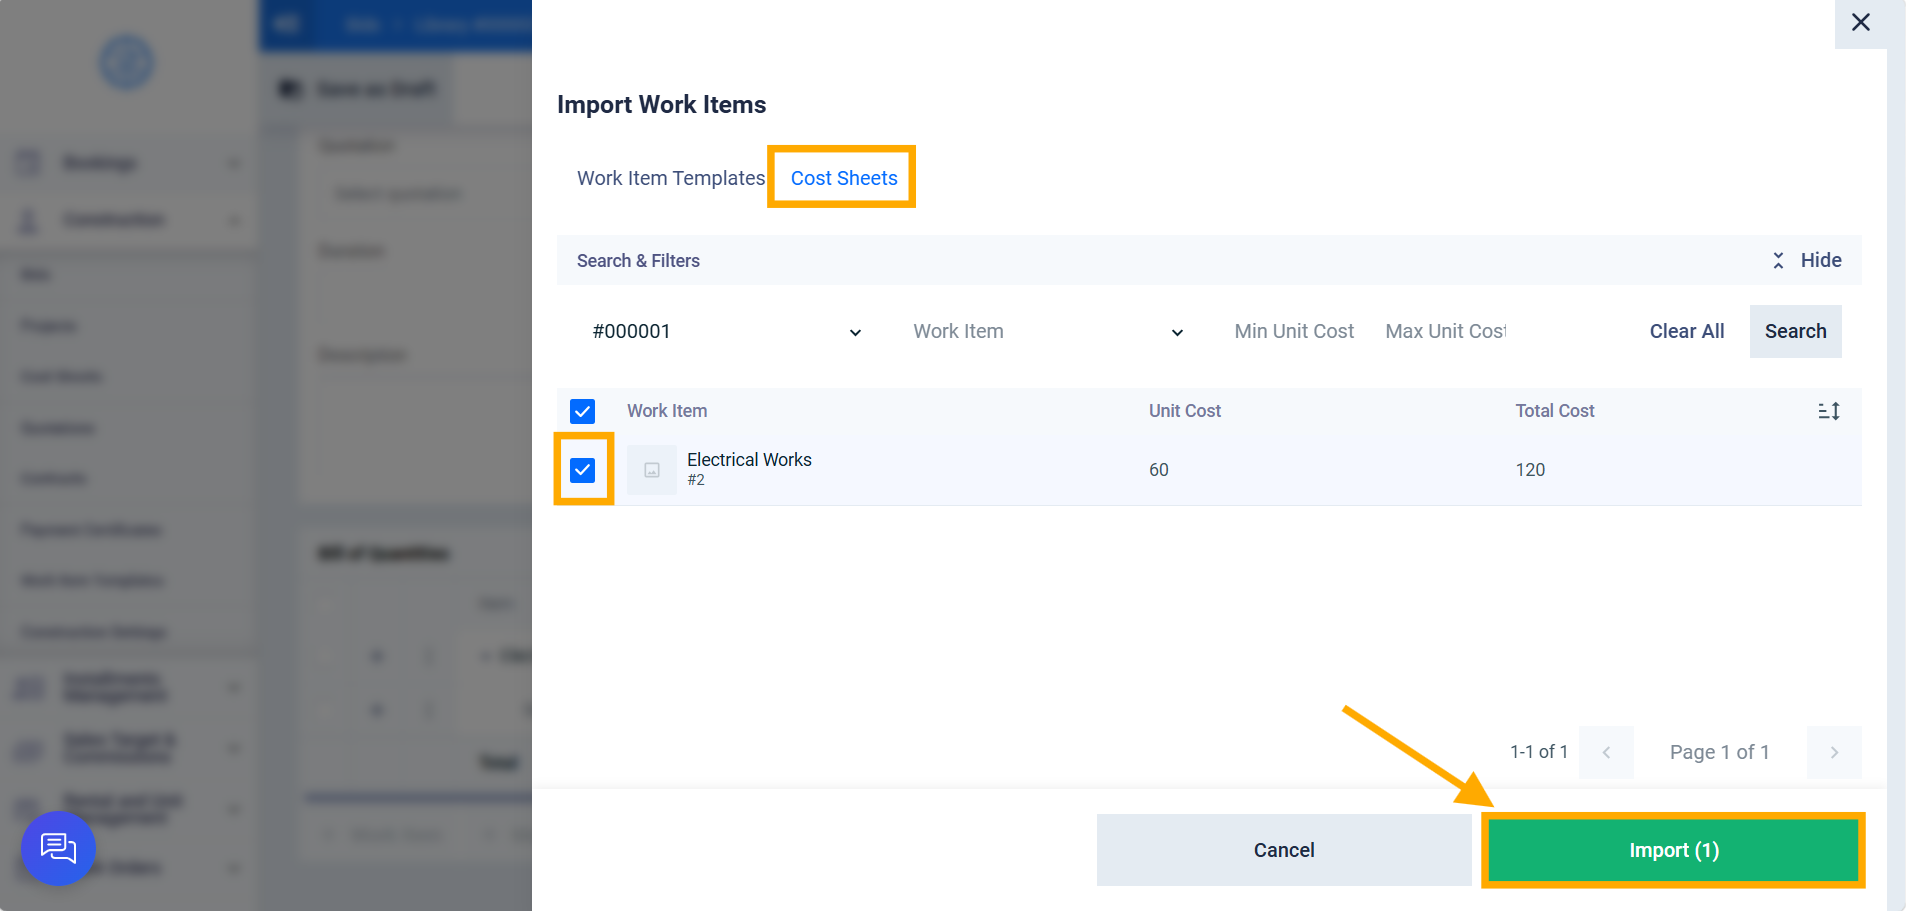
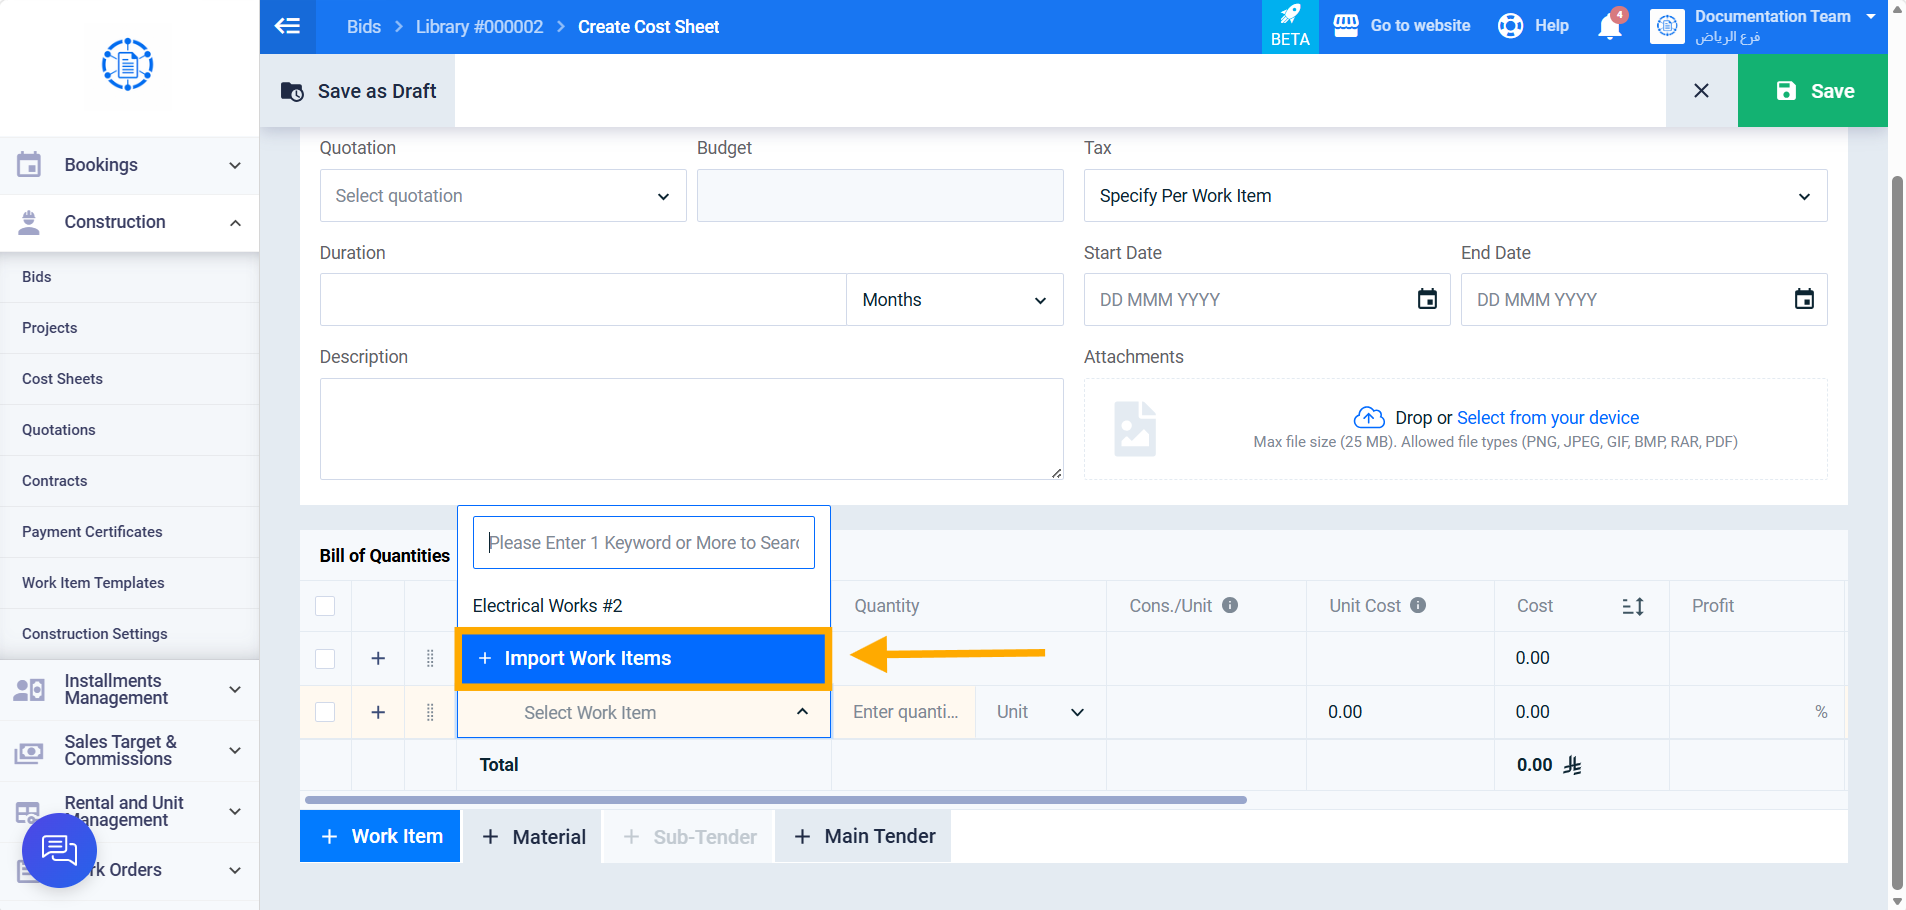
When adding a new work item to the cost sheet, select “Import Work Items” from the dropdown list — a side panel opens displaying two tabs: “Work Item Templates” (selected by default) and “Cost Sheets.”
Step 7: Import from “Work Item Templates”
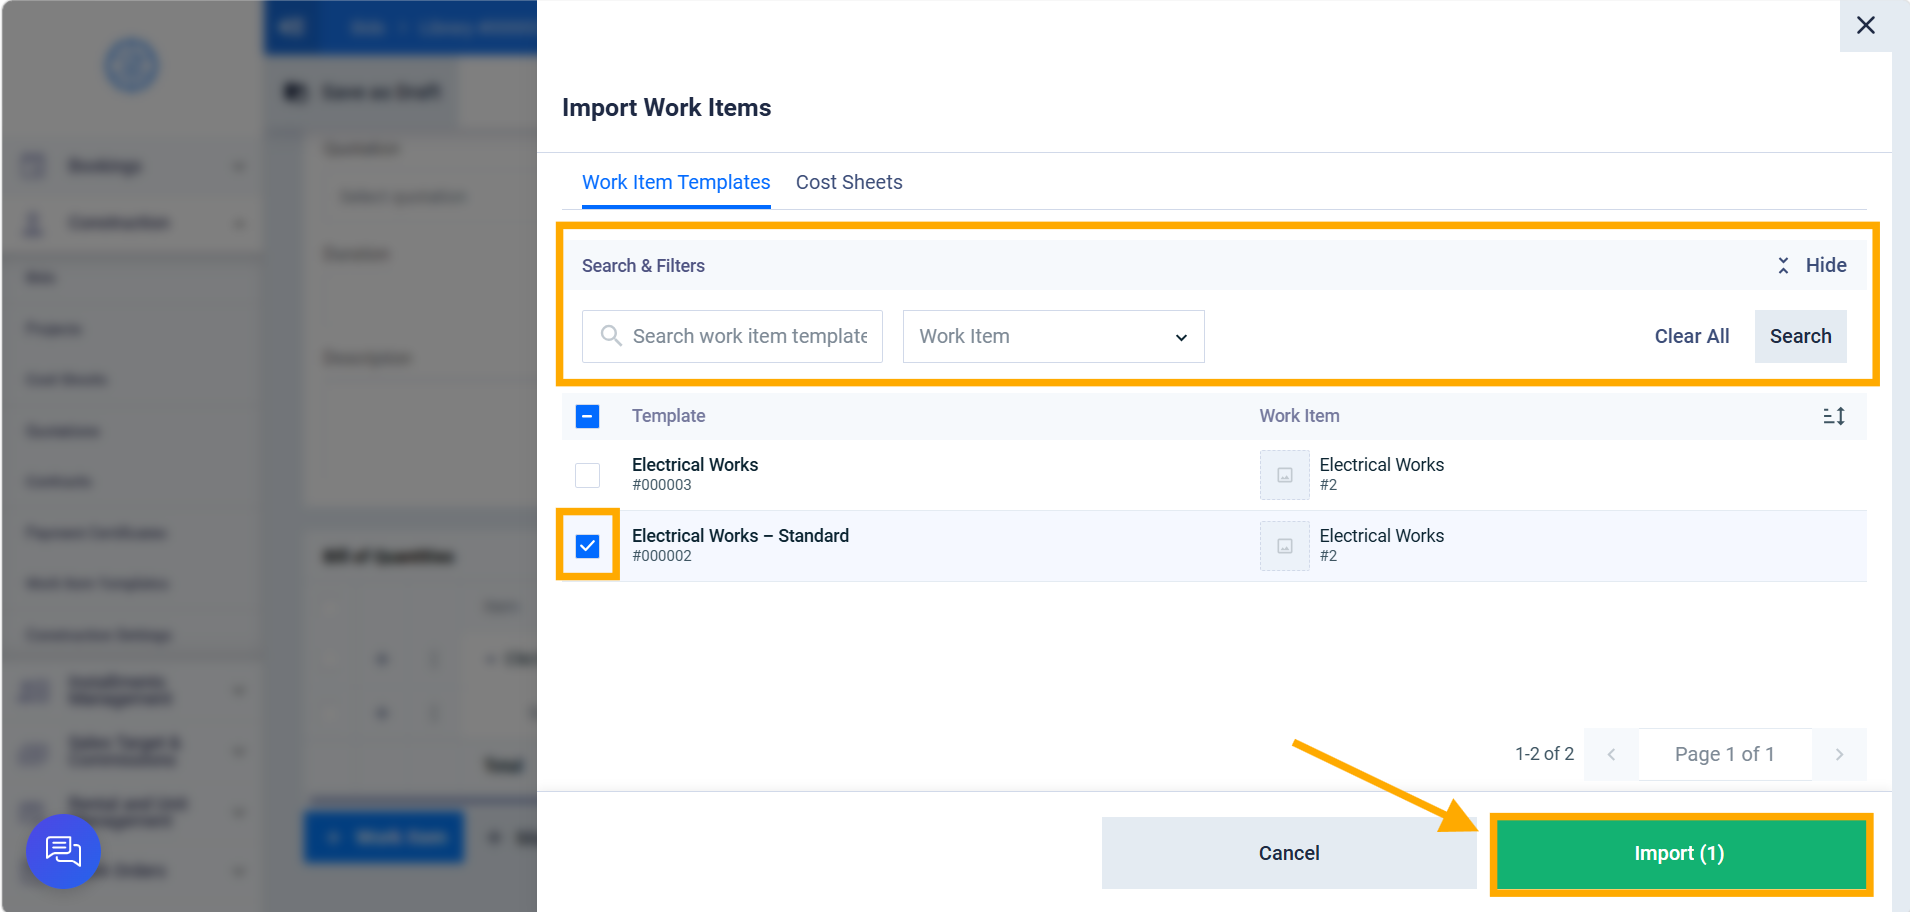
In the “Work Item Templates” tab, search by template title or work item title (only active templates are shown), select one or more templates, then click “Import”.
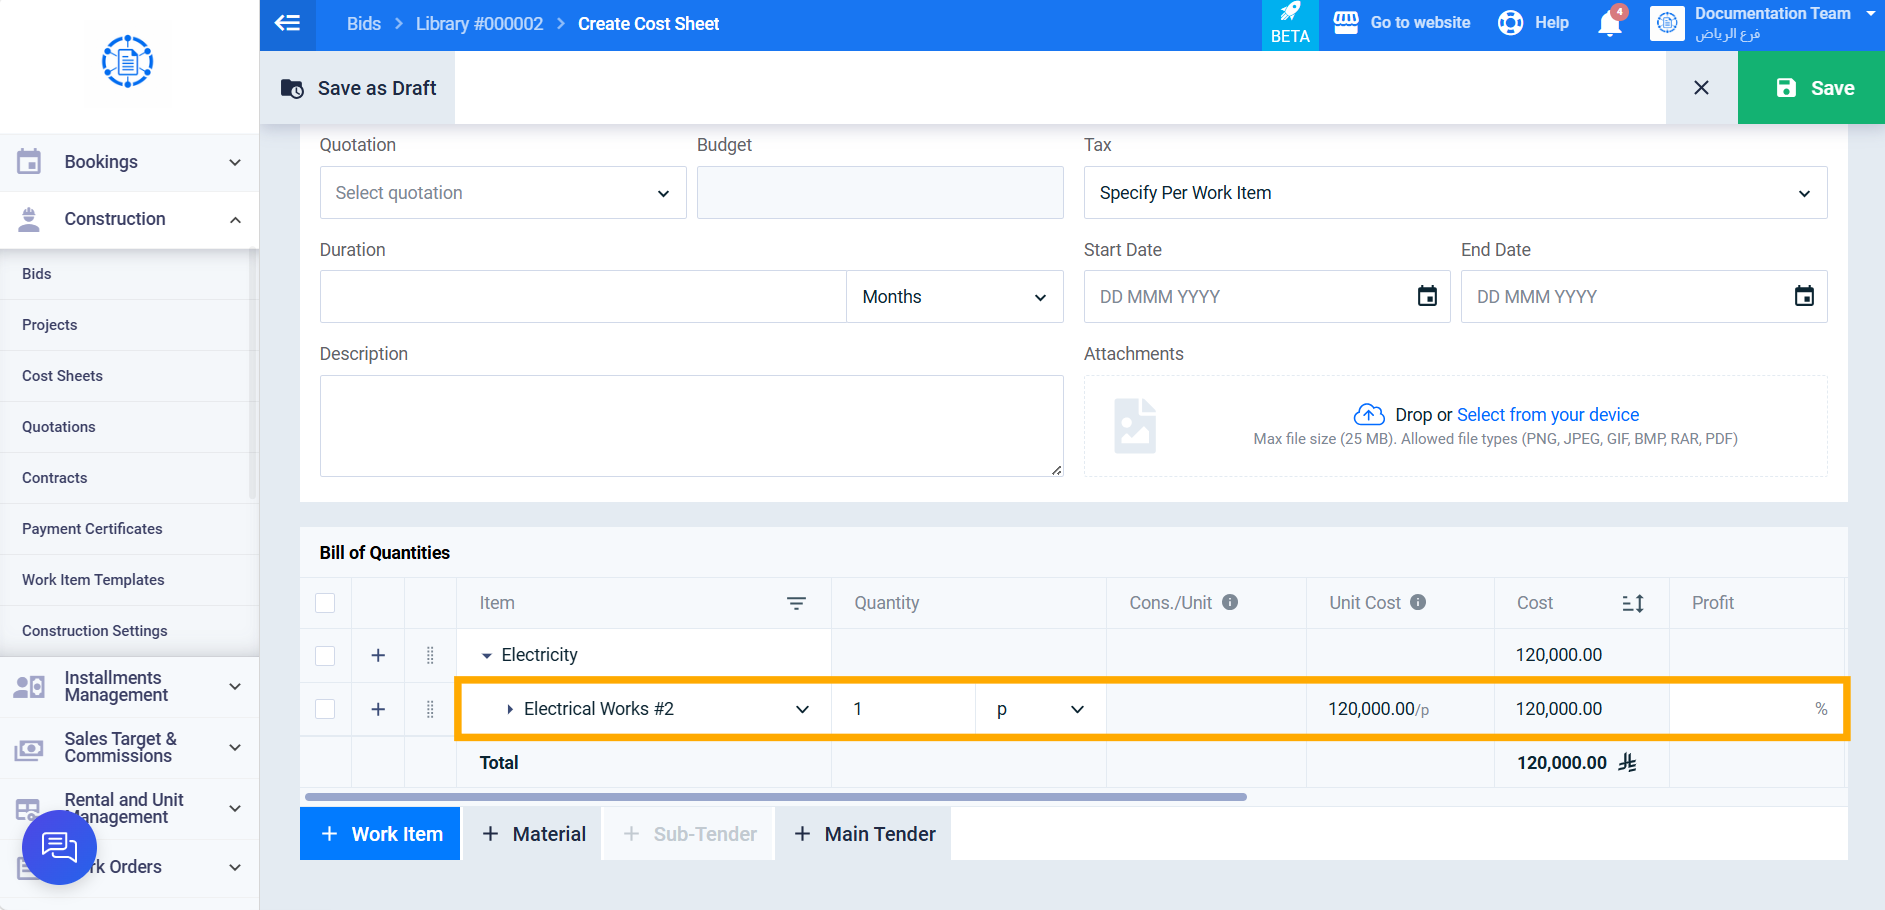
The selected work item is added to the cost sheet with a default quantity of “1.”
Step 8: Import from “Cost Sheets” (Alternative)
Alternatively, click the “Cost Sheets” tab to import a work item previously used in another cost sheet for the same bid. Search by cost sheet code or work item title, select the required item, then click “Import” — it’s added with the same original quantity used in the source cost sheet.