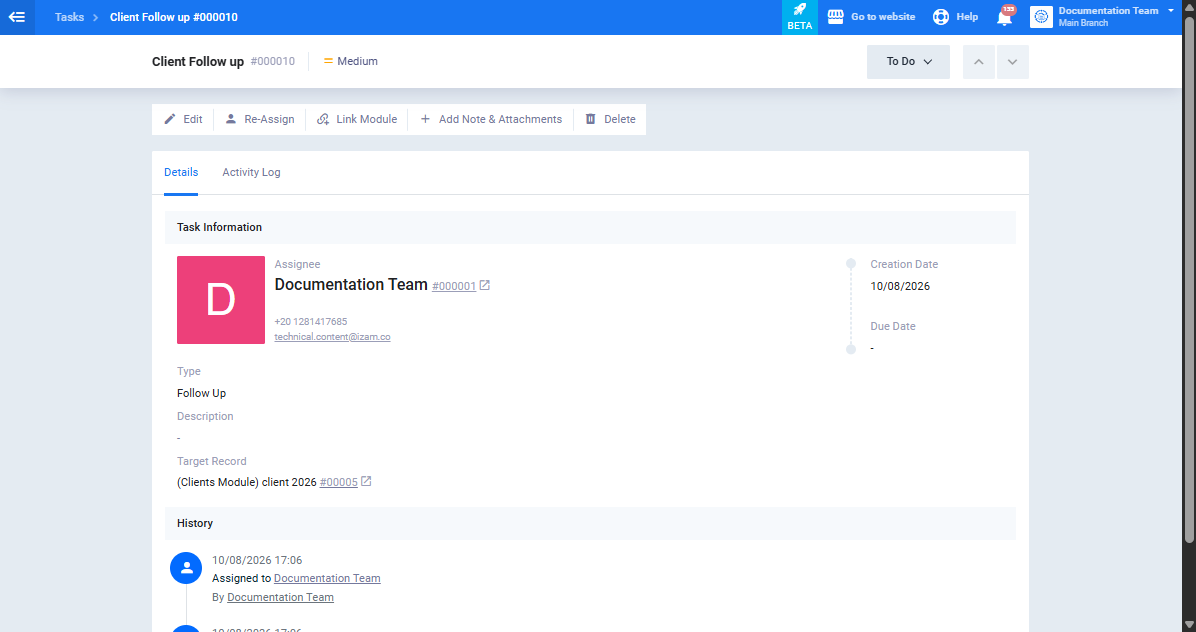
How to Create a New Task and Assign It to an Employee
Task management in the system lets you create a new task and assign it to any employee, specifying its type, priority, and due date, and linking it — if needed — to another record in the system, such as a client or an invoice. This guide walks you through the creation and assignment steps in detail.
Steps to Create a New Task and Assign It to an Employee
Step 1: Navigating to the Task Creation Screen
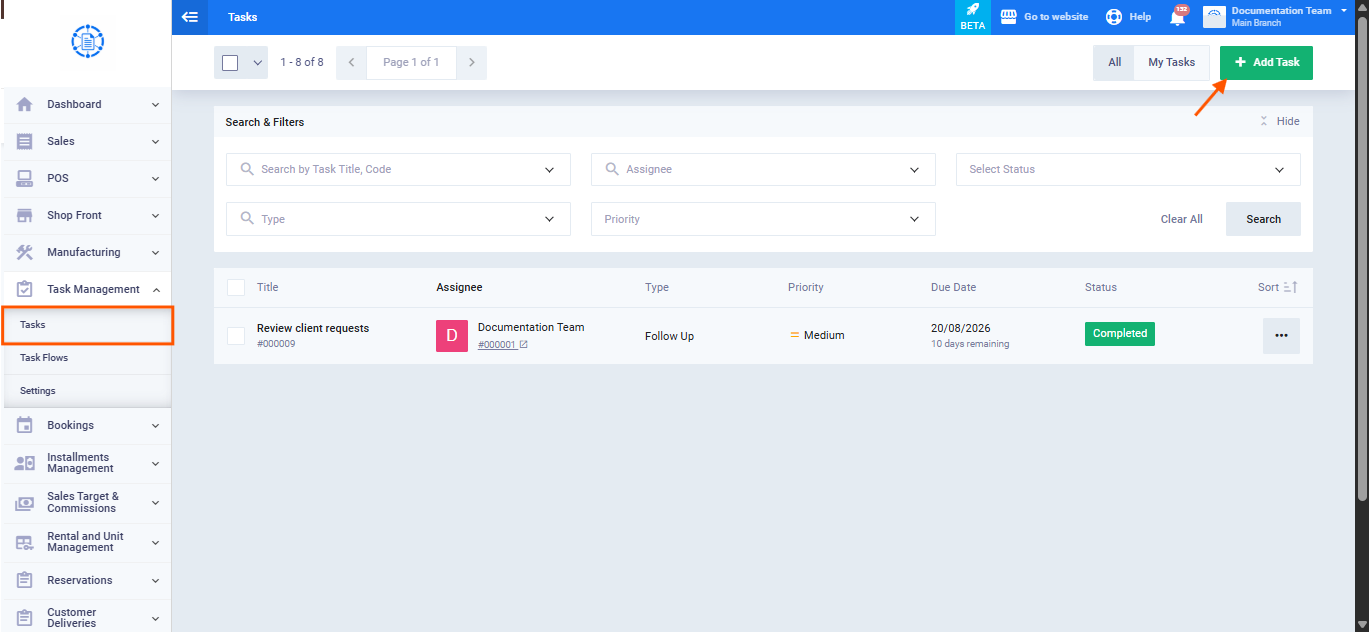
From the main menu, click “Tasks,” then click “Add Task” to open the creation form.
Step 2: Filling In the Task Details
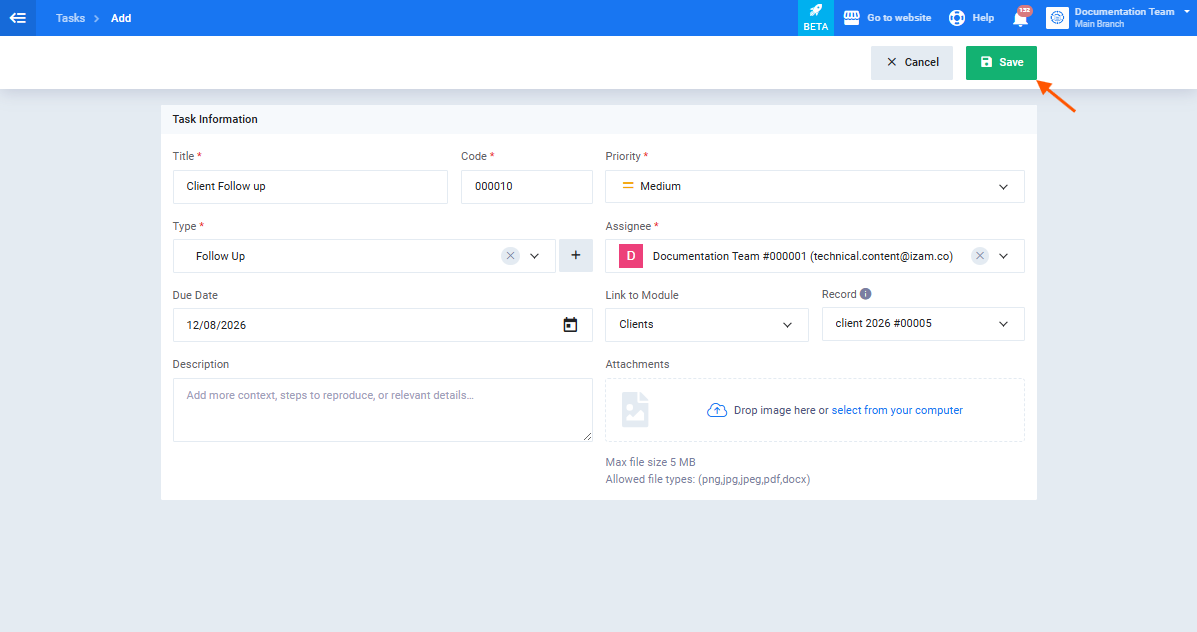
On the task creation screen, enter the following details:
- Title: A short, clear summary describing what needs to be done.
- Code: An automatically generated sequential number identifying the task.
- Priority: Low / Medium / High (defaults to Medium).
- Type: Select the appropriate task type from the dropdown. If the type you need doesn’t exist yet, click the “+” button next to the field to add a new one on the spot.
- Assignee: The employee the task will be assigned to.
- Due Date: The date by which the task must be completed (optional).
- Description: Add more context, steps to reproduce, or any other relevant details about the task (optional).
Step 3: Linking the Task to a System Record (Optional)
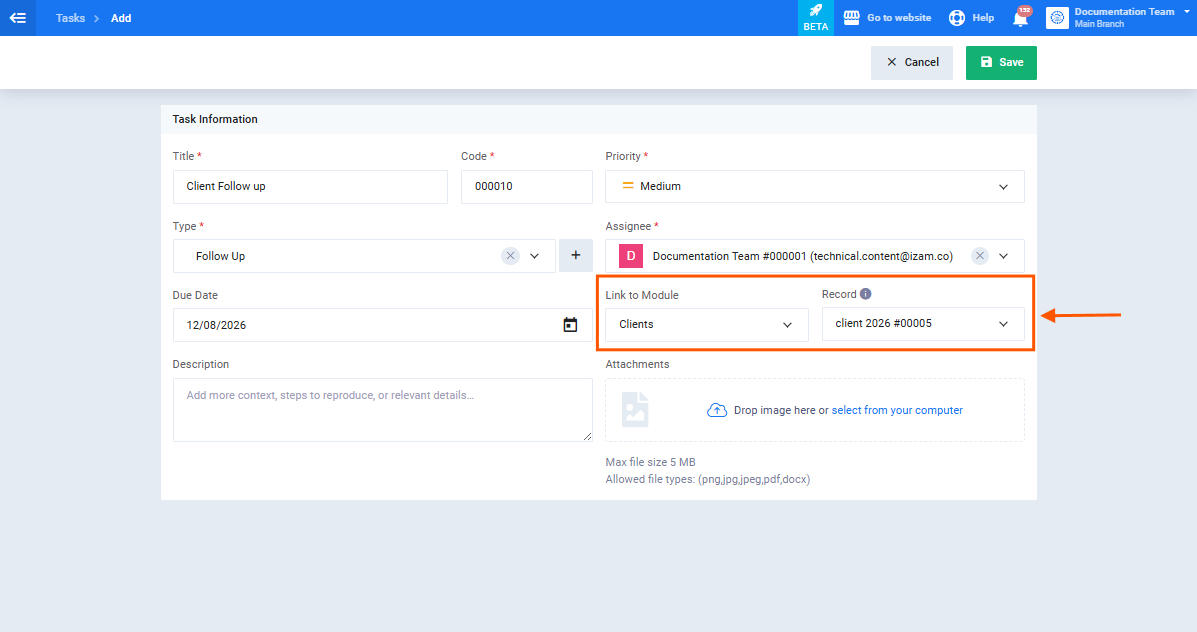
If the task relates to an existing record in the system (such as a client, invoice, or supplier), you can link it directly:
- From the “Link to Module Section” list, select the required record type.
- Select the specific record (e.g., an invoice number or client name).
Step 4: Adding Attachments (Optional)
You can attach any supporting files for the task (documents, images, etc.) from the “Attachments” section before saving.
Step 5: Saving the Task
Click “Save.” The task is created immediately and appears in:
- The general Tasks list.
- The “My Tasks” screen for the assigned employee.
The assigned employee receives an instant notification about the new task.