Defining the Second Shift and Calculating Employee Attendance for Two Shifts
Often, shifts are not continuous hours but are divided into two periods, with the employee working the total required hours in two separate sessions interspersed with a break.
For example, an employee may work from 8 AM to 12 PM and then from 6 PM to 10 PM. To implement an employee being assigned to two shifts, you should activate the feature within a specific period and follow certain steps, which we will review together in this article.
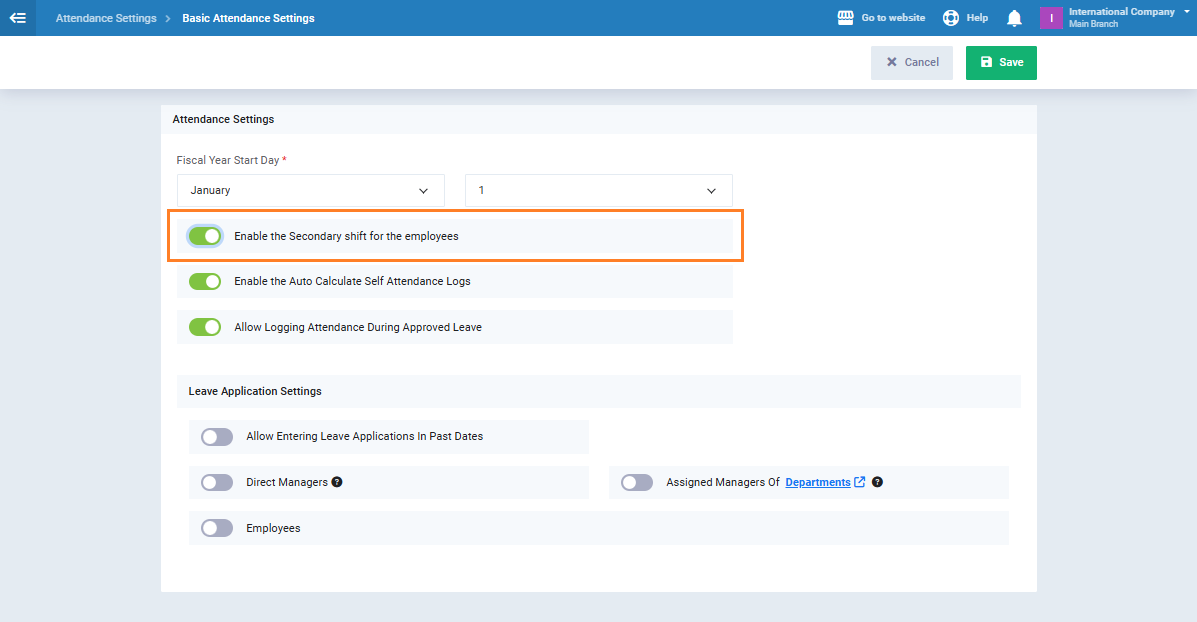
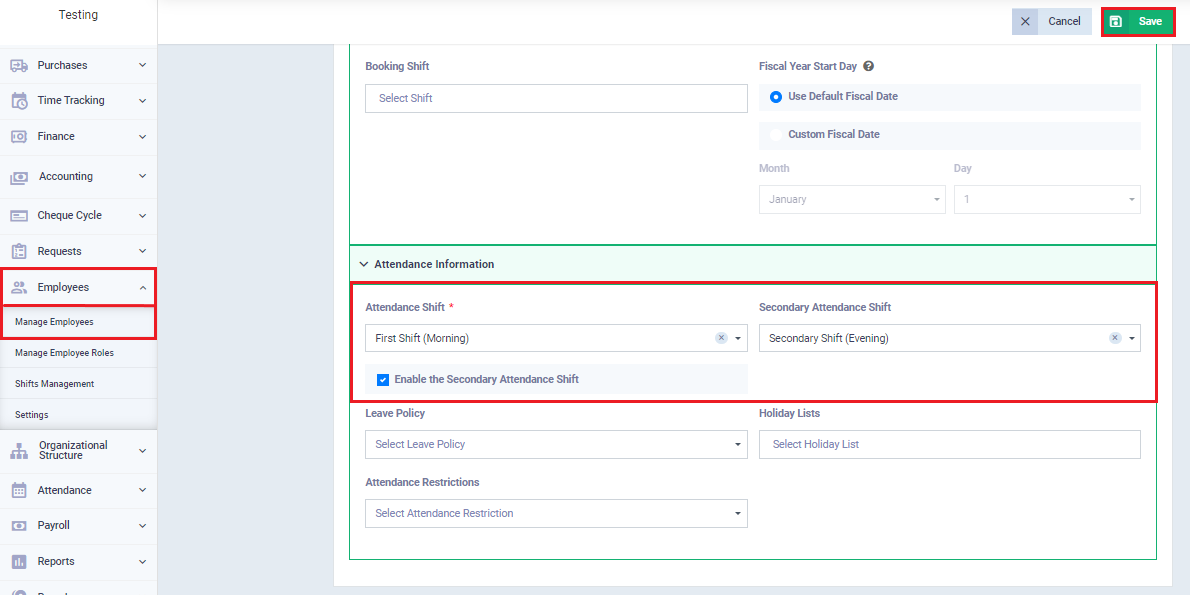
Activating the Second Shift in the Account
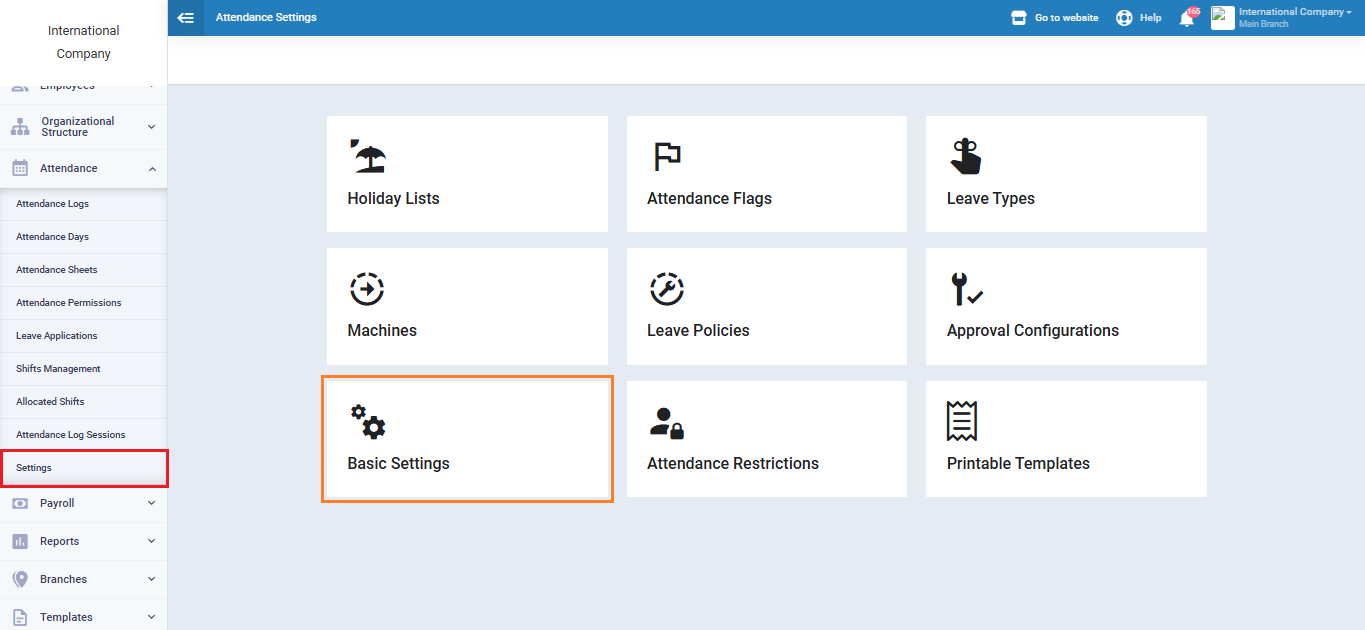
This will display a new field for the second shift in the employee’s profile, distinct from the first shift field.
Adding the first and second shifts in the account
Before assigning the shifts to the employee, you need to verify the registration of the shifts in the system and adjust their times.
As for the first shift, it is often the morning shift, followed by a break period, and then the second shift; the evening shift. To have two shifts do as follows:
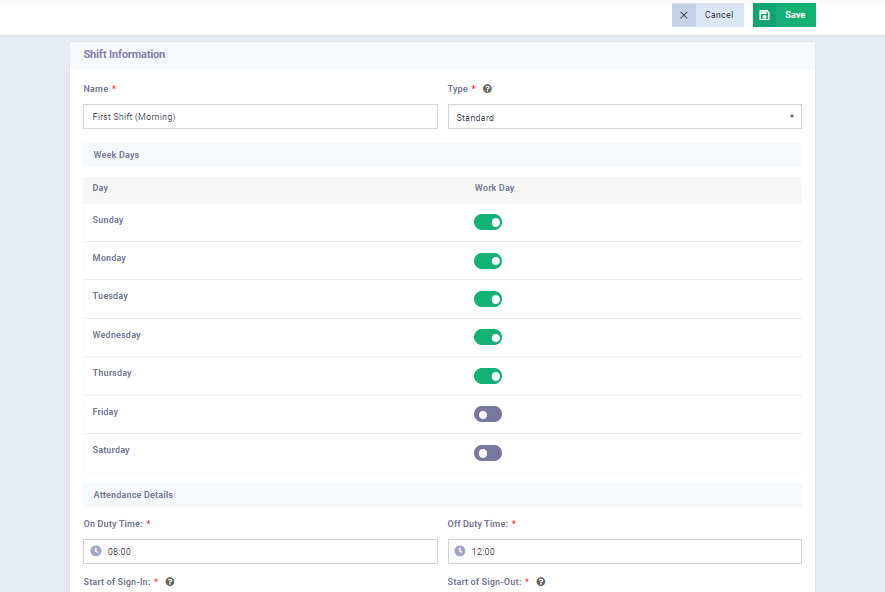
And here appear the timings of the first shift (Morning shift).
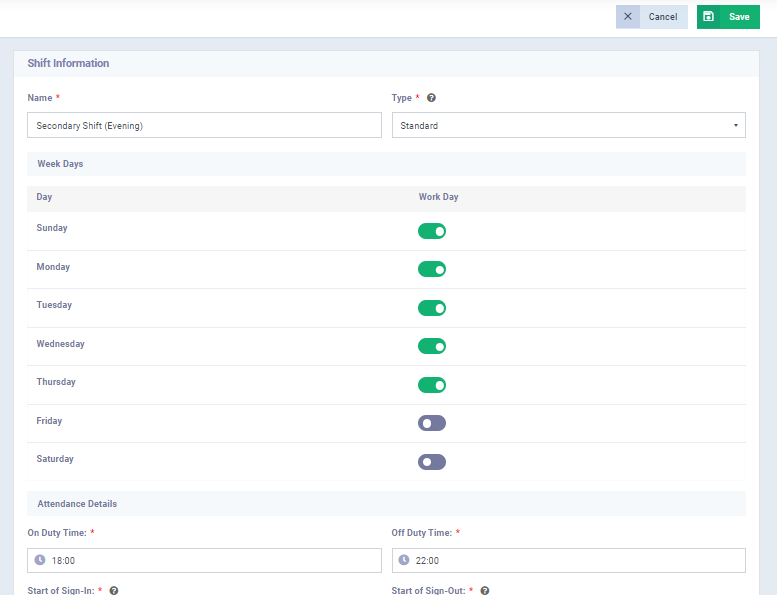
And here are the timings of the second shift (Evening shift).
Save them and proceed to assign them to the desired employee profile.
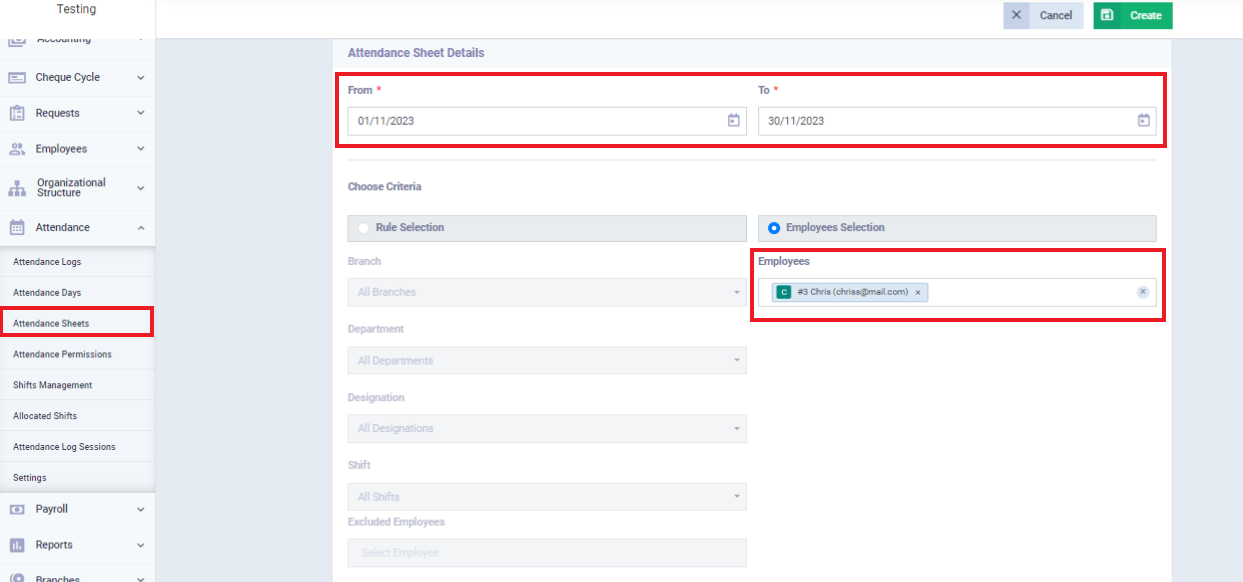
Explanation of assigning the two shifts in the employee file
Uploading attendance records for the employee
After preparing an Excel file containing the employee’s work start and end times during the two shifts, ensure that the data is matched and arranged in the following format:
- Employee’s name or ID number
- Shift date in the format: day/month/year
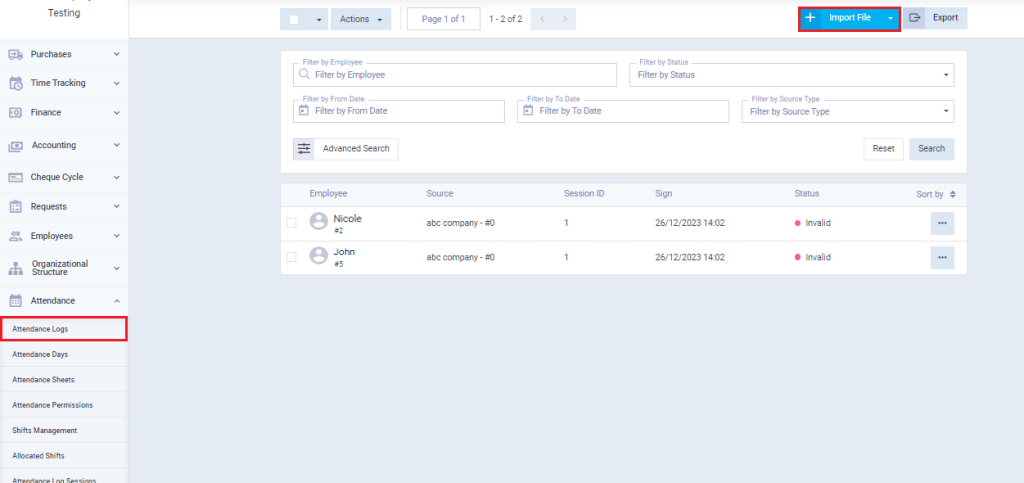
Then, upload the file in the system by clicking on the attendance logs option in the “Attendance” dropdown menu.
Click on “Import File” and upload the file that contains the attendance days from your device or through the fingerprint device connected to the system. Afterward, the program will calculate the attendance based on this file.
To upload the file, follow these steps:
- To upload the file click on “Choose file”,
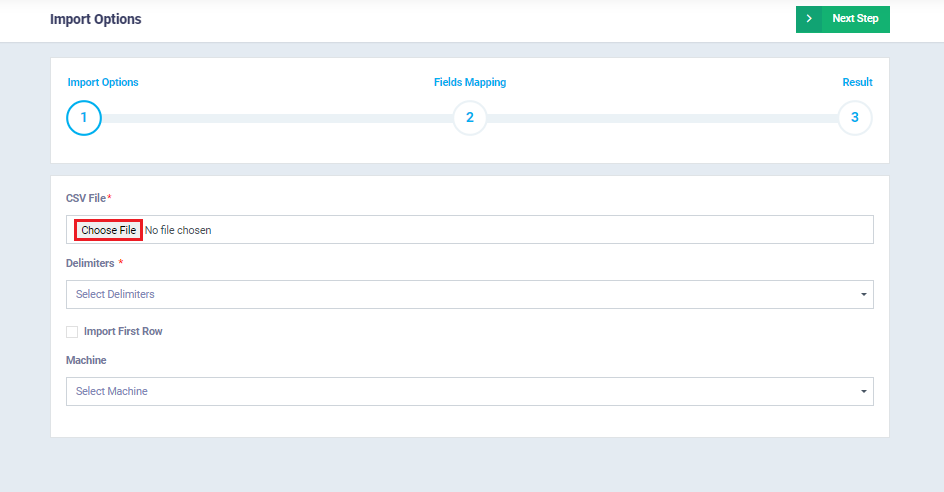
Considering the selection of ‘Comma Separated,’
then activate the option to skip errors during the import process.

A screen will appear indicating the successful completion of the import process.

Then, we proceed to calculate the employee’s attendance through the attendance log.
Otherwise, this message appears
Invalid Data, Wrong Relation Chriss at row #2
Calculating employee attendance and displaying the attendance summary for the two shifts
After creating the attendance log, you will receive a confirmation message, and a review copy of the log will be available, including a detailed summary of the employee’s attendance.
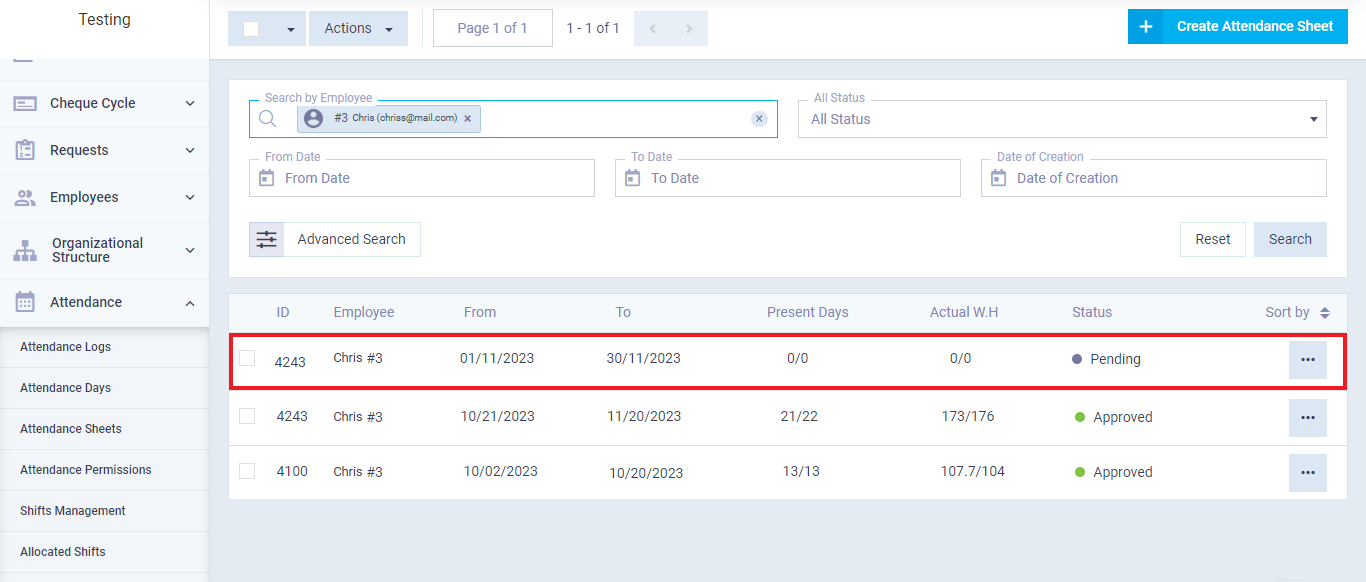
After clicking on the desired attendance log, you can access the following attendance details:
- Total working days
- Total attendance days and the attendance percentage
- Start of the fiscal year covered by this attendance log
- Total delay, including the number of delayed days and the total delayed time in minutes
- Expected working hours
- Actual working hours and the percentage of actual attendance hours compared to the expected ones
- Number of absent days
- Number of vacation days
- Days the employee left early
- Days the employee did not register their sign-out
- Days the employee did not register their sign-in
Details of Leaves:
These include categorized vacations:
- Regular vacations
- Exceptional vacations
- Any other type of system-defined vacations

In case you accept the attendance log and it matches the information you have, click on the approval button.
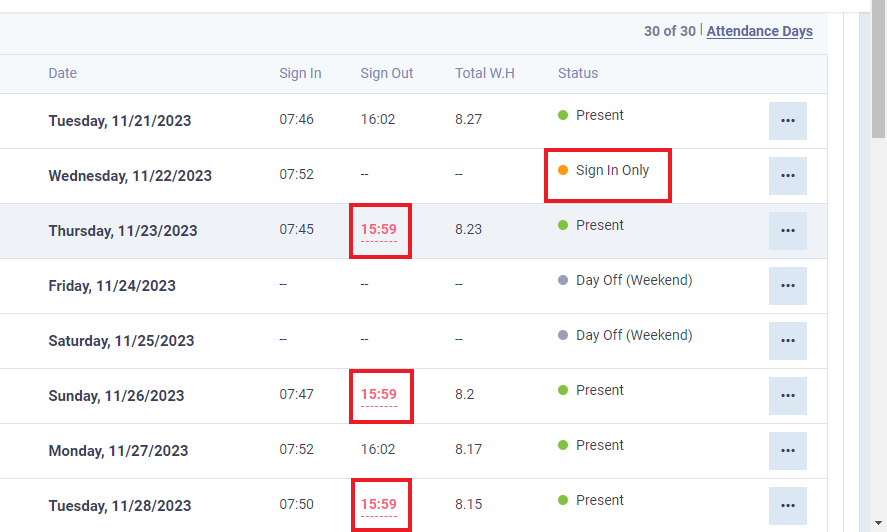
Navigate to the “Attendance Days” tab to review a list of all attendance days, including the entry and exit times for the employee, and the day’s status as either attendance, vacation, or another status.
Note the following:
- Times considered as tardiness according to your attendance rules will appear in red.
- You can accurately determine the total attendance hours for the employee during the day.
- After approving the attendance log, you cannot make changes to the status or entry/exit times.