


How to Allocate a Financial Custody to an Employee in Daftra
In a previous topic titled “How to Allocate Inventory Custody to an Employee,” we discussed the process of assigning permissions to an employee on a warehouse as their responsibility.
In this topic, the process won’t differ much, as we explore how to allocate a financial custody to an employee by creating a treasury and assigning permissions to them. This is done through detailed explanations of the following points:
- Create a new financial treasury with the employee’s name and assign permissions to them.
- Specify a single treasury in the account of the employee responsible for the custody.
- Display the financial transactions report on the employee’s treasury.
Create a new financial treasury with the employee's name and assign permissions to them
To allocate financial custody to an employee, we need to create a financial treasury in their name and then assign permissions to them. To complete this task, we must first ensure that we have added employees to our account.
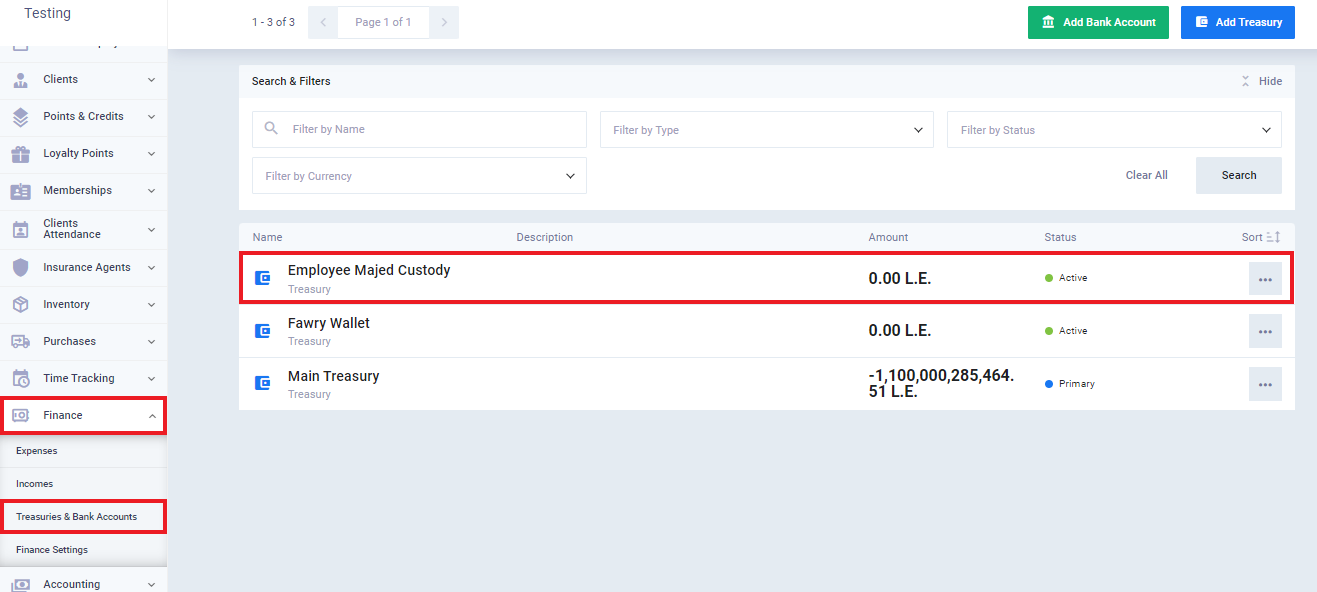
Let the employee for whom we will allocate the financial custody be Majed.
First: Create a new financial treasury with the employee's name
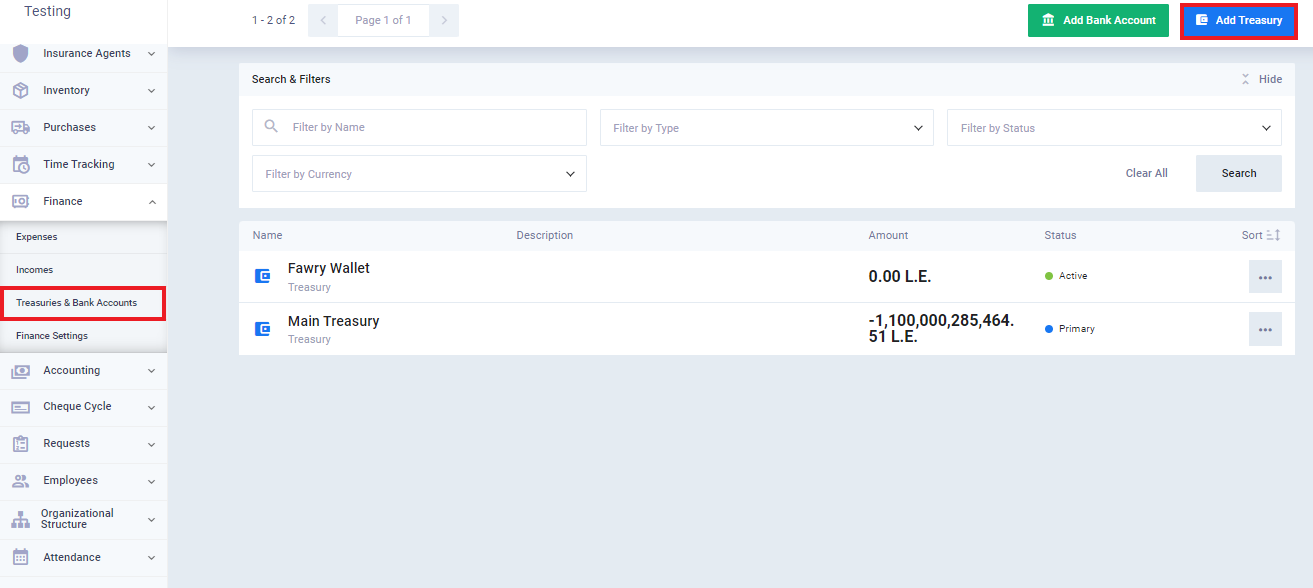
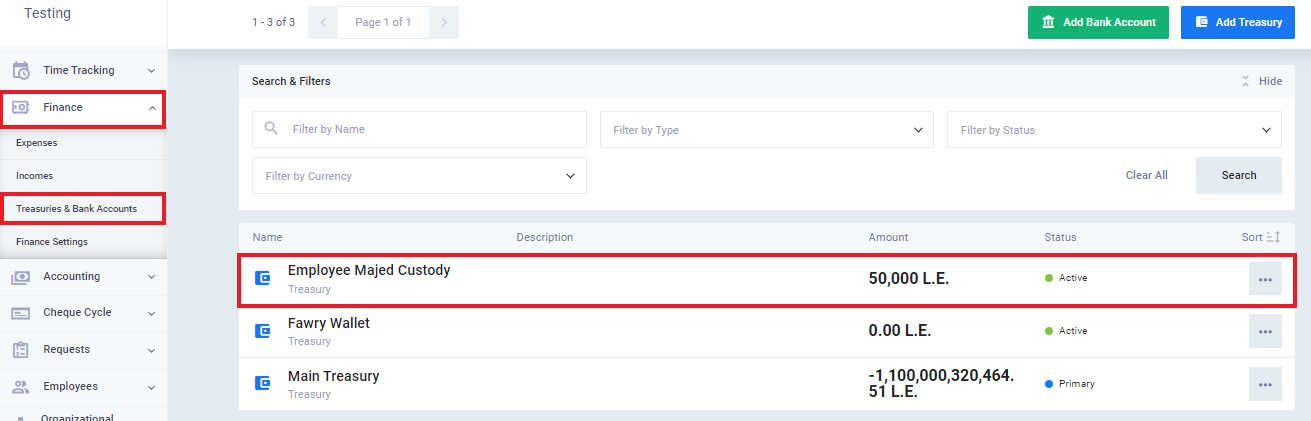
To create a financial treasury, click on “Finance” from the main menu, then on “Treasuries and Bank Accounts.”
Next, click on the “Add Treasury” button.
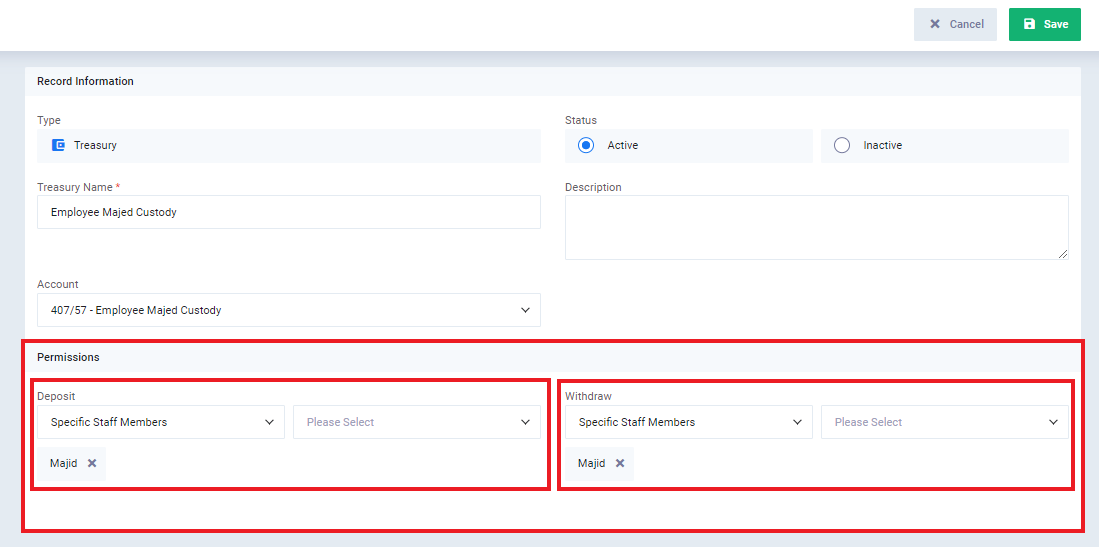
And now we fill in the details for the new cash box:
- Name: Write the name of the treasury as you want it to appear in the program’s lists and windows.
- Active: This option determines whether you want to activate the treasury or not. We will activate it; otherwise, we won’t be able to perform operations on it.
- Description: If you want to add specific details about the treasury, you can write them in this field.
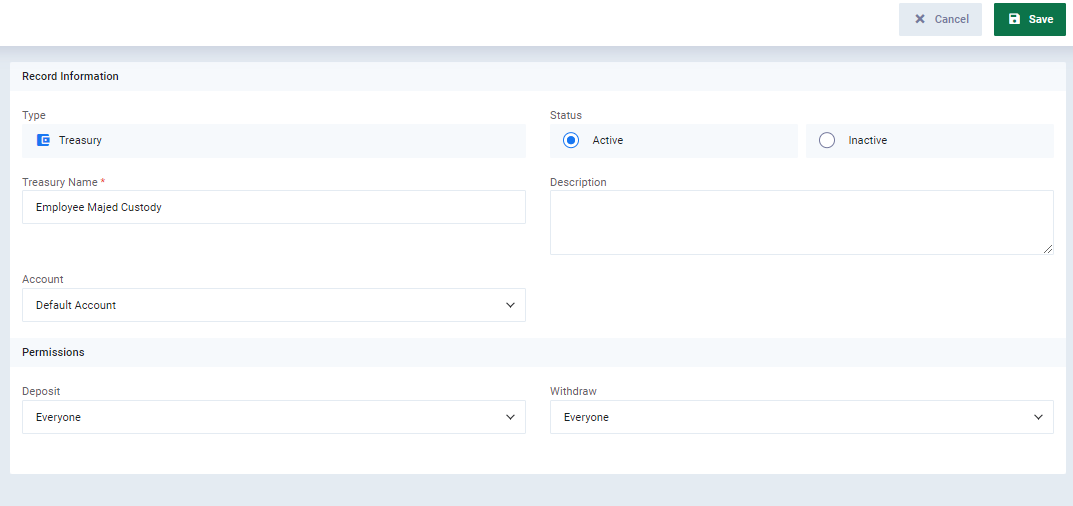
Then click on “Save“
Second: Assigning Permissions to the Treasury for the Employee
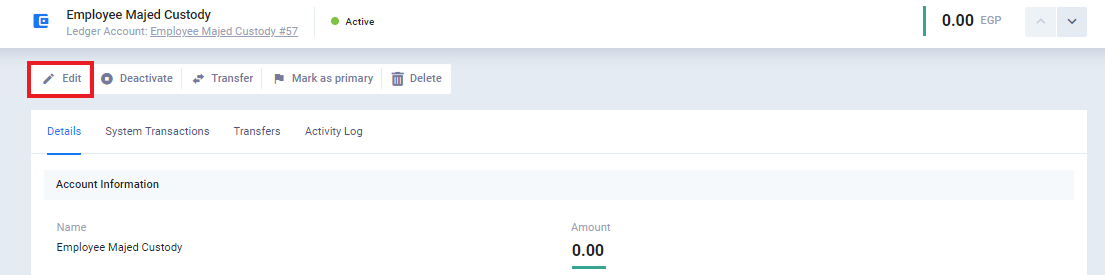
The treasury control panel appears, and we click on “Edit.”
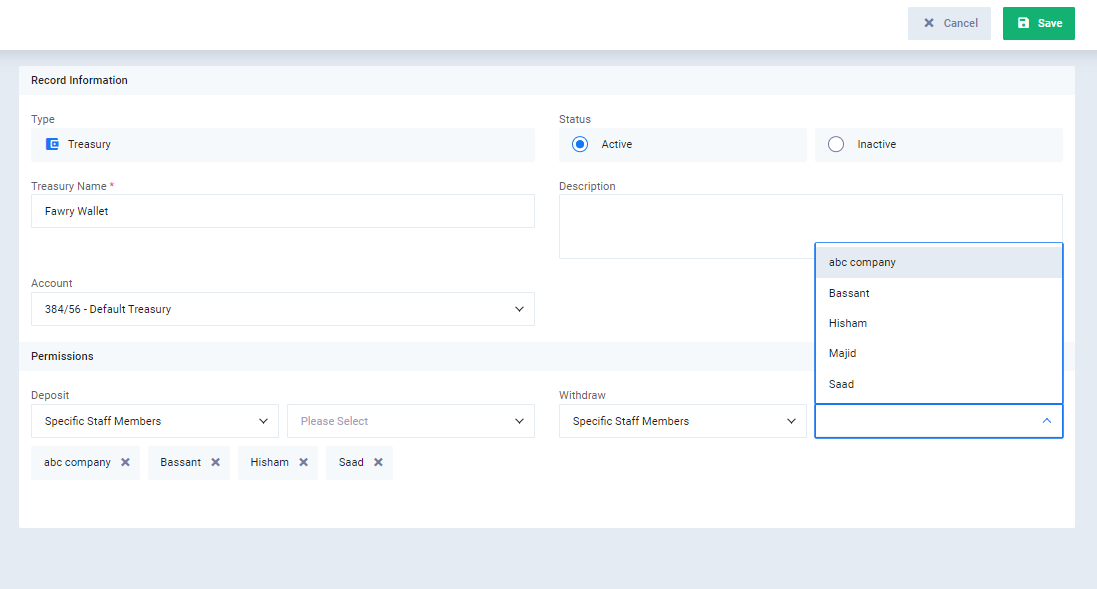
At the bottom of the control panel for creating a new treasury, the system presents two types of permissions for the treasury:
- Deposit
- Withdrawal
We assign both permissions to the employee Majed, then click on “Update,” as shown in the following image:
The statement of the two permissions is as follows:
The first permission: Deposit
This refers to the operations of receipts or collections, which is the effective part of the debit side of the treasury.
When specifying the deposit permission for employee Majed, he will be the only employee who can perform receipt operations, meaning that all funds received by the treasury will be through him only.
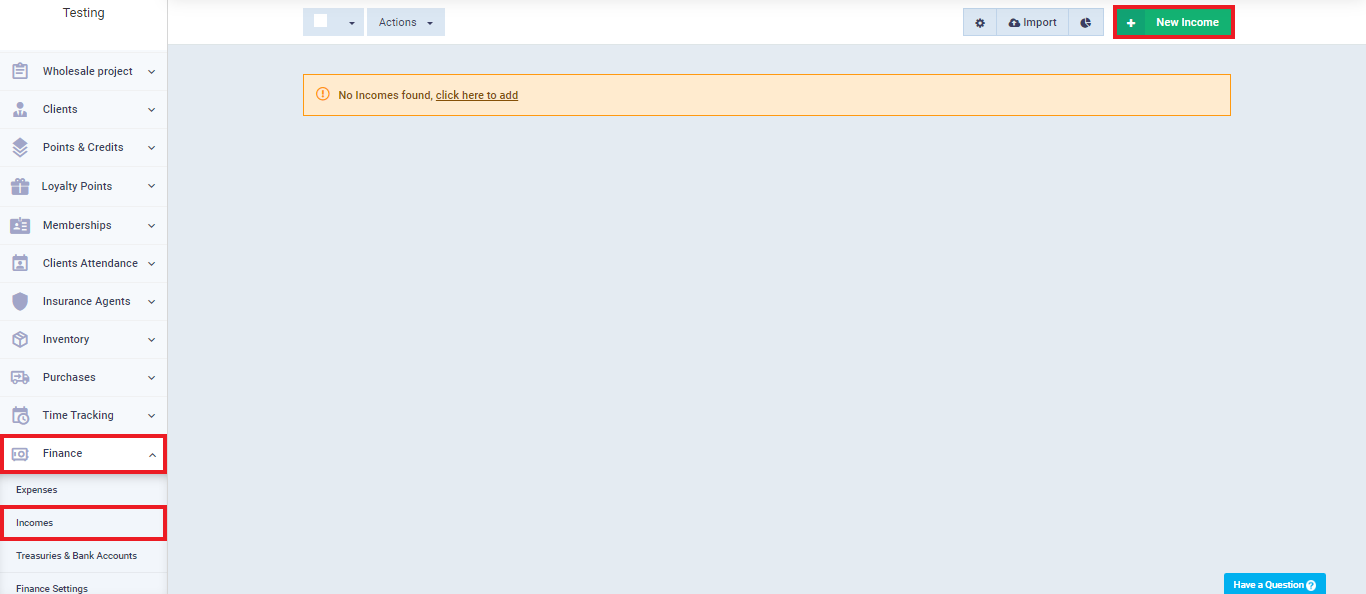
If another employee – let’s say Hisham – wants to carry out a cash receipt operation to the “Employee Majid’s Custody” treasury, he can do so by clicking on “Finance” from the main menu, then “Income,” and then clicking “New Income” as shown in the image:
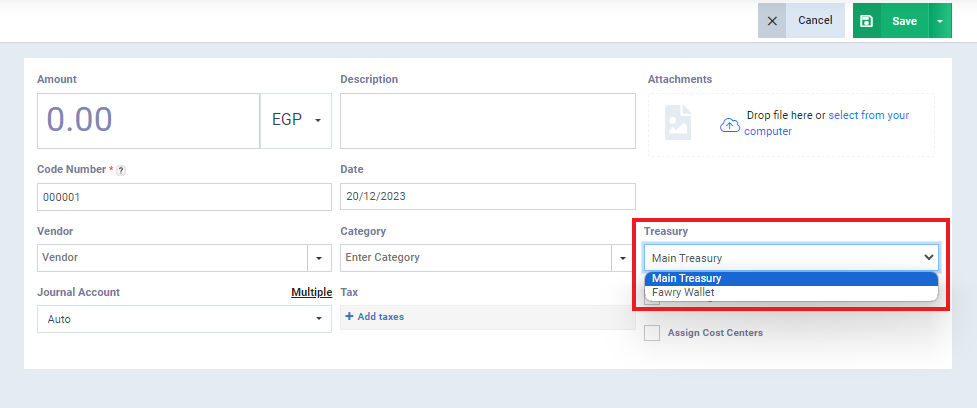
The control panel for adding the income will appear for him, but he will not be able to choose the “Employee Majid’s Custody” treasury since it will not be displayed among the available treasuries, as shown in the image:
The second permission: Withdrawal
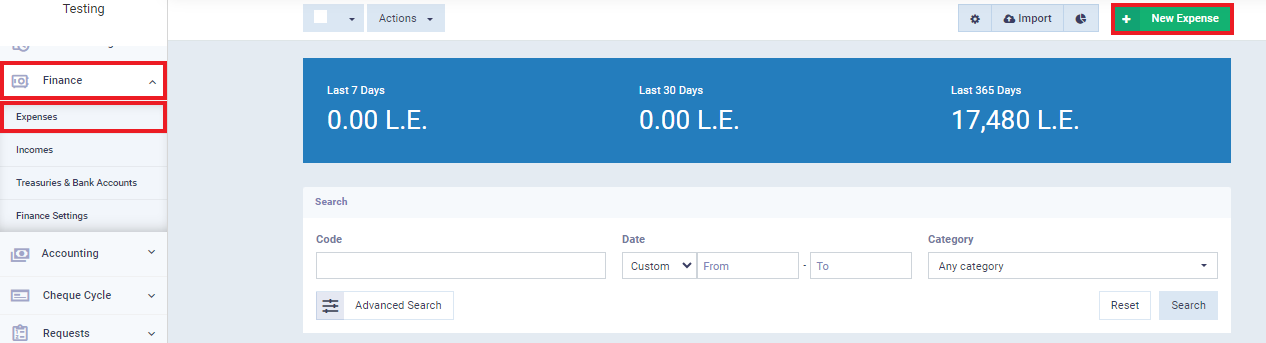
He will be presented with the control panel for adding the expense, but he won’t be able to choose the “Employee Majid’s Custody” treasury as it won’t appear among the available treasuries, as shown in the image:
Determining a Single Treasury in the Employee's Account with Custody
After assigning permissions to the employee Majid on the financial treasury “Employee Majid’s Custody,” this treasury can be made the only one in his account, hiding the rest of the other treasuries. This can be achieved through two steps:
Step 1: Assigning the Treasury to the Employee
We can assign a financial custody to an employee by creating a new treasury and specifying its permissions for the employee, as clarified in the section “Assigning Permissions to the Employee.”
Step 2: Adding Permissions for All Employees on the Remaining Treasuries Except for Employee Majid
To do this, we need to:
- Access each treasury from the available treasuries, except for the treasury for which permissions have been added for the employee Majed.
- Add permissions for all our employees on all these treasuries, excluding the employee Majed.
This is illustrated in the following image:
Then click “Save” after completing the task in each treasury.
Displaying the financial movements report on the employee's treasury.
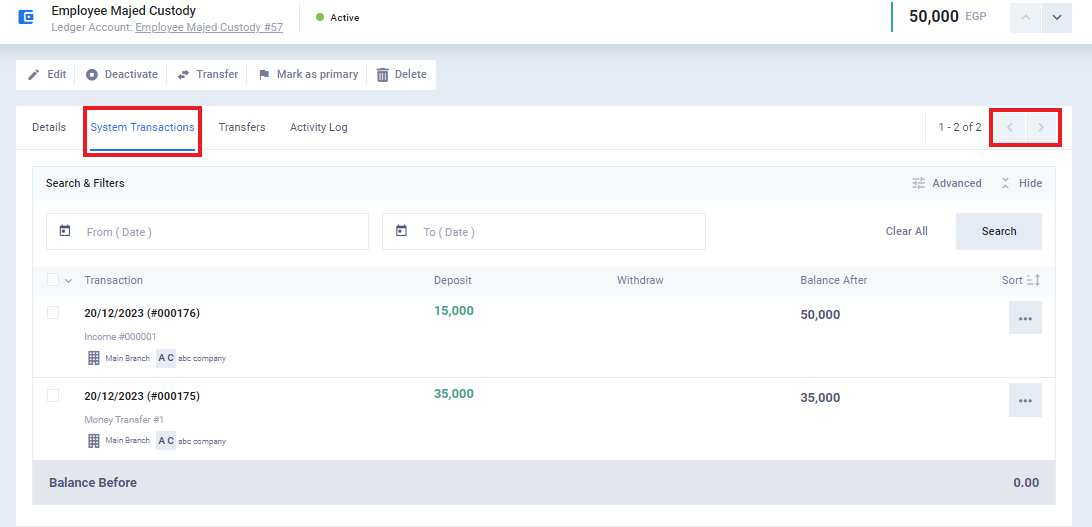
To enhance control over the circulation of funds within the organization, you can obtain a report of all transactions that have taken place in the financial treasury assigned to the employee.
You can review the system transaction for the treasury from oldest to newest or vice versa by clicking on the double arrows ∨ / ∧. Additionally, you can navigate between pages of system transactions for the treasury by clicking on the double arrows < / >.
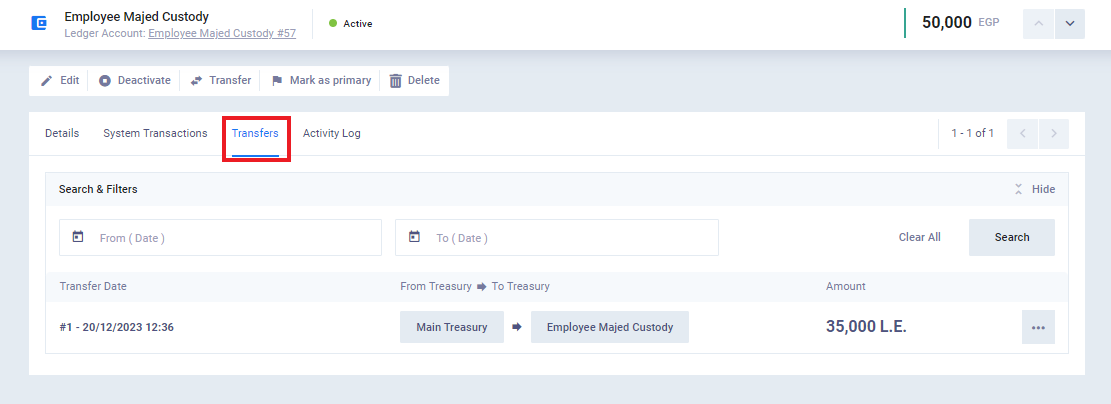
You can also click on “Transfers” to review the record of transfers that have occurred (to and from) the treasury.
With this, we have completed explaining how to allocate a financial custody for an employee, define permissions for them on the treasury, and illustrate how to make the treasury the only one visible in the employee’s account. We also covered the process of displaying reports on the transactions and transfers made on the treasury.