


Employee Permissions and Roles
Your employees can perform certain actions on the system, such as self-attendance registration or accessing the pay slip. System users who are employees can also directly handle tasks assigned to them, such as issuing sales invoices or approving requisitions. The nature and details of these tasks, as well as the information available to them, can be controlled through the job roles.
Adding an Employee Role
The employee role, such as being an accountant or sales department manager, defines the roles and responsibilities of employees based on their titles.
To add a new employee role, click on the “Employee Roles” dropdown under the “Employees” tab in the main menu, and then click on “New Role.” You can also easily edit or delete roles from the job roles list.

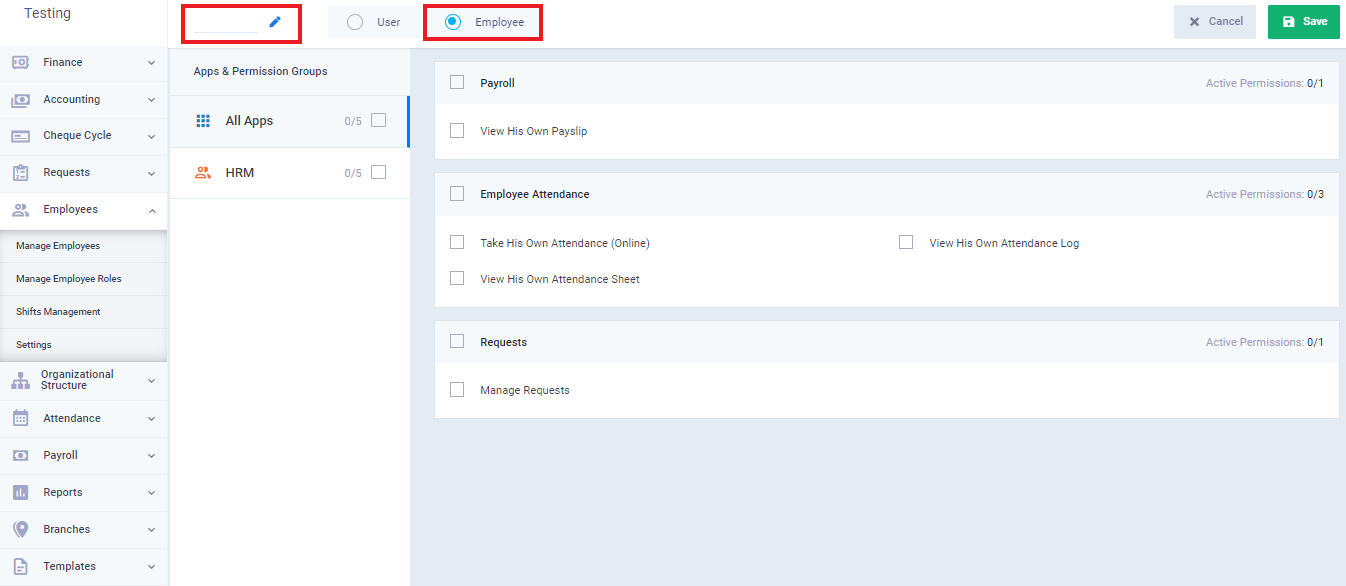
In the case where the job role is specifically assigned to employees, the available tasks will differ from what is accessible to regular users.
When selecting the “Employee” job role type, you will be presented with certain permissions, such as:
- Viewing the pay slip.
- Self-attendance registration.
- Viewing all attendance records.
- Accessing personal attendance logs.
- Managing requests.
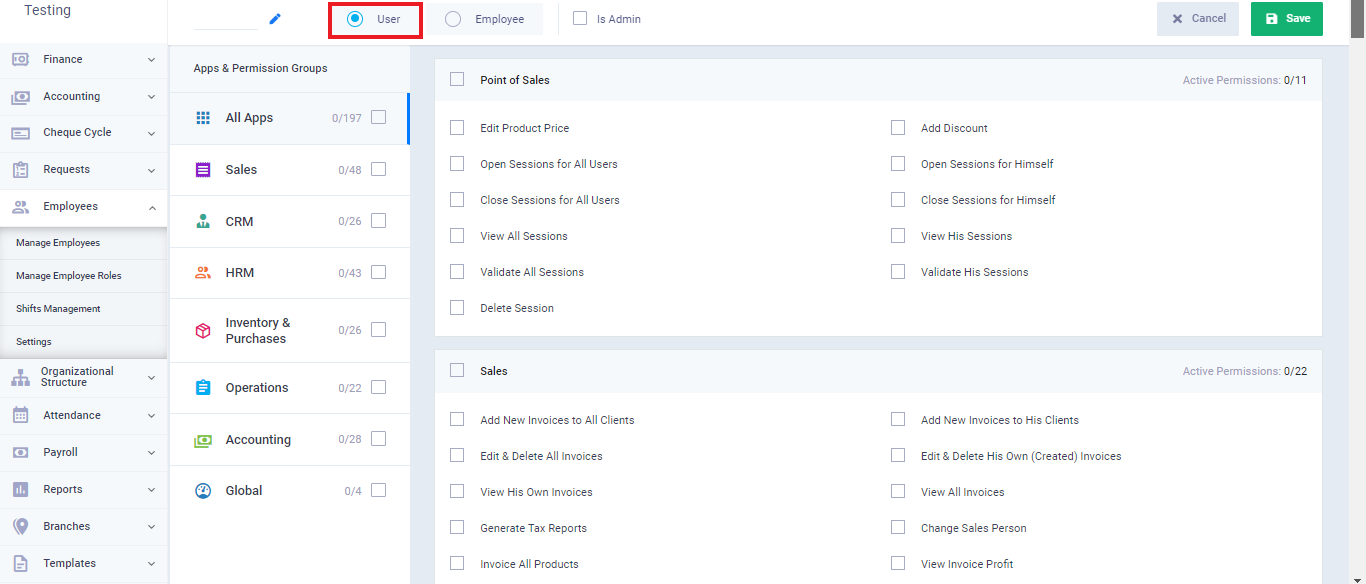
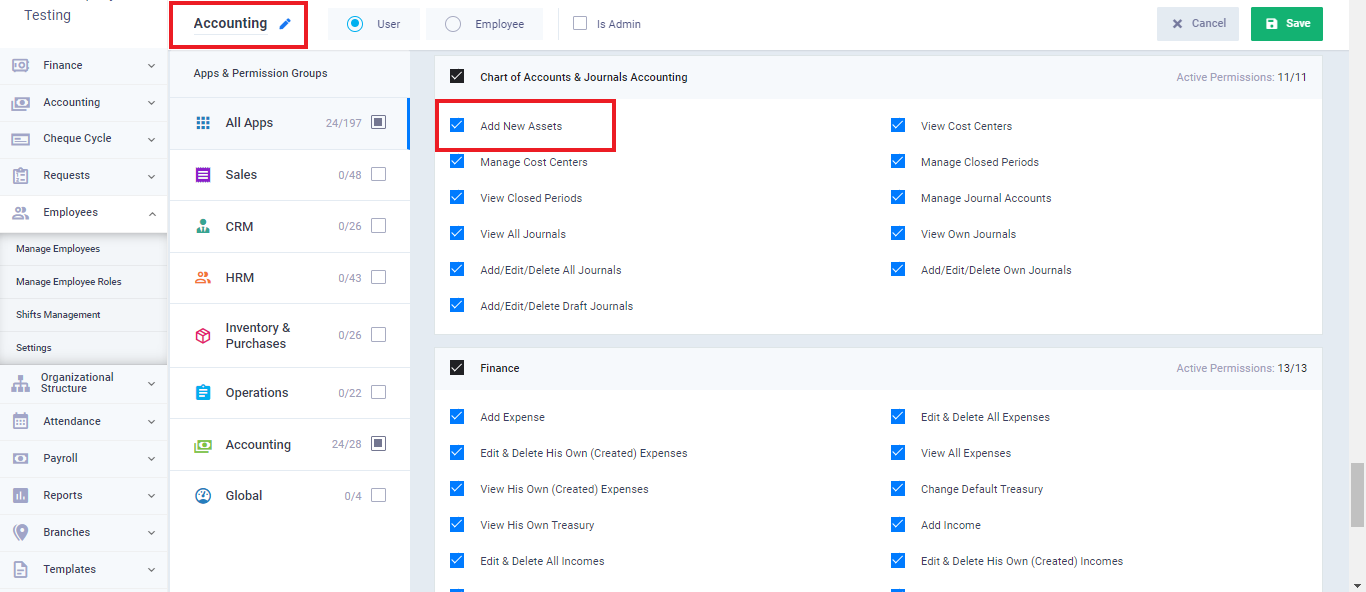
When choosing the job role type “User,” you will be presented with an extensive list of permissions. Activate the permissions you wish to include for the employee role, enter the role name, and then click “Save.”
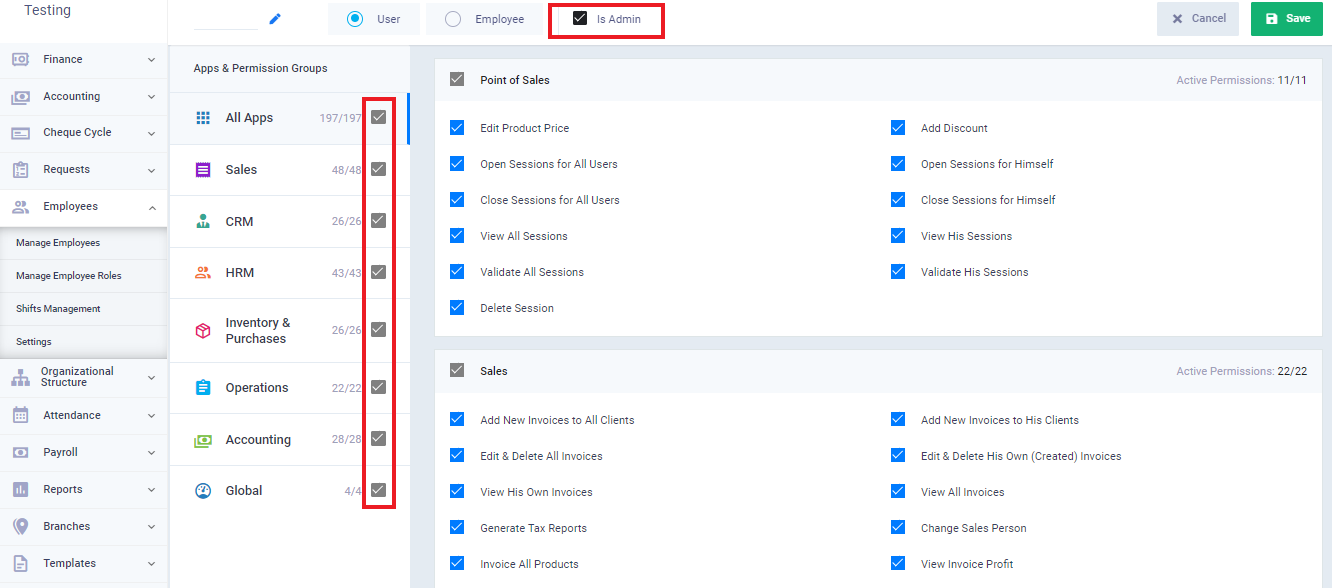
In the case of selecting the employee role type “Admin,” all permissions will be automatically activated.
Blocking certain pages for a granted permission to the user
After granting specific permissions to the employee, you might want to block a precise feature or a particular action included in this permission. This can be achieved using the “Restricted Pages” feature.
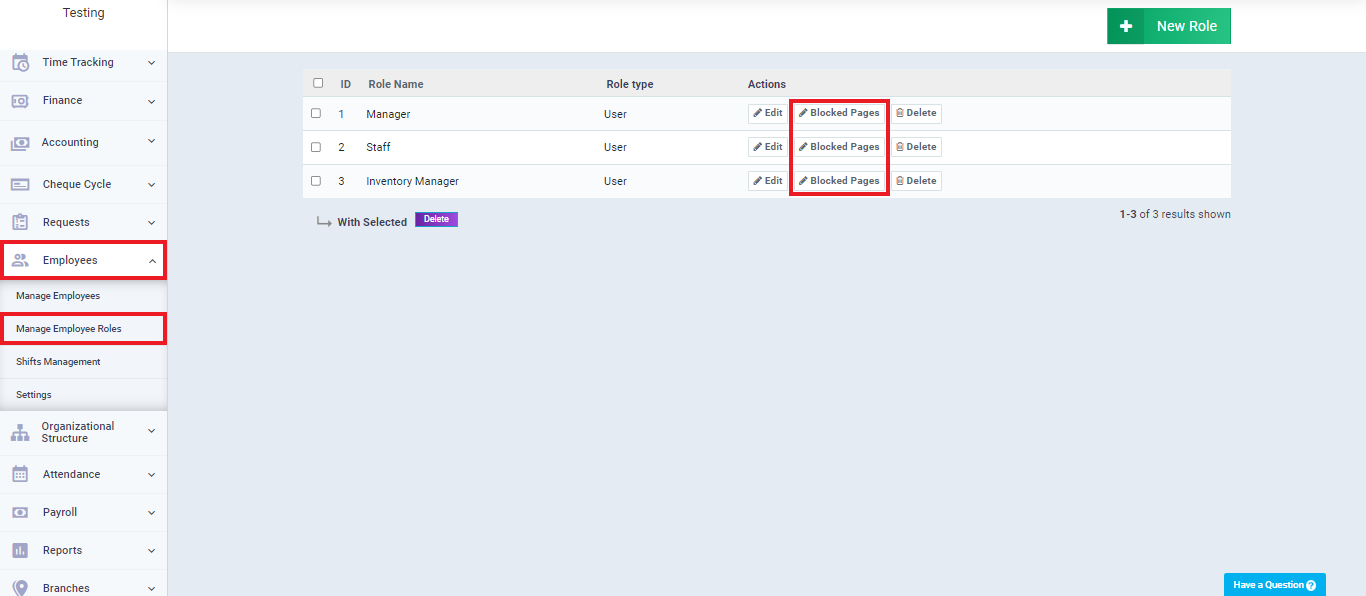
Steps to block a page for a role:
From the main menu, click on “Employees.”
Click on “Manage Employee Roles.”
Click on the “Blocked Pages” button next to the role for which you want to block specific pages.
Copy the link of the page you want to block for the role and paste it into the dialog box for blocked pages.
You can block more than one page for the role by entering the link of each page on a separate line.
Click on “Send.”
Example:
Copy the link of this page, for instance: “owner/clients/view/1#TransactionList,” and paste it into the dialog box for blocked pages.
After this, employees assigned to this role will not be able to access the “Transaction List” page for the client, even though it is part of the “View Clients” action allowed for them.
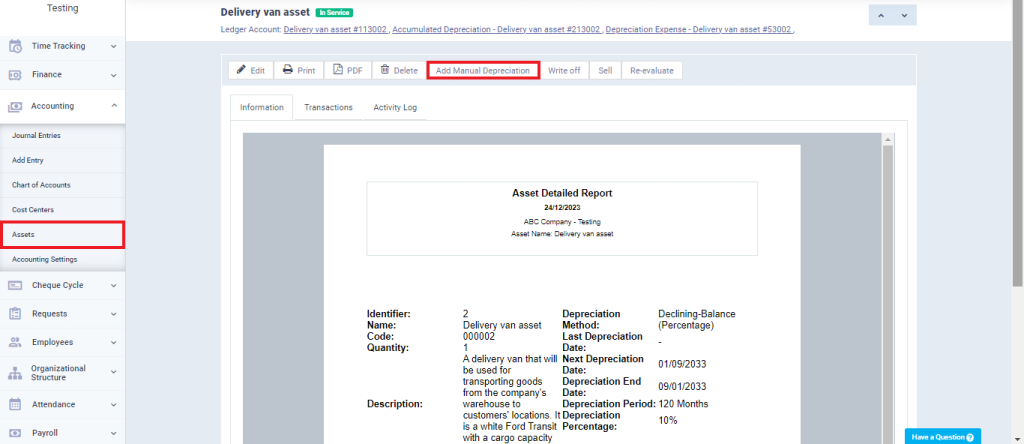
Practical Example of Blocking a Page for a User Role
However, you want to block users with this role from manually adding depreciation to assets.
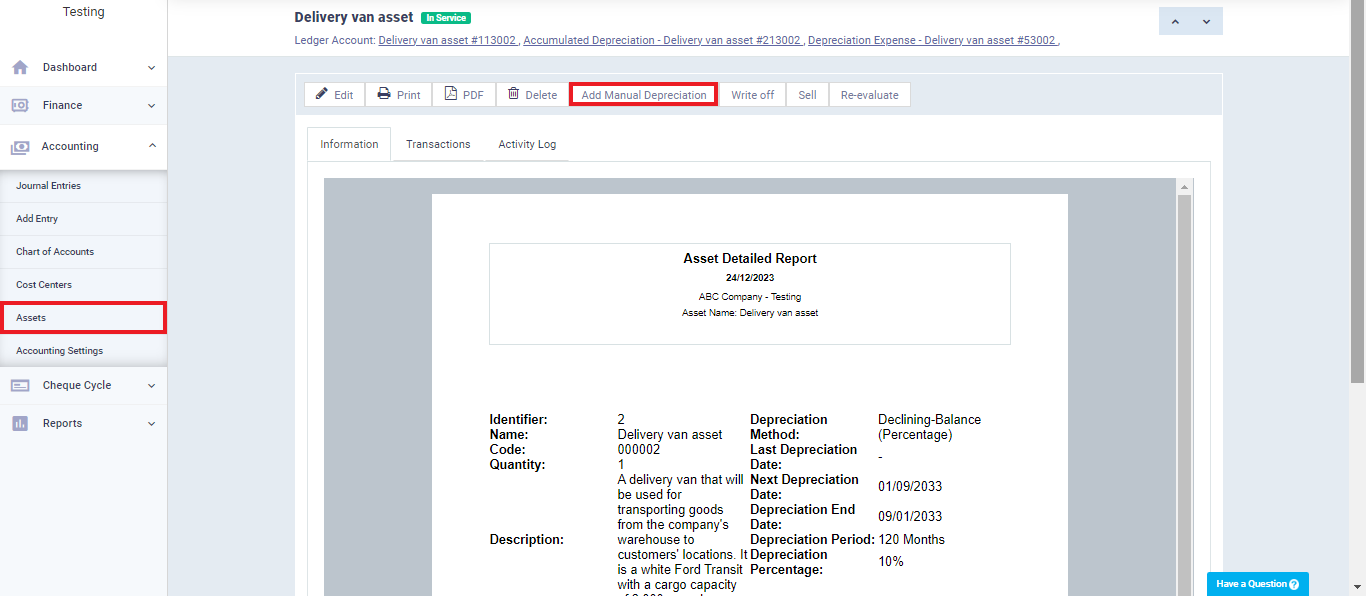
In this case, go to “Assets” under “Accounting” in the main menu.
Click on any asset you have and press “Add Manual Depreciation.”
Copy the page link starting from “owner” as follows:
owner/asset_deprecations/add/2#
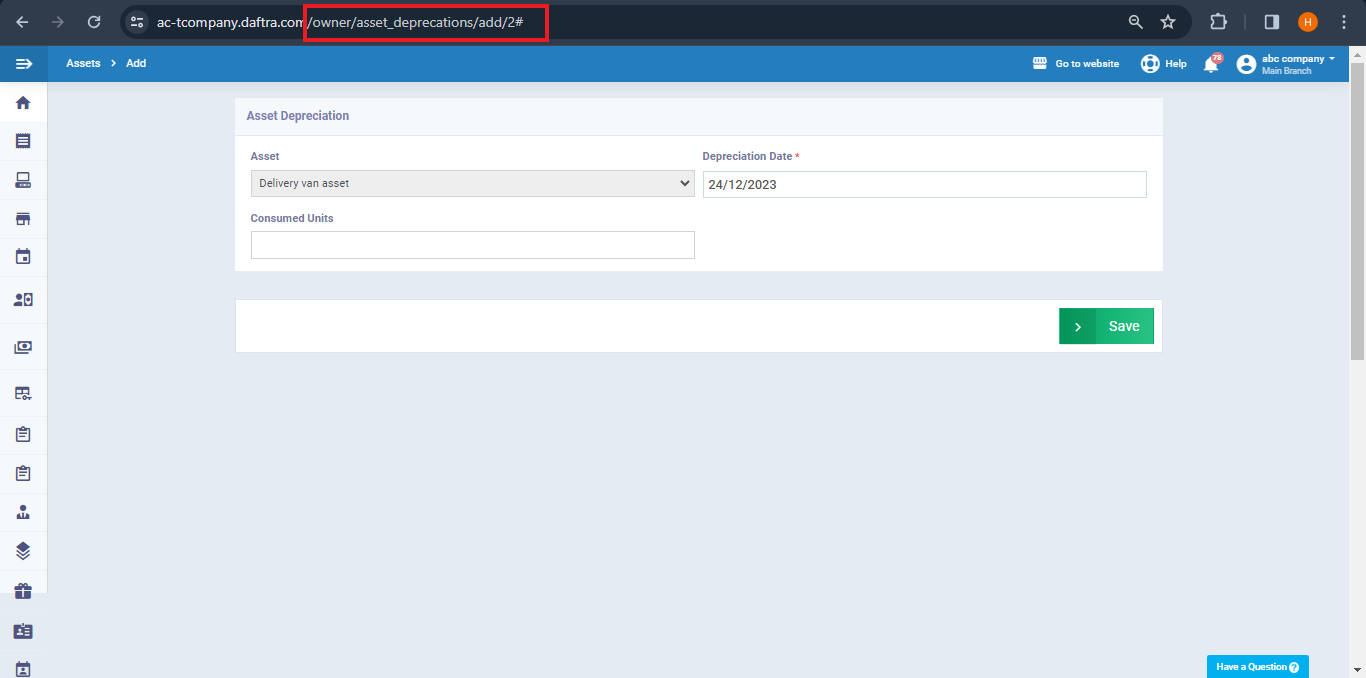
Then open the blocked pages for the role paste the page link, then click “Submit.”
After that, users with this accounting role will no longer be able to manually depreciate assets.

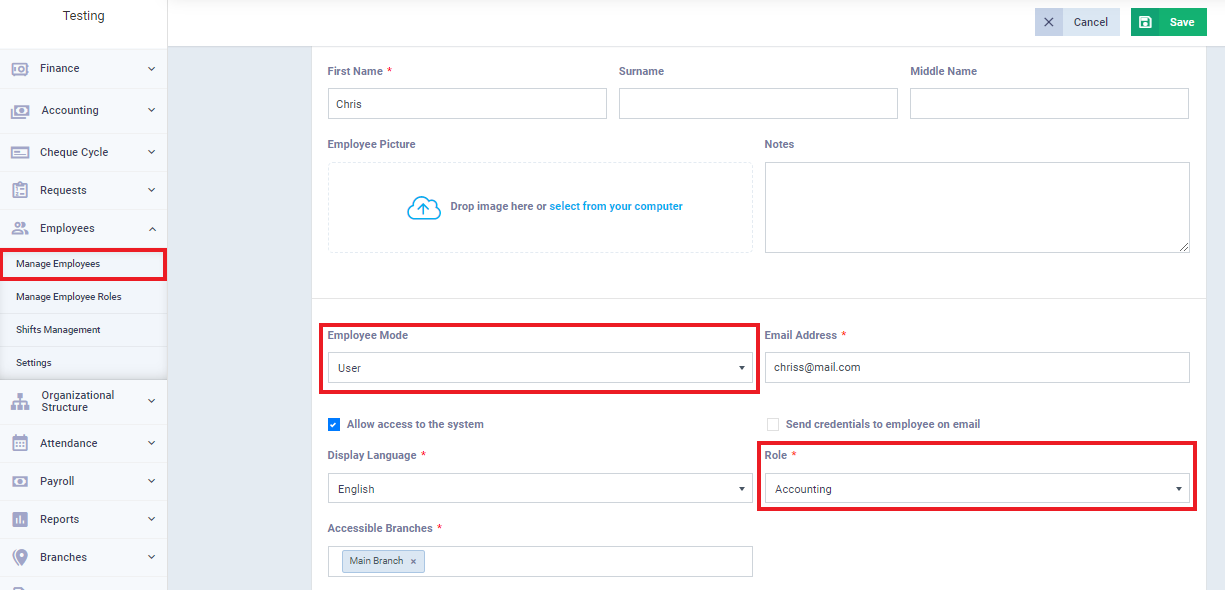
How to Assign a Role to Employees
To grant role permissions to a user, you need to assign the role to them through their profile by editing their profile or when adding them if they are a new user.
- Click on “Manage Employees” under “Employees” in the main menu.
- Select the employee to whom you want to assign the role.
- Choose the employee type as “User.”
- Select the role you want to assign.
- Click “Save.”
User Login to the System and Review of Permissions and Blocked Pages
The system appearance for a user with limited permissions differs from the admin who has full access. The user enters the system using their email and password, and you can review what appears to them to verify the nature of their permissions.
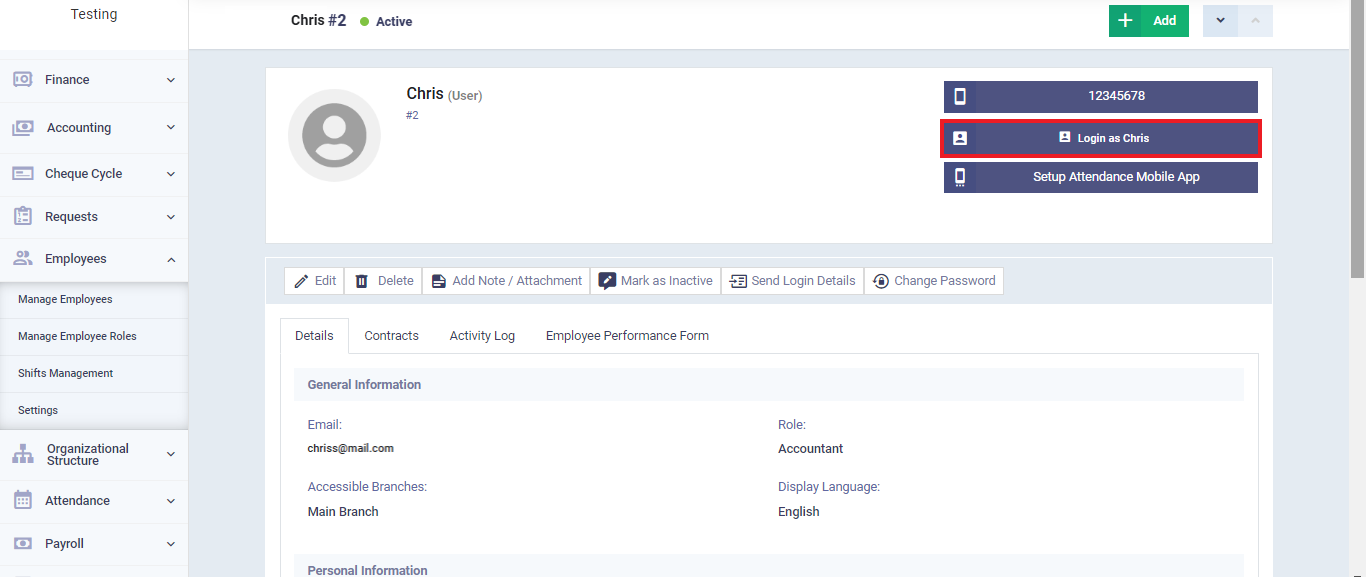
1. Click on “Manage Employees” under “Employees” in the main menu.
2. Click on the user to review their profile, then enter “Login as + Username.”
Here, you will see the login as an “Accountant” user, as illustrated in the previous example.
She sees all the permissions related to accounting and finance, but when she clicks on “Add Manual Depreciation” for an asset, the system does not respond. This is because we have previously blocked this page for the specific role assigned to her.
The pages blocked for the user:
- They do not appear in the main menu or on any screen of the system.
- When clicked, a message appears saying, “You are not allowed to access this page.”
- The user is redirected to the system’s main page.