


Generating Pay runs and Payslips
A pay run, also known as a pay batch, represents the total of the wages issued for a specific work period for all employees or a category of them. It is commonly issued on a monthly basis. Along with the pay run, there is a document for each employee, known as a payslip, also referred to as a wage statement or payment receipt. This payslip is automatically generated when the pay run is issued, or you can independently generate the payslip through the payslip issuance window.
How to generate the Pay Run
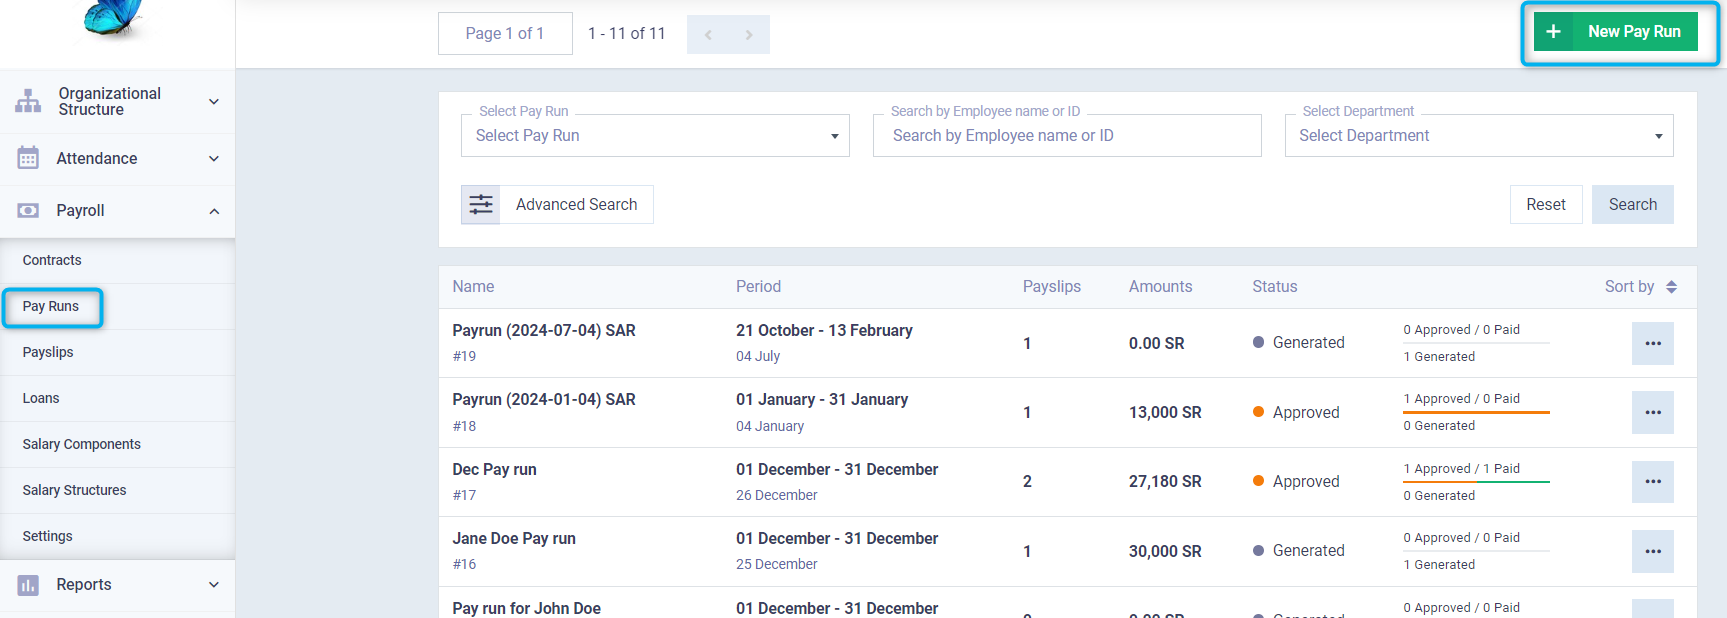
To add a new pay run, click on the “Pay Runs” dropdown under “Payroll” in the main menu and press “New Pay Run”.
Enter the pay run information as follows:
Name: Write the required name for the pay run.
Posting Date: Select the pay run registration date from the calendar.
Start Date: Select the pay run start date from the calendar.
End Date: Select the pay run end date from the calendar.
Validate Attendance: Click on the validate attendance checkbox to check the employees’ attendance record for issuing the pay based on it. If not activated, the pay is disbursed considering the employee’s attendance without referring to the attendance logs.
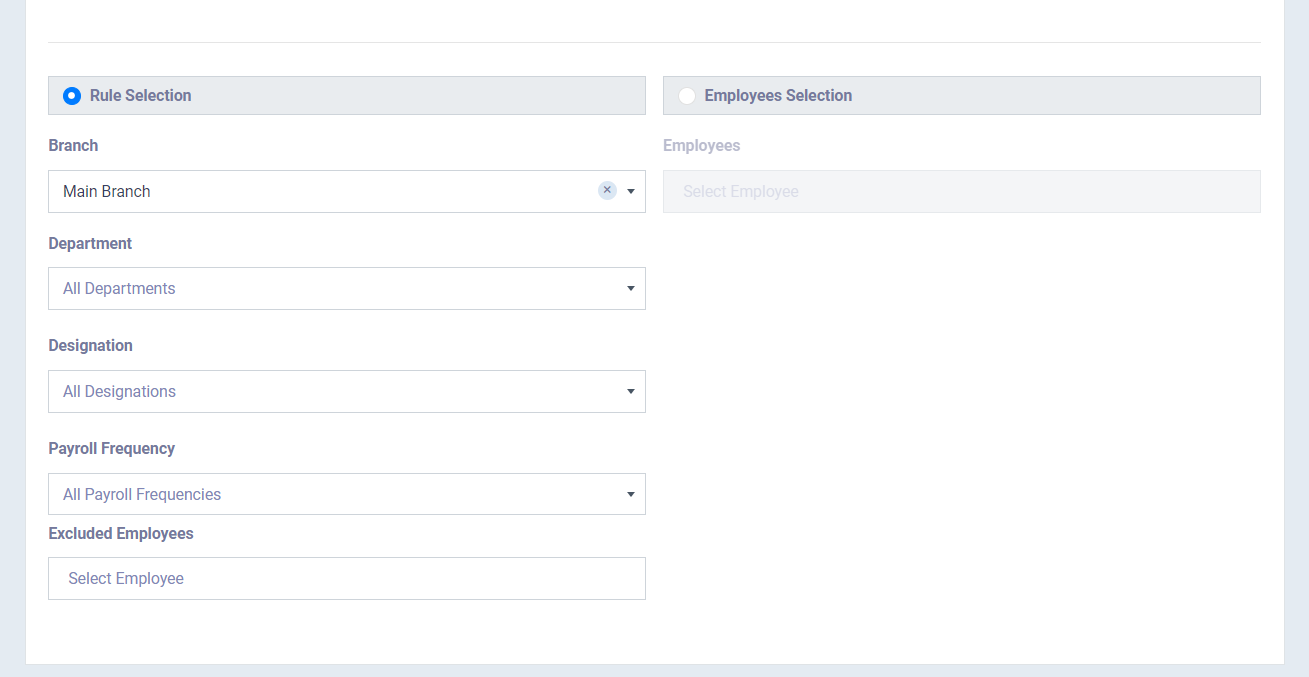
Pay runs can either be issued for a specific employee by clicking on “Employees Selection” and choosing that employee.
Or it can be issued for a branch, department, or designation by clicking on “Rule Selection”.

Excluded Employees: Start typing the names of employees excluded from the pay run and select them from the dropdown list.
Payroll Frequency: Select the pay frequency as monthly, annually, or quarterly.
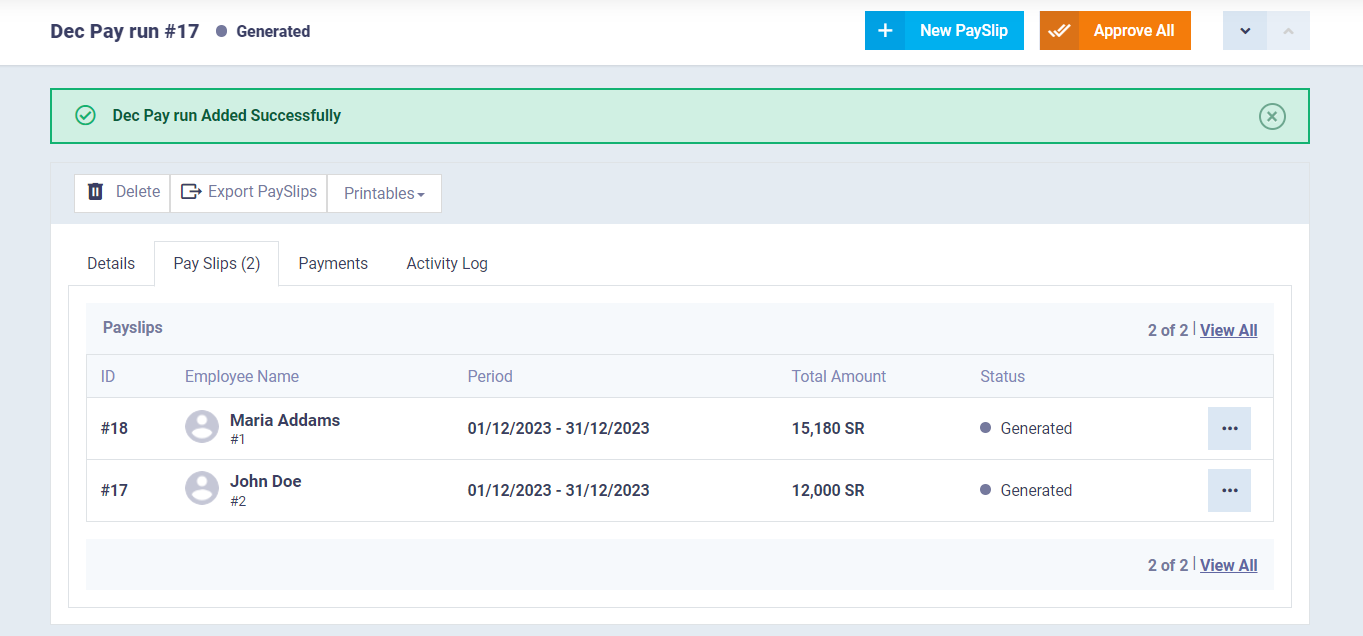
After issuing the pay run, you will notice the included payslips within it, which you can view, edit, or delete.
You can also print or download the pay run including the payslips and all details.
Click on the “Approve All” button to approve after reviewing the data of the created pay run.
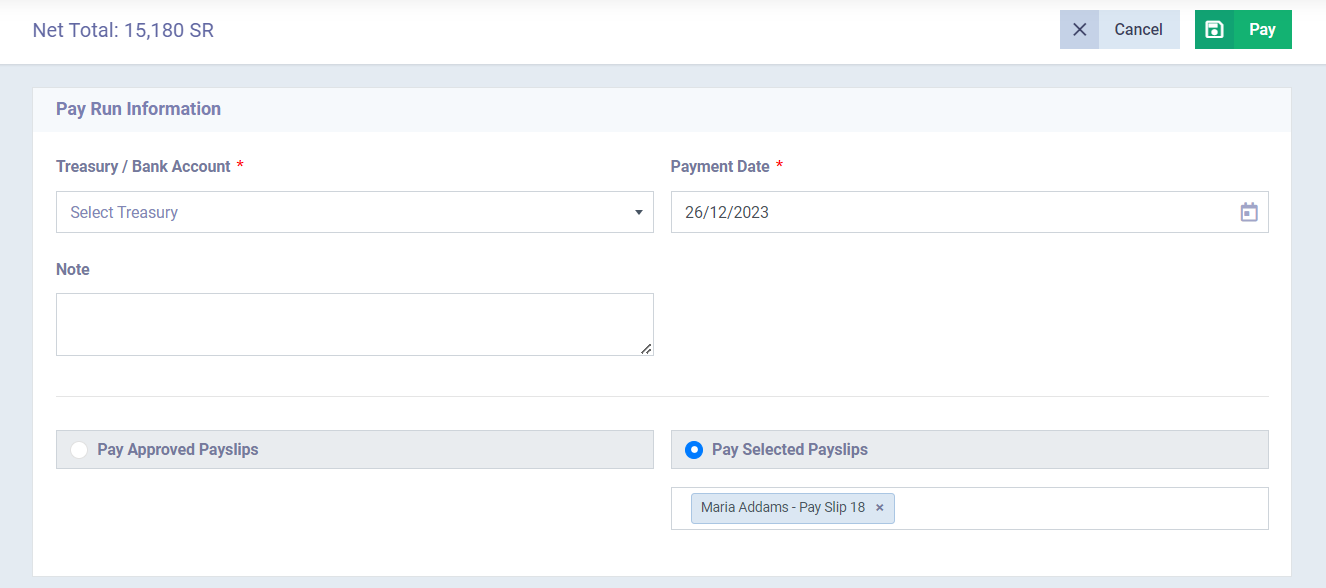
Click on the “Pay” button to proceed with the payment of the created payslips.
Select the treasury from which the pay run amount will be paid, choose the payment date, and choose to pay all the payslips of this run or select specific payslips for partial payment of the run.
How to create the Payslip
From the main menu, click on “Payroll” then click on “Payslips” and then click on “New Payslip”.
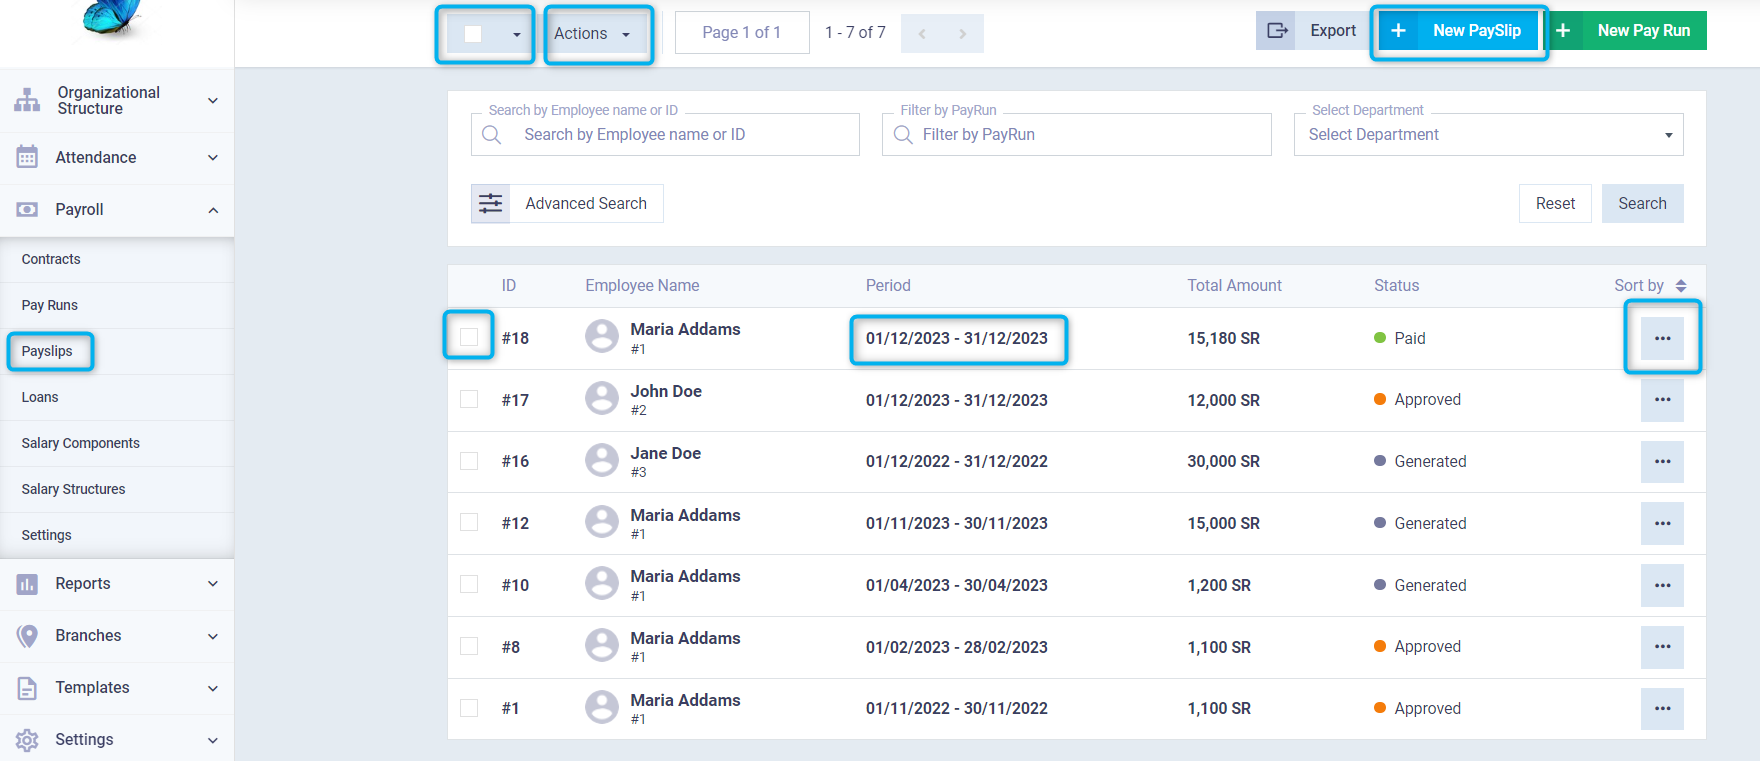
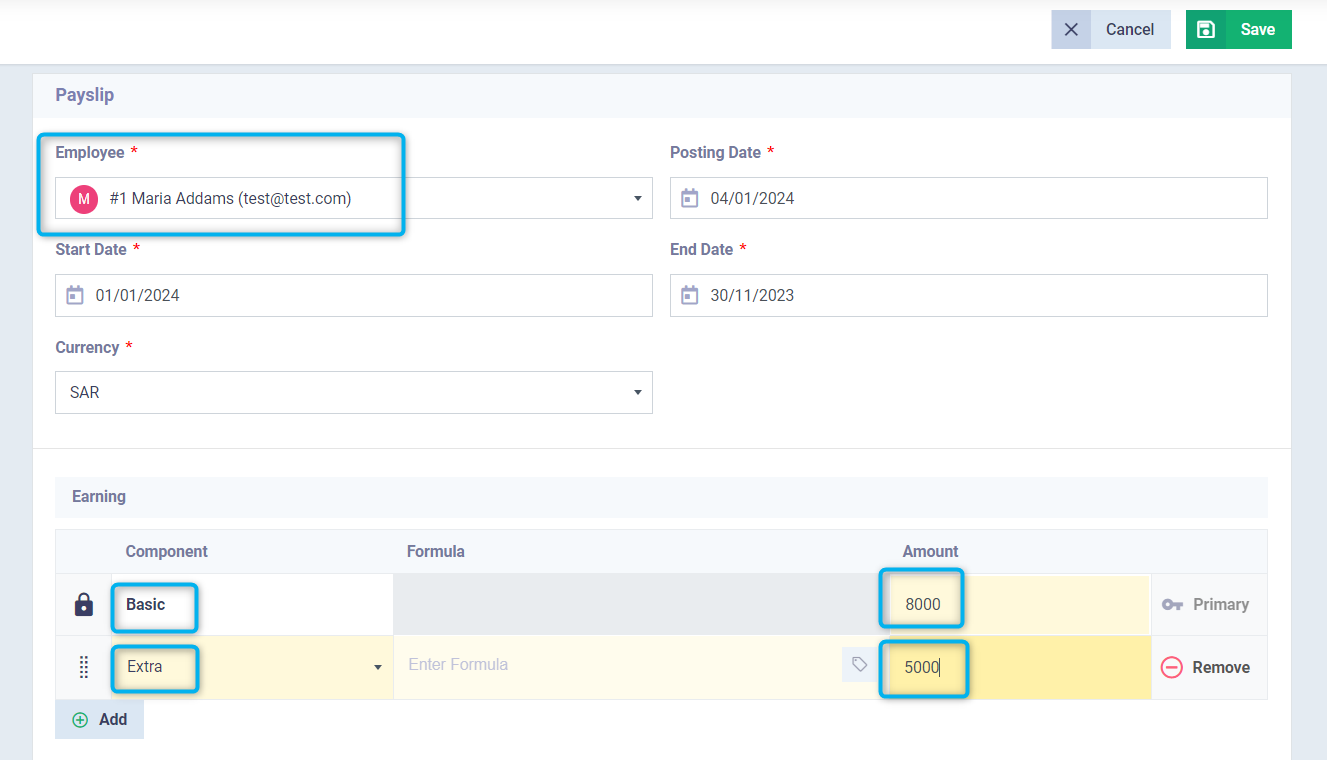
Enter the payslip information as follows:
Employee: Choose the required employee for the payslip.
Posting Date: Select the registration date for the payslip from the calendar.
Start Date: Select the start date for the payslip from the calendar.
End Date: Select the end date for the payslip from the calendar.
Currency: Enter the currency in which you want to issue the payslip.
Enter the basic salary in the Basic field, and add any earnings and deductions by selecting from the salary components you have previously created.
Click on the “Save” button.
Here, you will see data related to the employee’s loan to clarify the deduction amount related to the loan, if any.
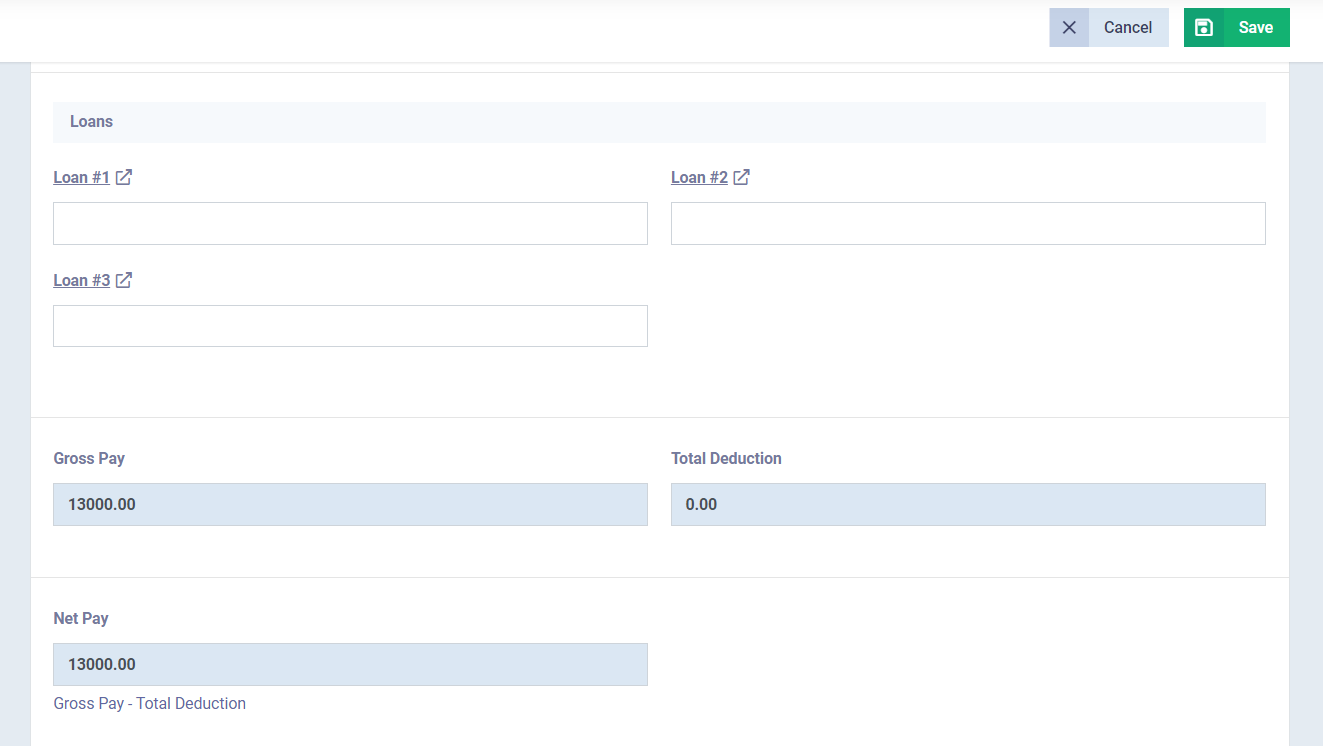
After saving the payslip, its details will appear, and you can also perform some actions such as editing and deleting.
To approve the payslip, click on the “Approve” button.
