Shifts System
Normally, all employees work in a single shift with specific and fixed attendance and departure times. However, with a desire to provide a higher level of service and be present for clients all the time, or to increase productivity without resorting to spatial expansion and doubling production lines, there can be consecutive shifts that occupy a larger time span, extending to continuous shifts throughout the day. Our shift system offers everything the Human Resources Management department needs to implement shifts, whether single or multiple shifts throughout the day. This article answers questions such as:
- How do I add a shift ?
- What is the difference between a standard shift and an advanced shift?
- What is an allocated shift?
- How do I add an allocated shift?
- How do I assign a shift to a specific employee?
Before starting to explore the shift system, make sure to activate the attendance app, which specializes in shifts, through clicking on “Settings” in the main menu, and choosing “Apps Manager”.
What is the Difference between a Standard Shift and an Advanced Shift?
There are two types of shifts in the system that you can use:
- Standard Shift:
In the standard shift, the days of the shift are determined, and everyone has a fixed attendance and departure time that does not change with the day. This means that if the work start time is from 9 AM to 5 PM from Sunday to Thursday, the time will be the same every day.

- Advanced Shift:

Here, the days assigned for the shift are determined, and accordingly, a time is set for each day of the shift. For example, the advanced shift time for Sunday might be from 8 AM to 4 PM, and the time for Monday for the same shift from 9 AM to 5 PM.
How to add a Shift
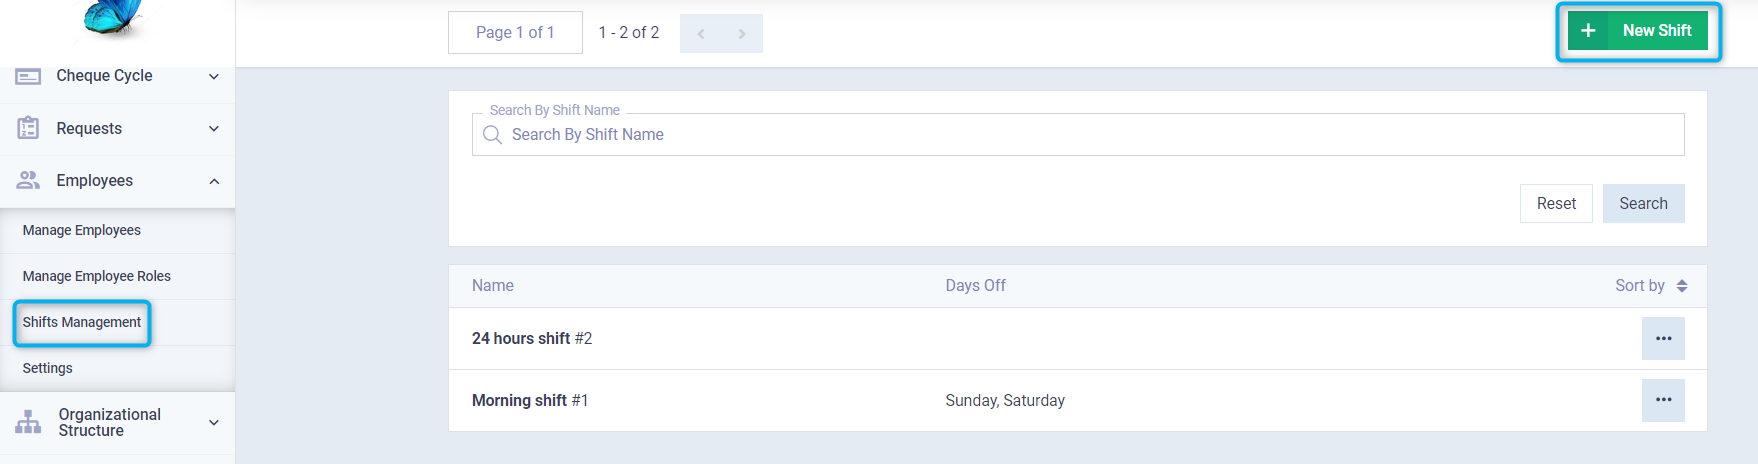
The information needed to create a simple shift is straightforward. All you need to do is head to the “Shift Management” section under “Attendance” in the main menu. This will display all previous shifts, and you can add a new shift by clicking on the “New Shift” button.
Then, add the name of the shift in the designated field, choose the type of shift whether standard or advanced, and select the days the shift will apply to, leaving the weekends/ off days inactive.
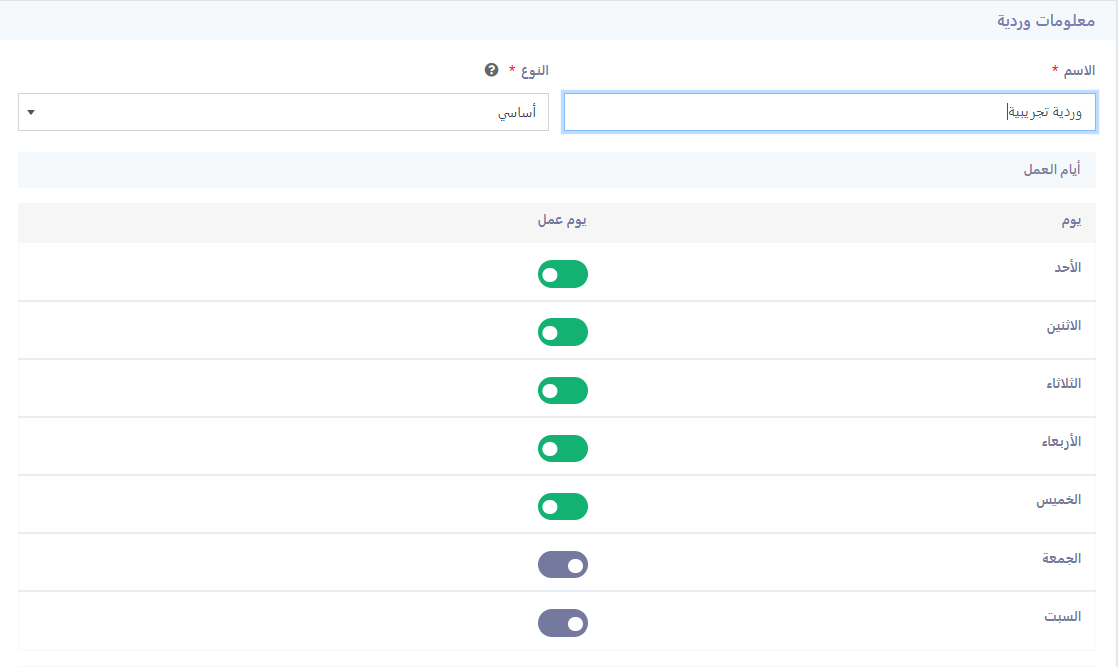
If it’s a standard shift, you will determine the attendance rules (shift times) once for all days. However, if it’s an advanced shift, you will set the attendance rules for each day separately.
As for the Data of the Attendance Rule of the Shift:
On Duty Time: The start time of the shift.
Off Duty Time: The end time of the shift.
Start of Sign-In: The earliest time an employee can arrive and have their working hours counted. This could be set at the same time as the on duty time or earlier, depending on your policies.
For example:
If the shift starts at 8 AM
- Start of Sign-In time could also be at 8 AM, meaning employee attendance is only counted from the on duty time.
- Or at 7:45 AM, allowing employees arriving a quarter of an hour or less early to be counted as present.
End of Sign-In: The latest time an employee can arrive for the shift and be marked as present.
For example:
If the shift starts at 8 AM
- For instance, the end time could be set at 8 AM, not counting any employee arriving late.
- Or it could be at 9 AM, allowing for up to one hour late arrival while still being counted as present.
Start of Sign-Out: The beginning of the hour when an employee can leave the shift. This might be earlier than the shift end if you allow your employees this flexibility.
For example:
If the shift ends at 4 PM
- The Start of Sign-Out time could be at 4 PM, not counting any employee leaving early.
- Or it could be at 3 PM, allowing for up to one hour early departure while still being counted as present.
End of Sign-Out: The latest time employees can leave. This is usually a critical time as it precedes another shift with a mandatory start time.
For example:
If the shift ends at 4 PM
- The End of Sign-Out time for departure could be at 4 PM, not counting any employee leaving late.
- Or it could be at 5 PM, allowing for up to one hour late departure while still being counted as present.
Lateness grace period: The time frame within which an employee can be late without penalties being applied.
Start late time: When activated, lateness is calculated from the shift start. If not activated, lateness is calculated based on the attendance start time you set, not the shift start.
For example:
If the lateness grace period allowed for an employee is 15 minutes
- Lateness could be calculated from the shift start, e.g., 8 AM, meaning an arrival at 8:10 AM is still considered on time.
- Or from the Start of Sign-In time, e.g., 7:45 AM, making the latest on-time arrival at 8 AM.
What is an Allocated Shift?
The allocated shift is a temporary shift for a specific period, such as setting work schedules for a specific month, or it may be exclusive to a particular employee or a department in the company and does not apply to everyone or all the time.
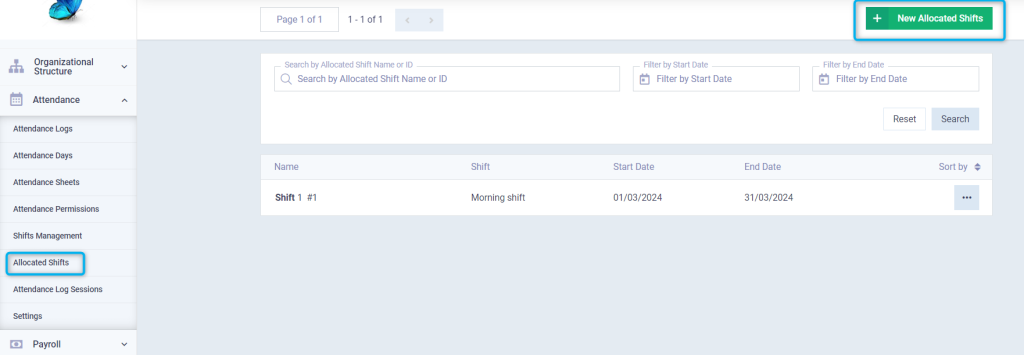
How to add an Allocated Shift
From the allocated shifts section in the Attendance tab of the main menu in the system, click on the “New Allocated Shifts” button:
After specifying the shift details, you can control the type of customization you want to apply to this shift, which could be:
- Choosing a specific date for the shift to be valid only during that time, by setting the date.
- Selecting a specific employee by activating this option, and entering the name or code of the employee for whom the shift is to be customized.
- Choosing a department, designation, or employees of a specific shift for the allocated shift to apply to them.
Remaining details include:
- Assigned Shift: Where you attach a shift you created in the usual way, setting the attendance times and days. This shift serves as a template for the allocated shift, meaning that the times are set as a regular shift and then attached to the allocated shift.
- Shift Type: Refers to the priority of the allocated shift over other shifts. If it’s primary, it overrides the regular timings for the specified period or employee; if it’s secondary, it remains inactive until set as primary.
How to assign the Shift in the Employee File
Assigning a shift to an employee means obligating them to the specific start and end times of that shift, and it can be changed if the employee’s shift changes. This is done from their personal profile in the following way:
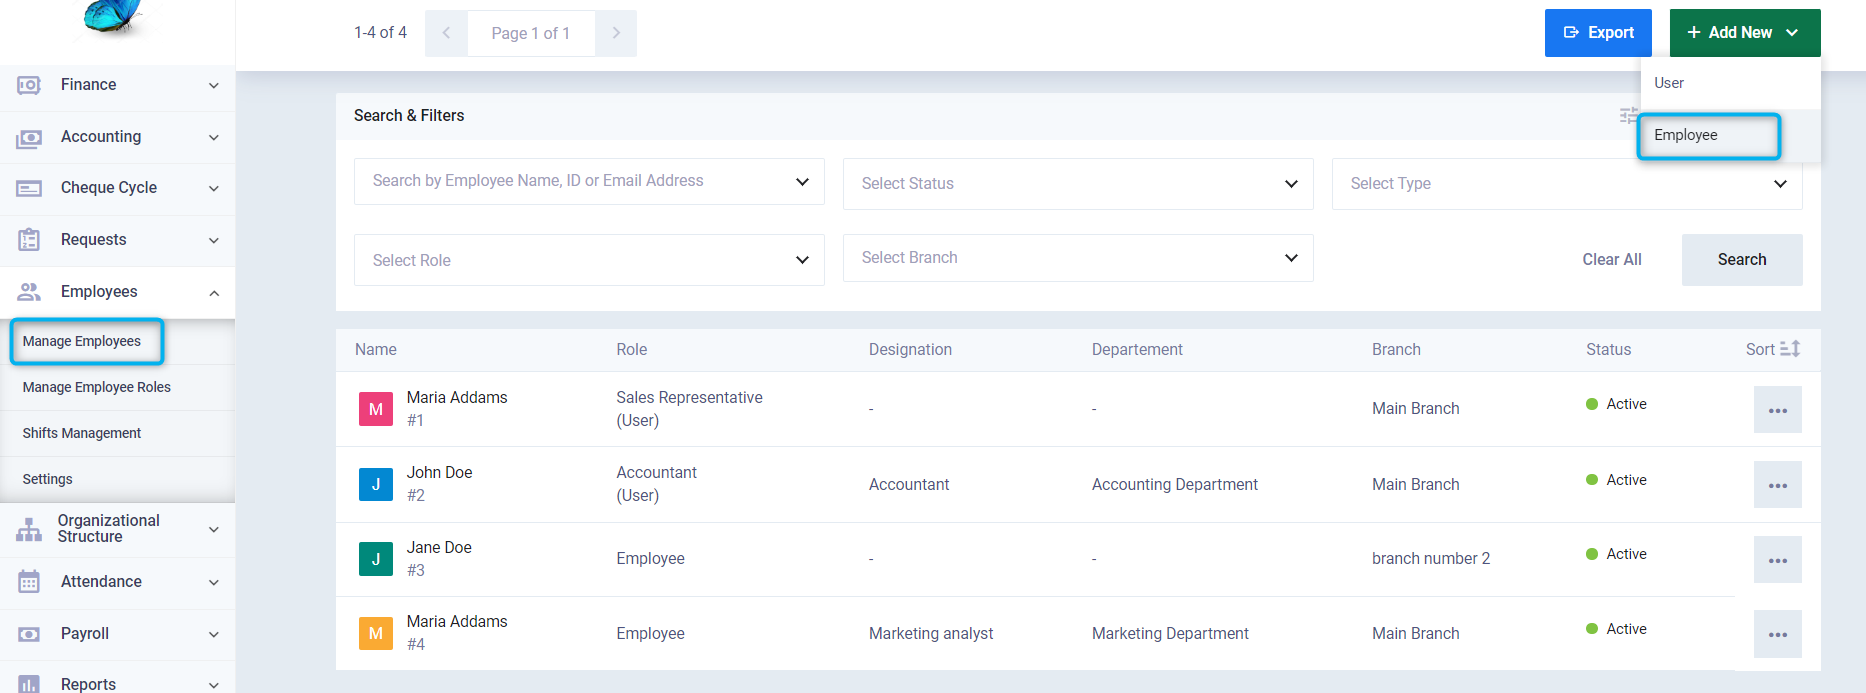
First, select Manage Employees from the Employees section in the main menu in the system, click on the arrow next to the Add New button, and choose an employee. This is if you want to assign a shift to a new employee, or click on the personal profile you want to assign a shift to if it’s an existing employee.
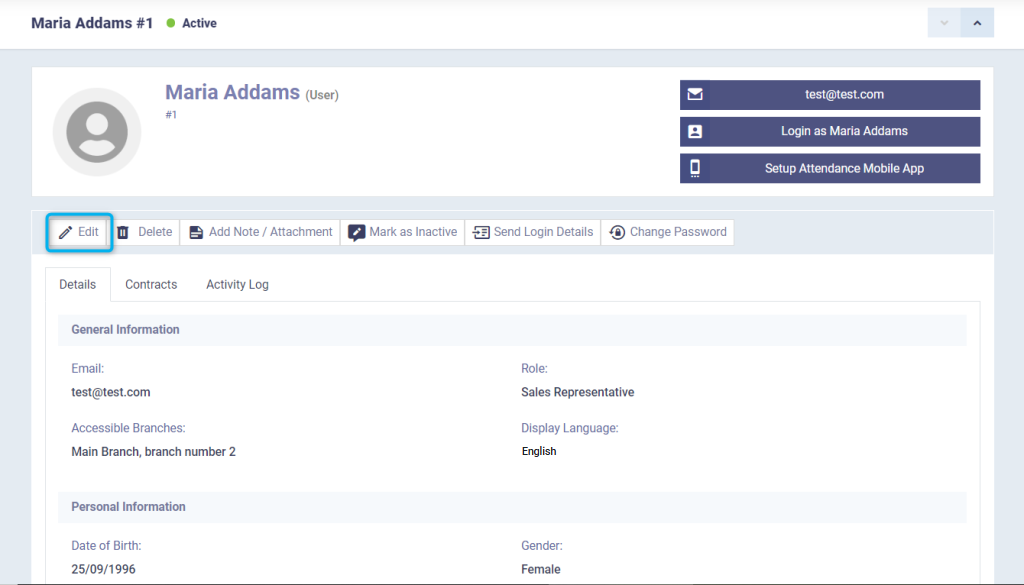
If you choose the profile of a previous employee, click on the Edit button to add the shift details.
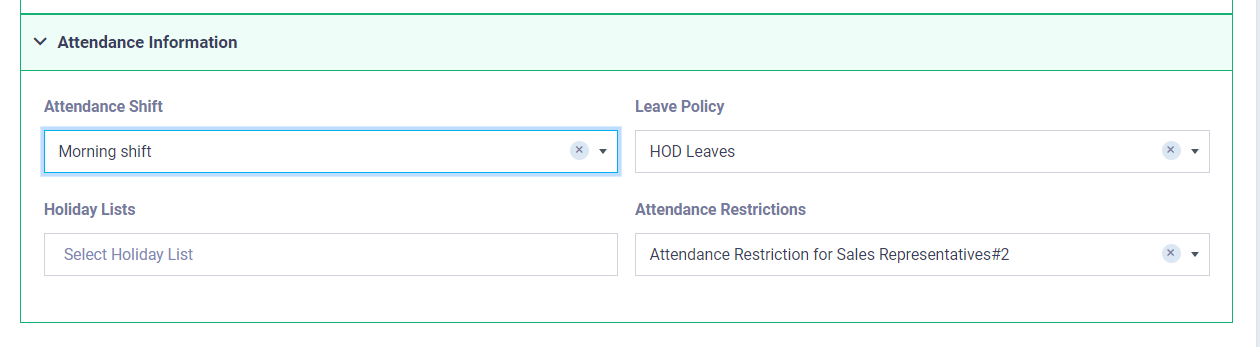
Then move to the Attendance Information section, determine the shift you want to assign to them, then save the data. This will obligate the program to count attendance, absence, and leave for this employee according to the assigned shift.
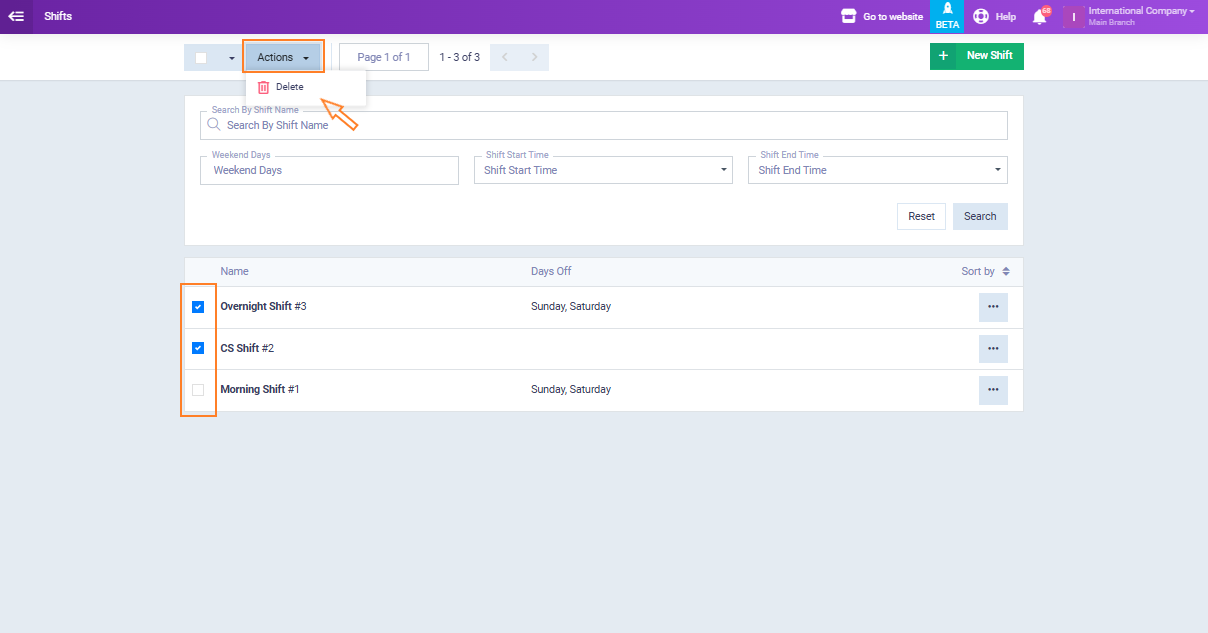
Deleting a Shift
You can delete a single shift by clicking on “Shifts Management“, then click on the three dots “…” beside the shift you want to delete and click “Delete“.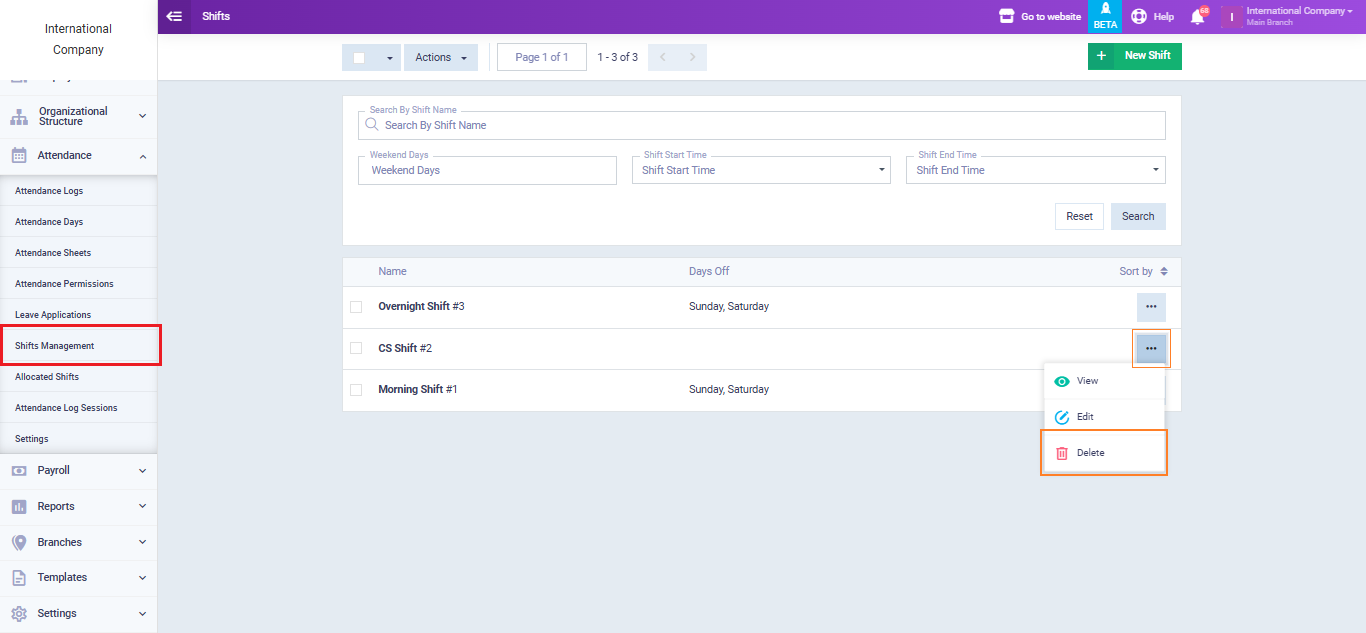
Or you can delete multiple shifts at the same time by marking the checkbox beside the shifts you need to delete, then click on the button “Actions“, then click “Delete“.