
How to Assign Inventory to an Employee
In certain situations, it is necessary to assign inventory responsibility to an employee, with one of the common scenarios being your sales staff whose job nature involves handling goods. To address this, the system has developed a warehouse management system, allowing you to allocate a warehouse to one of your employees, define their permissions, and equip this warehouse with an inventory responsibility.
In this article, we delve deeper into explaining how to assign inventory responsibility to your sales employee, providing a detailed explanation of the following points:
- Creating a new warehouse with the employee’s name and specifying their permissions.
- Transferring products from the main warehouse to the employee’s warehouse.
- Designating a single warehouse in the employee’s account with inventory responsibility.
- Displaying a stock movement report for the employee’s specific warehouse.
- Conducting a stocktaking for the employee’s warehouse.
Creating a New Warehouse with the Employee's Name and Defining Permissions
The first step to assign inventory responsibility to an employee is to create a warehouse in their name and define the permissions for it. To successfully complete this task, we need to ensure that the employees are added to our account.
Let’s assume the name of the employee for whom we are adding permissions is Nicole.
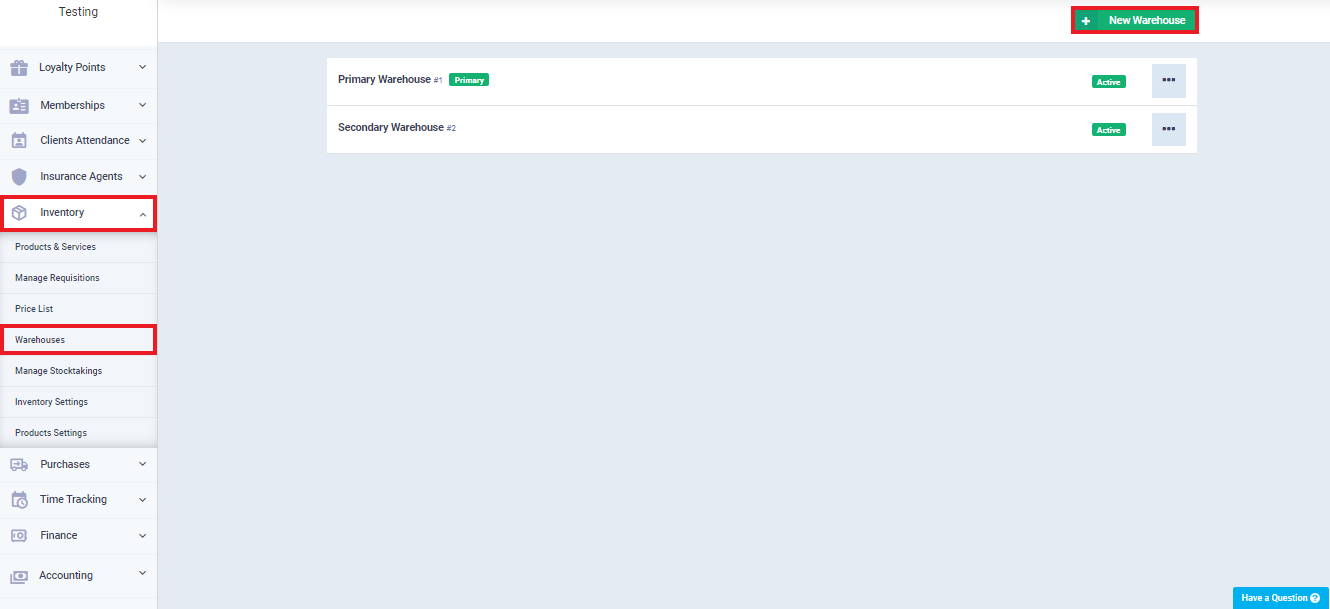
First: Creating a New Warehouse
To create a new warehouse, start by clicking on ‘Inventory‘ in the main menu, then click on ‘Warehouses.’
Next, click on ‘New Warehouse‘ in the top-right corner of the panel.
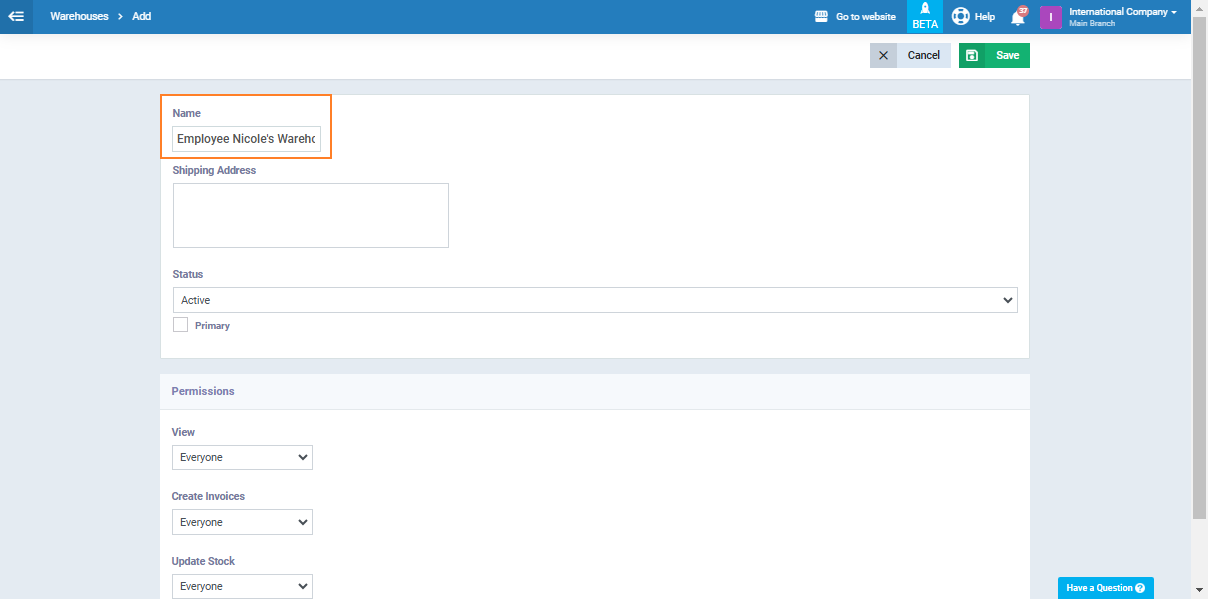
Now, fill in the details for the new warehouse:
- Name: Add the warehouse name, let it be ‘Employee Nicole’s Warehouse’.
- Shipping Address: In our case, the warehouse is a mobile inventory with sales employee Nicole. Otherwise, you can specify an address.
- Active: This option determines whether you want to activate the warehouse or not. Activate it to perform operations; otherwise, you won’t be able to.
- Primary: When this option is activated, the warehouse becomes the primary one, and newly added inventory is automatically transferred to it. In our case, we won’t make it primary as it is assigned to a specific employee, and naturally, it cannot be the primary warehouse.
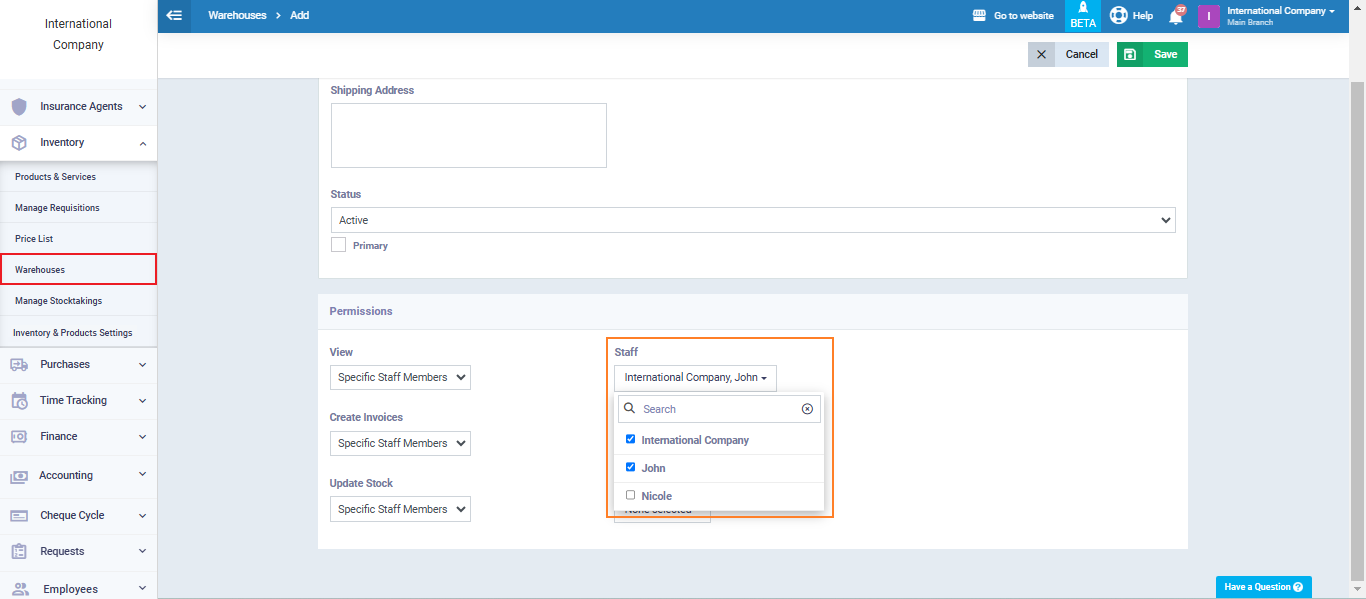
Second: Assigning Warehouse Permissions to the Employee
At the bottom of the control panel for the ‘Employee Nicole’s Warehouse‘, you will find the section for ‘Permissions’: View, Create Invoice, Edit Inventory.
Add the three permissions for employee Nicole, then click ‘Save.’
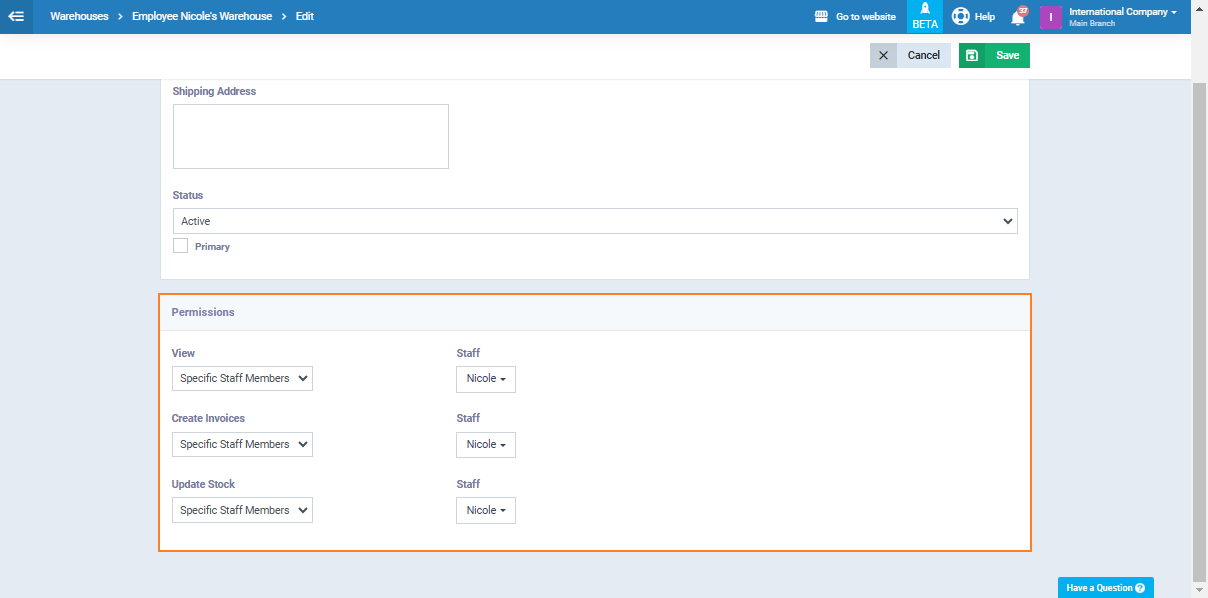
And the explanation of these permissions is as follows:
The first permission: View Permission

The second permission: Create Invoice
This permission allows the selection of the warehouse within invoices. This means that no other employee except ‘Nicole‘ will be able to create a sales invoice for goods stored in the ‘Employee Nicole’s Warehouse‘.
The third permission: Modify Warehouses
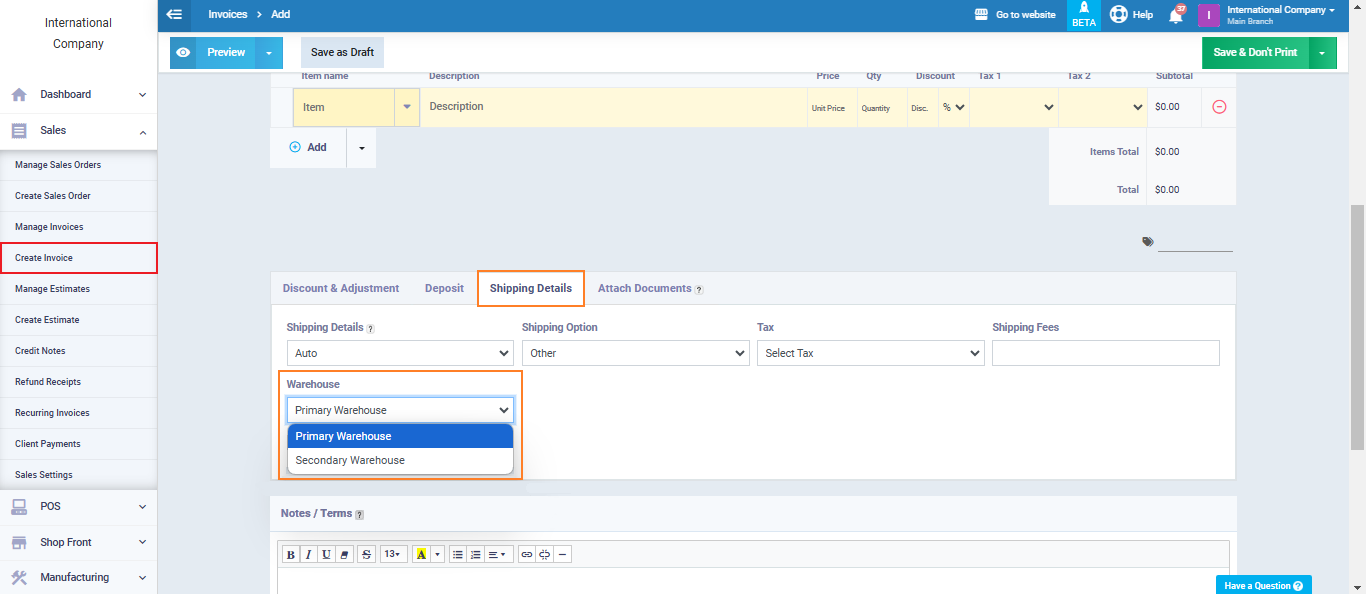
This permission allows the selection of the warehouse when creating manual stock movements. When any other employee, not Nicole, attempts to add a manual stock permission, the ‘Employee Nicole’s Warehouse‘ will not appear for selection.
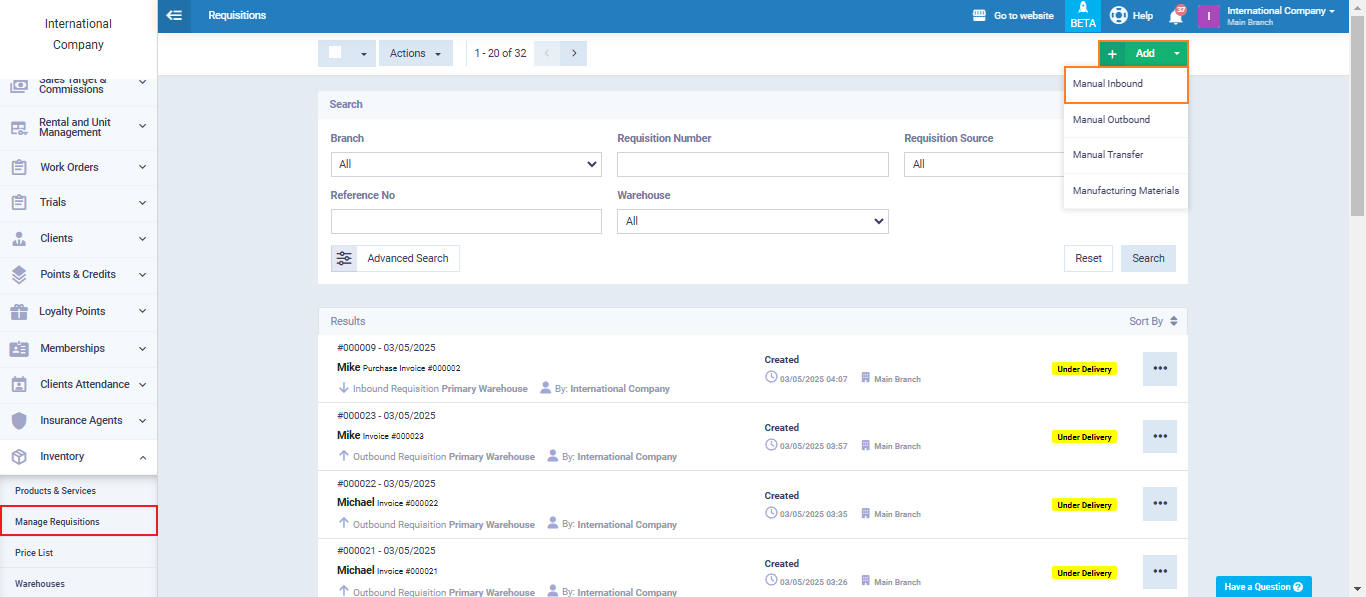
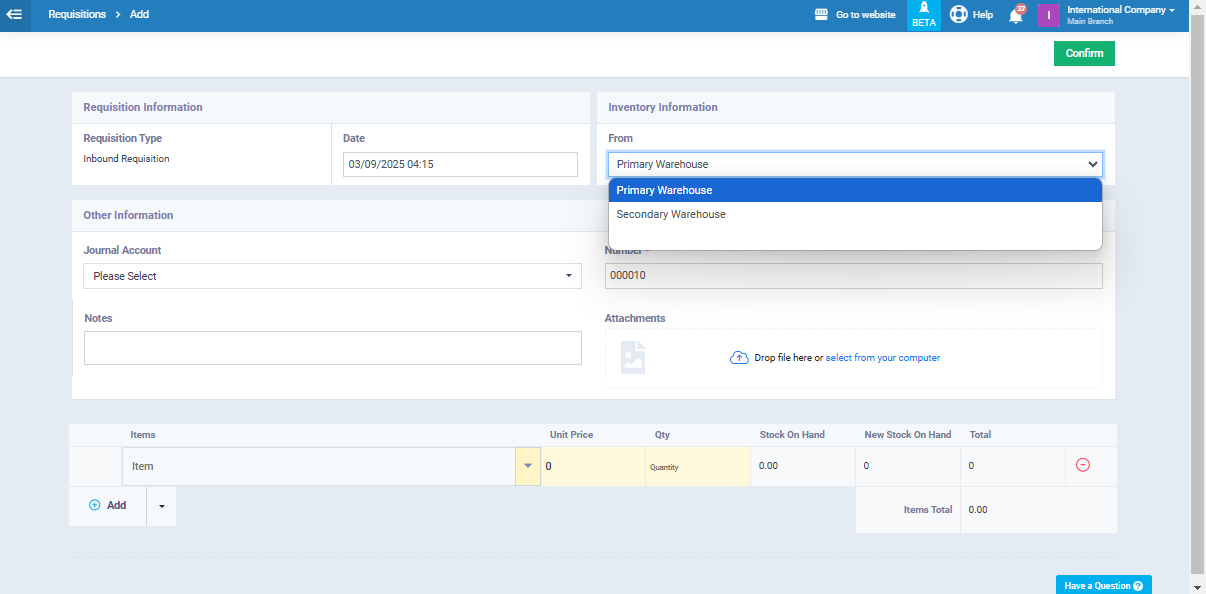
For example, if the employee John attempts to add a manual stock permission – from his account on the program – by clicking on ‘Inventory‘ in the main menu, then ‘Manage Requisition,’ and then clicking on the green ‘New‘ button at the top right of the requisition management control panel, and chooses ‘Manual Inbound‘ as shown in the image:
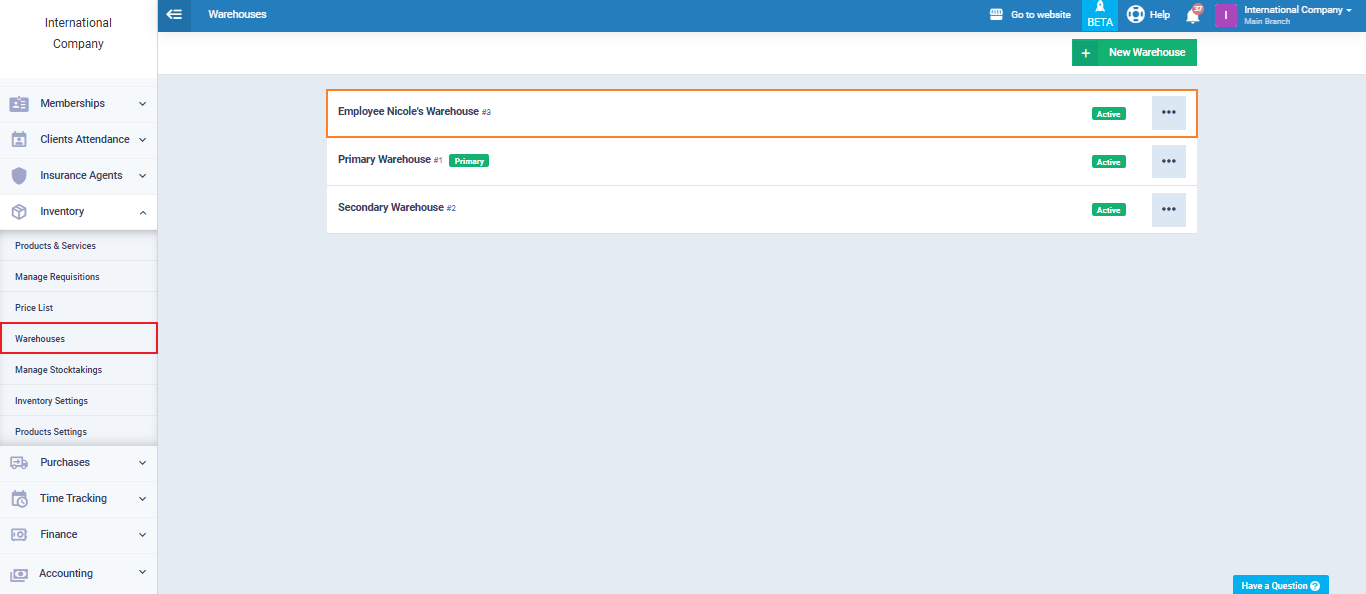
Thus, we have added all the permissions for employee Nicole to the ‘Employee Nicole’s Warehouse’, and we have observed the impact of adding these permissions on various operations.
Assigning a Single Warehouse to an Employee's Account
The system allows us to designate a single warehouse in an employee’s account. After assigning permissions to employee Nicole for the warehouse “Nicoles’s Warehouse,” we can hide the other warehouses from him through two steps:
Step 1: Assign the Warehouse to Employee Nicole
Initially, we need to assign permissions to employee Nicole for one of the warehouses. We explained how to do this in the section “Assigning Permissions to the Employee,” with details and examples.
Step 2: Adding Permissions for All Employees on Other Warehouses, Except for Employee Nicole
To achieve this, we must:
- Access each warehouse from the available ones, excluding the warehouse for which Nicole’s permissions were added.
- Add permissions for all our employees on these warehouses, excluding employee Nicole.
Transferring Products from the Main Warehouse to the Employee's Warehouse
As previously explained, a set of products can be assigned to Employee Nicole by transferring these products from the main warehouse to his warehouse, “Employee Nicole’s Warehouse“. This is done by creating a stock transfer authorization as follows:
First, click on “Inventory” in the main menu, then click on “Manage Requisition.”
![]()
We now see the control panel for the stock transfer authorization. Now, we fill in the transfer details as follows:
- Select the date of the transfer operation.
- In the Warehouse Data field, transfer from the “Primary Warehouse” to the “Employee Majed’s Warehouse.”
- In the Item box, choose the product. Multiple products can be added for transfer to the employee’s warehouse, ensuring that these products are available in the main warehouse.
- In the Quantity field, specify the quantity you want to move from the main warehouse to the employee’s warehouse.
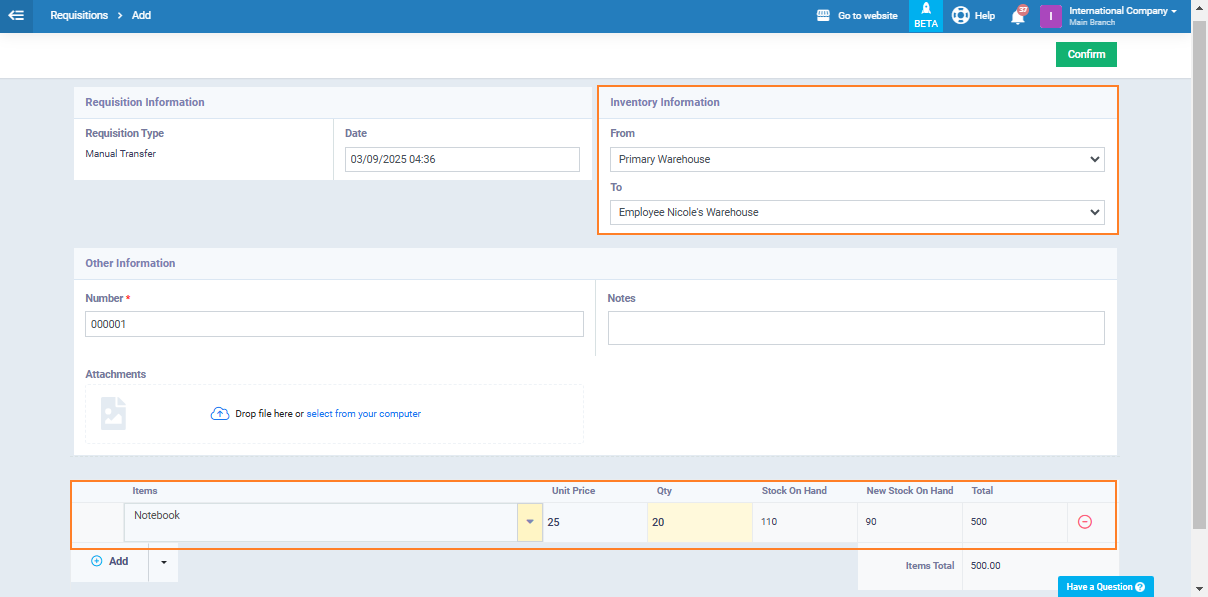
Then click on ‘Save‘
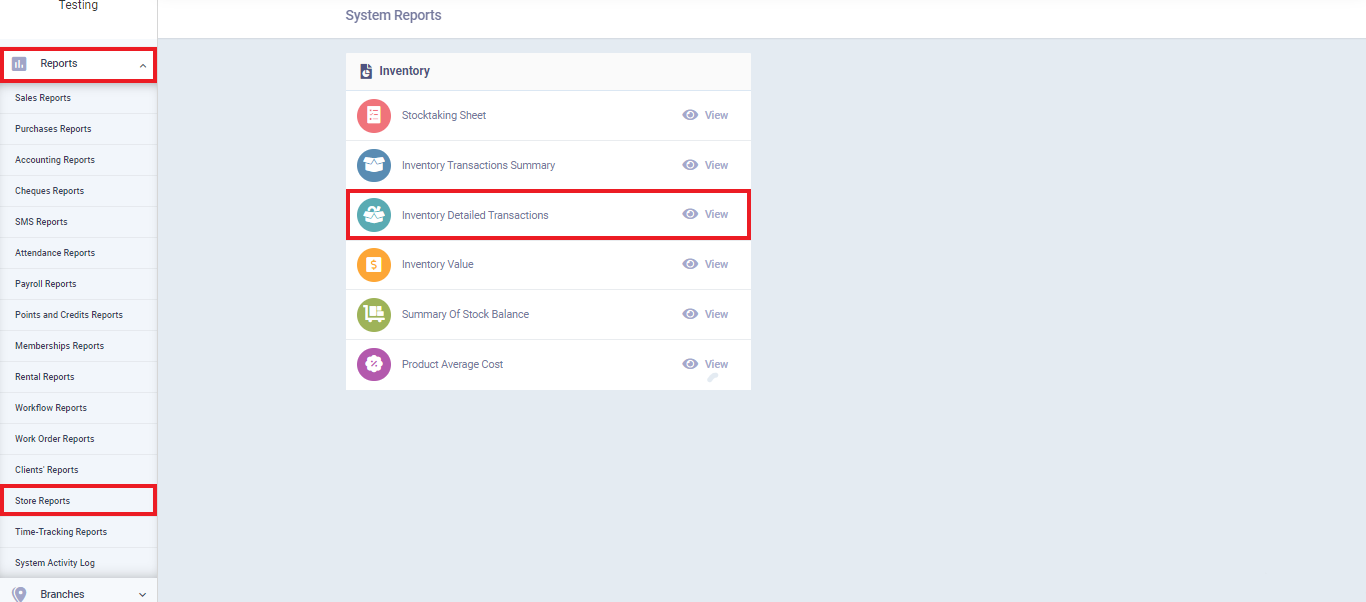
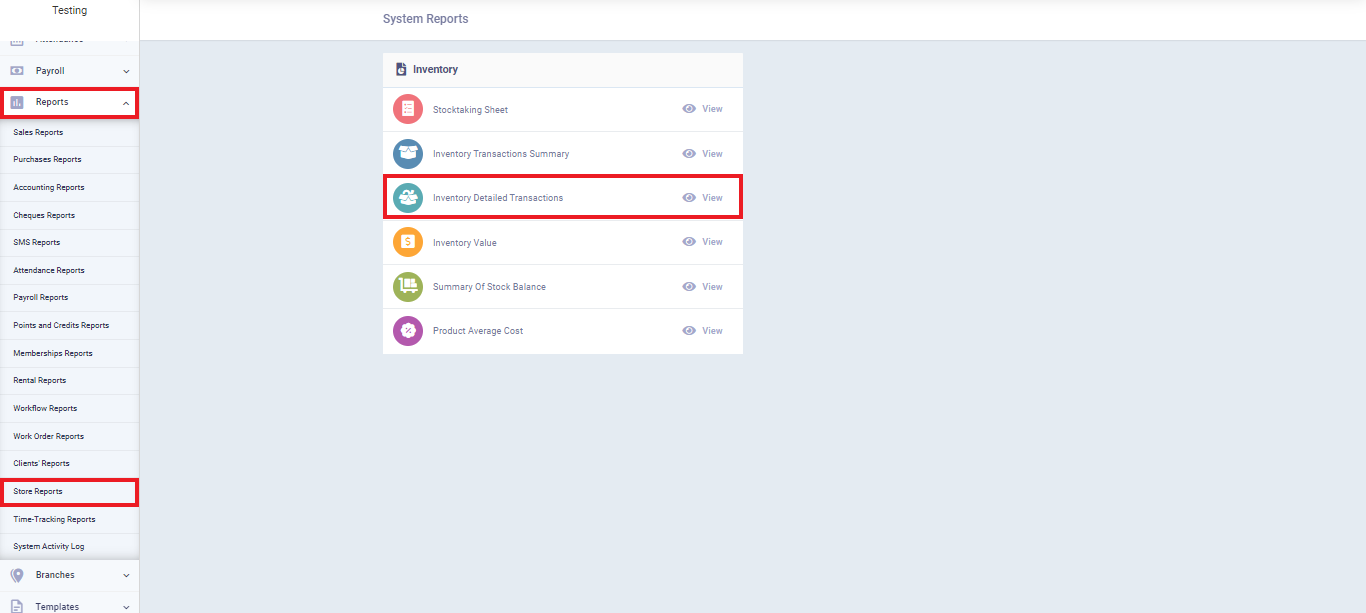
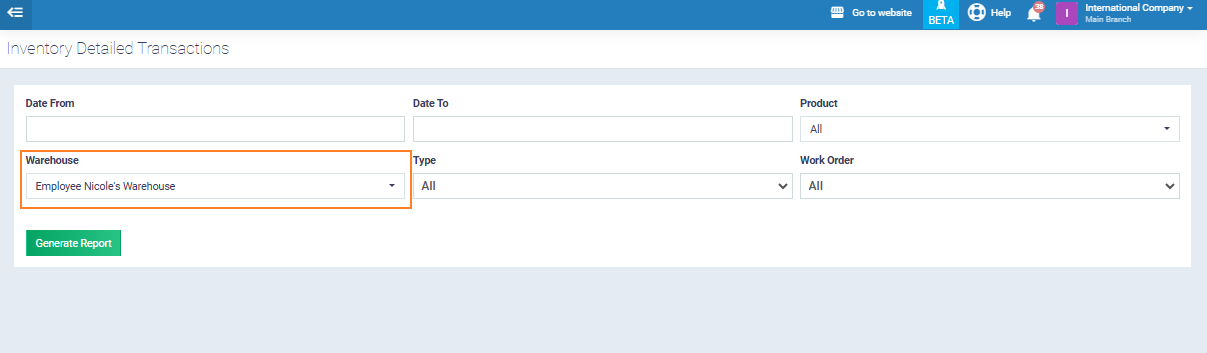
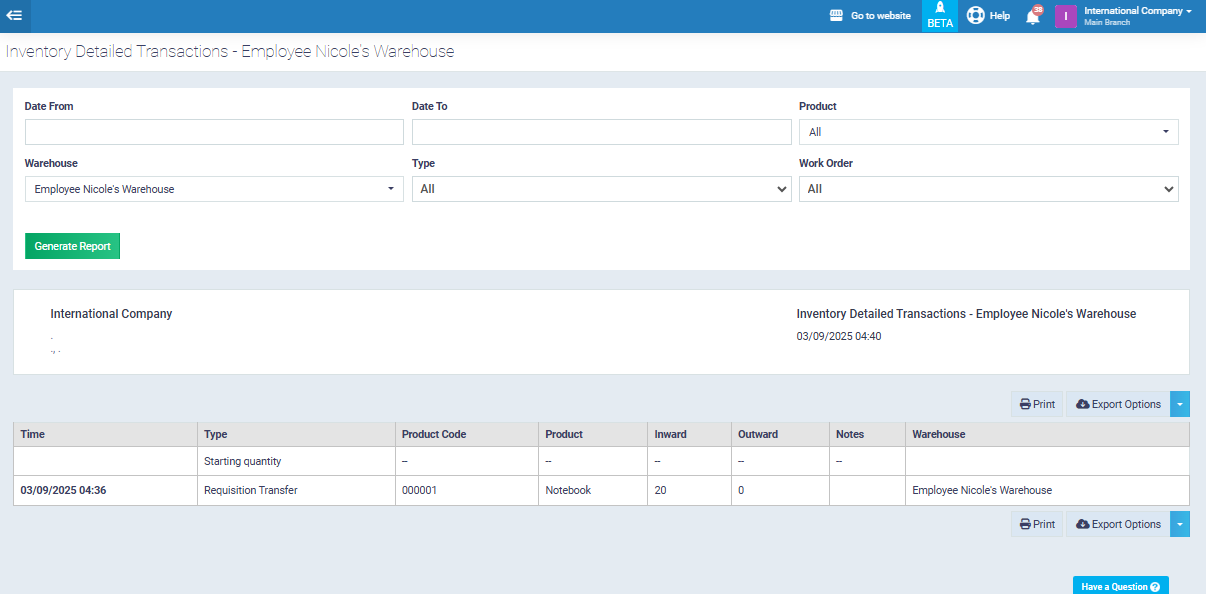
View the "Inventory Detailed Transactions" Report for the Employee's Inventory
The system allows you to view a report of all movements in the employee’s warehouse.
Stocktaking the employee's warehouse
We can conduct an inventory stocktaking on the warehouse assigned to the employee to determine if there is any discrepancy.
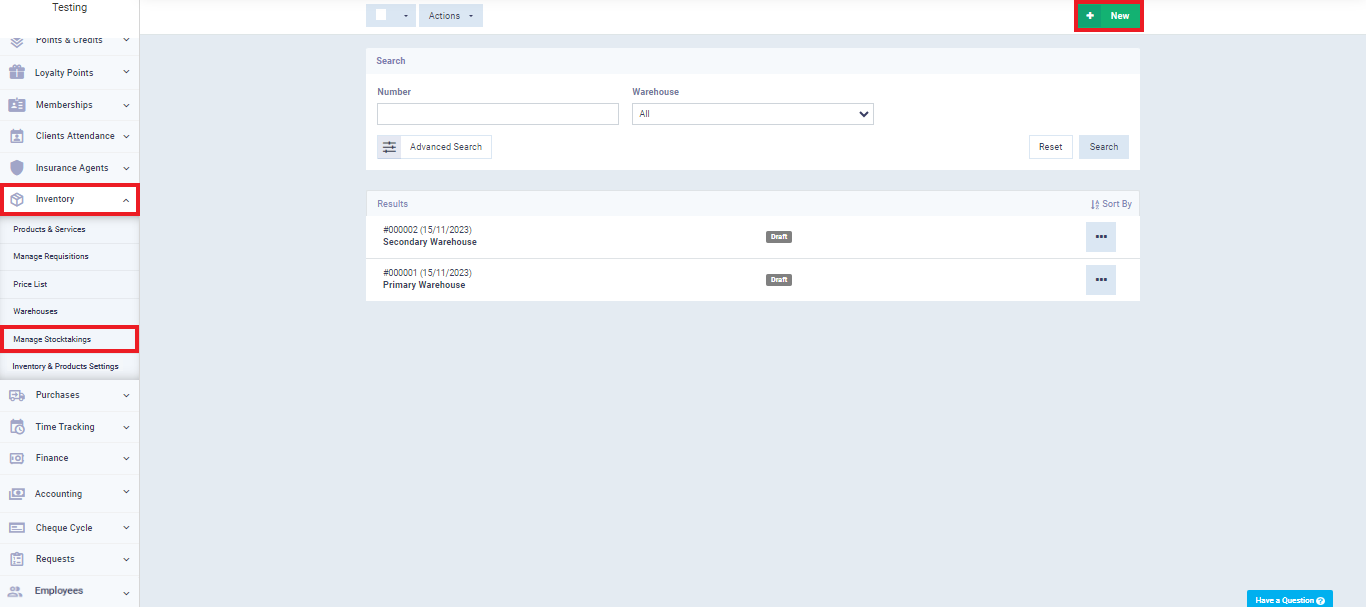
To do this, we first click on ‘Inventory‘ from the main menu, then click on ‘Manage Stocktaking,’ and finally click on the ‘New‘ button.
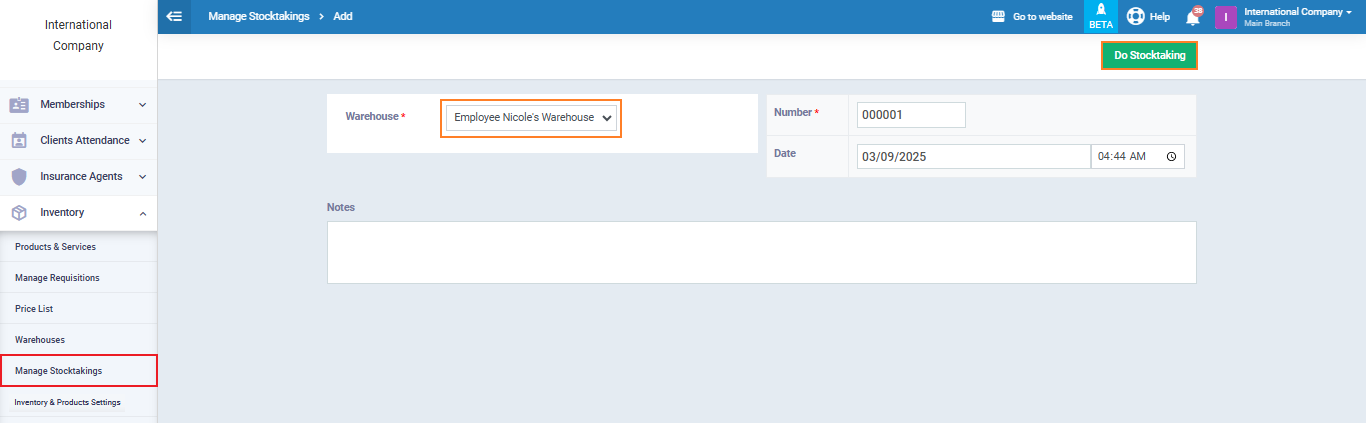
We fill in the inventory stocktaking details on the control panel:
- Warehouse: Select the ‘Employee Nicole’s Inventory‘ warehouse for which permissions have been assigned to Employee Nicole.
- Number: This is a serial number that distinguishes the stocktaking sheet. The number can be changed, and the format of the serial number can be controlled through ‘Sequential Numbering Settings‘ in the account.
- Date: Specify the date of the inventory stocktaking.
- Notes: If there are any specific notes about the inventory stocktaking, they can be written in this field.
Then we click on “Do Stocking”
Selecting the products to stocktaking in the warehouse
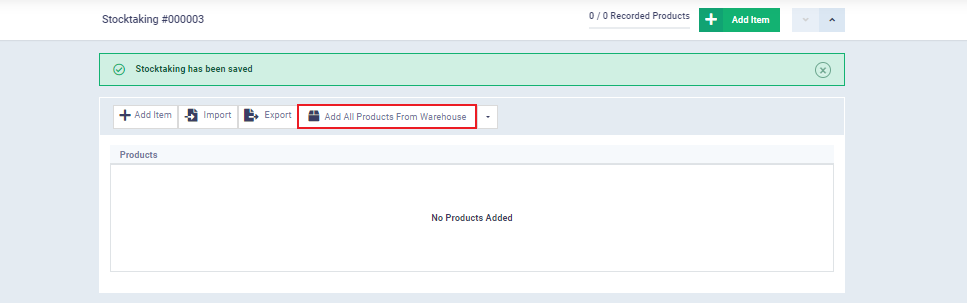
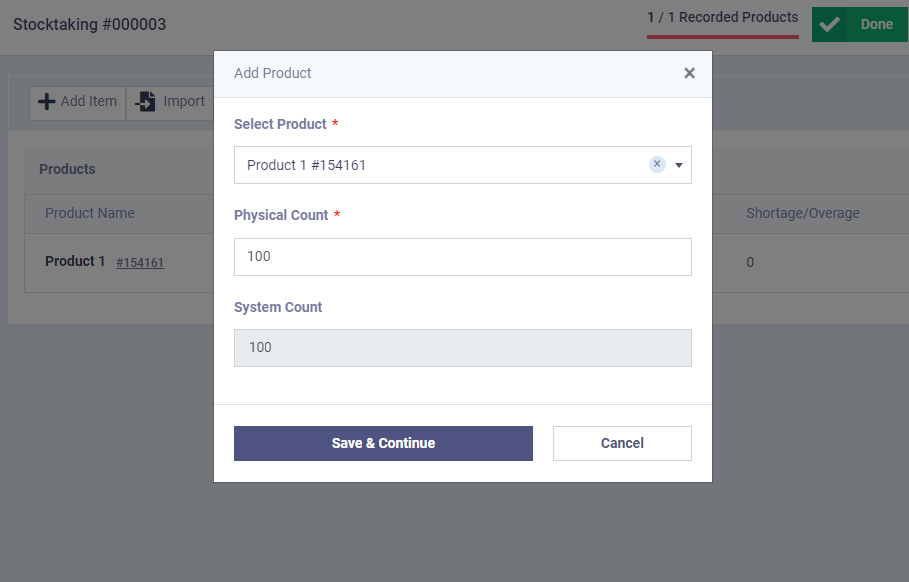
As well, we can choose specific products from the warehouse to stocktaking by clicking on ‘Add Product,’ as shown in the following image

A floating screen will appear with the following data:
- Select Product: Here, we specify the product from the inventory for which we want to conduct a stocktaking. If no specific product is selected, stocktaking will be applied to all products in the inventory.
- Select Unit: This refers to the unit of measurement assigned to the product during its addition. If no unit of measurement is assigned, this field will not appear.
- Physical Count: Enter the quantity of the product present in the stock.
- System Count: The system will automatically display the quantity of the product in the system for comparison with the stock quantity to calculate discrepancies for reconciliation.
Enter the required data and click ‘Save and Continue.’
This will take you back to the stocktaking sheet.
Click on ‘Save & Continue‘ then ‘Done’
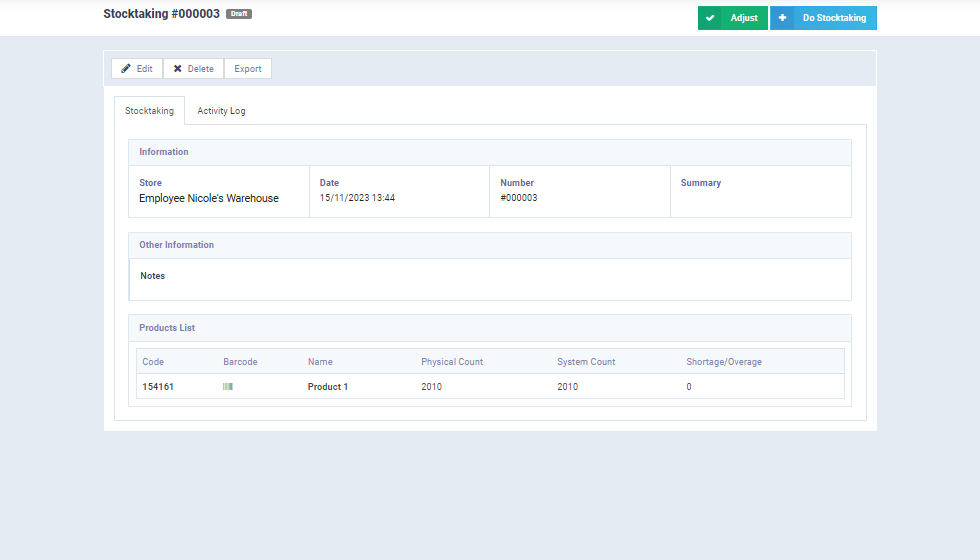
Settlement after Stocktaking
After instructing the settlement, the system automatically generates warehouse addition and withdrawal transactions to address any shortages or surpluses in the inventory list. It also transfers the total value to the ‘Cost of Sales’ account.