How to Use Multi-Barcodes ?
Most production lines offer their products in individual units, boxes, and cartons. The units representing the product may vary, but ultimately, it is one product. How can we link all these units together, assigning a barcode to each, making it easy for the seller to call up each unit directly?
Simply put, this is done through the Multi-Barcode feature in the system, where you can add a product with multiple units (piece, box, carton), assigning a barcode to each unit with a custom price.
In this topic, we will explore this feature in detail, covering the following points:
- Adding a new unit template.
- Adding a multi-unit product and assigning barcodes to each unit.
- Obtaining the barcode label.
- Creating a sales invoice with a multi-unit product.
Adding a New Template
To add a unit template, we first need to activate the feature that allows the use of multiple units. Otherwise, the system will treat the product as a basic unit, such as a single piece of chocolate. After activating this feature, we can inform the system that there is a piece, a box, and a carton of this product. Consequently, it becomes easier to manage each of the three units at the point of sale.
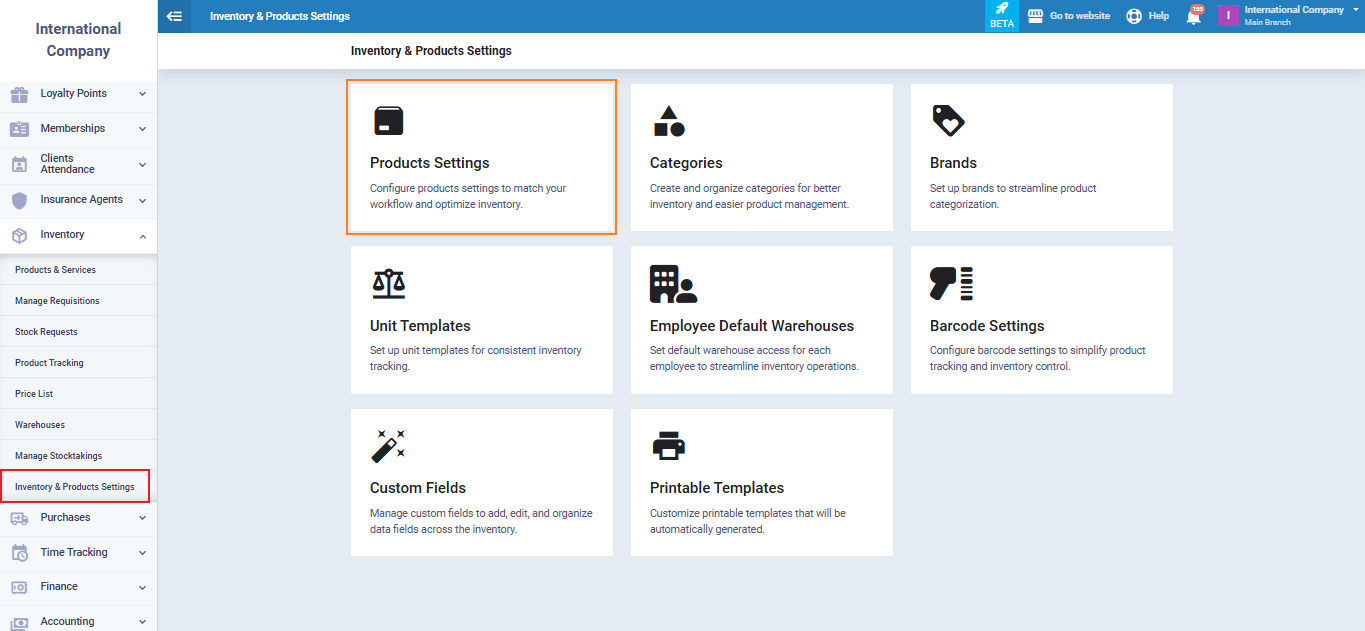
To enable the feature for multiple units, we click on “Inventory” from the main menu, then select “Inventory & Product Settings,” and choose the “Product Settings” tab as shown in the following image:
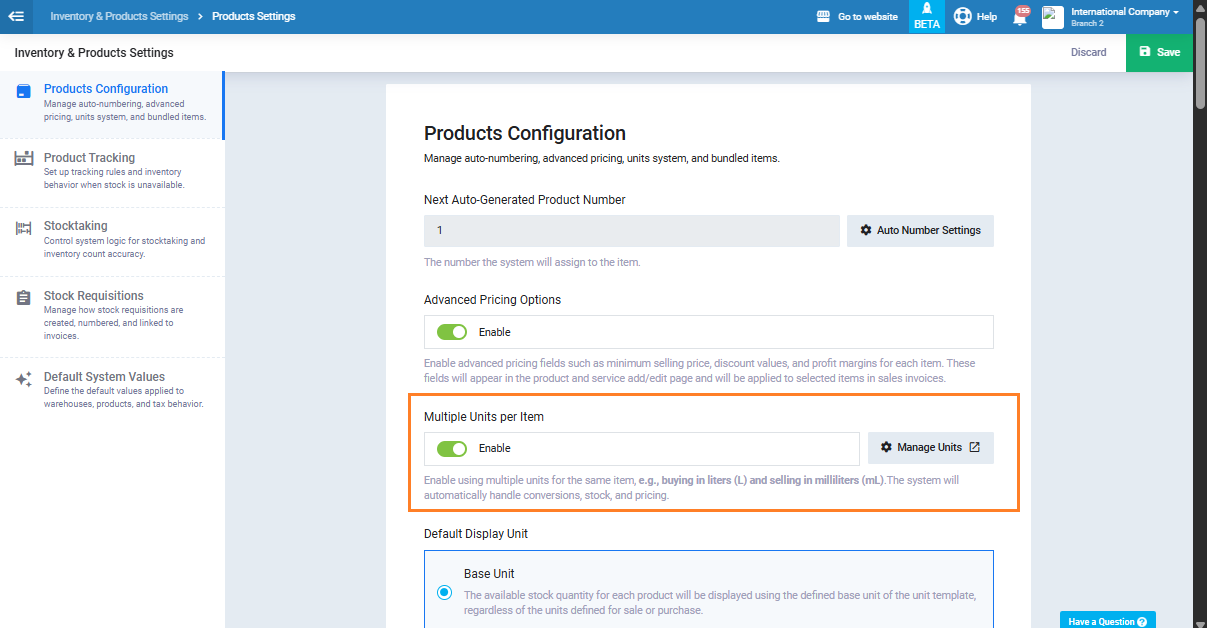
Then click on “Manage Units”
 Now we fill in the unit data as follows:
- Base Unit Name: This is the smallest unit that can be sold for the product, and the system automatically deals with it if no additional units are entered. Let it be “Piece.”
- Short name: Here, we can add a shortcut for the name of the base unit. Let it be “P.”
- After setting the nature of the base unit to “Piece” and giving it a distinction, we now begin to add units, from the smallest to the largest, as follows:
- Add the name of the larger unit, let it be “Box,” and the conversion factor, i.e., the number of pieces in each box, let it be 12. The distinction is “B.”
- Then click “Add Unit” to add a unit larger than it.
- Add the name of the larger unit, let it be “Carton,” and the conversion factor, i.e., the number of boxes in each carton, let it be 10. The distinction is “C.”
- This way, we can keep adding units indefinitely. Add a name for this template to use it in sales invoices, let it be “P 12 B 10 C.” This name consists of unit symbols and their quantities, making it easy for us to specify them when adding the product.

Adding a Product with Multiple Units and Assigning a Barcode for Each Unit
We will now begin adding a product, and we can use the guide “add a new product” on the system to complete this step.
We fill in the data as follows:
- Name: Here we add the product name, in our practical example, let it be “Chocolate.”
- In the Unit Template field, we choose the template we created recently named “P12 B10 C.”
- In the left barcode field, click on “Multiple” to start adding details for the product in its different units as follows:
- Unit factor: Choose from the available units in “P12 B10 C“: (Piece, Box, Carton).
- Barcode: Add a barcode for each unit.
- Quantity: Add the quantity called for from each unit in the sales invoice. For example, if we specify a quantity of 5 for the Box unit and its barcode is scanned at the point of sale, the system will directly add 5 boxes to the invoice.
- Selling price per unit: Add the selling price for each unit separately, allowing us to adjust the price when selling in bulk or in large quantities.
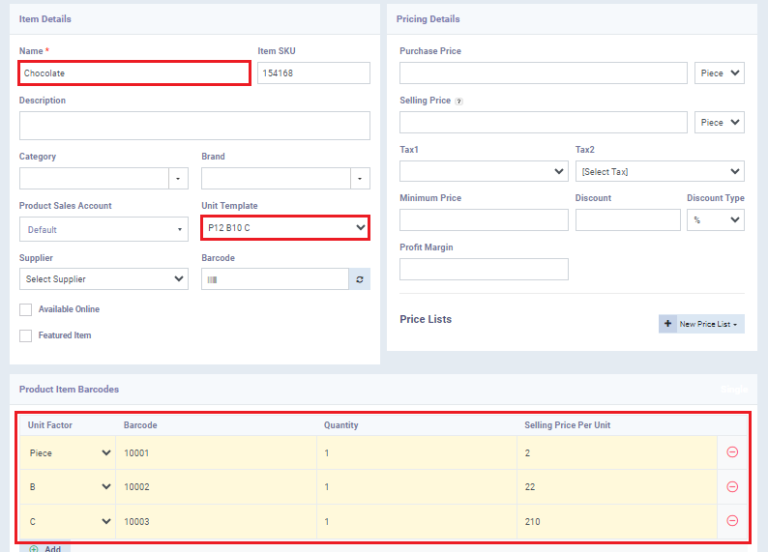
Then click on “Save”
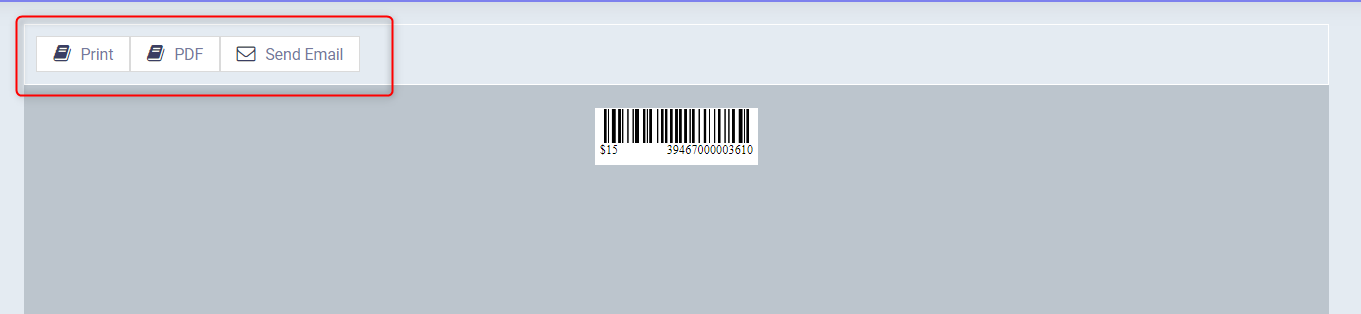
Getting the Barcode Label
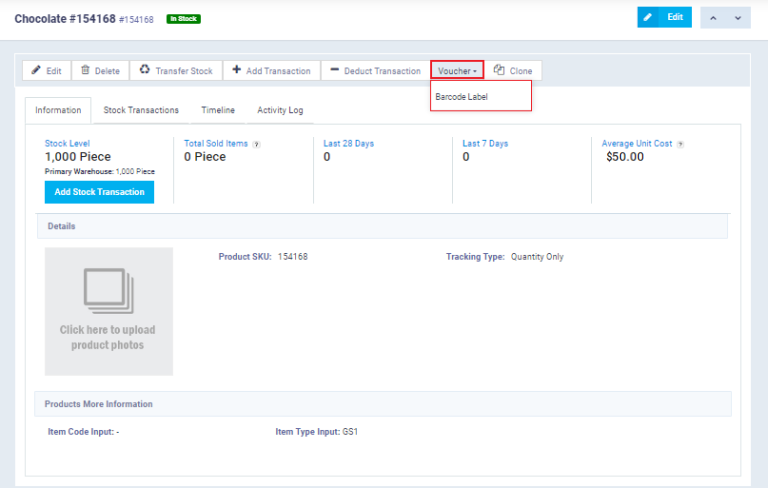
Now click on “Vouchers” then “Barcode Label”

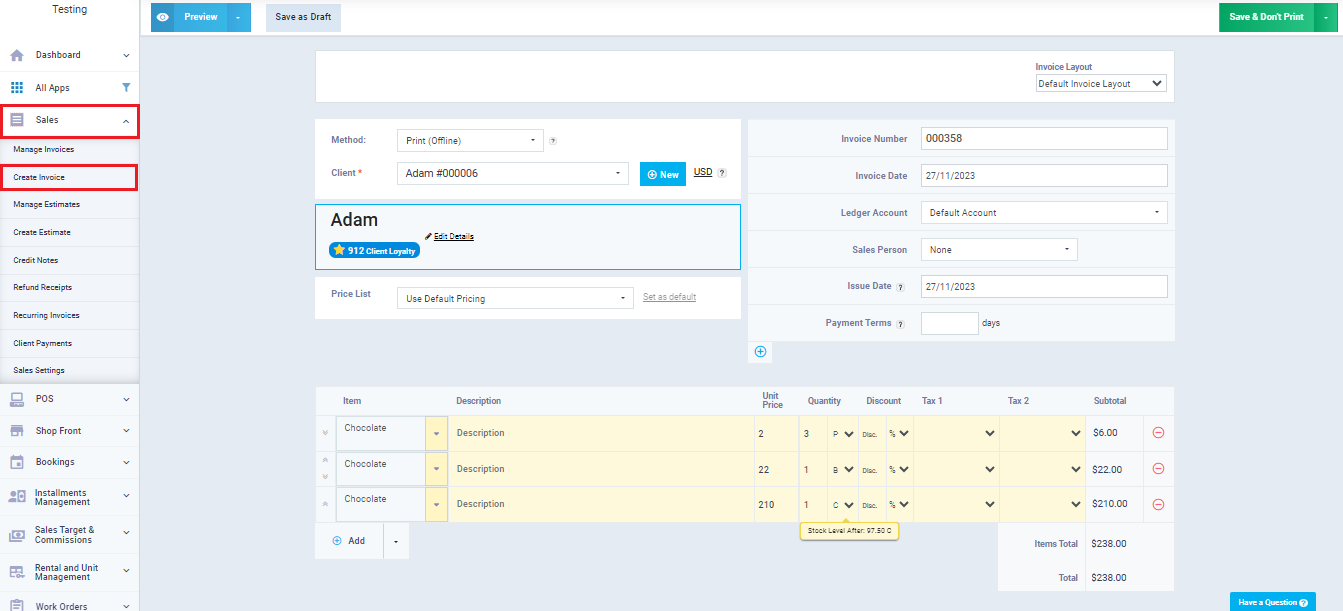
Creating an Invoice for a Multi-Unit Product
You can start by creating a sales invoice for the client Youssef, who wants to purchase: 3 pieces, a box, and a carton of chocolate products. We can use the guide “Create a new sales invoice” on the system to complete this step successfully.
- In the client field, we add the client Youssef. If you don’t have any clients, you can use the guide “add a new client” to the system to complete this step successfully.
- In the item field, instead of selecting the item by searching for its name, we scan its barcode, and the product details will appear.
- In the quantity field, we add the quantity the client will buy for each unit.
- Once the item is selected, the system will display its selling price automatically.
Then click on “Save.”