How to Create a Stock Inbound/Outbound Requisition
Stock requisitions are among the most important transactions that contribute to maintaining the integrity and tracking of inventory. They also play a crucial role in ensuring the quality of various warehouse transactions, such as inventory and employee assignments. Despite their importance, creating stock permissions is a simple process in the system. In this article, we’ll walk you through the steps of creating a stock inbound/outbound requisition.
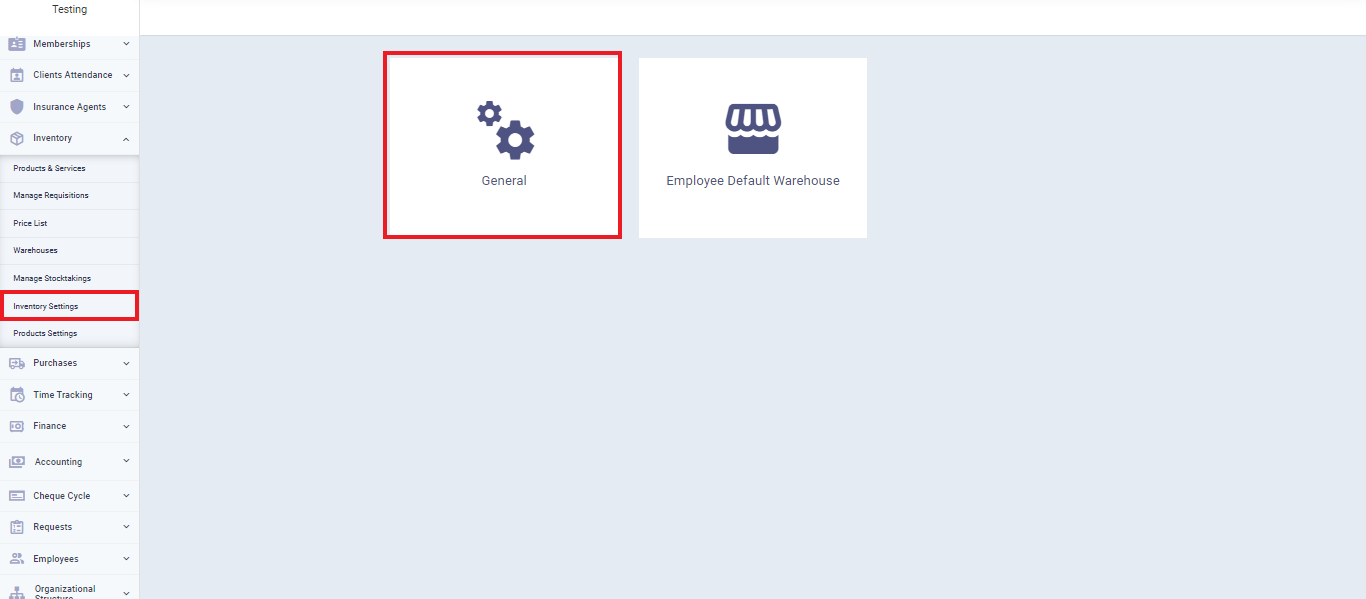
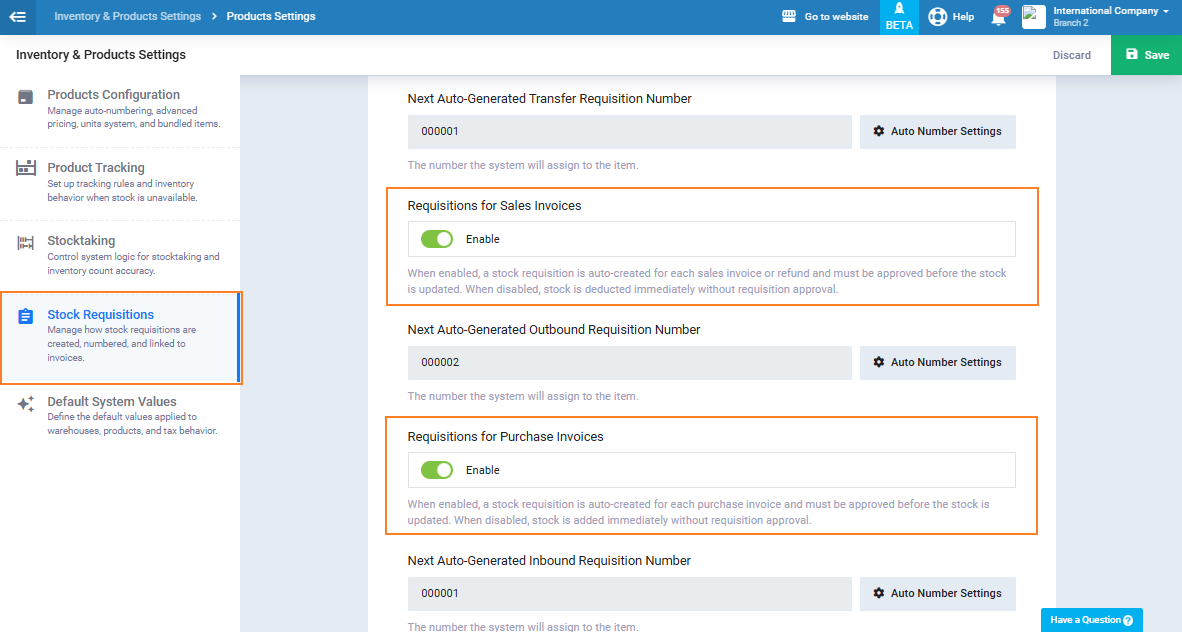
Enable Requisitions
How to Create a Requisition on Daftra
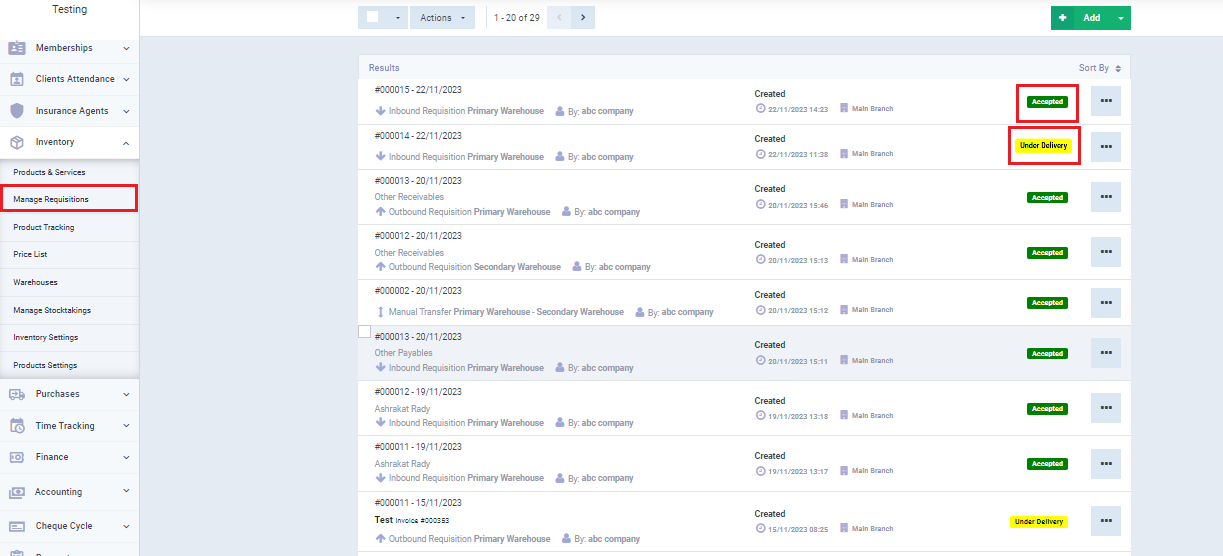
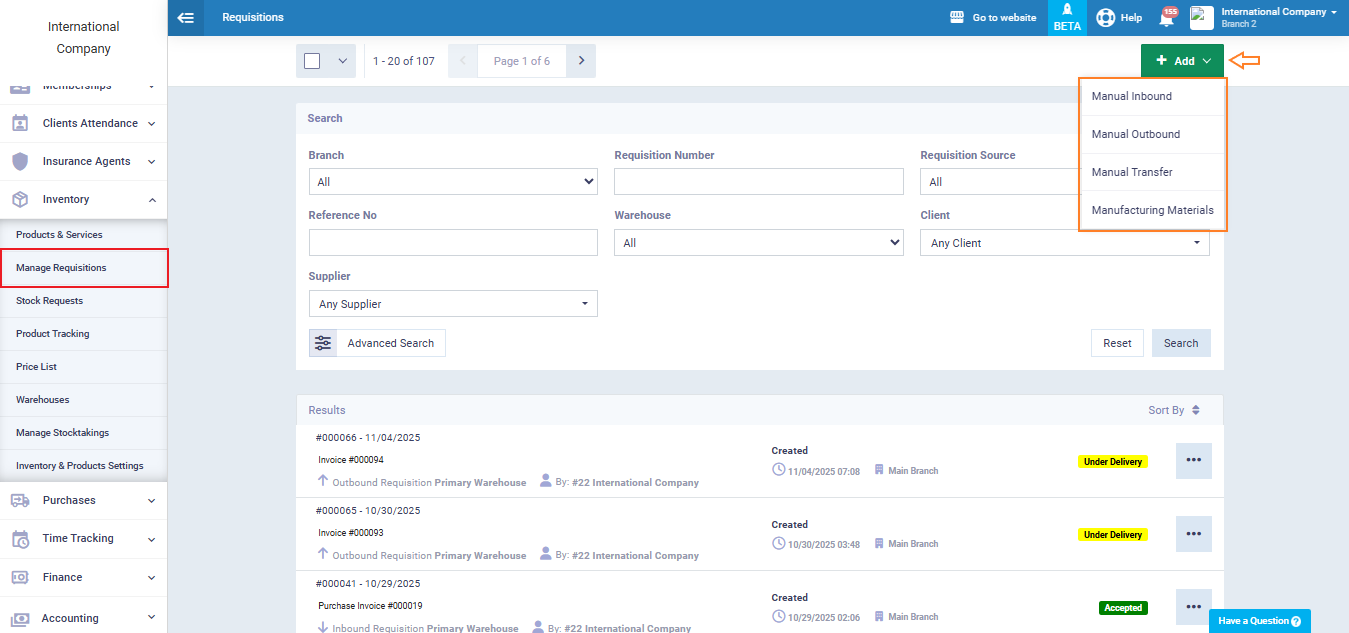
Click on “Manage Requisition” under “Inventory” in the main menu. Then, click on the “Add” button and choose between:
- “Manual Inbound” to create an addition requisition.
- “Manual Outbound” to create a withdrawal requisition.
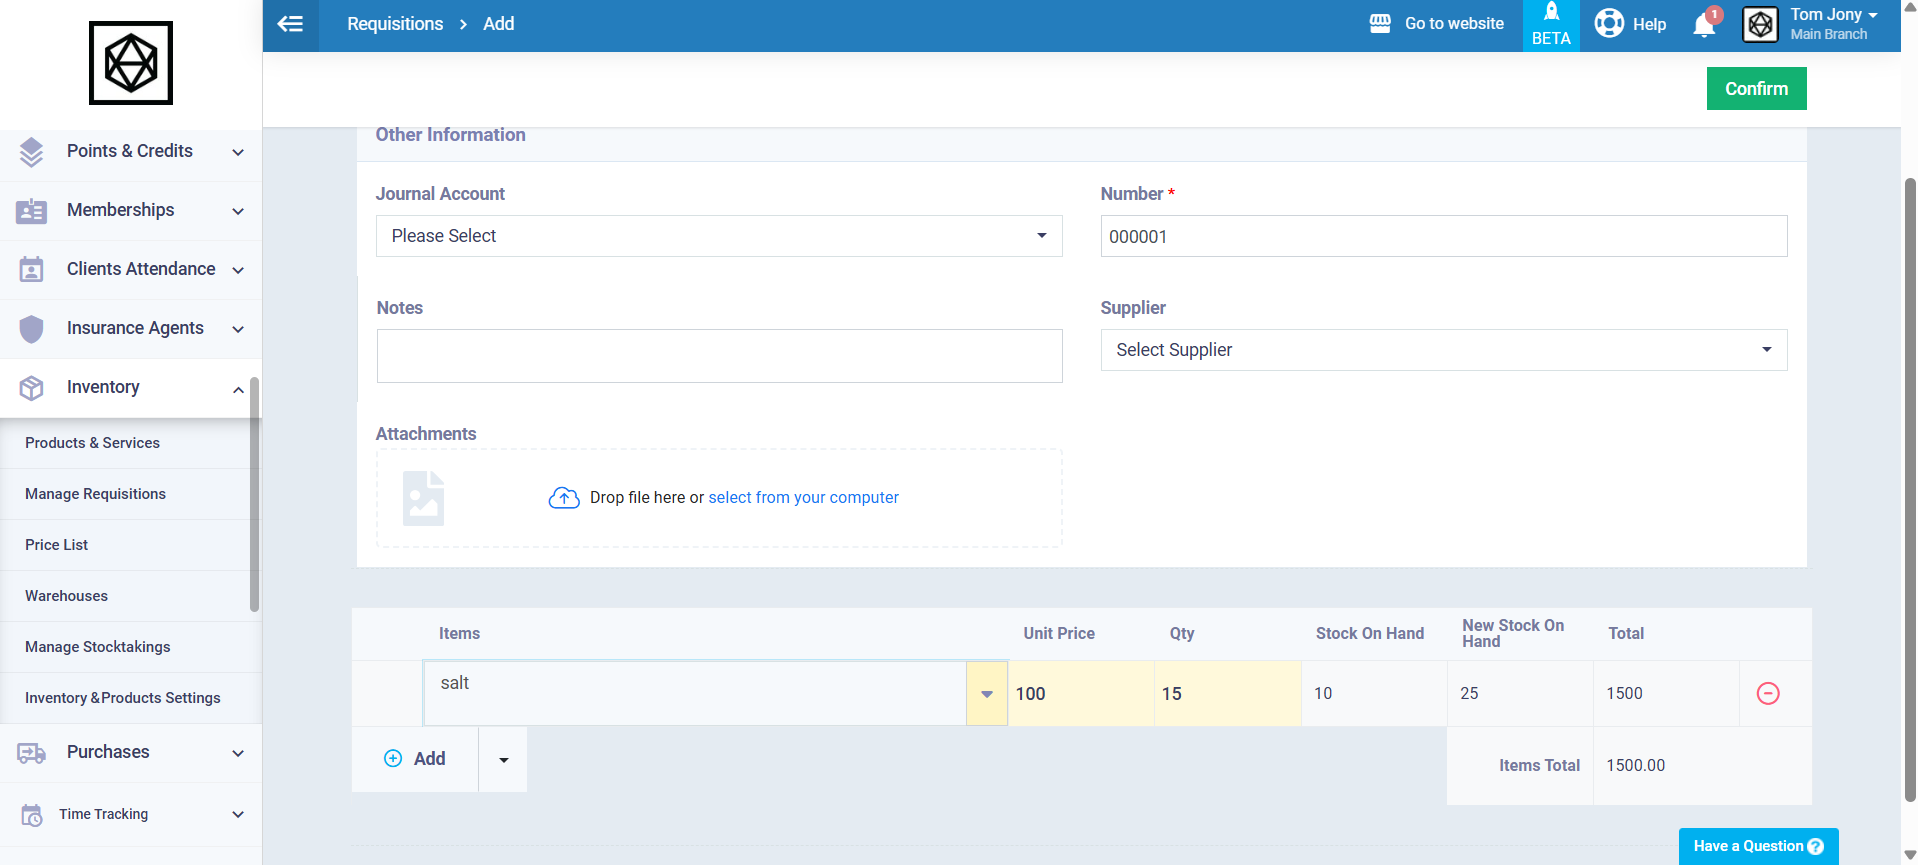
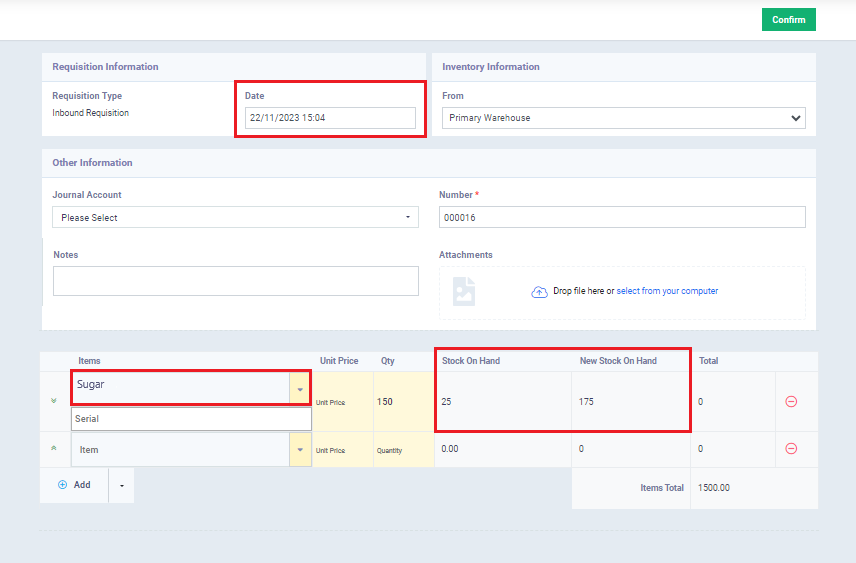
Enter the following information for the requisition:
- Requisition Date: Automatically set to the creation date, but you can change it.
- Warehouse Data: Choose the warehouse for which you want to add or withdraw stock items included in the requisition.
- Subaccount: Useful if you want to manually assign an account for recording the entry of the addition or withdrawal requisition in the chart of accounts.
- Notes and Attachments: Include any notes or files associated with the addition or withdrawal requisition.
-
- Items: Add the products included in the addition or withdrawal requisition, along with their quantities and unit prices. The system will display the inventory balance before and after the addition or withdrawal.
- Add (+): Click to add more items to the same requisition.
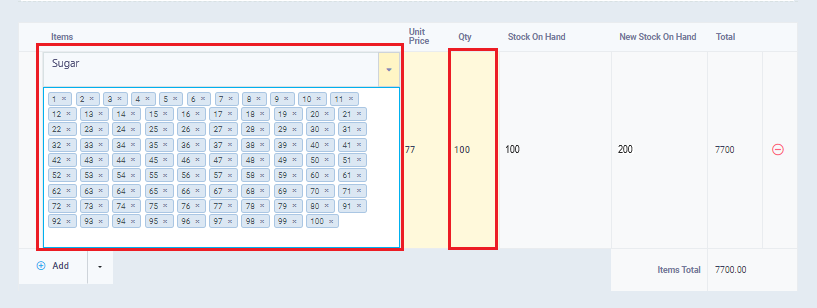
Impact of Product Tracking Type on Inventory Requisition
There is the conventional method of tracking inventory through the quantity of the product and the impact of stock transactions on this quantity, whether it increases or decreases. There are other methods such as tracking stock through batches or more specific methods like:
- Serial Number
- Expiry Date
In such cases, it is necessary to specify the serial numbers and expiry dates for the products that need to be added or issued in the inventory requisition.
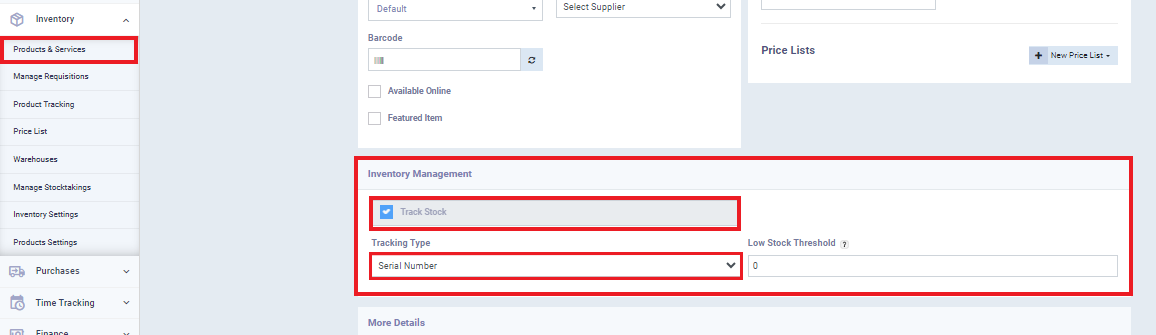
To set the tracking type, click on “Products and Services” under “Inventory” in the main menu, and select the product for which you want to choose the tracking type, or make the selection when adding the product from the beginning.

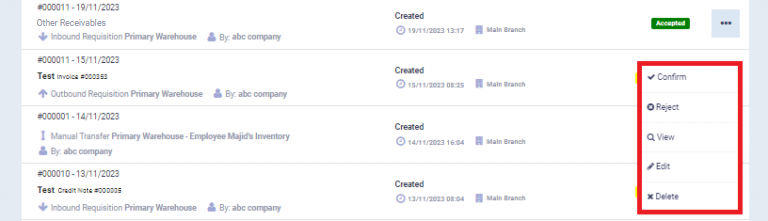
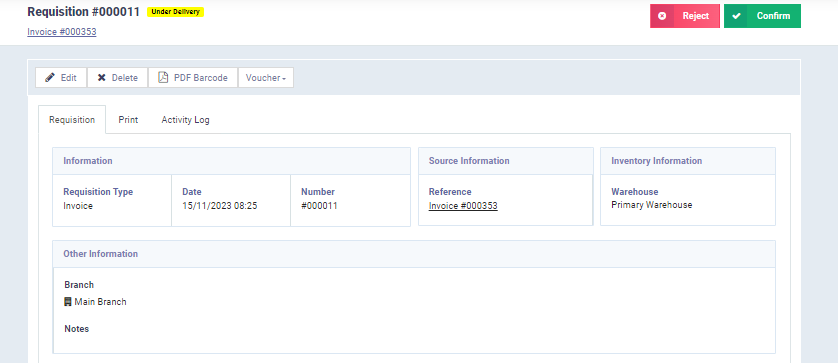
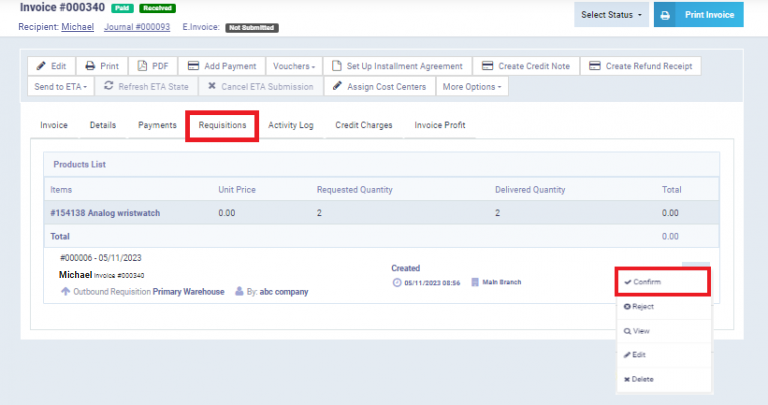
Accepting and Declining Stock Requisition