
Tracking a Product by Serial Number
Continuing with the educational tutorials on the system, we will review the feature “Track Product by Serial Number” and how to perform related operations.
Through the software, you can track your products using one of three methods: serial number, shipment number, or expiration date. In this article, we will specifically focus on the first method, “serial number.”
Adding a Product with Serial Number Tracking
To complete this task, you need to first activate the product tracking system in the inventory. Then, add a new product specifying the tracking type as “Serial Number.” Here are the steps:
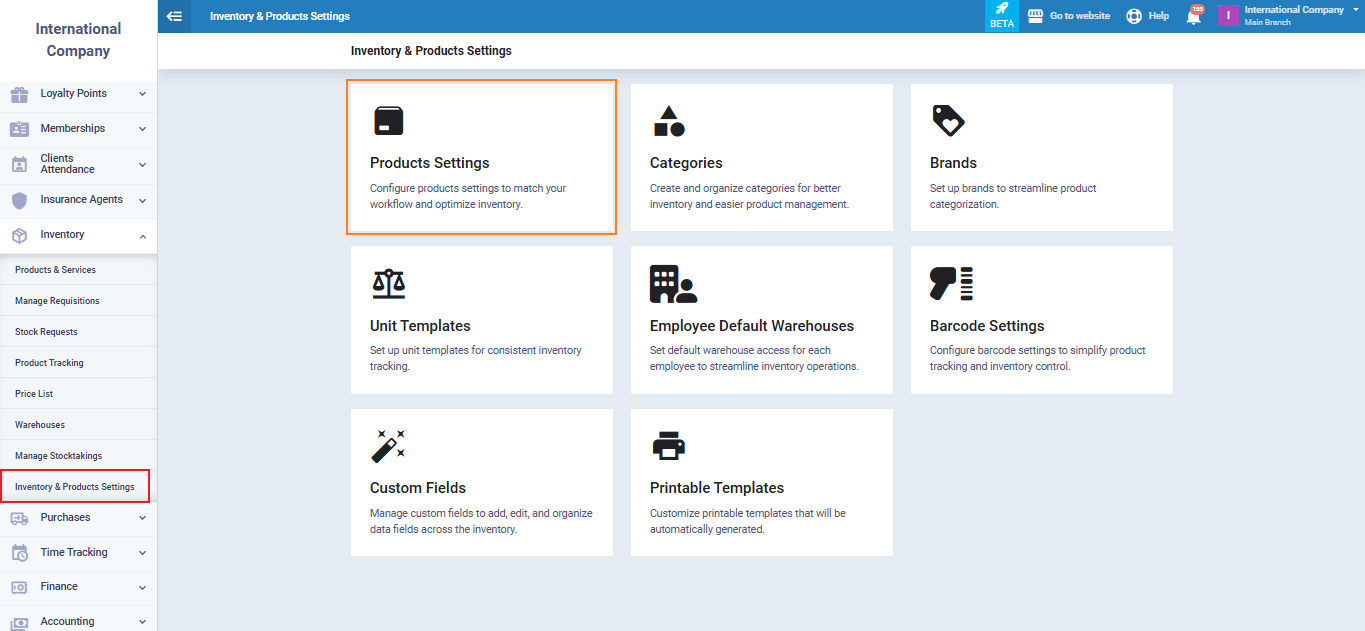
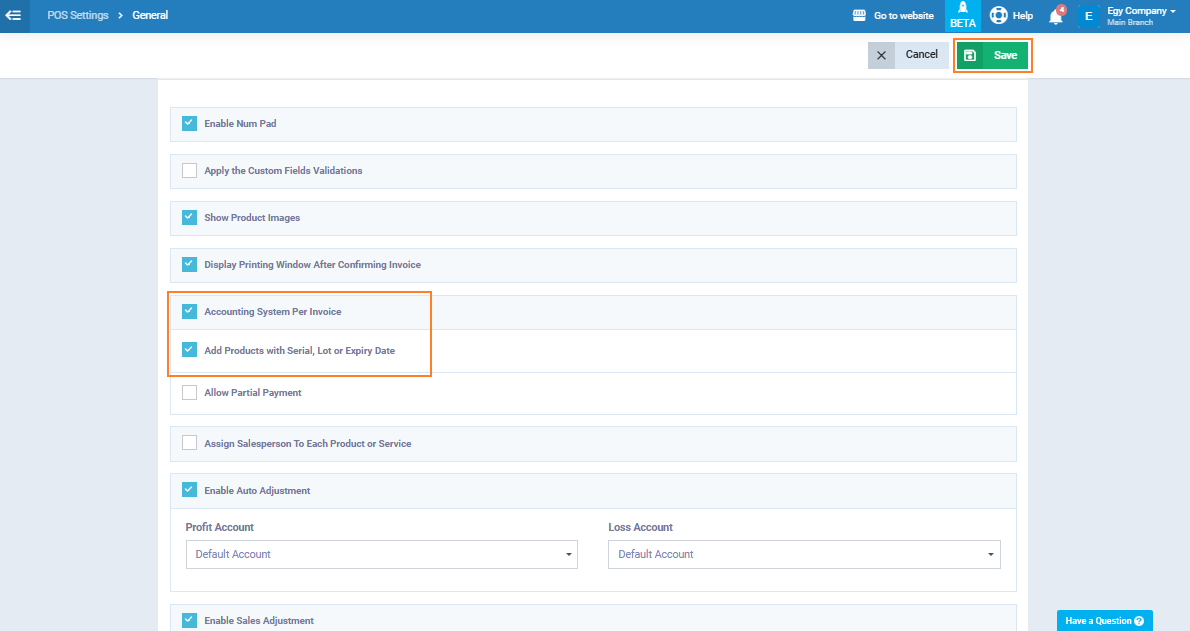
Activating the Product Tracking System in the Inventory
- Go to “Inventory” from the main menu and select “Inventory Settings.”
- Click on the “General” tab.
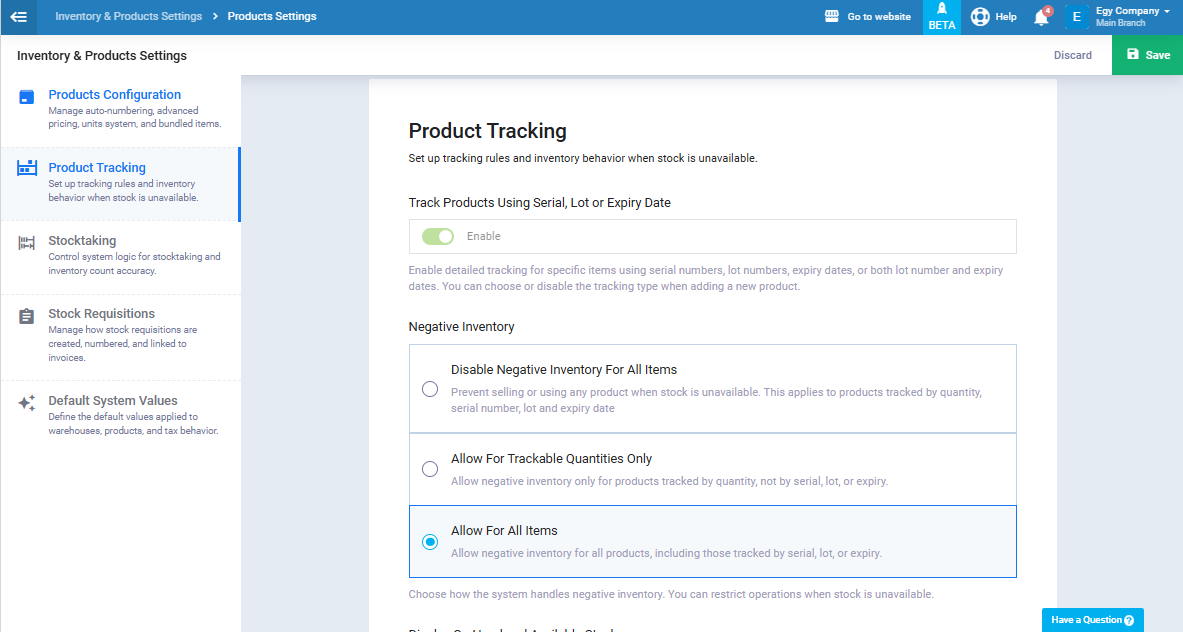
- Serial Number
- Shipment Number
- Expiry Date
Adding a New Product and Selecting the Tracking Type (Serial Number)
After activating the product tracking feature, we can add a new product and assign a serial number to it as a tracking method.
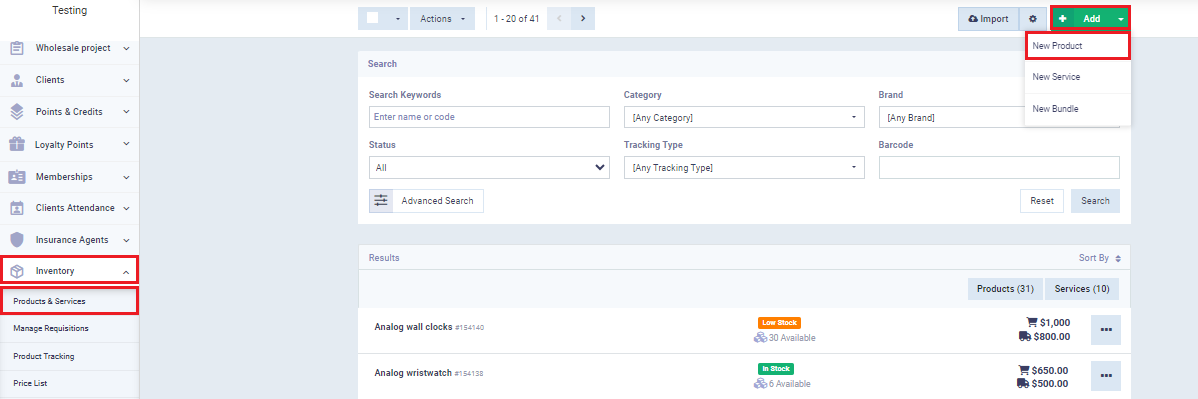
First, go to “Inventory” from the main menu, then choose “Products and Services.” Click on “Add,” select “New Product” as shown in the image, and you can refer to the “How to add a new product” guide to fill in the rest of the information.
![]()
Assigning a Serial Number from Requisition
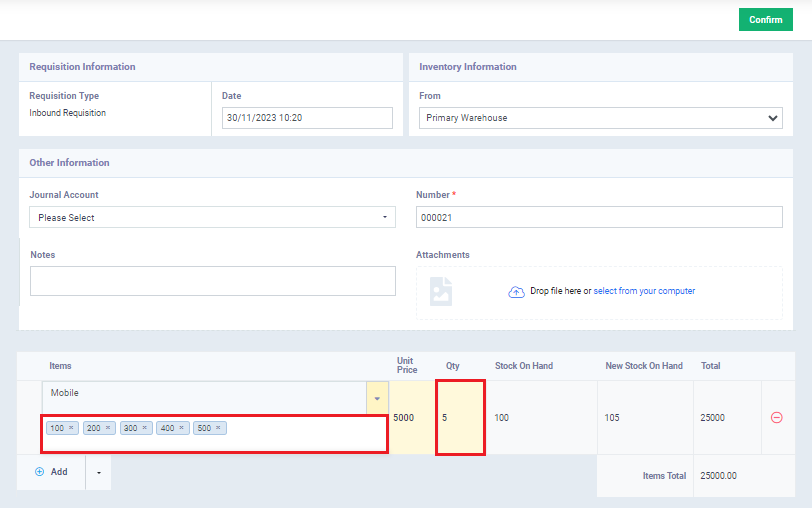
The system allows you, when adding a quantity to an existing product through requisition, to assign a serial number to this product as a tracking method.
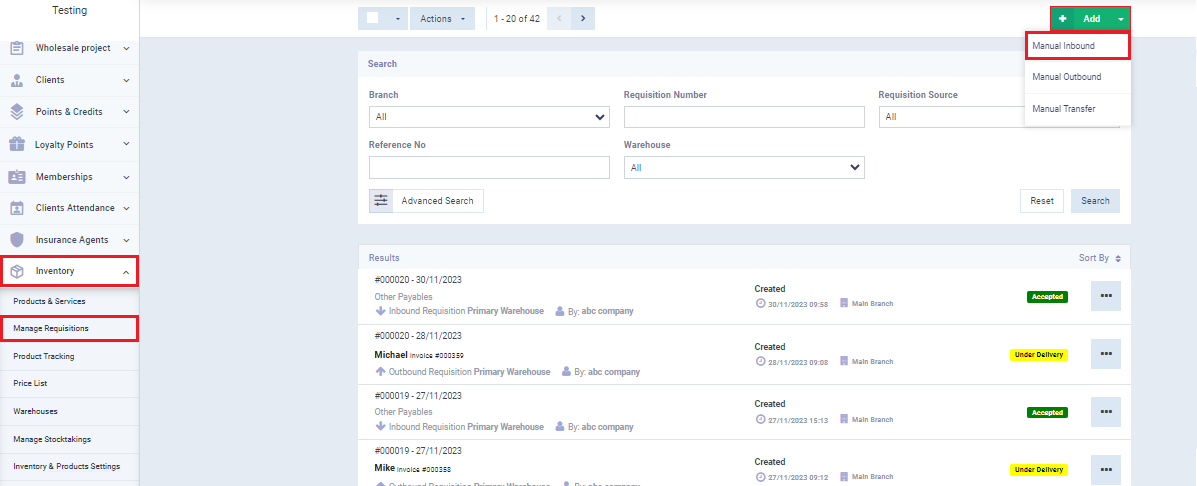
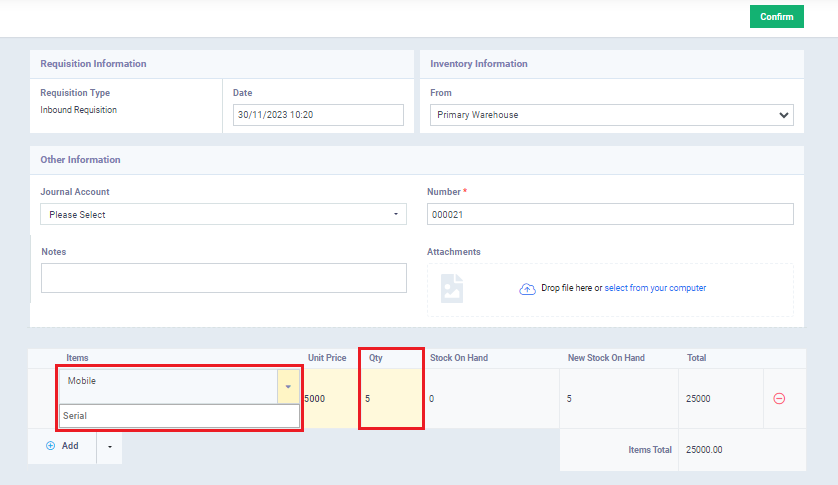
To assign a serial number to the “Mobile Phone” product from the requisitions, click on “Inventory” from the main menu, then select “Manage Requisitions.”
Next, click on the “Add” button and choose “Manual Inbound” from the dropdown menu, as shown in the image.
And now, we enter the data for the requisition as required. You can refer to the “Creating a Manual Inbound Requisition” to complete this step.
In the “Items” field, select the “Mobile Phone” product that you want to add to the requisition with a serial number.
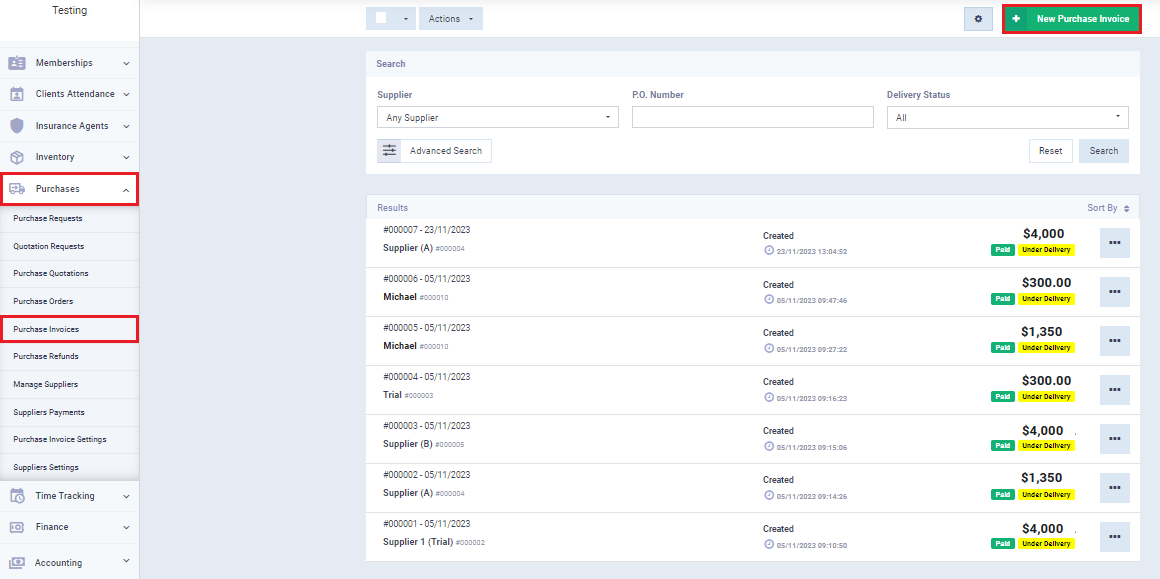
Setting a Serial Number from a Purchase Invoice
You can assign a serial number to the “Mobile Phone” product from its purchase invoice as a means of tracking.
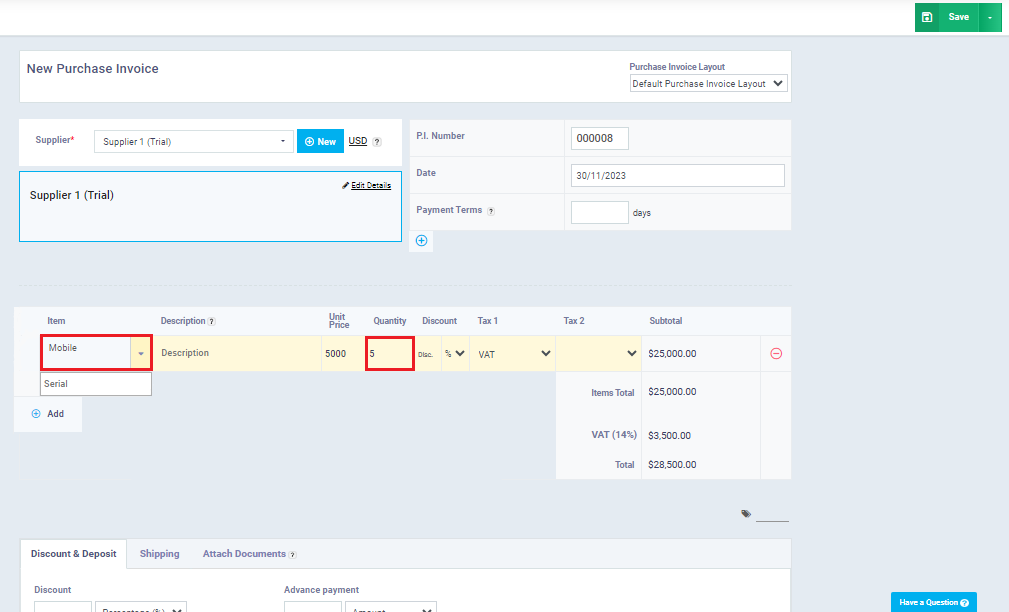
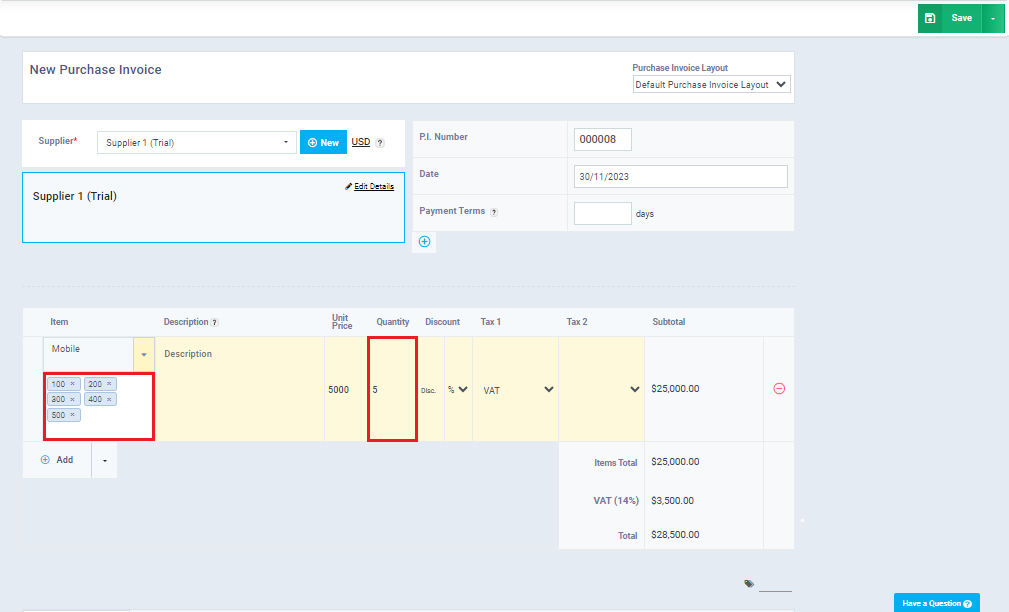
And now click “Save“.
The Impact of Activating Requisitions on Adding a Serial Number to a Product from a Purchase Invoice
When activating the option “Enable Requisitions for Purchases and Sales,” the requisition is responsible for approving the issuance or receipt for purchases and sales, not the invoice. Therefore, if you have enabled the option “Enable Requisition for Purchases and Sales,” you will need to add the serial number to the purchase invoice from the inbound requisition associated with the invoice.
In this case, you will create a purchase invoice for a product that you have tracked by serial number. After that, go back to “Inventory” from the main menu, then click on “Requisitions,” and choose this purchase invoice to assign a serial number to its items for tracking.
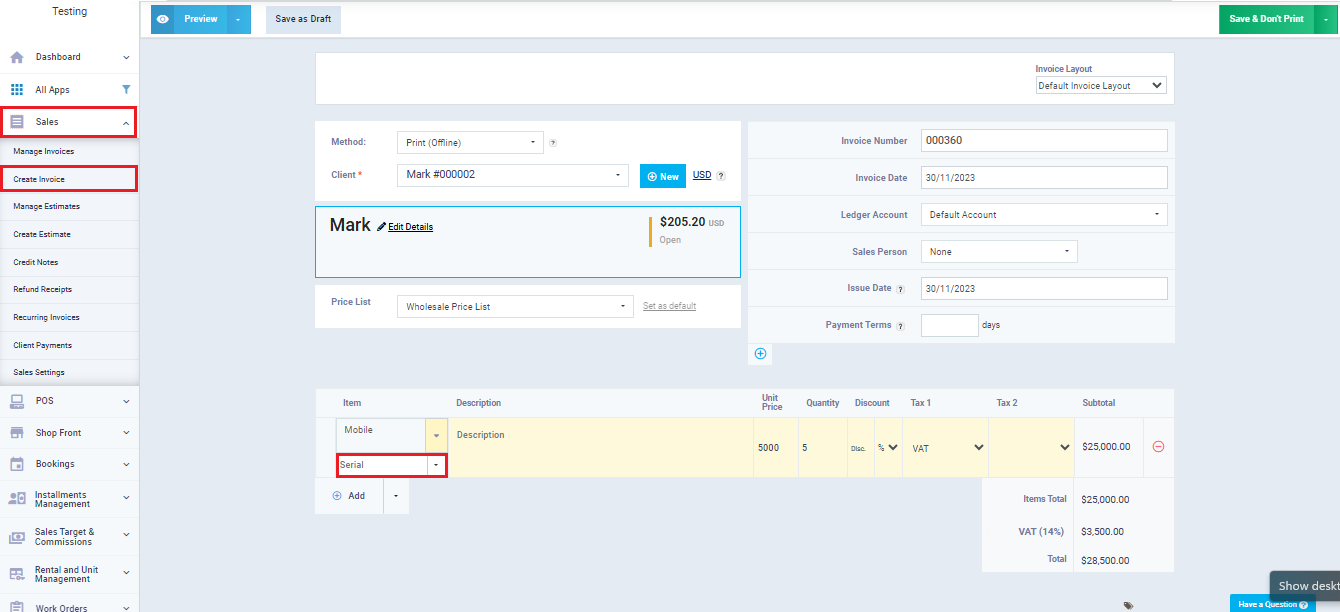
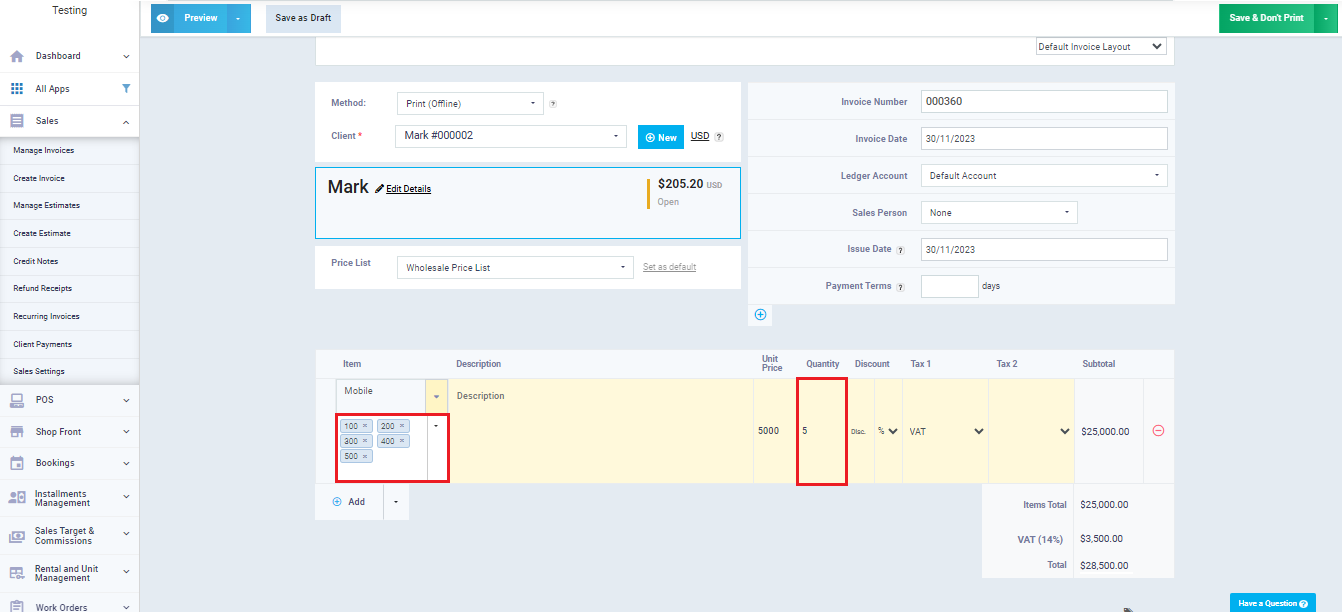
Issuing a Product with a Serial Number from the Sales Invoice
You can issue a product with a serial number from its sales invoice.
Now, let’s continue with the steps after confirming that the enable requisitions for purchases and sales are not activated.
First, click on “Sales” from the main menu, then select “Create Invoice.”
Enter the sales invoice details as required, and you can refer to the “Creating a new sales invoice” guide for assistance.
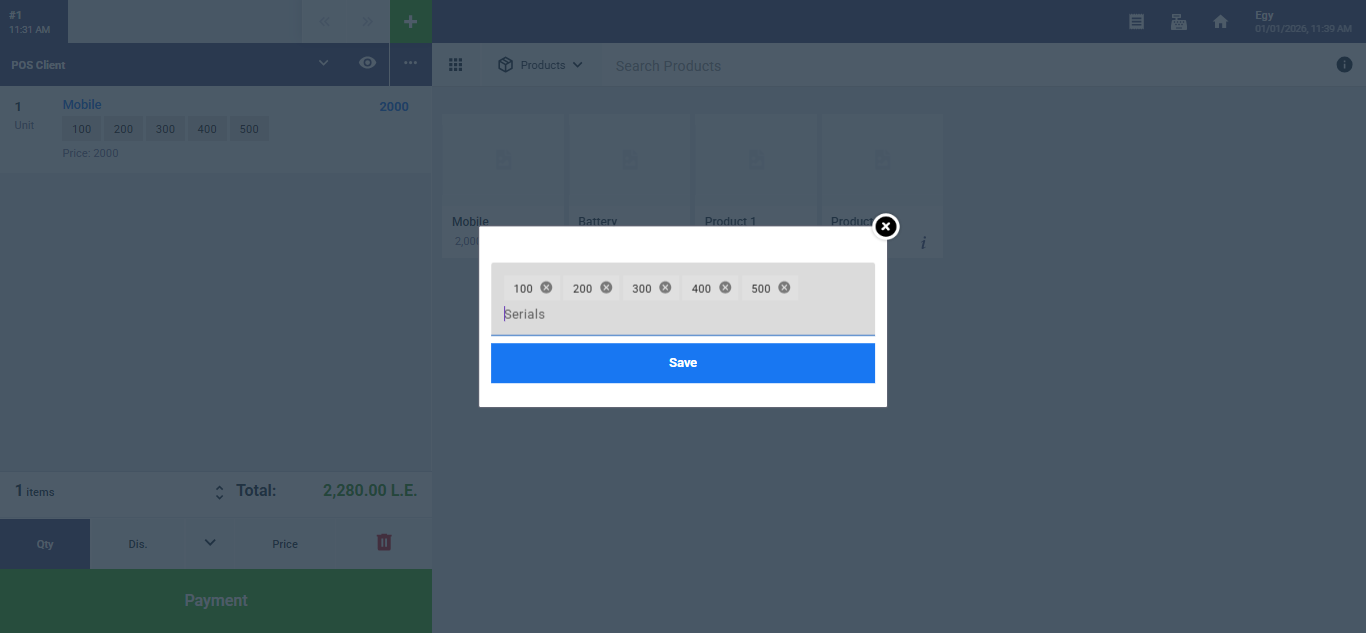
Adding a product with a serial number tracking system to a point-of-sale program
To add items with a serial number tracking system when creating a sales invoice from a point of sale program, follow these steps:
Activate "Add Products with Tracking System to Invoice"
Choosing the product with a tracking system on the sales screen
Now we begin the task of creating an invoice from the point of sale and adding products to it with a serial number tracking system.
We continue the steps of creating a sales invoice from the point of sale by clicking on “Point of Sale” from the main menu.
Then click on “Start Selling” to open a new sales session or go directly to an already open sales session.
In the “Sales Screen,” we select the product “Mobile Phone.”

Tracking Product Tables
The system provides the feature to review the movement of tracked products in organized tables. This feature allows us to access the serial number of the product and know its purchase and sales invoices.
To display the movement of the “Mobile Phone” product tracked by the serial number, we first click on “Inventory” from the main menu, then click on “Product Tracking.”
Choose between the two displayed cards: “Serial Number.”
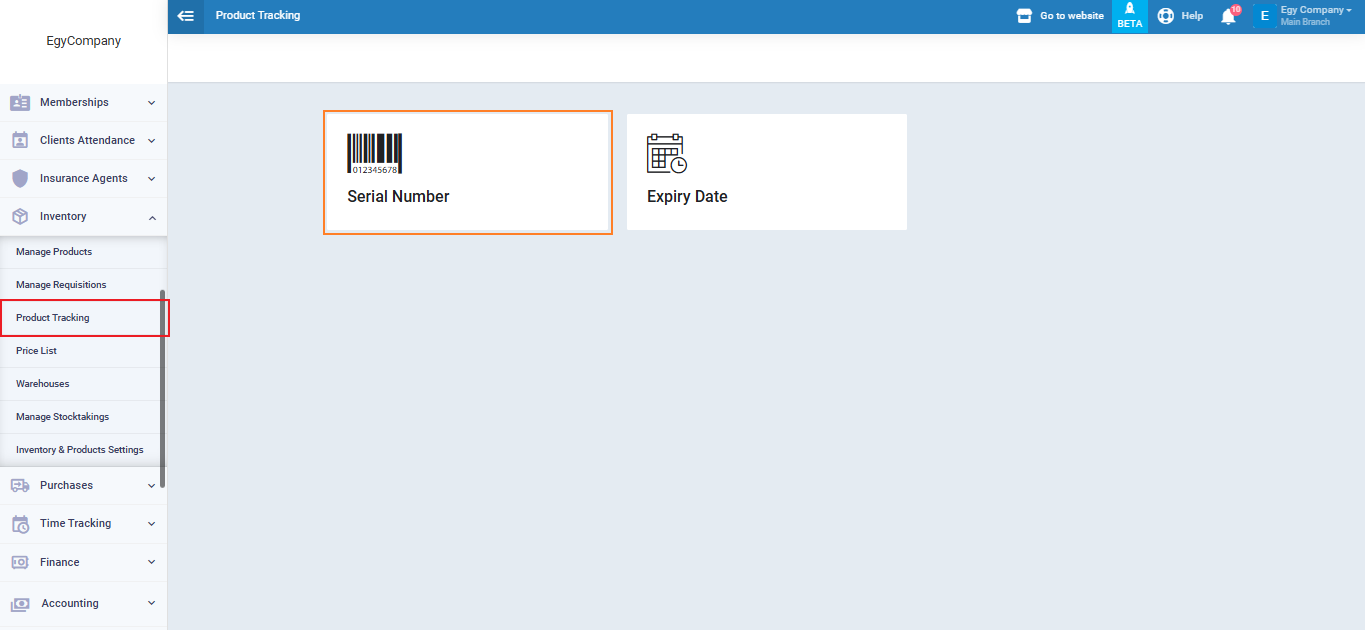
A list of products assigned with a tracking method (serial number) will appear. Click on the “Mobile Phone” product to display its inventory movement.
![]()
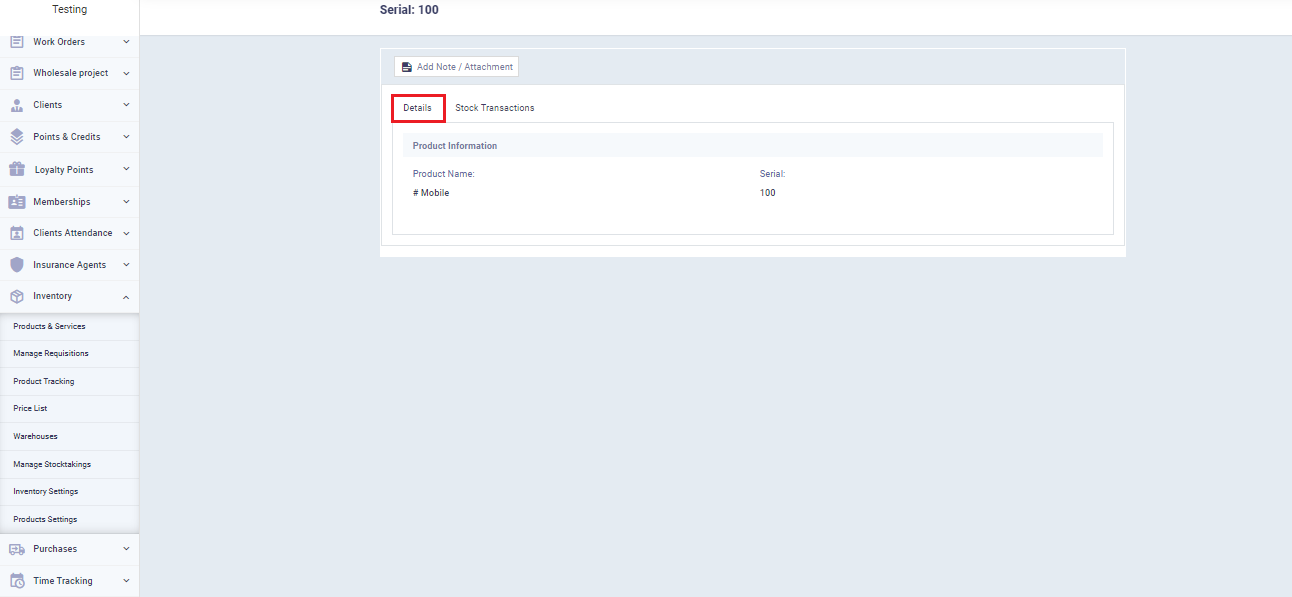
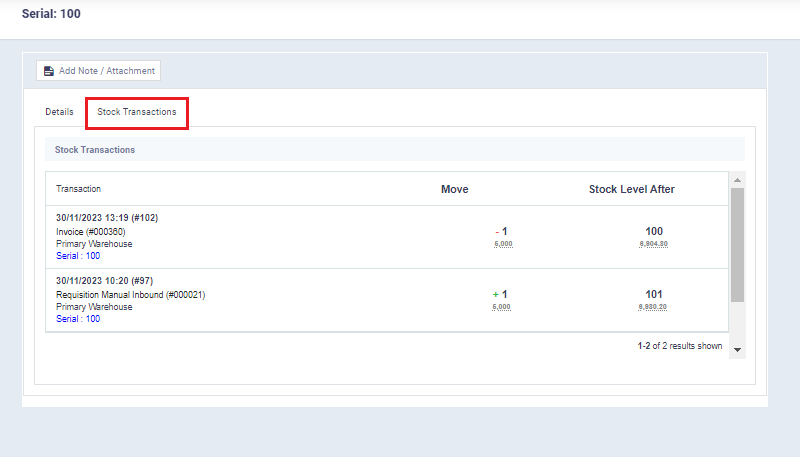
And thus, we have reviewed the transactions of the product “Mobile Phone,” identified its serial number, and accessed its purchase and sales invoices.