How to do a Stocktaking Adjustment for a Product or for the Stock
Inventory shortages or discrepancies between the actual physical stock and the stock recorded in the software or books are common, and they often lead to a need for stocktaking adjustments. Stocktaking adjustment is also a fundamental step for closing the accounts and preparing financial reports. In this article, we will learn about the steps for stocktaking adjustment for specific products or for the total stock you have.
Steps to create a new Stocktaking Sheet
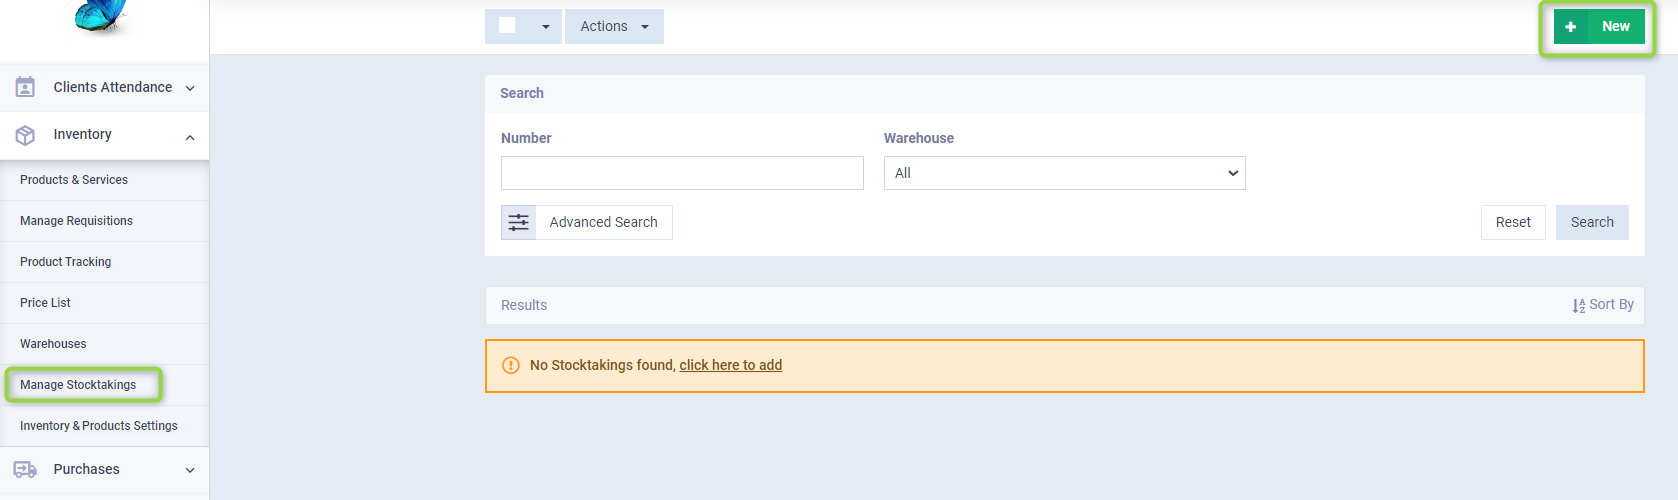
Click on “Manage Stocktaking” from the dropdown menu under “Inventory” in the main menu and click on the “New” button to create a new stocktaking sheet.
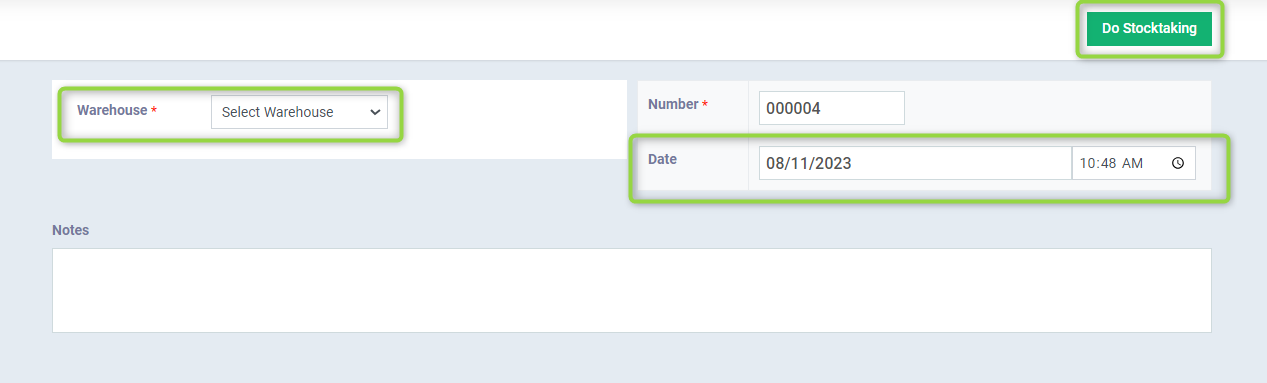
Choose the warehouse you want to perform the stocktaking on, set the date and time, and write any notes related to the stocktaking adjustment process.
Stocktaking one or more Products
After opening the stocktaking sheet, click on the button “Add Item”.

From the dropdown menu under “Select Product” select the product you wish to stock-take then select the stocktaking unit from the dropdown menu under “Select Unit” from among the units you have previously added to the system for this product, and enter the actual product quantity resulting from monitoring your inventory, to be compared with the number recorded in the software, then click on the button “Save and Continue”.
You can repeat the process and enter more than one product to perform the stocktaking adjustment for them together.
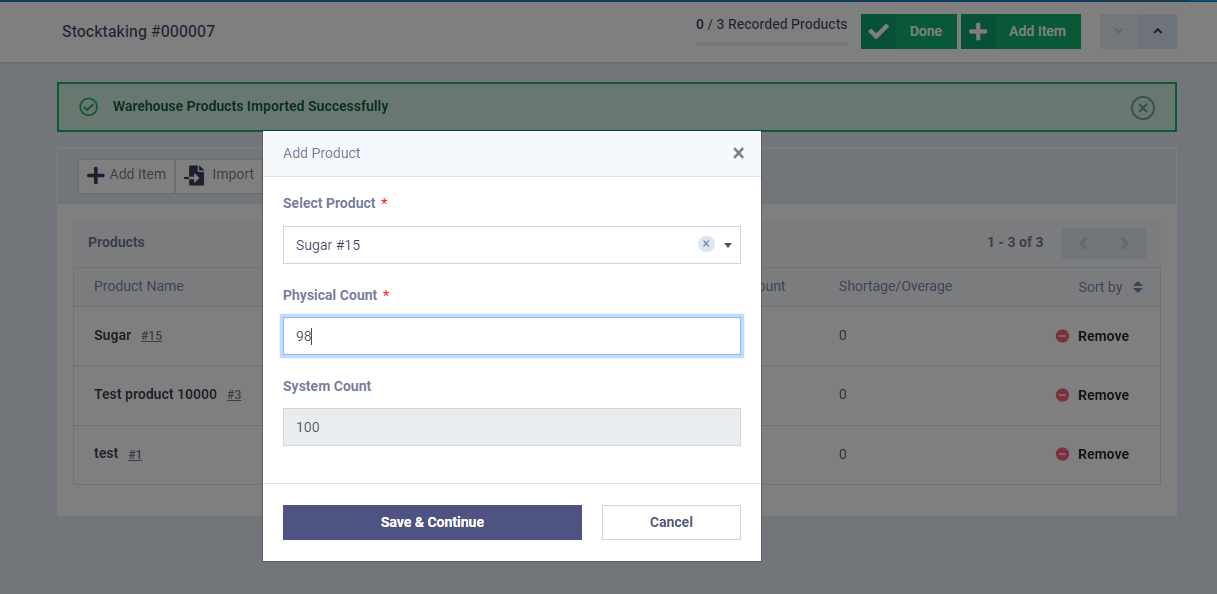
The products you have chosen will be displayed, with a clarification of the quantity of deficit or surplus in the system compared to the actual quantity.
Stock-taking all the Products in one Warehouse
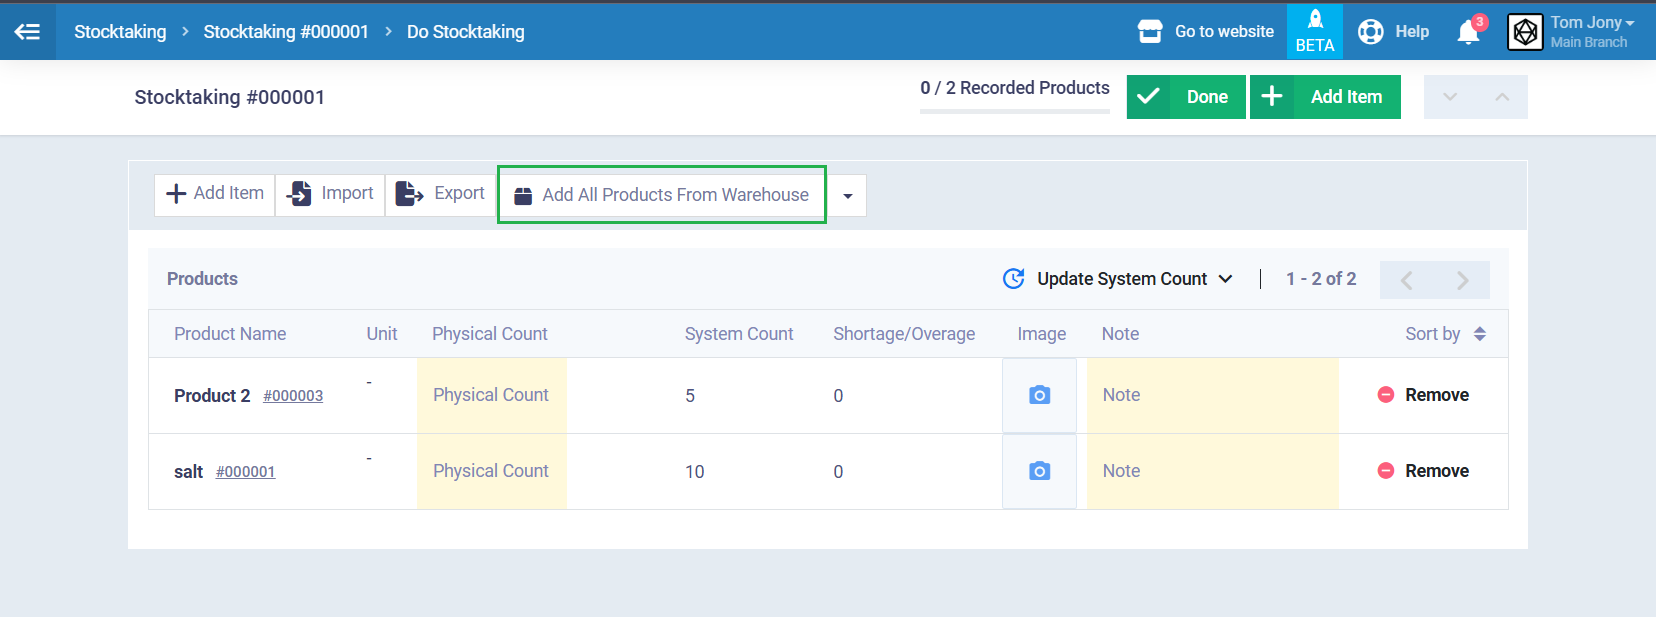
To stock-take all products in the warehouse you selected when creating the stocktaking sheet, click on the button “Add All Products From Warehouse” to import the warehouse’s products. Next to the product name, enter the actual stock count when you conduct the inventory under the column “Physical Count” and then click on the button “Done” to compare the actual stock count with the count in the system.

Stock-taking the Inventory of All Warehouses
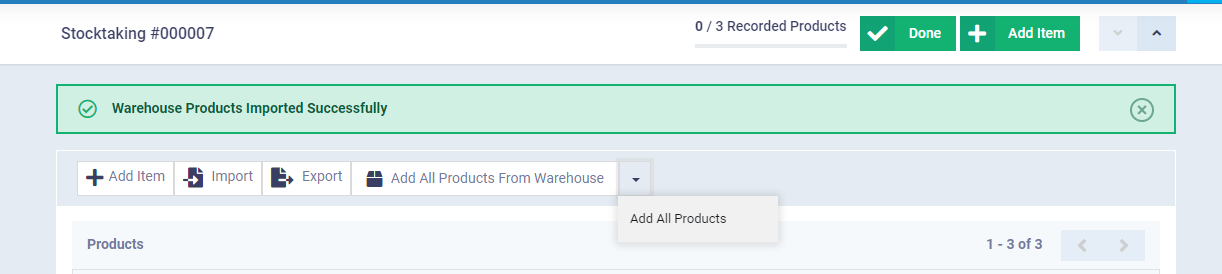
Despite selecting a single warehouse when creating the stocktaking sheet, you have the option to stock-take all warehouses on the same sheet to perform a comprehensive stocktaking adjustment. From the same stocktaking sheet screen, click on the arrow next to “Add All Products From Warehouse” then click on the dropdown choice from the arrow “Add All Products” to find all your products have been imported.
Next to the product name, enter the actual stock count when you stock-take the warehouse under the column “Physical Count” and then press the “Done” button to compare the actual stock count with the count on the system.
Completing the Stocktaking Adjustment
After comparing the actual stock count with the count on the Daftra program, and clicking on the “Done” button, you move to the stocktaking sheet where you can “Edit” it, “Export” it, or “Delete” it if you wish.
Click the “Do Stocktaking” button to return to the stocktaking sheet products screen, or click the “Adjust” button to complete the stock adjustment for the sheet.

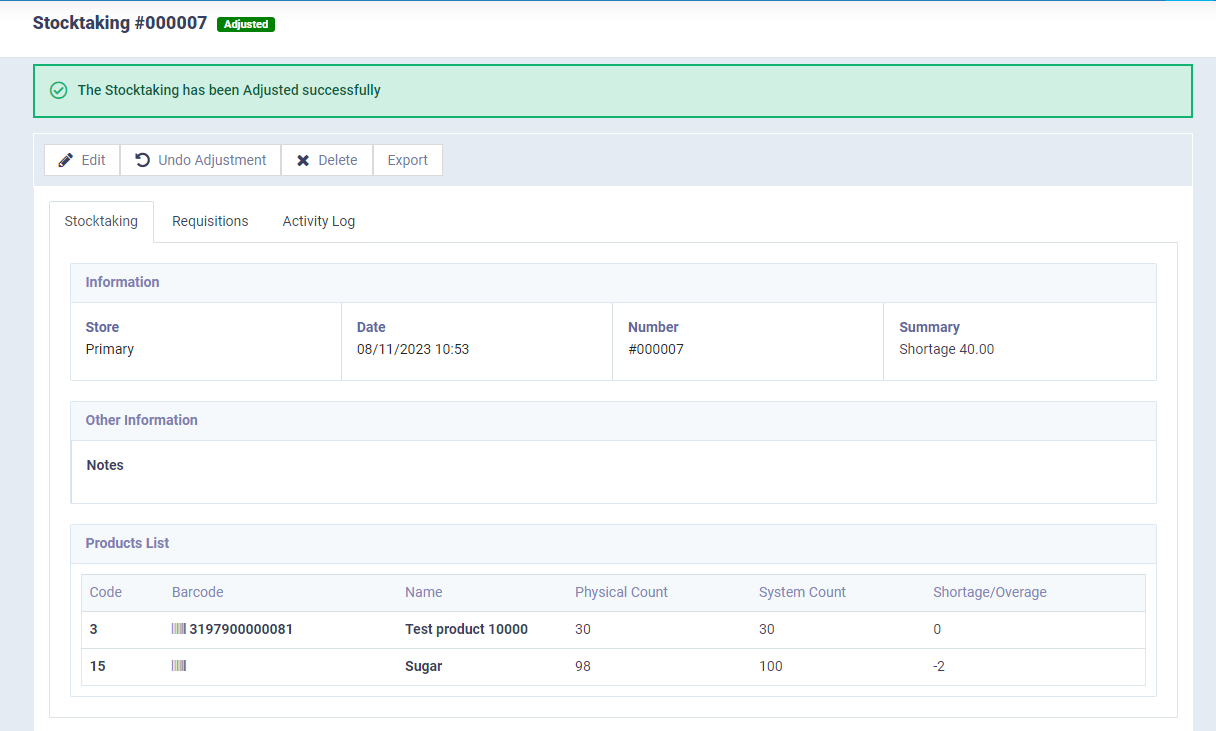
After completing the stock adjustment, the stocktaking sheet will be available to you, with the option to edit or undo the adjustment, among other actions.
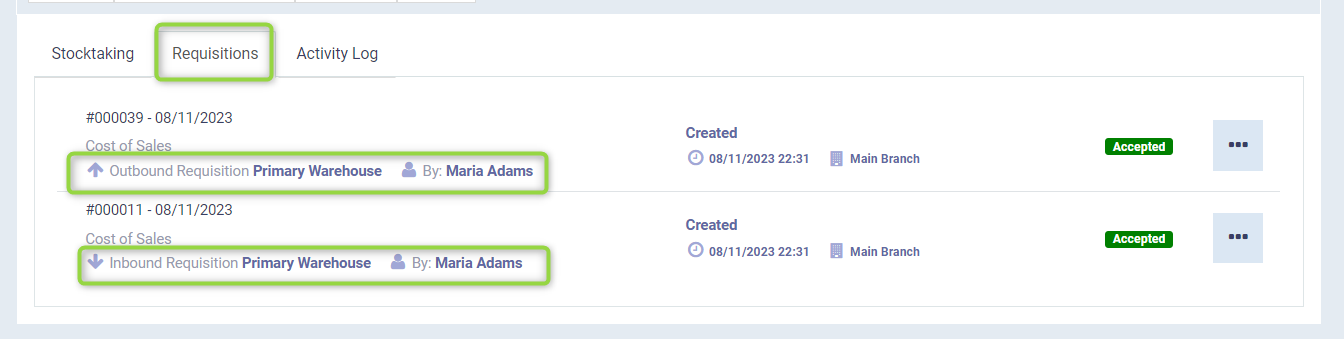
By clicking on the “Requisitions” tab of the inventory sheet, you can view the requisitions related to the products you have adjusted.