Adding a New Product or a New Service
You can add your products and services to your account individually or by importing products from a file. Here are the detailed steps to add a new product.
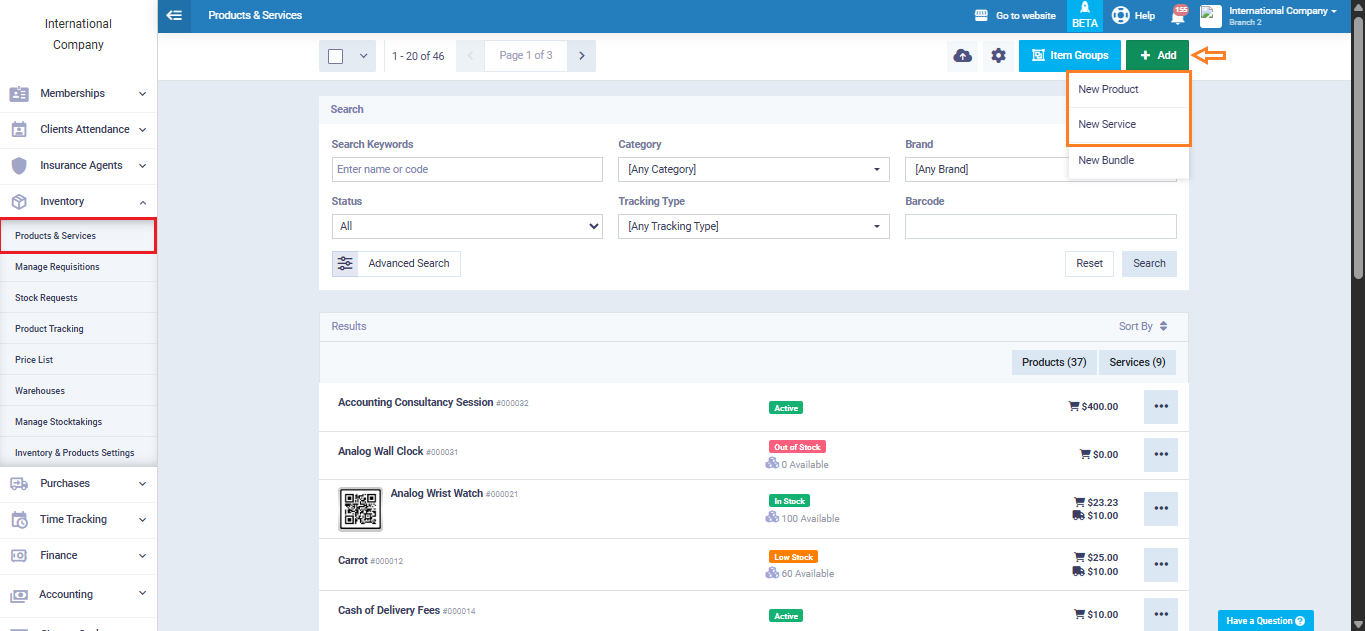
How to add a Product or a Service
Click on “Products & Services” from the drop-down menu under “Inventory” in the main menu, and then click on the “Add” button and select “New Product” or “New Service”.
A screen for adding product or service details appears, similar except for some fields we will detail in.
Required Information:
Item Details:
- Name: Enter the name of the product as you want it to appear in the product list, invoices, reports, and all transactions.
- Item SKU: The product code is automatically set sequentially starting from the number 1, and you can modify it or control its format.
- Category: Choose the product category from the drop-down list.
- Brand: Type the brand name into the field and press “Enter” to define the brand for the product being added.
- Unit Template: Choose a unit of measure or distinction template for your product, such as “Weight,” “Number of pieces,” which will then appear in the invoices. It allows the selection between more than one distinguishing unit for the same measure, such as kg or g if the unit template is weight. You can add more than one unit of measure for your products, such as kilograms and grams, for example.
- Supplier: Select the supplier from whom you purchased the product from the dropdown menu.
- Barcode: Enter the product’s barcode numbers manually, or click on the circular arrow icon at the end of the field to generate a random barcode number.
- Available Online: Click on the checkbox “Available Online” to add the product to your online shop (shop front) screen.
- Featured Item: Click on the checkbox “Featured Item” to display the product in the “Featured Products” section on the shop front directly.
- Purchase Price: Enter the purchase price of the product from the supplier.
- Selling Price: Enter the selling price of the product to clients.
- Tax1: Select the tax applicable to the product from the dropdown menu.
- Tax2: If there is a second tax that can be applied to the product, choose it.
- Minimum Price: Enter the minimum specified price for selling the product.
- Discount: If you want to set a fixed discount for the product, whether a percentage or an amount.
- Profit Margin: Enter the percentage of the product’s profit margin to automatically calculate the selling price without the need to enter it in the selling price field.
- Price Lists: Choose a price list to add the product to; you can also add the product to more than one price list with different values for each list.

From the dropdown selections, choose the price list you want to add the product to.
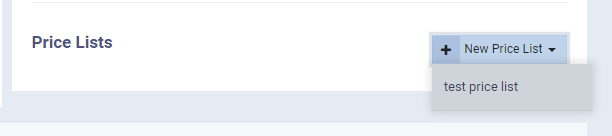
Leave the product price field empty if you want to make the price list’s product price similar to the selling price, or enter a special selling list price here for this product.

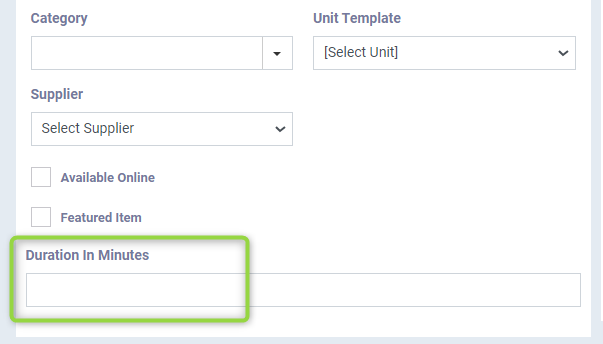
In case of adding a “New Service” you will find a field not present when adding products related to the details of the item, which is “Duration in Minutes”, where you define the duration of the service when booked by the client.
In case of adding a “New Product” you will find data not present when adding services related to inventory management details, which includes the following:
- Inventory Tracking: When “Inventory Tracking” is activated by clicking on the ✅ mark above the checkbox, it allows choosing more accurate methods to track the product other than quantity tracking, which is useful in monitoring inventory movements.
- Track Stock: Choose from the dropdown list the required tracking type, as follows:
-
-
- Serial number.
- Lot number.
- Expiry date.
- Lot number and expiry date.
- Quantity only.
-
Initial Stock Level: Add the product quantity in inventory, known as “Beginning of Period Balance”
- Low Stock Threshold: Enter a quantity at which the system sends a notification when your inventory falls below it, to overcome stock depletion issues.

The data for “More Details” include some specifics related to adding a product or service, which are:
- Internal Notes: Write any notes specific to the product.
- Tags: Enter distinctive tags for the product to facilitate finding it in search, choose a tag from the dropdown list or by typing the tag you want then pressing Enter on your keyboard.
- Status: Determine the product’s status to be one of the following:
- Active
- Suspended
- Inactive

After entering all the details related to the product or service, click the “Save” button.
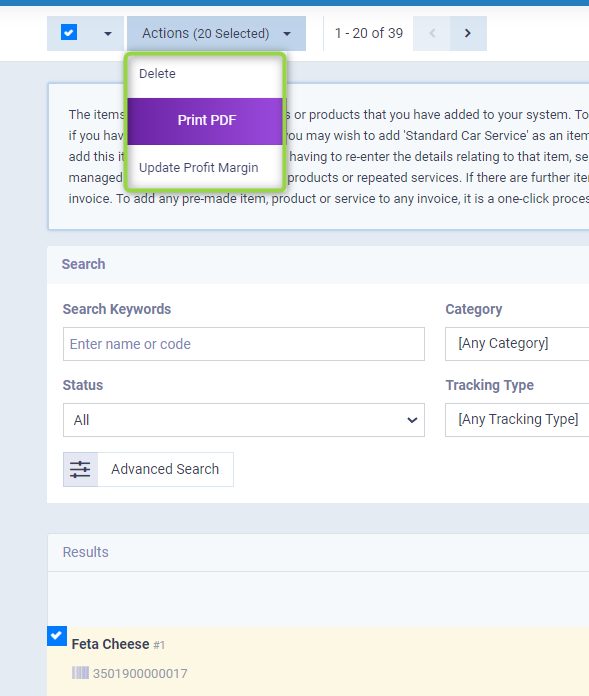
Actions related to Products and Services
You can perform some actions on one or more products together, click on “Products & Services” from the dropdown under “Inventory” in the main menu, and select the products you want by activating the checkmark ✅ to the right of the product or service name, or select all products by clicking on the checkmark ✅ at the top of the page.
Click on actions and press on one of these actions to activate it on all the selected products:
- Delete.
- Print PDF.
- Update Profit Margin.
By clicking on the dots next to a product, you can do the following:
- View the product.
- Edit the product.
- Delete the product.
- Copy the product to get an exact duplicate of its data, with the ability to make some modifications to it.

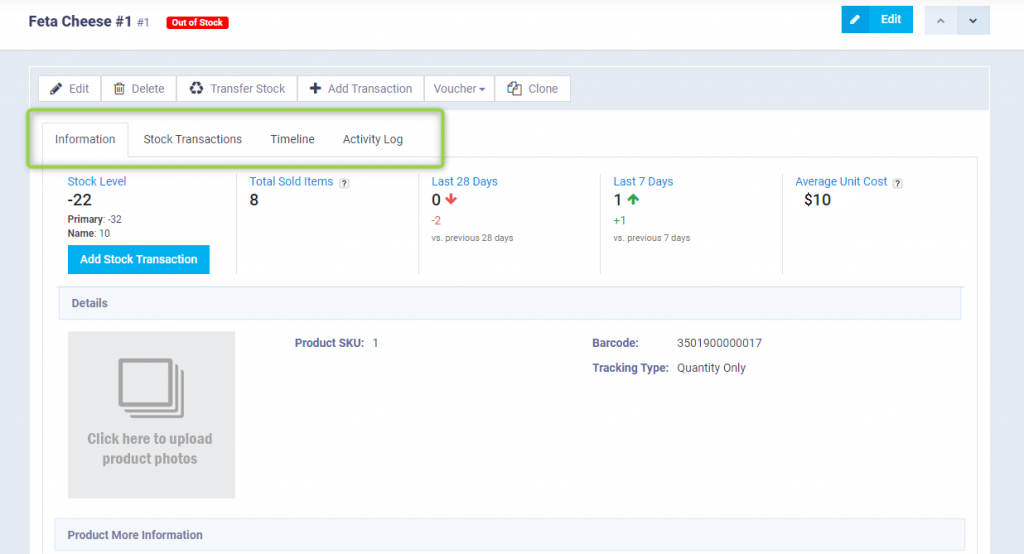
After saving or reviewing the product, you will find some actions like transferring the product to a different warehouse or adding/deducting a quantity of the product, in addition to some tabs which display:
- Product Information: This includes information such as the quantity of the product, the total pieces sold, and the average cost price.
- Stock Transactions: This is a list that contains all the inventory movements related to the product, and you can control the time period you wish to review the inventory movements for.
- Timeline: It shows the actions that have been carried out on the product, marked with the time of occurrence.
- Activity Log: To review the activities that have been done on the product, with the ability to filter by the user who performed the activity, of course.