




A Complete Guide to the Commission System
The commission system allows you to fully manage sales employee commissions, from configuring commission rules and defining the calculation method (fixed commission per invoice or tiered commission tied to target achievement), to assigning rules to employees, departments, and roles, and tracking sales periods and approving final commissions. This guide covers the complete system workflow.
Before You Begin
- Make sure the “Targeted Sales & Commissions” app is activated through the App Management screen.
- The commission system consists of three main screens within the “Targeted Sales & Commissions” menu: Commission Rules, Sales Periods, and Sales Commissions.
- Make sure employee, department, and role data is configured before creating commission rules.
Understanding the Two Commission Calculation Methods
The system provides two commission calculation methods, which you choose when creating a rule:
- Fixed Commission: Calculated directly on each qualifying invoice, either as a percentage of the line item value or a fixed amount, without tiers and without any link to target achievement. Suitable for rewarding each sale immediately.
- Tiered Commission: Calculated at the sales period level based on the employee’s target achievement percentage, with the commission value progressing between tiers you define in advance. Suitable for tying commission to performance and motivating employees to achieve sales targets.
The key difference lies in the timing of calculation: fixed commission shows its value on each commission record as soon as the invoice is created, while tiered commission is calculated at the period level as a whole and appears as a dash “—” in individual records.
Creating a New Commission Rule
- Click on the “Sales Target & Commissions” menu, then “Commission Rules“, then “New Commission Rule.”
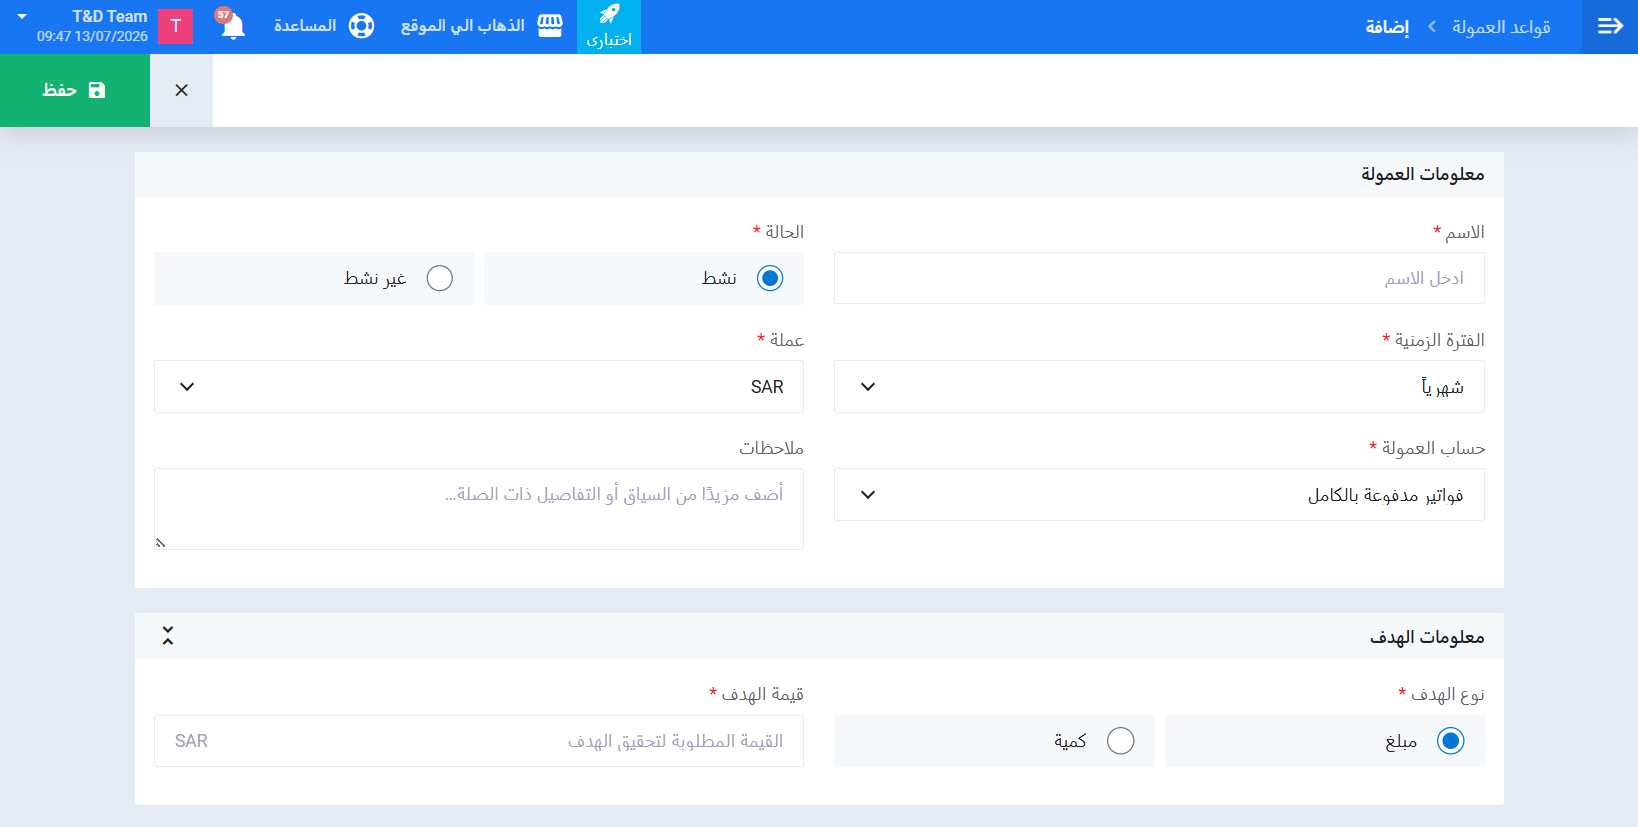
- From the “Commission Information” section enter: name, status (Active / Inactive), time period (Monthly / Quarterly / Annually), currency, commission calculation basis, and notes.
- From the “Target Information” section, specify the target type (Amount / Quantity) and value, must be greater than zero.
Setting Up Fixed Commission
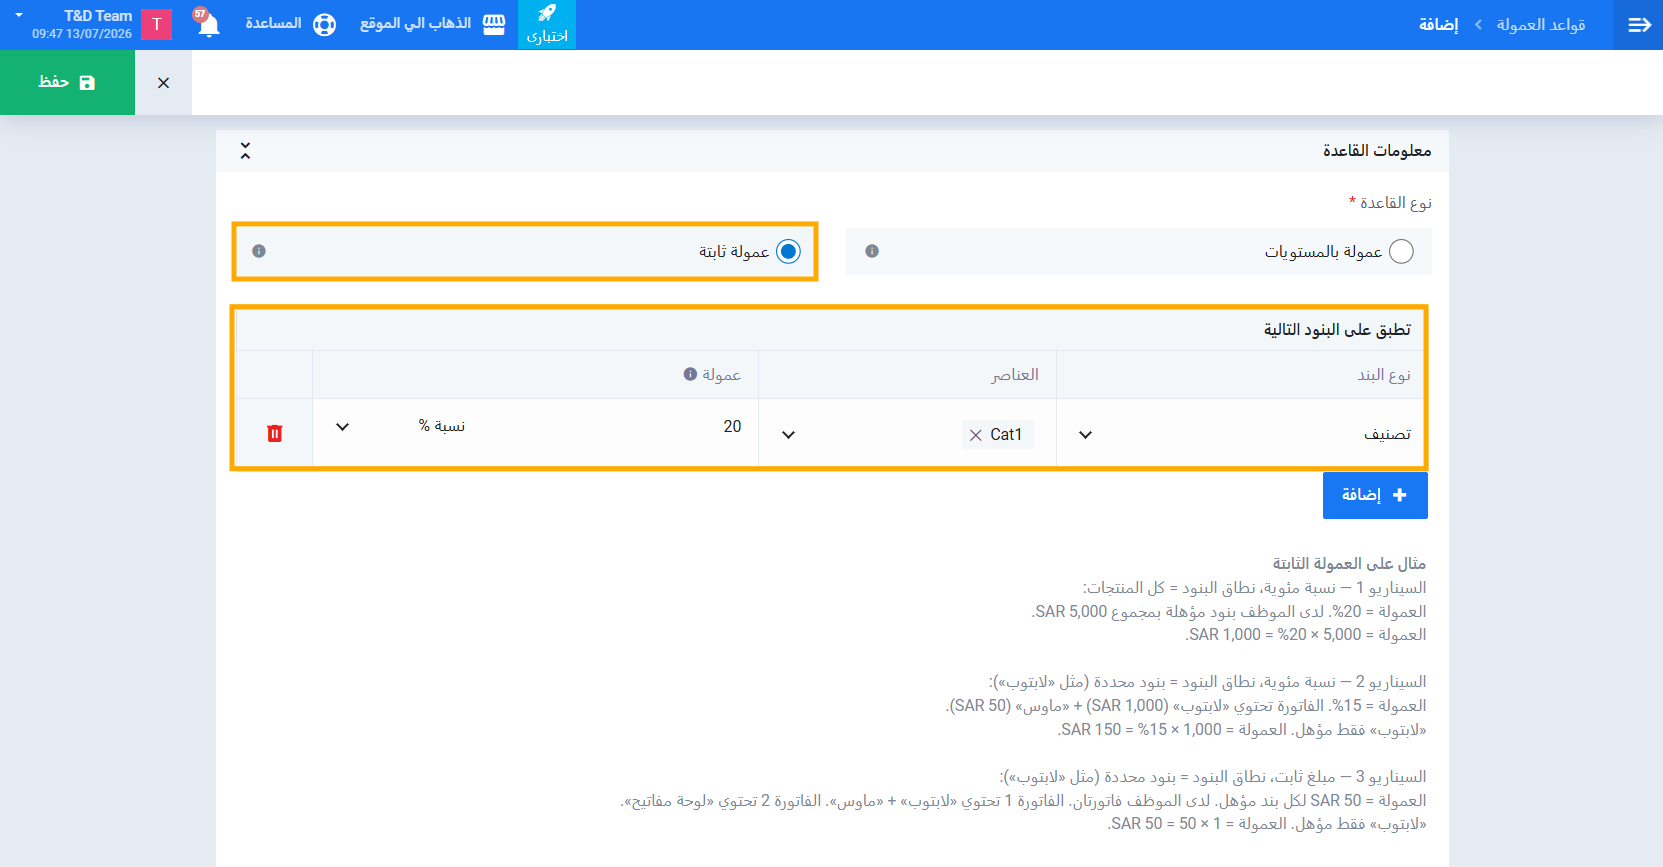
From the “Rule Information” section select “Fixed Commission“, then in the “Applies to the Following Items” table define each line:
- Item Type: “Item” for specific products, “Category,” or “All Products.“
- Elements: The required products or categories.
- Commission: The commission value and its type, “Percentage %” or “Fixed Amount.”
Calculation Examples:
- Percentage on all products: commission is 20% and the employee’s qualifying items total 5,000 → commission = 5,000 × 20% = 1,000.
- Percentage on specific items: commission is 15% on “Laptop,” invoice contains Laptop (1,000) and Mouse (50) → only the qualifying item counts: commission = 1,000 × 15% = 150.
- Fixed amount: commission is 50 per qualifying item; two invoices contain one qualifying “Laptop” → commission = 1 × 50 = 50.
Setting Up Tiered Commission
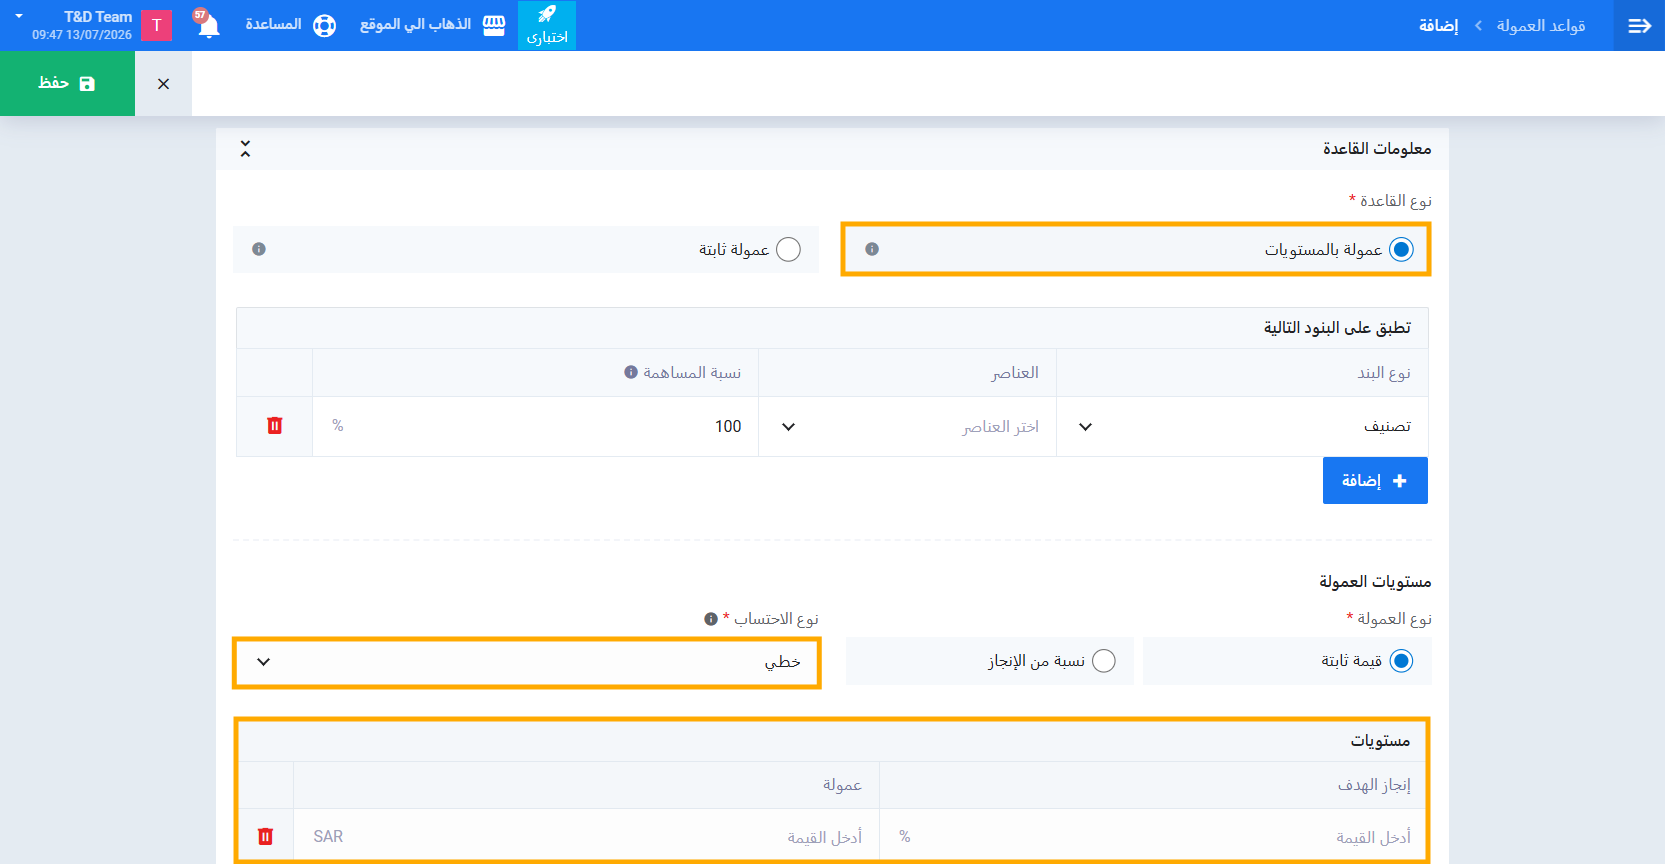
From the “Rule Information” section select “Tiered Commission” (selected by default), then:
- From the “Applies to the Following Items” table, define the included items and the contribution percentage for each line, this is the percentage of each invoice that counts toward target achievement (not the commission rate), defaulting to 100%.
- From the “Commission Tiers” section, specify the commission type: “Fixed Amount” or “Percentage of Achievement,” and the calculation type: “Linear,” “Highest,” or “Lowest.”
- From the “Tiers” table, add tiers, for each tier enter the target achievement percentage and the corresponding commission, with a maximum of 20 tiers and no duplicate percentages.
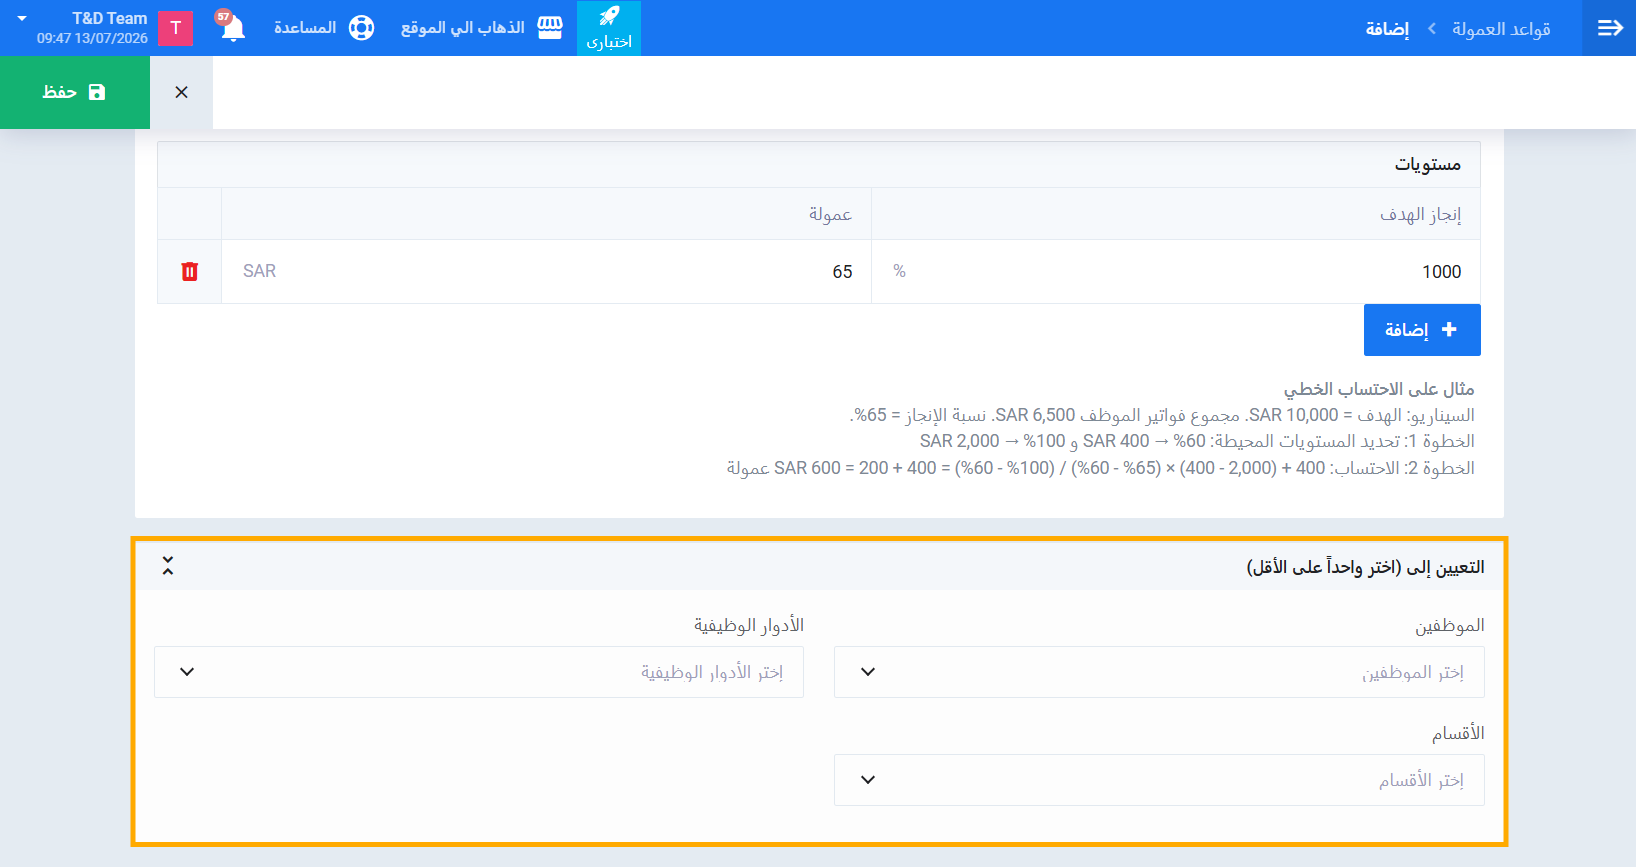
Example illustrating the three calculation types, target 10,000, achievement 6,500 (65%), surrounding tiers: 60% → 400 and 100% → 2,000:
- Linear: Proportional distribution between the two tiers: 400 + (2,000 − 400) × (65% − 60%) ÷ (100% − 60%) = 600.
- Highest: Uses the next tier above the achievement: 2,000.
- Lowest: Uses the last fully achieved tier: 400.
Assigning the Rule to Employees
From the “Assign To (select at least one)” section, specify the entities the rule applies to, you can combine: Employees (or “All Employees“), Roles, Departments, or Branches if the Branch feature is enabled. Then click “Save.”
Sales Periods — Creating and Tracking
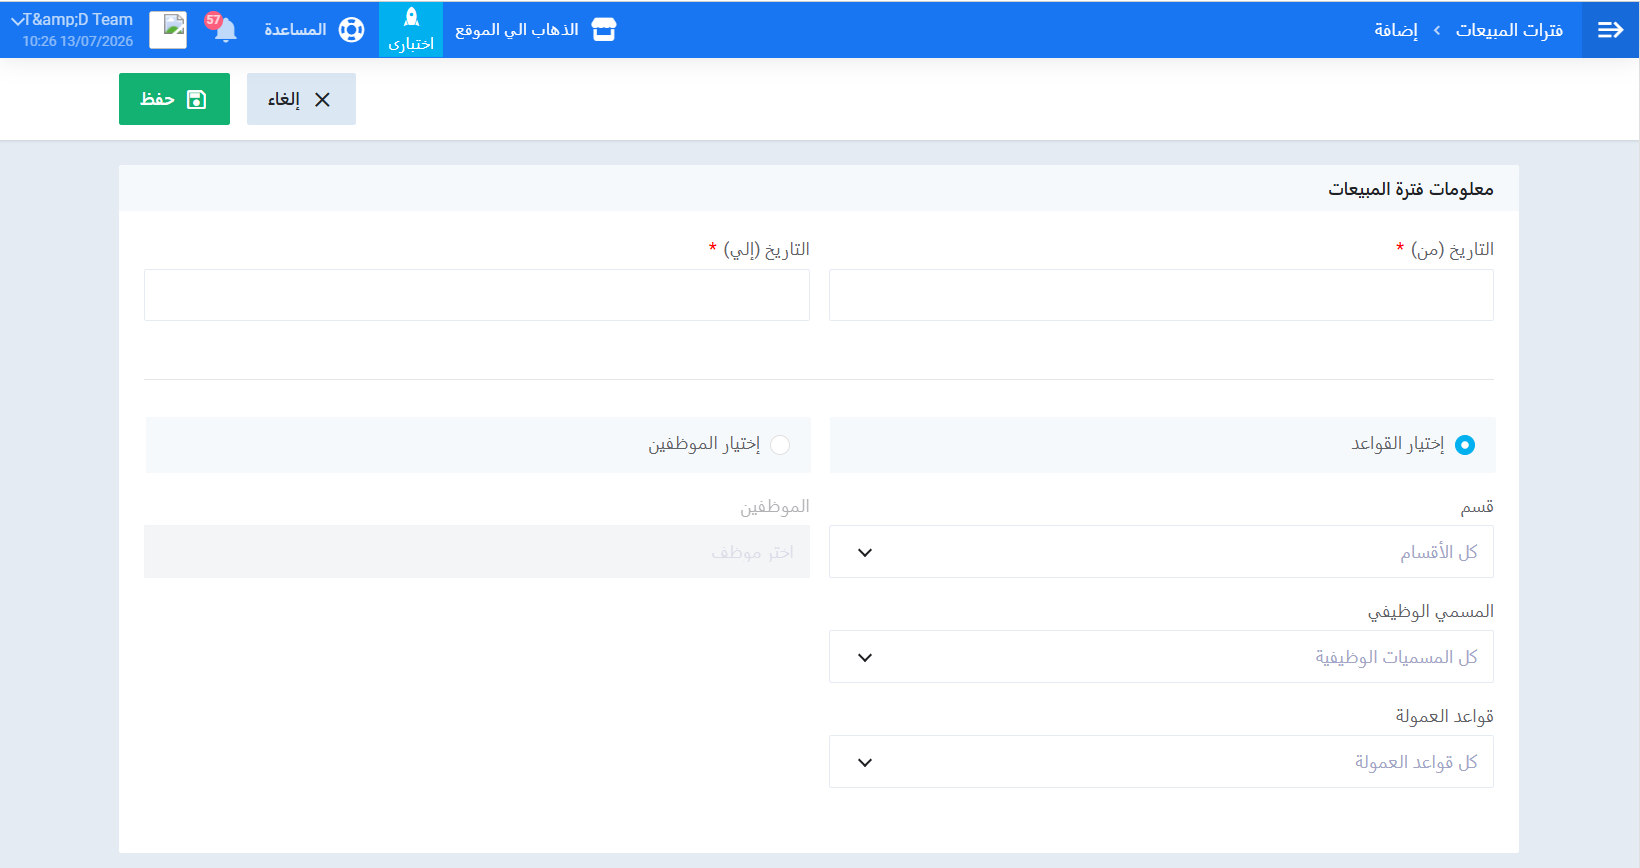
A sales period is the time frame in which employee sales accumulate and commission is calculated. To create a period:
- Click “Sales Periods,” then “Add.”
- Define the period range: Date (From) and Date (To).
- Define the included employees either through “Select by Rules” (with optional filtering by department, job title, and commission rule) or “Select Employees” to select them directly. Then click “Save.”
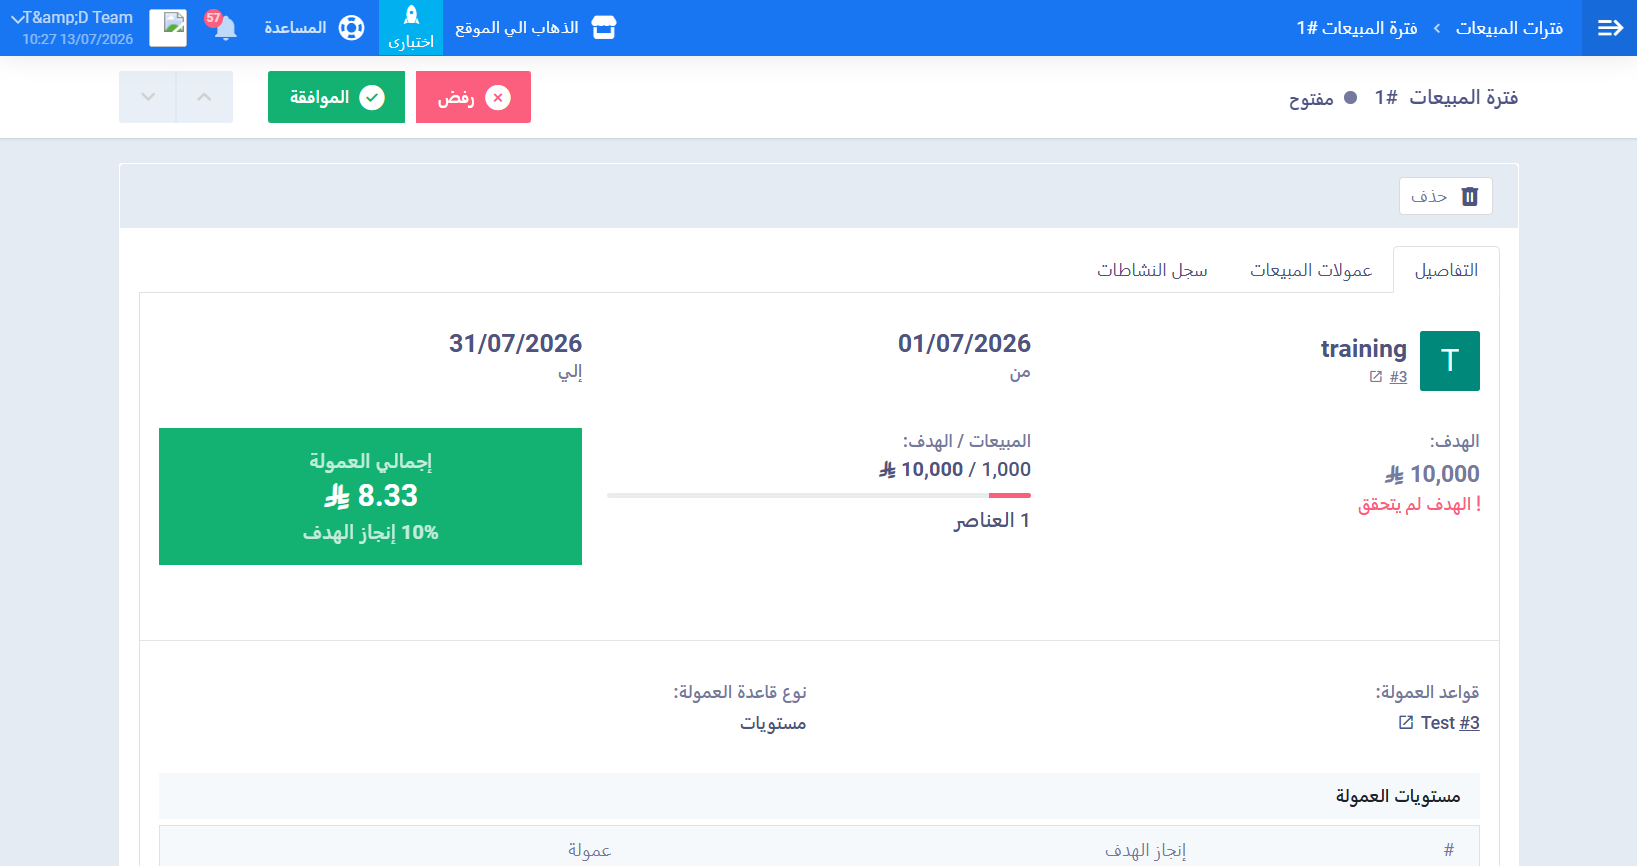
After creation, the period details screen displays: the date range, target, a “Sales / Target” bar showing achievement percentage, a “Total Commission” card, the linked commission rule and its type, the commission tiers table for tiered rules, a “Sales Commissions” tab for period records, and an “Activity Log” tab.
How the System Calculates Achievement and Commission
In tiered rules, the system calculates each invoice’s contribution toward the target in two steps:
- Net Amount = Invoice Total − Discounts − VAT.
- Approved Amount = Net Amount × Contribution Percentage — this is what is added to target achievement.
Recalculation happens automatically with every transaction: new invoices increase achievement and commission, while refunds and credit notes deduct their approved amount from both — as long as the period remains open.
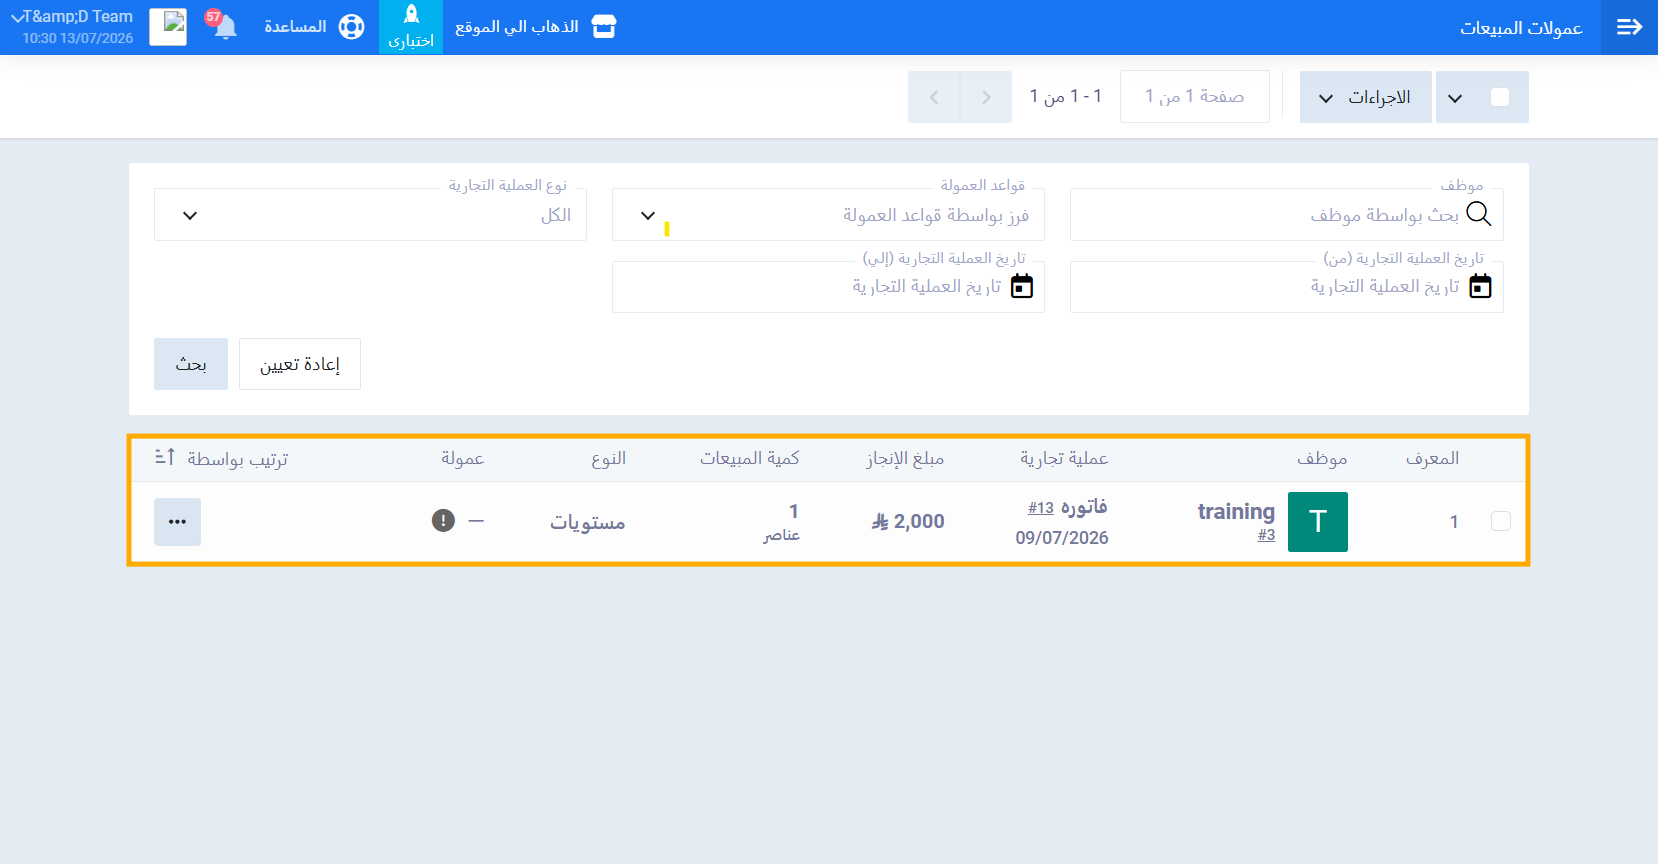
In tiered rules, commission appears as a dash “—” in individual sales commission records with an explanatory tooltip on hover, because commission is calculated at the period level as a whole. The “Achievement Amount” column shows each transaction’s contribution toward the target.
Approving or Rejecting a Sales Period
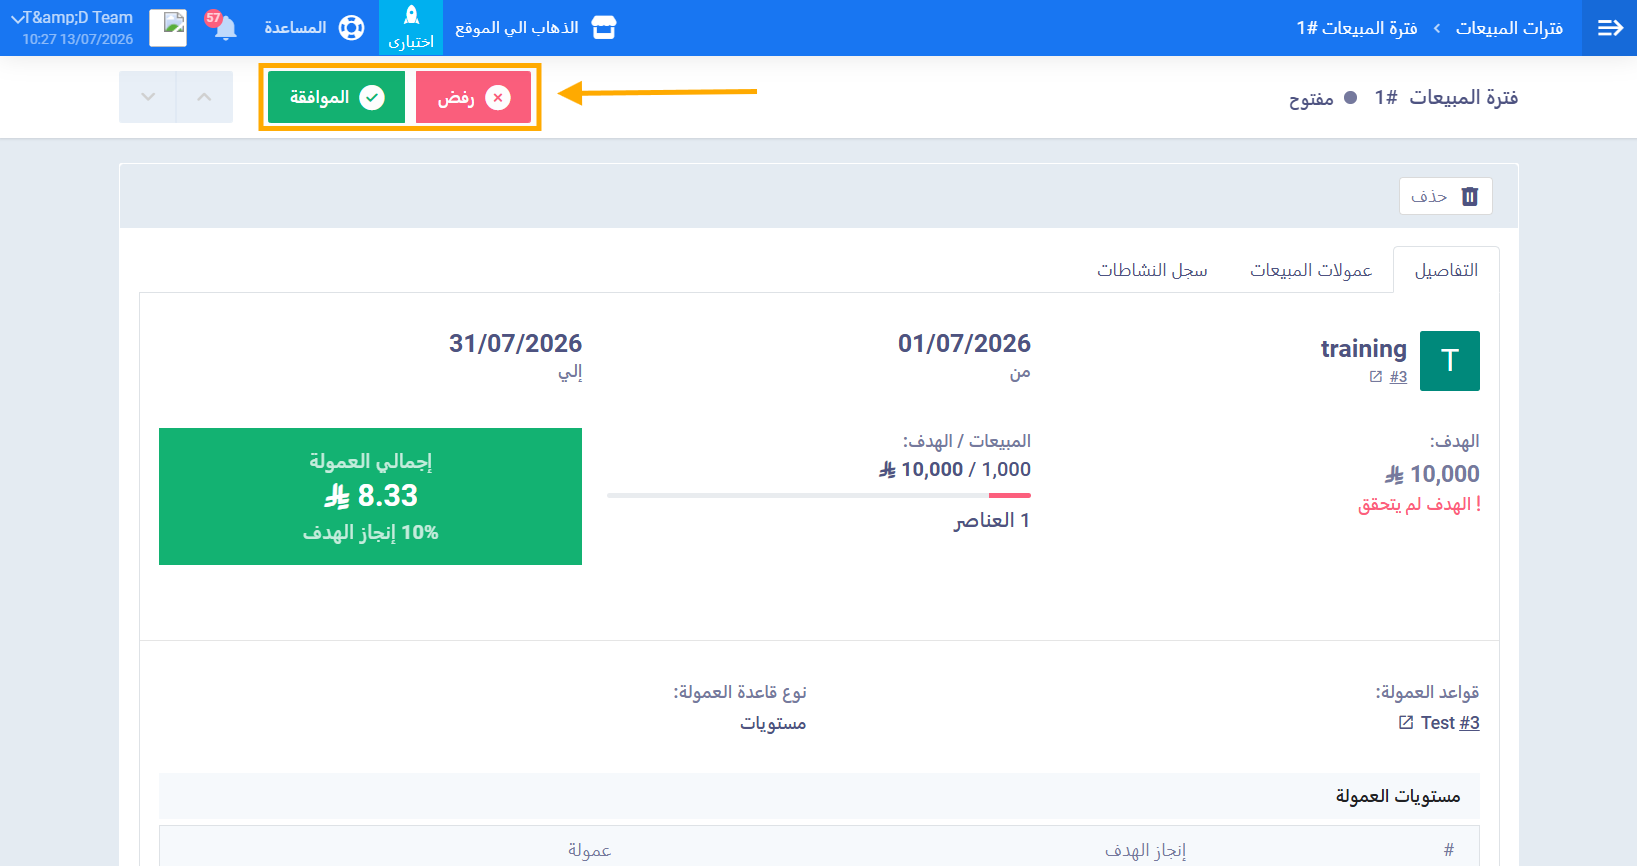
After the period is complete and you have reviewed its results, from the top of the open period view screen:
- Click “Approve” to approve the period and lock the commission permanently. After approval, the system stops recalculating, and subsequent refunds have no effect on the approved period.
- Or click “Reject” if there are issues with the period results.
Review any expected refunds and credit notes before approving, any refund after approval will not reduce the calculated commission.