


Complete Setup of UAE Electronic Invoicing
The system enables you to issue electronic invoices compliant with the UAE Federal Tax Authority (FTA) requirements, export them in XML format, and generate tax audit files. This guide covers all the steps required to properly configure the UAE Electronic Invoice system from start to finish.
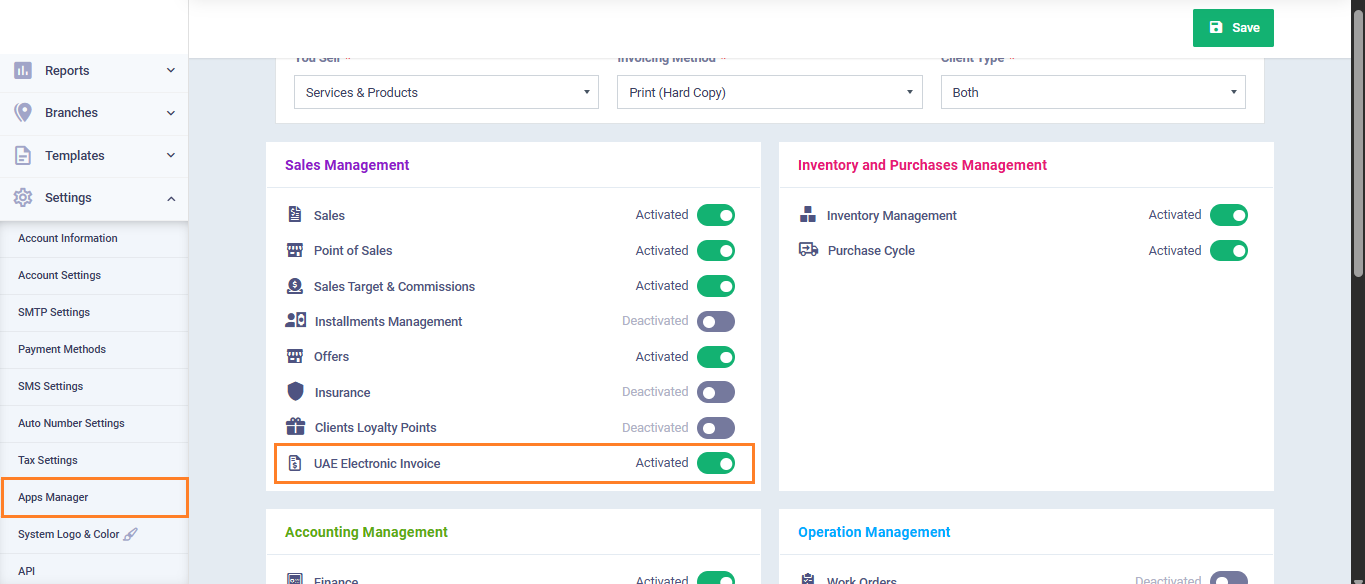
First: Activate the UAE Electronic Invoice Application
- From the main menu, click “Settings“.
- Go to “App Manager“.
- Find “UAE Electronic Invoice” under the “Sales Management” group.
- Click “Activate“.
- Click on the “Save” button.
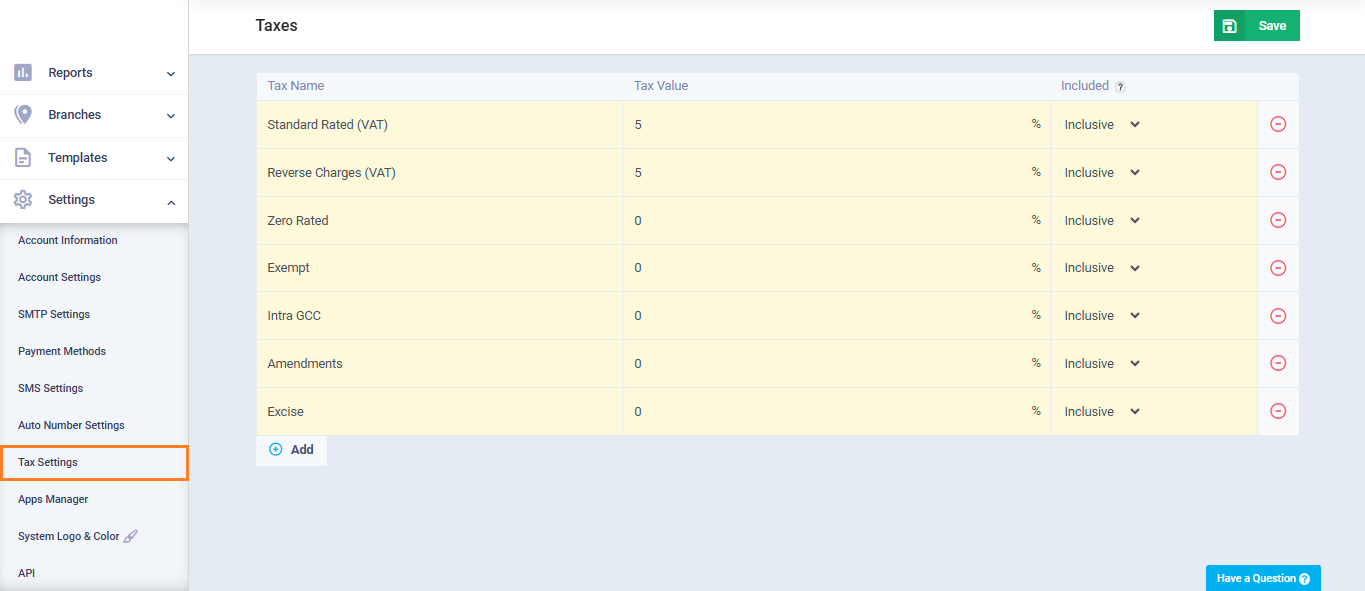
Second: Review Default Taxes
When the account is created with the country set to UAE, the system automatically generates the following taxes. Make sure they exist before proceeding:
- From the main menu, click “Settings“, then select “Tax Settings“.
- Verify that the following taxes exist:
| Tax Name | Rate | Type |
| Standard Rated (VAT) | 5% | Inclusive |
| Reverse Charges (VAT) | 5% | Inclusive |
| Zero Rated | 0% | Inclusive |
| Exempt | 0% | Inclusive |
| Intra GCC | 0% | Inclusive |
| Amendments | 0% | Inclusive |
| Excise | 0% | Inclusive |
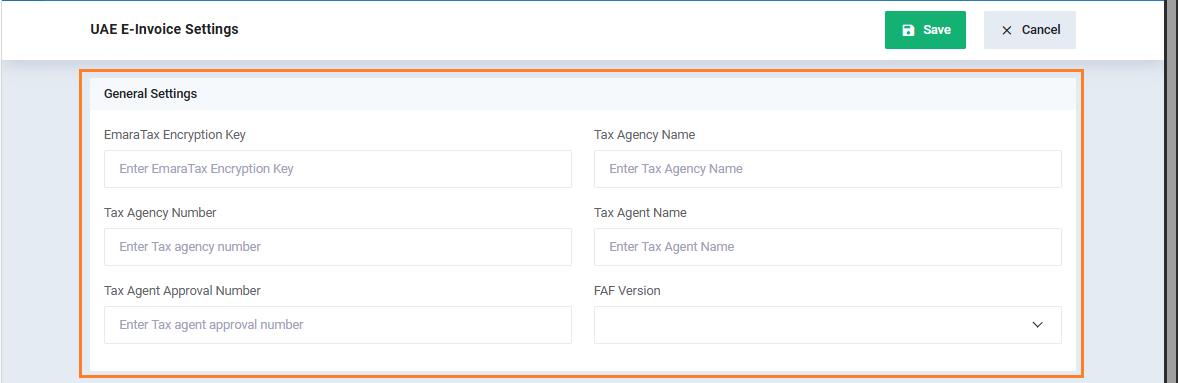
Third: Configure UAE Electronic Invoice Settings
- From the main menu, click “Sales“, then select “Sales Settings“.
- Open the “UAE Electronic Invoice Settings” card.
- Go to “General Settings“.
General Settings
Enter the following details related to your FTA tax profile:
- EmaraTax Encryption Key: Your encryption key from the EmaraTax platform
- Tax Agency Name: Official registered tax agency name
- Tax Agency Number (TAN): Issued tax agency ID
- Tax Agent Name: Authorized tax agent name
- Tax Agent Approval Number (TAAN): Official approval number
- FAF Version: Required tax audit file version
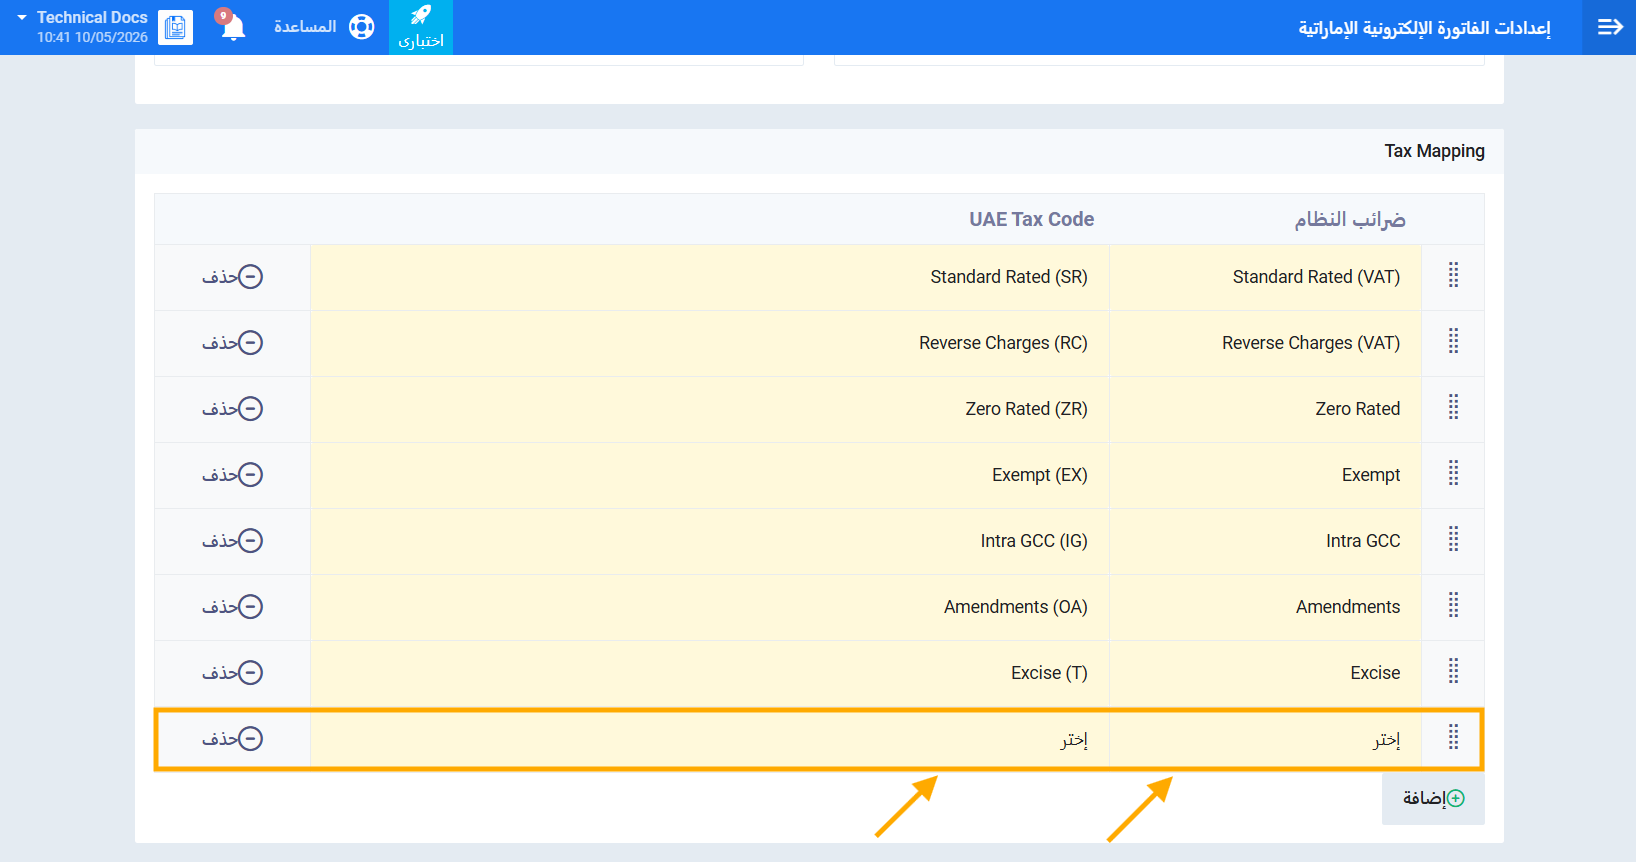
Fourth: Map Taxes to Official Tax Codes
From the same settings page, go to “Tax Mapping“. When the application is activated for the first time, default taxes are automatically mapped to their official codes. Verify and complete any missing mappings. To add a new mapping manually:
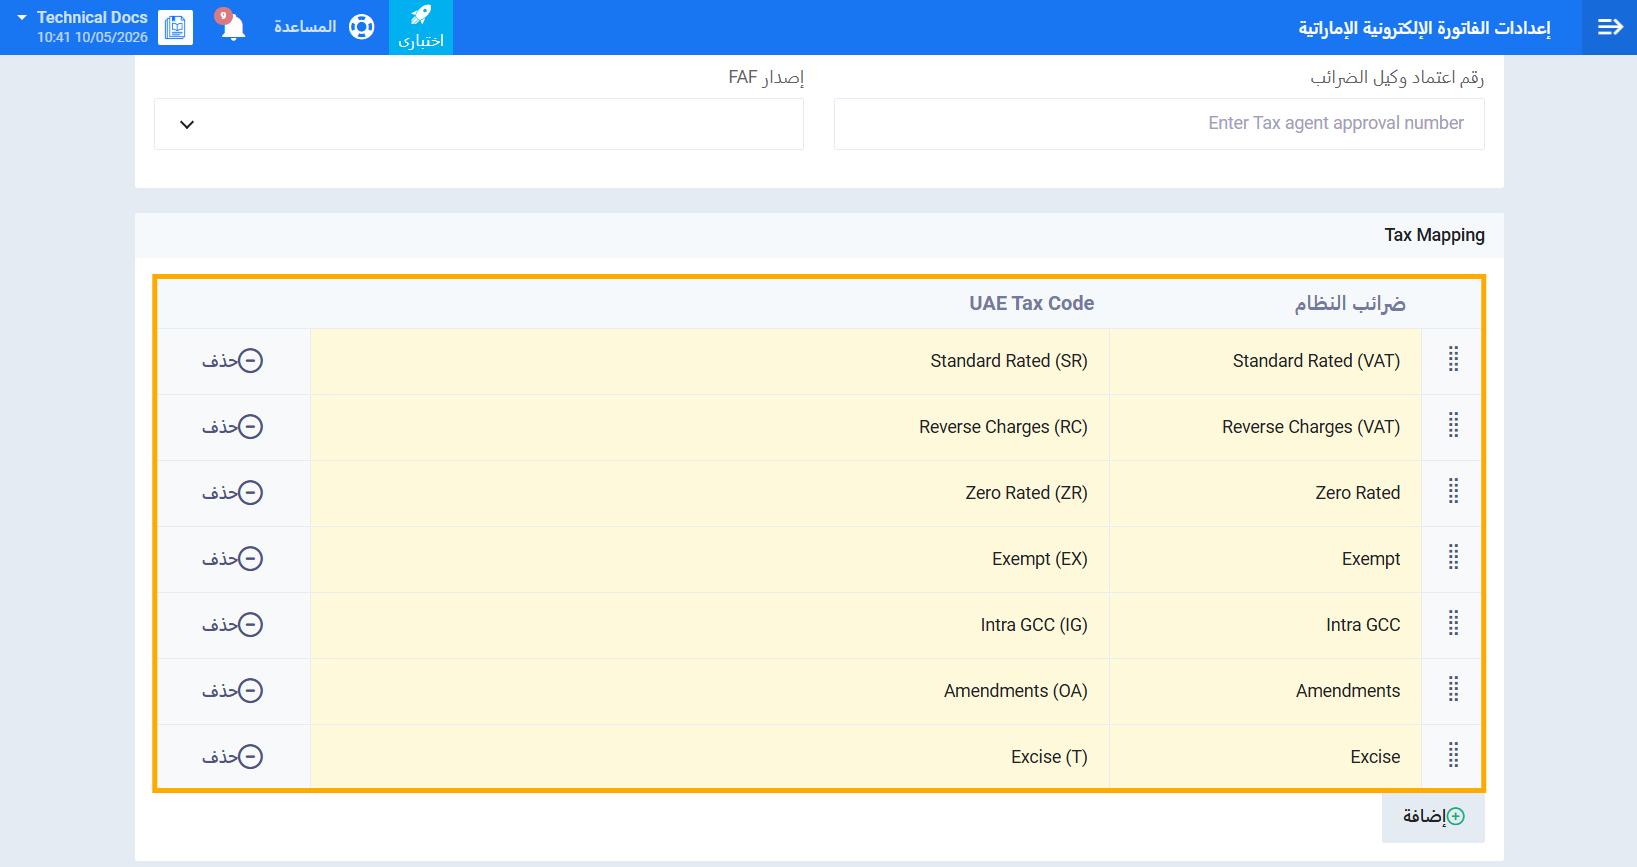
لإضافة ربط جديد يدوياً:
- اضغط على زر إضافة أسفل جدول الربط.
- من عمود ضرائب النظام، اختر الضريبة المطلوبة.
- من عمود UAE Tax Code، اختر الكود الرسمي المقابل.
- اضغط على حفظ.
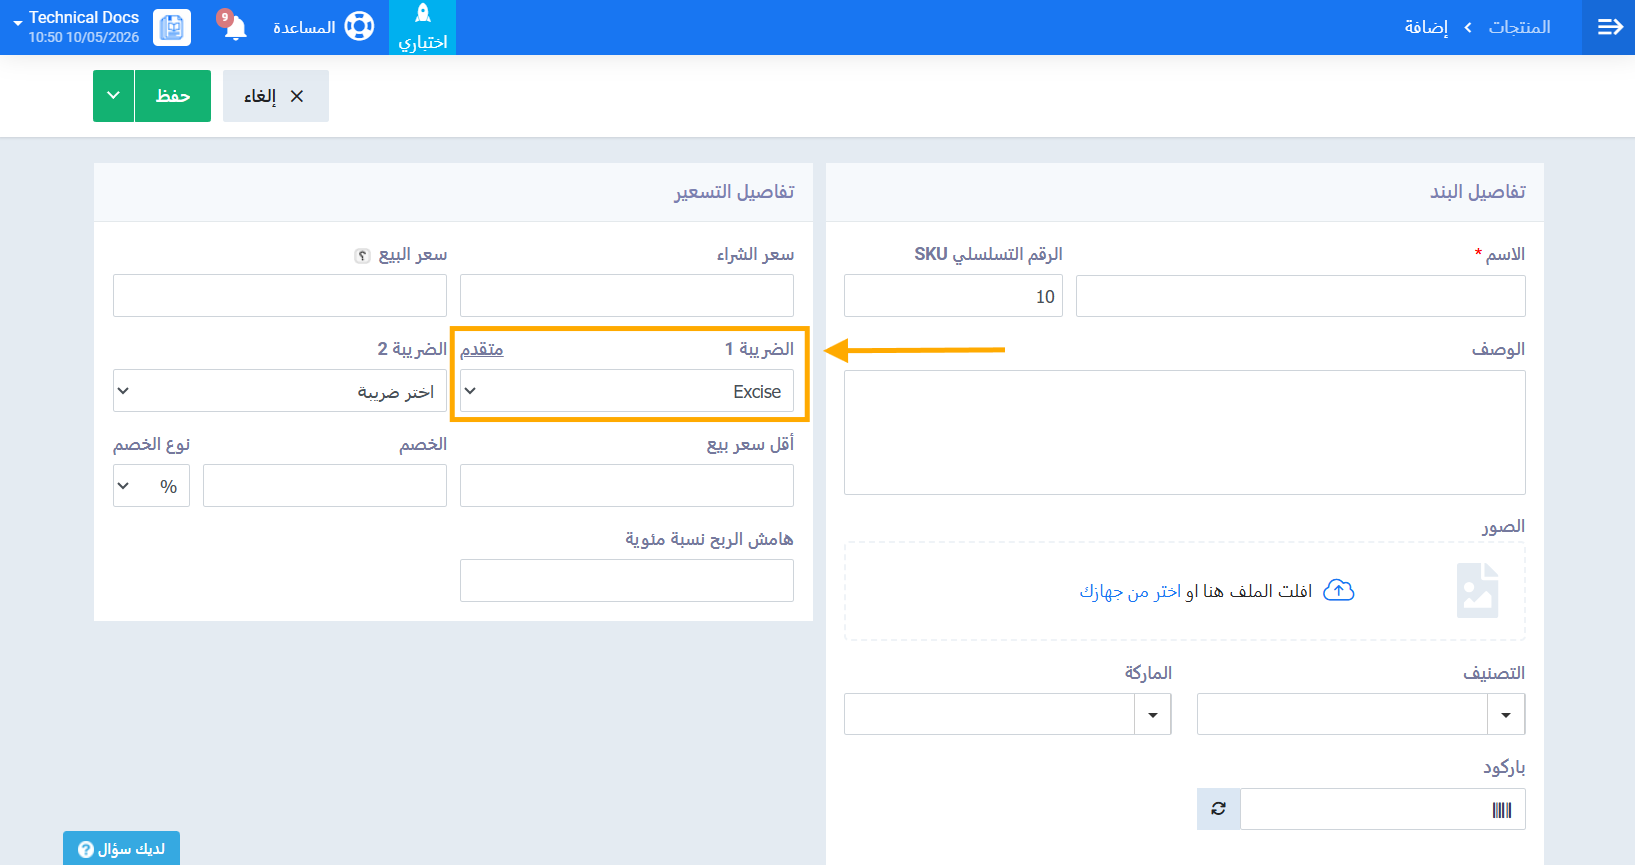
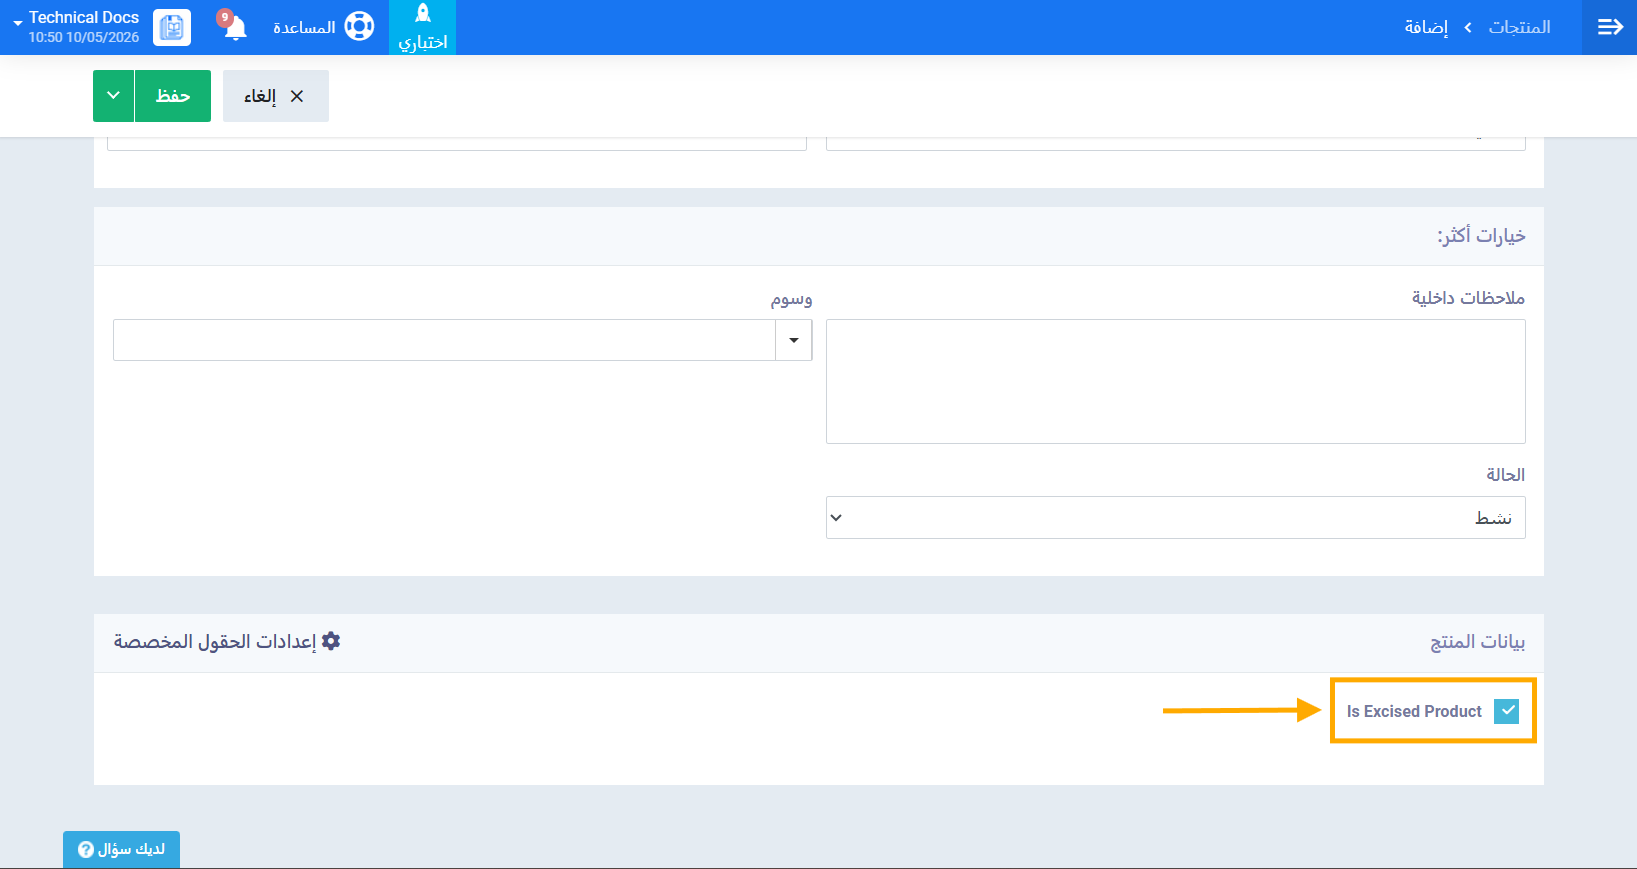
خامساً: تصنيف المنتجات الانتقائية
إذا كنت تتعامل مع منتجات خاضعة لضريبة السلع الانتقائية، يجب تصنيفها في النظام حتى يتحكم النظام تلقائياً في الضرائب المتاحة لها:
- من القائمة الرئيسية، اضغط على المخزون ثم اختر المنتجات والخدمات.
- افتح المنتج المطلوب أو أضف منتجاً جديداً.
- فعّل خانة الاختيار Is Excised Product.
- تأكد من أن الضريبة المختارة للمنتج هي ضريبة انتقائية (Excise).
- اضغط على حفظ.
التحقق من اكتمال الإعداد
بعد اتباع جميع الخطوات السابقة، تحقق مما يلي للتأكد من اكتمال الإعداد:
- جميع الضرائب الافتراضية الإماراتية موجودة في إعدادات الضرائب.
- جميع بيانات وكالة الضرائب مُدخلة في الإعدادات العامة.
- جميع الضرائب مرتبطة بأكوادها الرسمية في جدول Tax Mapping.
- ضريبة السلع الانتقائية مرتبطة بكود Excise (T) إذا كنت تتعامل مع منتجات انتقائية.
- المنتجات الانتقائية مصنّفة بشكل صحيح في شاشة المنتجات.
- زر Export XML ظاهر في صفحات عرض الفواتير وإشعارات الدائن والمردودات.
- قسم تقارير تدقيق الضرائب ظاهر تحت التقارير.