


Comprehensive Guide to Loyalty Points
Loyalty points in the system ensure client retention and help you establish long-term relationships with them. You can offer discounts based on rules you define, and you have full control over them. In this guide, we will first explain what loyalty points mean, and then we will provide detailed explanations and practical examples of the following:
- Activate Loyalty Points App
- Rules for loyalty points.
- Loyalty points conversion rate.
- Loyalty points on invoices.
- Converting loyalty points into discounts on invoices.
- Refunded invoices with loyalty points.
- Tracking earned and redeemed loyalty points.
- Additional features: Editing, disabling, reactivating, and deleting loyalty rules.
What's Meant by Loyalty Points?
Loyalty points in the system are a credit added to a client’s account in exchange for their purchases. Whenever a client makes a purchase, their loyalty points increase based on the rules you define when setting up loyalty rules. This added credit in the client’s account can be used as a discount on the total amount due in future purchases.
Activating Client Loyalty Points
The first step to start using your loyalty points is to activate the feature. All you need to do is go to “Settings” in the main menu, then select “App Manager.”
You will see all the apps available in your account. Please note that the Client Loyalty Points feature is only available in the Comprehensive Package and is not available in the Basic and Advanced Packages.
Now, activate the “Client Loyalty Points App” under Sales Management, then click “Save,” as shown in the following image:
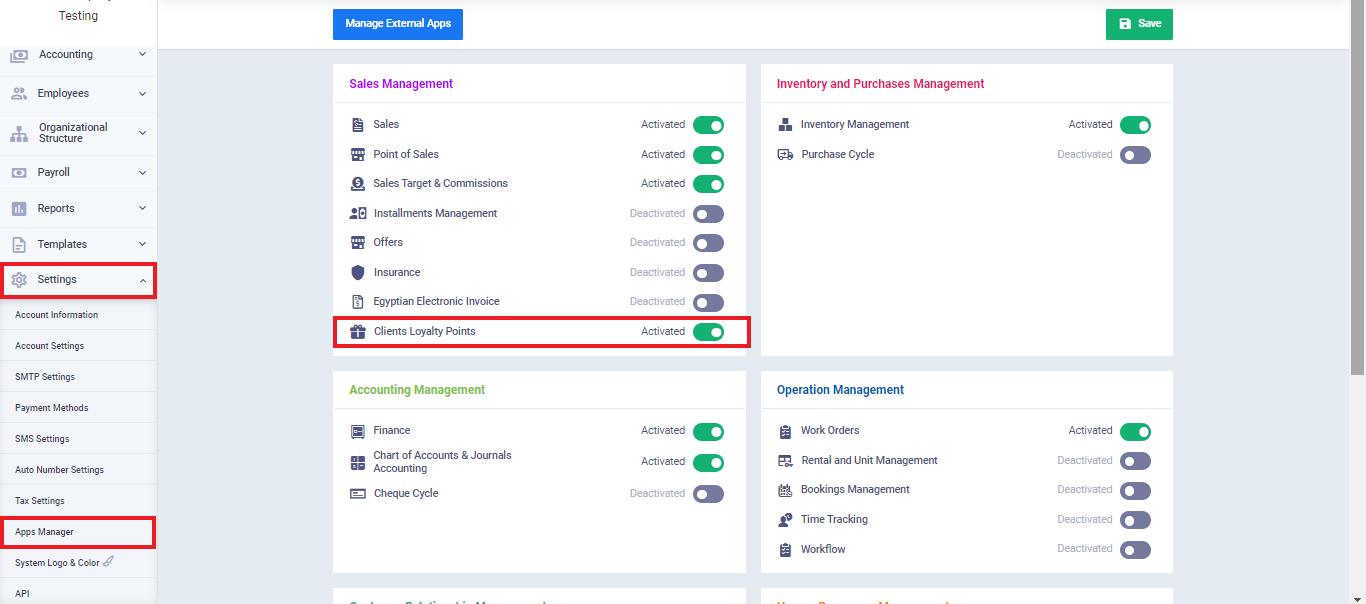
With that, you have successfully activated the Client Loyalty Points app. Now, you can start adding loyalty rules through which you calculate additional credit and apply the discount mechanism.
Loyalty Rules
Before we explain how to add a new loyalty rule, let’s address the question: Why do you need to add a new loyalty rule?
- To determine the financial value of loyalty points for use in discounts on purchases.
- To set a minimum total purchase value that client must meet to earn new loyalty points.
- To define an expiration period during which clients can use the points.
Add a New Loyalty Rule
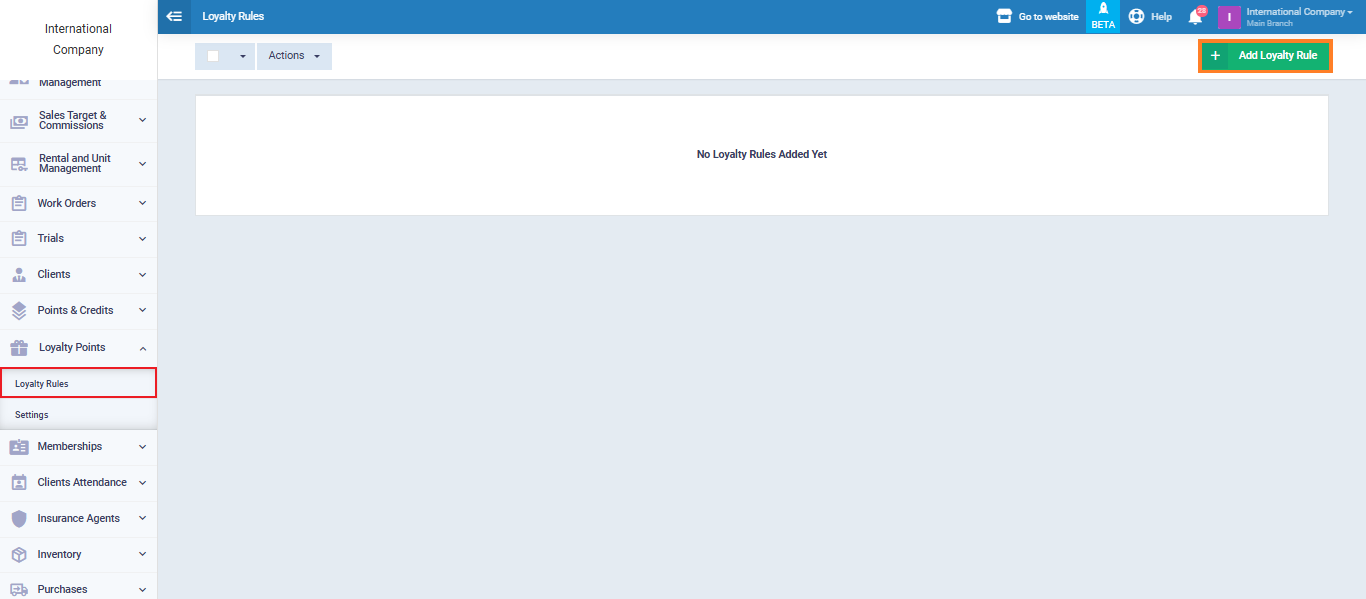
To add a new loyalty rule, click on “Loyalty Points” in the main menu, then select “Loyalty Rules,” and click “Add Loyalty Rule,” as shown in the following image:
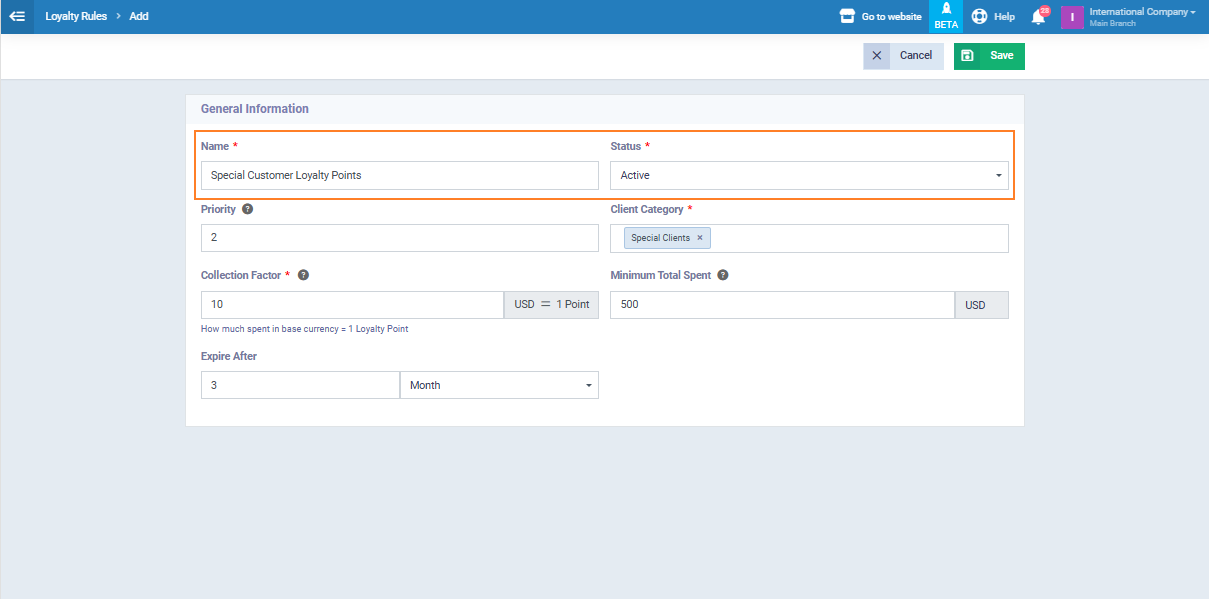
Start filling in the details of the new loyalty rule. In our practical example, we’ll use “Special Clients Loyalty Points” as follows:
Name:
Enter the loyalty rule’s name.
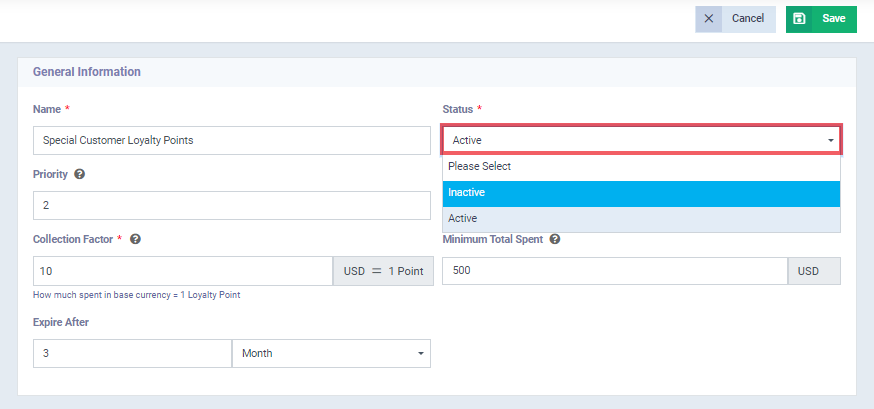
Status
To use “Special Customer Loyalty Points” in the account, we will select “Active.” In other cases, such as not wanting to activate the loyalty rule, we would choose “Inactive.”
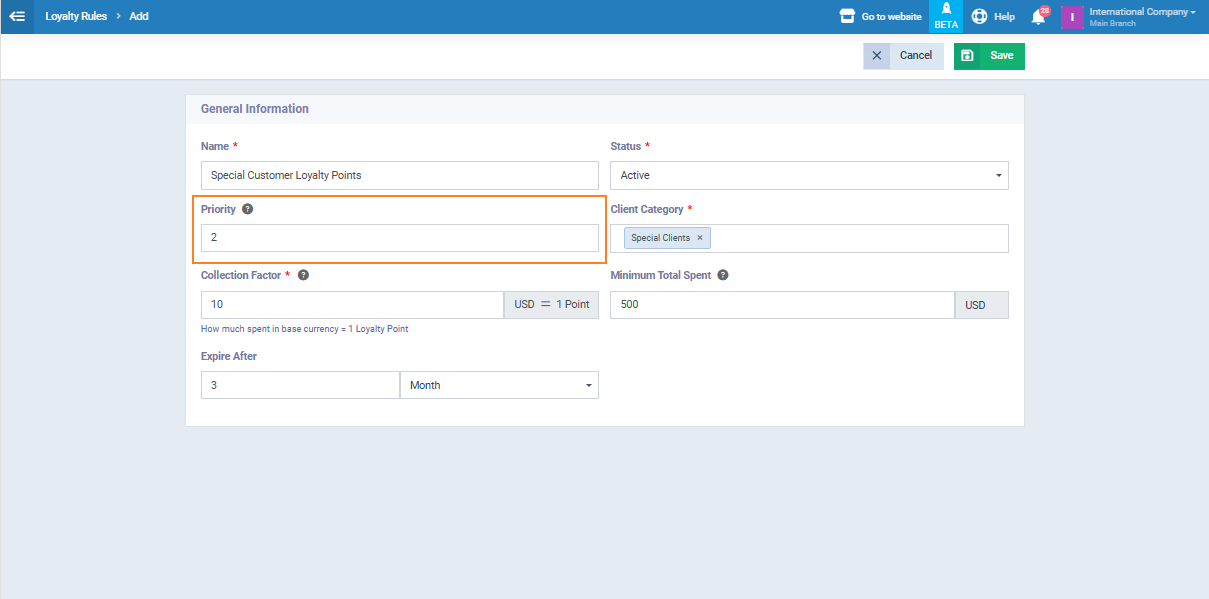
Priority Level:
If you have multiple loyalty rules in your account, and a client is subscribed to more than one, you need to set priority to apply one rule over another so that both rules aren’t applied to the same client simultaneously.
In this case, you will assign a value to each loyalty rule, where the rule with the higher value will take priority when applied, in case it overlaps with another one.
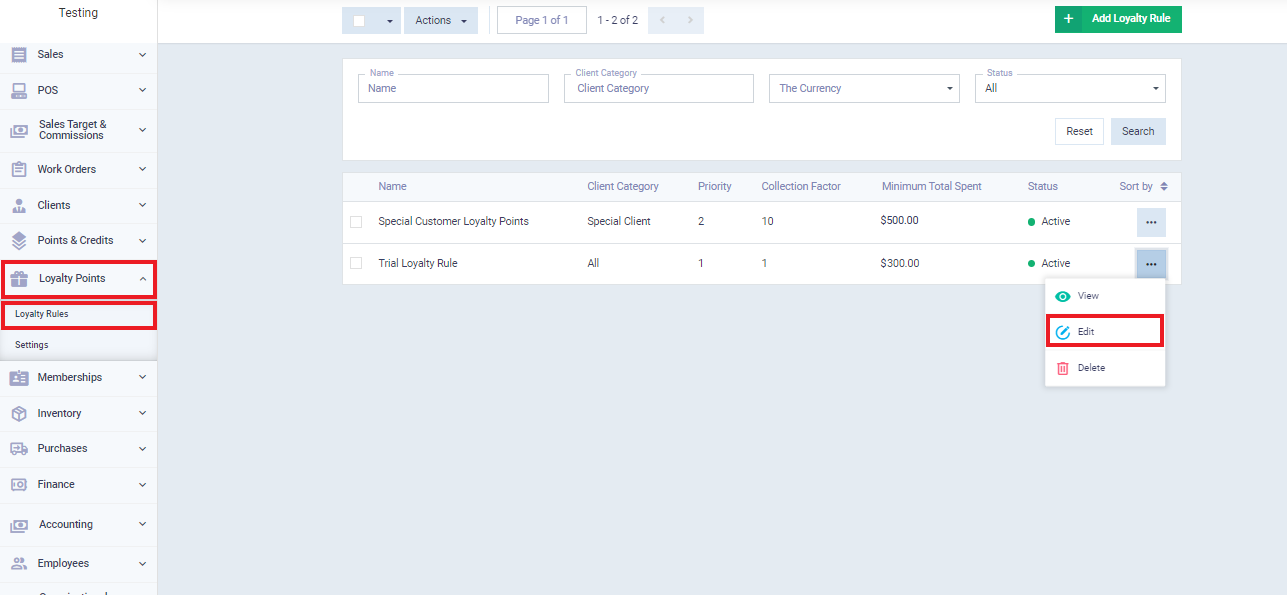
In our example, we have a sample loyalty rule and the “Special Customer Loyalty Points” rule. We will set the priority value to “1” for the sample loyalty rule, and “2” for the “Special Customer Loyalty Points” rule, as shown in the image:
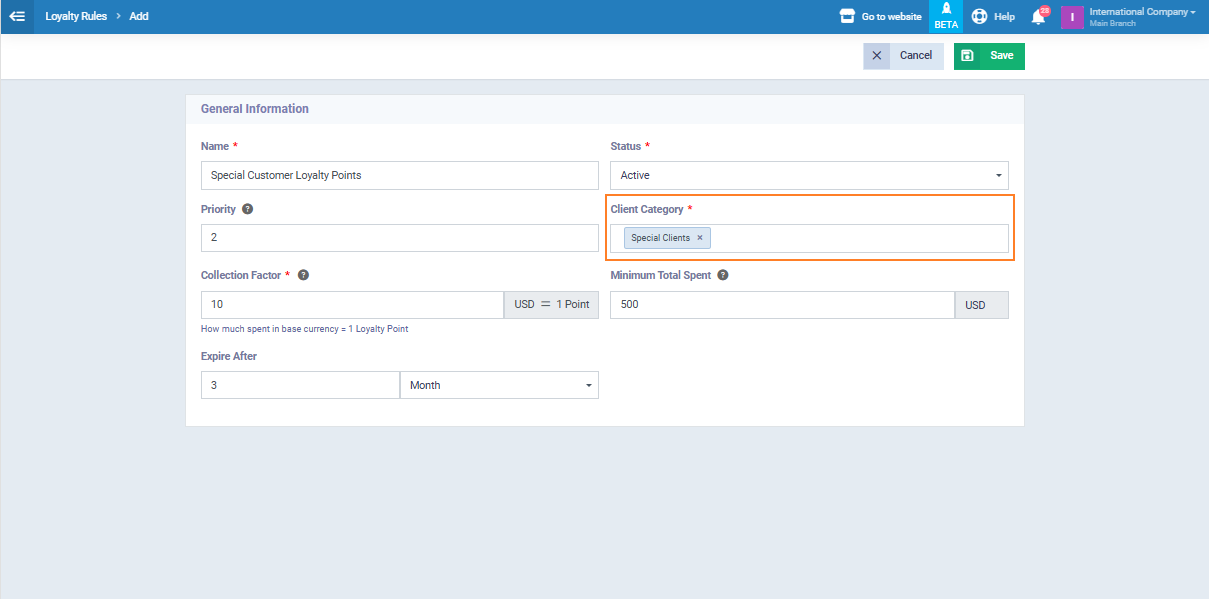
Client Category:
In this option, you can choose between selecting a specific client category from your client categories or applying the loyalty rule to all your clients without specifying a category and leaving this field empty.
In our example, we will designate “Special Clients” to enjoy the features of “Special Customer Loyalty Points,” as shown in the following image:
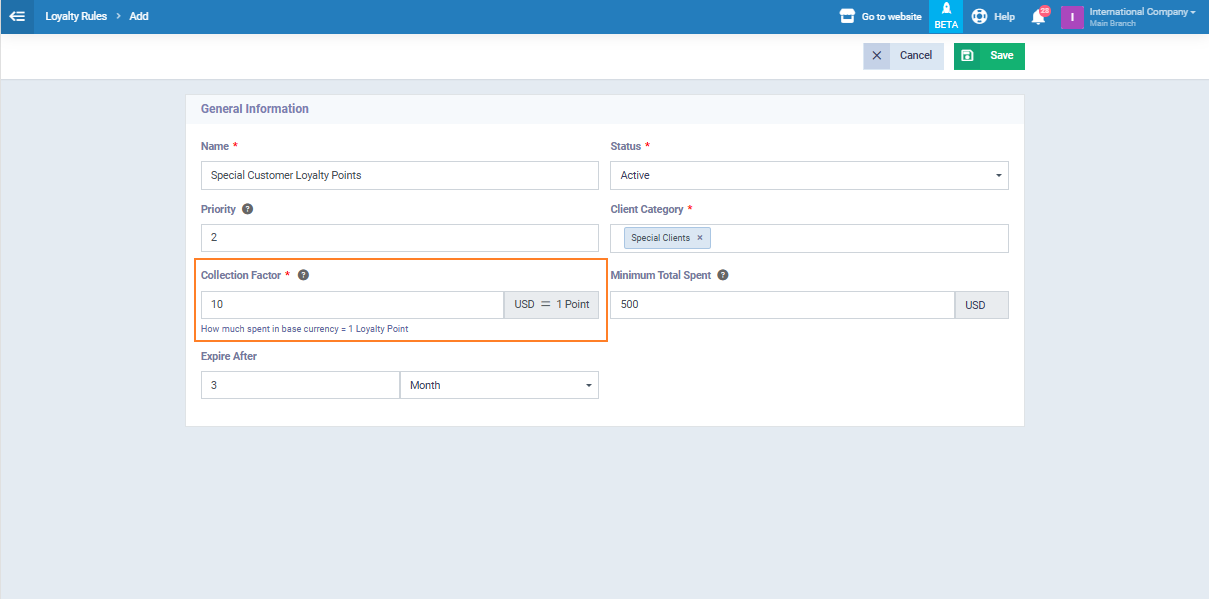
"Collection Factor"
In this field, you need to specify the amount of money the client should pay for each loyalty point. For example, you can set a value of 0.5 pounds to earn one loyalty point. So, when a client makes a purchase worth 100 pounds, they will earn 50 loyalty points, which they can use as a discount on future purchases.
In our specific example for “Special Clients Loyalty Points,” we will set the collection factor to 10 pounds. This means that when a client successfully makes a purchase worth 10 pounds, they will earn one loyalty point. We will see the impact of this on the sales invoices we create for client in the “Special Client Category.”
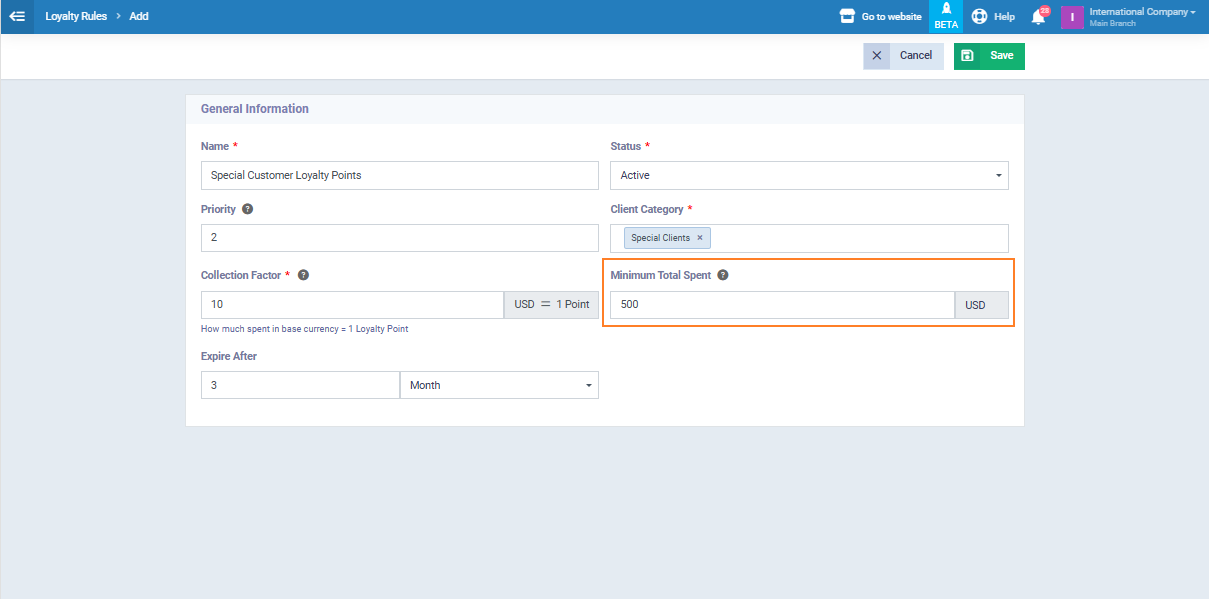
Minimum Redemption Limit:
You can set a minimum limit for the total purchase amount a client needs to reach to acquire new loyalty points. For example, if you set the limit at 300 pounds and a client buys from you for 290 pounds, they won’t be able to earn additional loyalty points.
The system gives you the freedom to choose whether to set a minimum limit or not. If you don’t want to add a minimum limit, you can leave this field empty. In our example, we will set a minimum redemption limit of 500 pounds as shown in the following image:
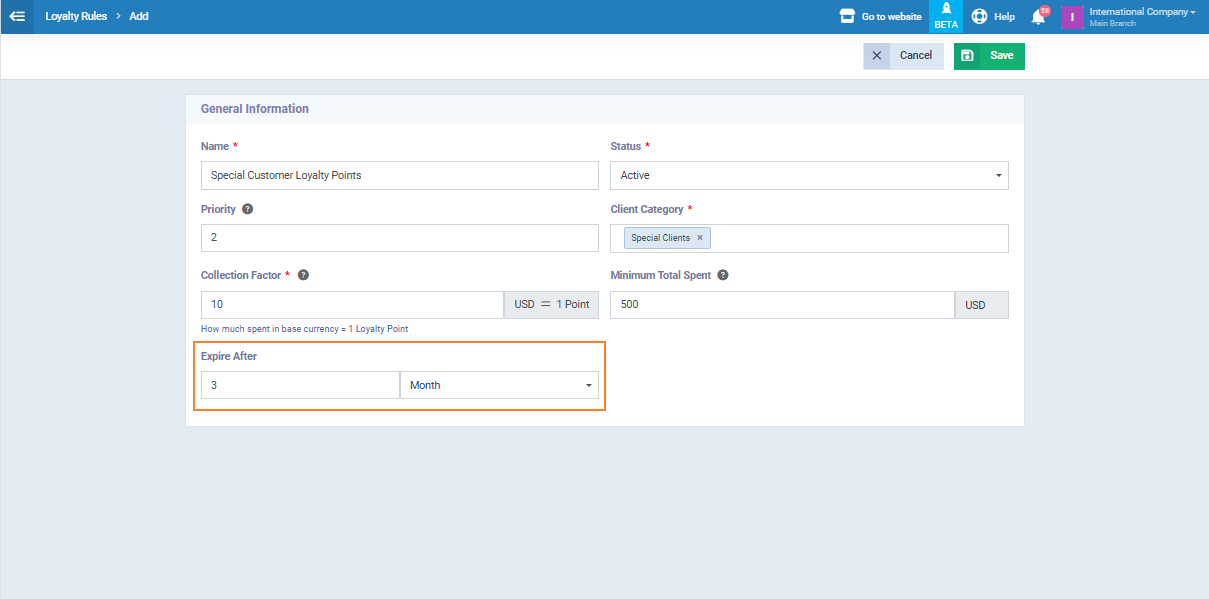
Expiration Date:
You can specify a duration in days, months, or years from the date of loyalty points acquisition. When this duration expires, client can no longer benefit from the points. For example, you can set it for 100 days, 5 months, 3 years, or choose “Not Expired” if you want this loyalty rule to be active indefinitely.
In “Special Client Loyalty Points,” we will set a 3-month validity period for the points, as shown in the image:
After filling in all this information, click “Save.”
Loyalty Points Conversion Factor
Please note that there are two concepts here: “Loyalty Points Collection Factor” and “Loyalty Points Conversion Factor.” The following lines will explain the difference between them.
To set the “Loyalty Points Conversion Factor,” click on “Loyalty Points” in the main menu, then select “Settings.” Fill in the two fields as shown in the image below:
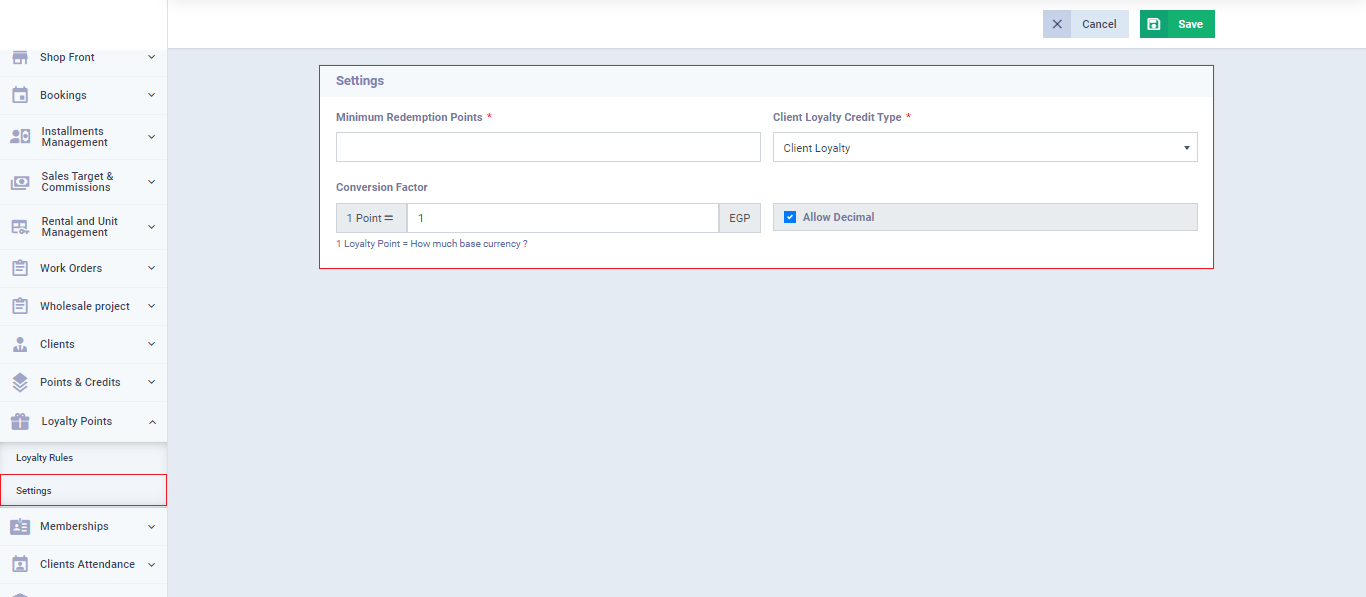
Customer Loyalty Balance Type: Naturally, we will choose “Loyalty Points” because we are currently setting up the loyalty points application in the account. Generally, when it comes to specifying the balance type, the system allows you to choose between “Loyalty Points” or “Financial Amount for Balance Top-up.”
Conversion Factor: In this field, enter the financial value equivalent to one loyalty point. This allows the client to receive a discount based on their loyalty points for each new purchase.
Allow Decimal: In case you need the credit type to be in decimals, allow this feature.
As an illustrative example, we will set a transfer coefficient of 1 pound. This means that a client with 10 loyalty points will be able to receive a 10-pound discount, and we will see the impact of this on the invoices later.
Tracking Earned and Redeemed Loyalty Points
What are Earned Loyalty Points?
Earned loyalty points are those that clients acquire in exchange for making purchases.
What are Redeemed Loyalty Points?
Redeemed loyalty points are those that clients have used to get discounts on subsequent purchases.
Tracking Earned Loyalty Points
You can track the loyalty points for each of your clients for every purchase they make, along with the status of the points and the amount consumed.
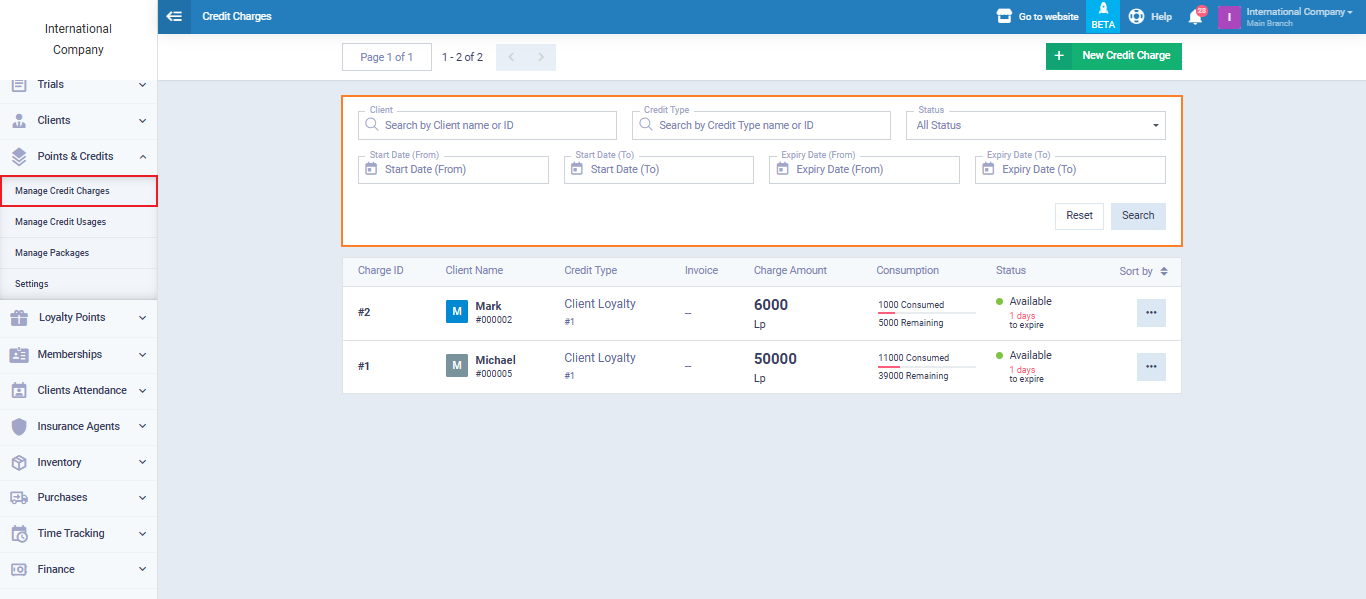
If you want to track the earned loyalty points for your clients, click on “Points and Credit” in the main menu, then “Manage Credit Charges.” The tracking panel will appear, with the ability to filter the results based on the following data:
- Client: You can search for a specific client in your records and review the history of the loyalty points they have earned, as well as their status.
- Credit Type: As mentioned earlier, there are two types of credits – either a financial amount or loyalty points earned from purchases. The system allows you to choose between these two options for filtering your search.
- Status: Loyalty points can have one of four statuses: Available, Consumed, Expired, Suspended. Each of these statuses is explained as follows:
- Available: The client has loyalty points that can be used as discounts on future purchases without any restrictions.
- Consumed: The client has used all their loyalty points.
- Expired: If you set an expiration date for loyalty points, once that date has passed, the points become invalid for use.
- Suspended: The software allows you to suspend a client’s loyalty points balance, which, in turn, suspends all related activities.
-
Loyalty Points Expiry: You can also filter loyalty points based on their expiration period, whether from the start date or the end date.
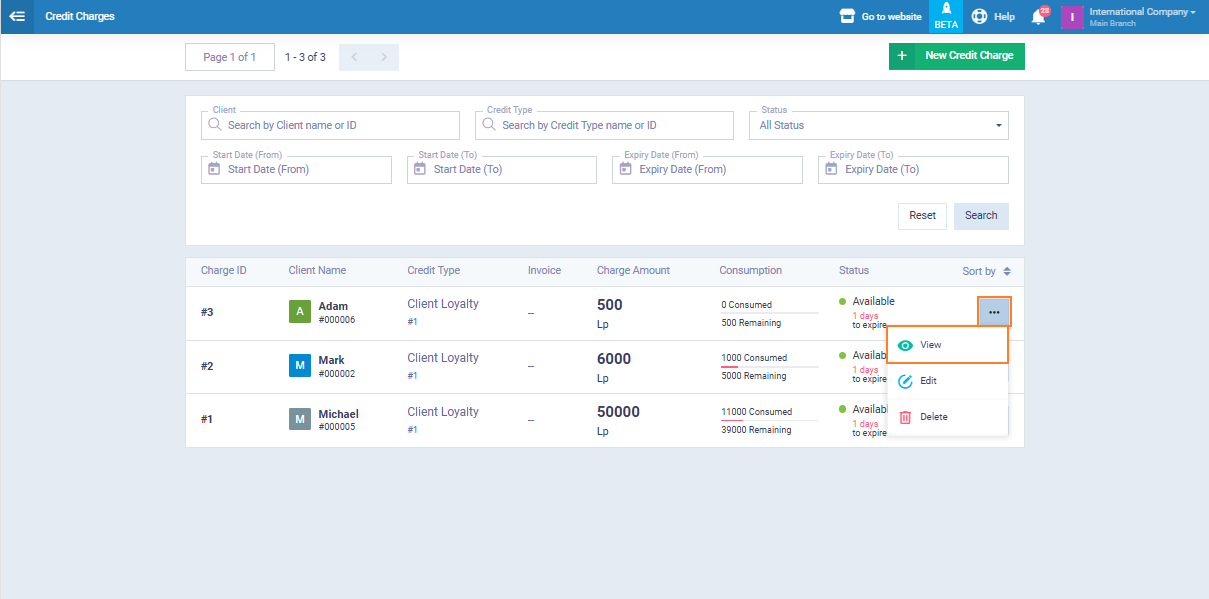
We click on <…> to the left of any acquisition operation we want to track, then select “View” as follows:
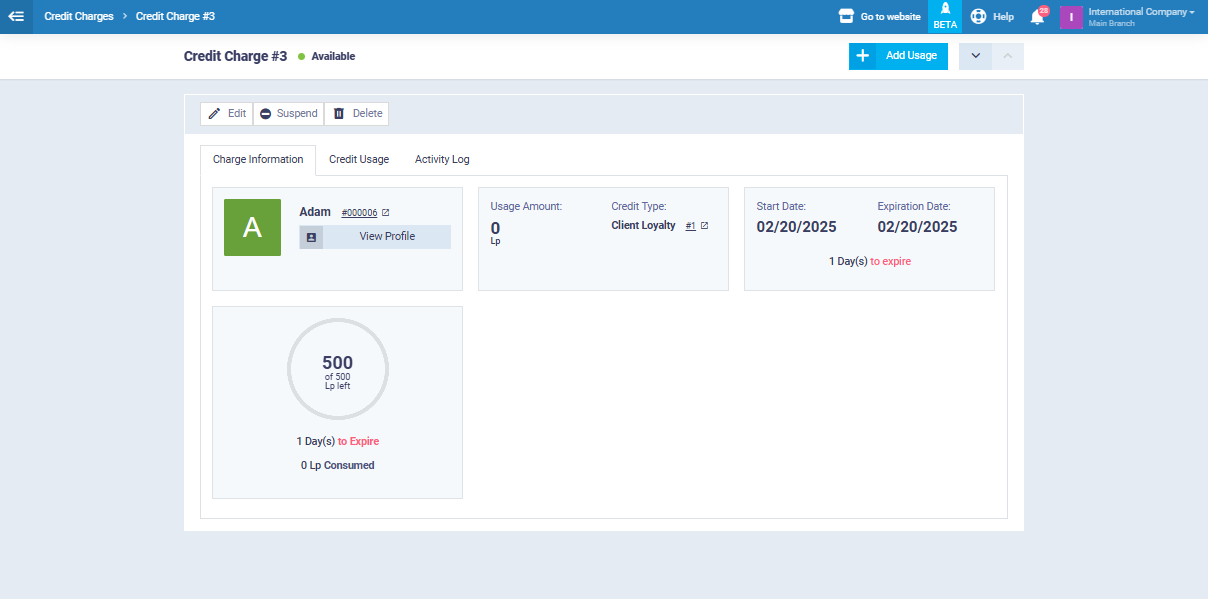
The tracking panel appeared as shown in the following image. As we can see, it includes the consumption amount, the remaining points validity, the invoice from which the discount was deducted, and any other activities.
Tracking Consumed Loyalty Points
The software provides you with a dedicated control panel for tracking the consumption of your client’s loyalty points. This way, you can monitor the amount of discounts given in exchange for loyalty points.
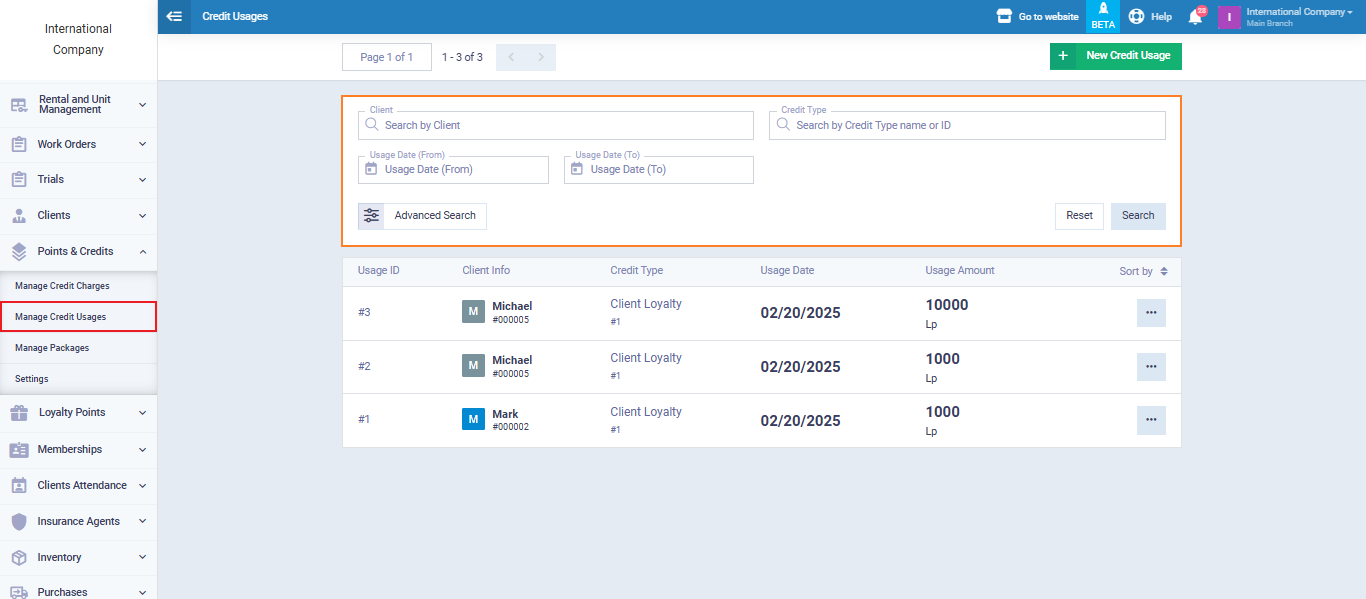
To do so, click on “Points and Credit” from the main menu, and then click on “Manage Credit Usage.” This will display a control panel for managing the consumed loyalty points, with the option to filter the results based on the following data:
- Client: You can search for a specific client you have and review the history of the loyalty points they acquired and their status.
- Credit Type: As mentioned earlier, there are two types of added credit, either in exchange for a financial amount or loyalty points in exchange for purchase transactions. The system allows you to choose between these two options to filter your search.
- Loyalty Points Acquisition Date: You can also filter loyalty points by the date the client acquired them.
Additionally, you can search by the name of the balance or its identification number, as shown in the following image.
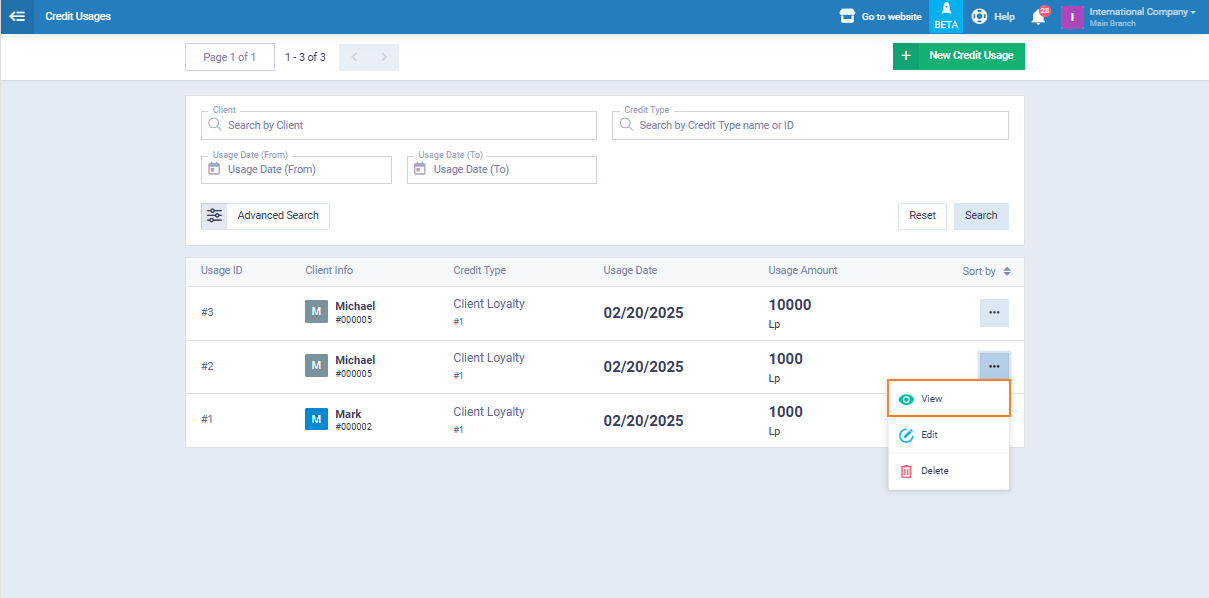
After filtering and reviewing the search results, you can select a consumption transaction to view all its details. To do this, click on the three dots to the left of the transaction icon <…> and choose “View.”
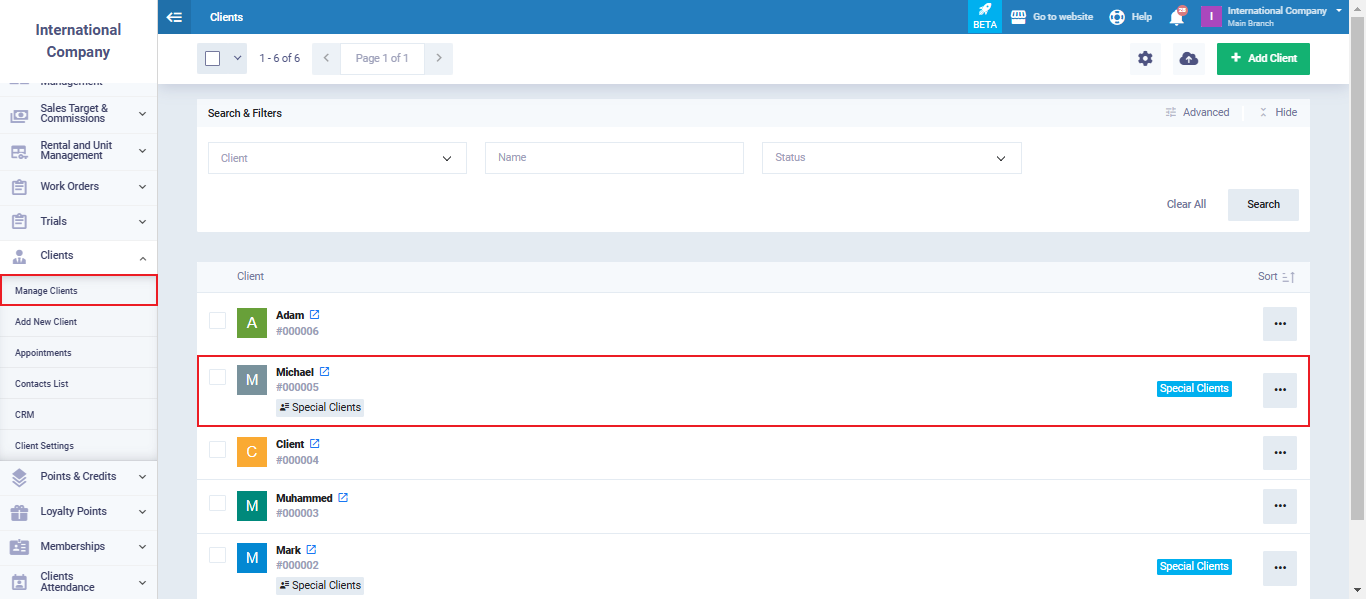
Another easy way to track a specific client's loyalty points is by accessing the client's profile
Click on “Clients” in the main menu, then select “Manage Clients,” and choose the client “Michael,” as shown in the following image:
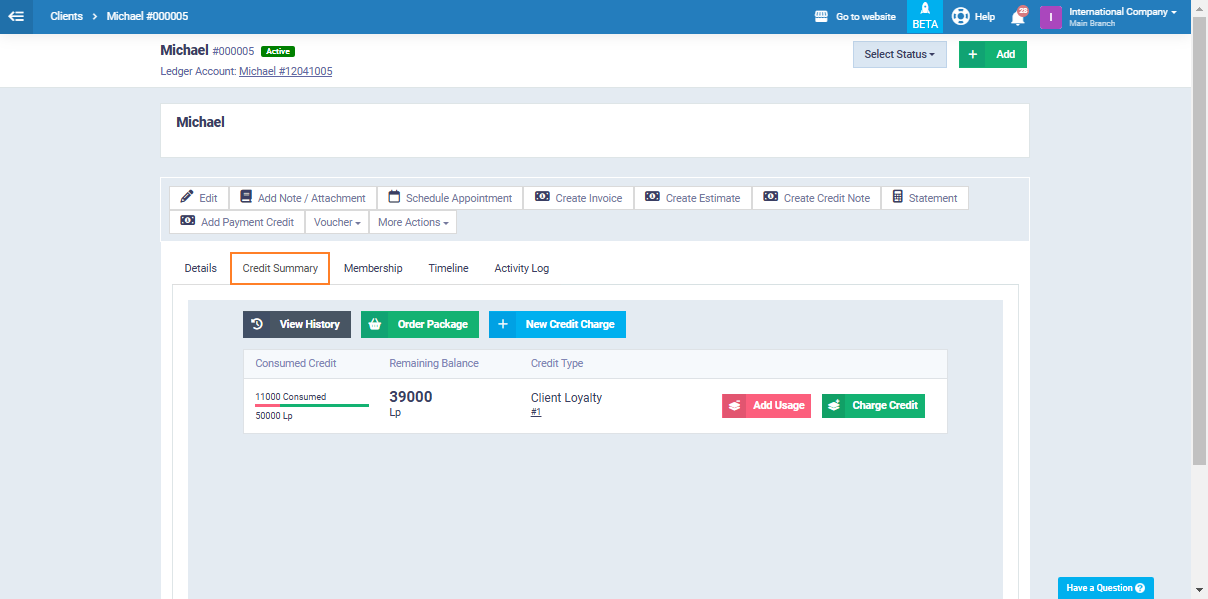
After selecting him, you will see his profile dashboard. Click on “Credit Summary,” and you will see both earned and consumed loyalty points, as shown in the following image:
Editing and Disabling Loyalty Rules
Editing Loyalty Rule
You can edit any of your loyalty rules at any time by clicking on “Loyalty Points” from the main menu and selecting “Loyalty Rules.”
Choose the loyalty rule you want to edit from the available rules, then click on the three dots on the left of the rule < … > and select “Edit,” as shown in the following image:
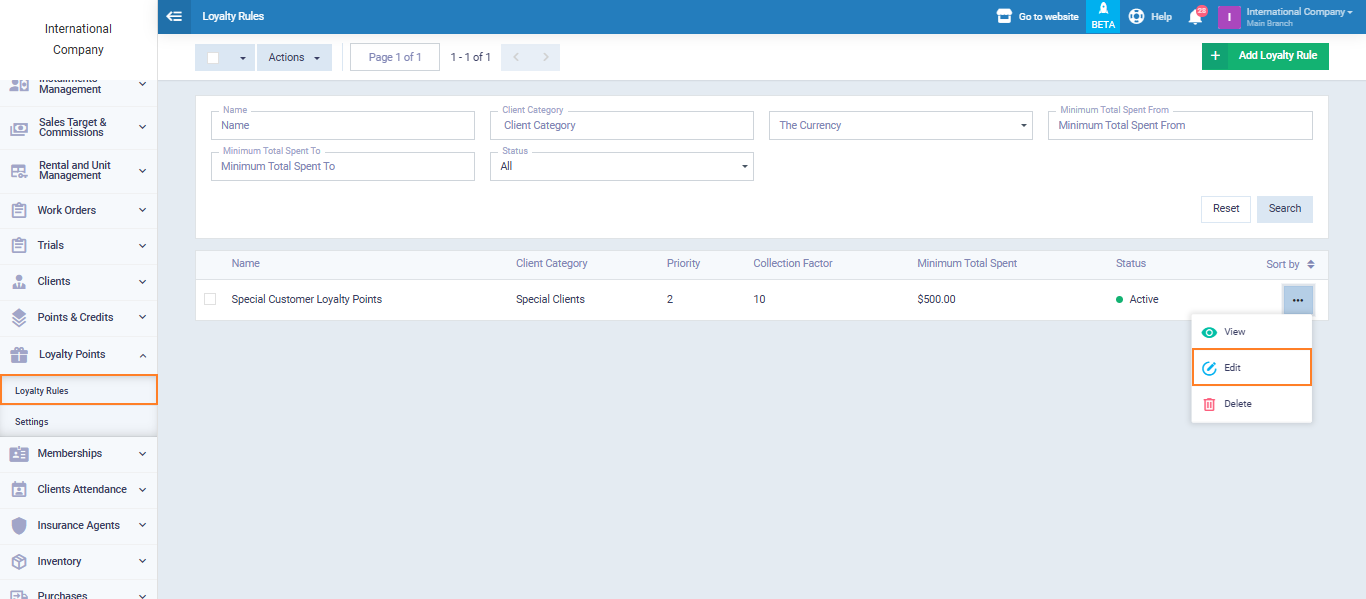
Make the modification and then click “Save.”
Disabling Loyalty Rule
You may need to disable a loyalty rule if you want to keep it but temporarily stop it from being active. For example, if a loyalty rule is specific to a particular season or a set of clients, or for any other reason.
All you need to do to disable a loyalty rule is to click on “Loyalty Points” from the main menu and then choose “Loyalty Rules”
Click on the three dots <…> on the left of the rule and select “Edit“, as shown in the image below:
In the loyalty rule control panel, change the status from “Active” to “Inactive” as shown in the following image:
Deleting a Loyalty Rule?
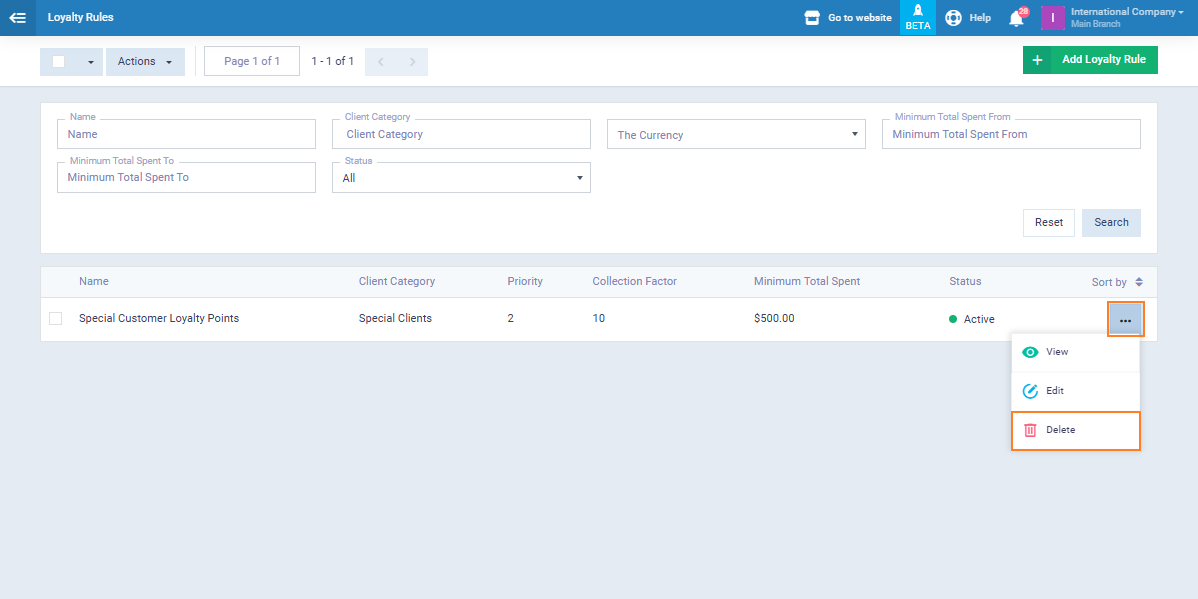
To permanently delete a loyalty rule, all you need to do is click on “Loyalty Points” from the main menu, and then select “Loyalty Rules.”
Choose the loyalty rule you want to delete from the available loyalty rules, then click on the three dots < … > and select “Delete,” as shown in the following image:
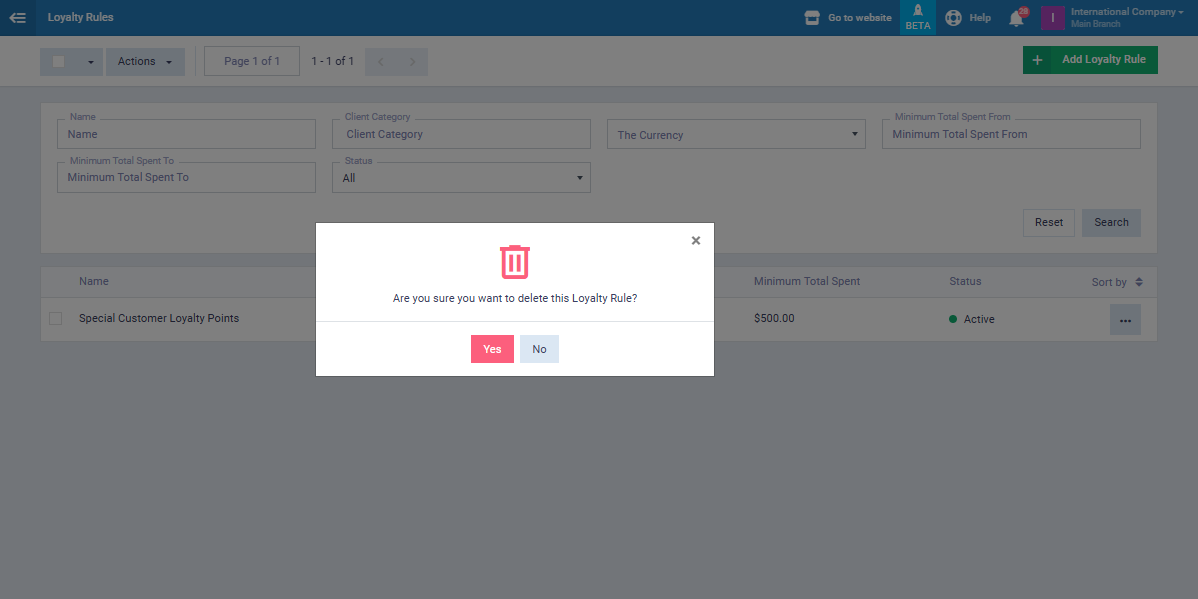
You will receive a confirmation message as shown in the following image. Click “Yes” if you are sure that you want to permanently delete the loyalty rule.
Loyalty Points in Invoices
Converting Loyalty Points to Discounts on Invoices
Now, let’s discuss how to apply loyalty points as discounts on the sales invoices you create for your clients. This is done after adding the loyalty rule, specifying the clients, and determining the value of one loyalty point in the chosen currency.
To create a sales invoice for a client with loyalty points, start by clicking on “Sales” in the main menu, and then click “Create Invoice.”
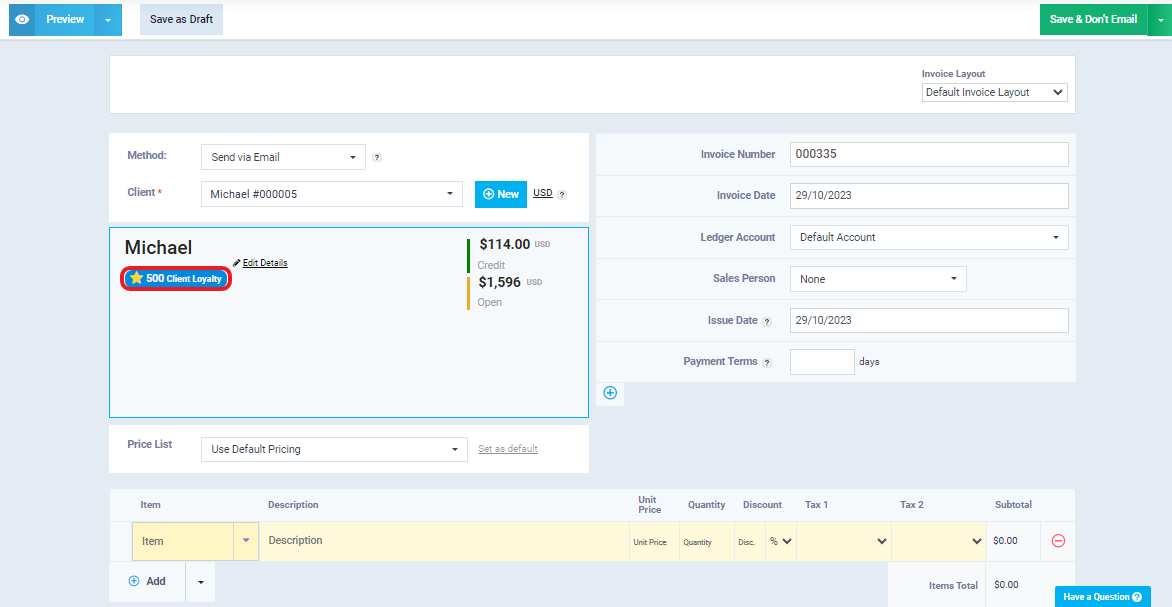
When you begin to create a sales invoice and select a client, such as “Michael,” who is in the “Special Clients” category, you’ll automatically see in the client’s data section on the invoice screen that they have 500 loyalty points. This is shown in the following image:
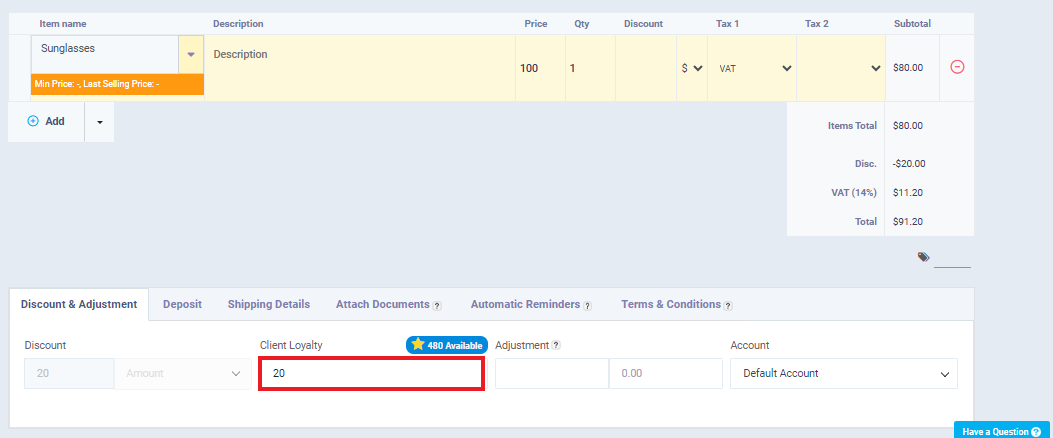
We proceed to specify the item, which is “Sunglasses” with a unit price of $100 and a quantity of 1.
In the “Discount and Adjustment” field, we set the number of points that the client “Michael” will use for a discount on this invoice to be “20” points. This is shown as follows:
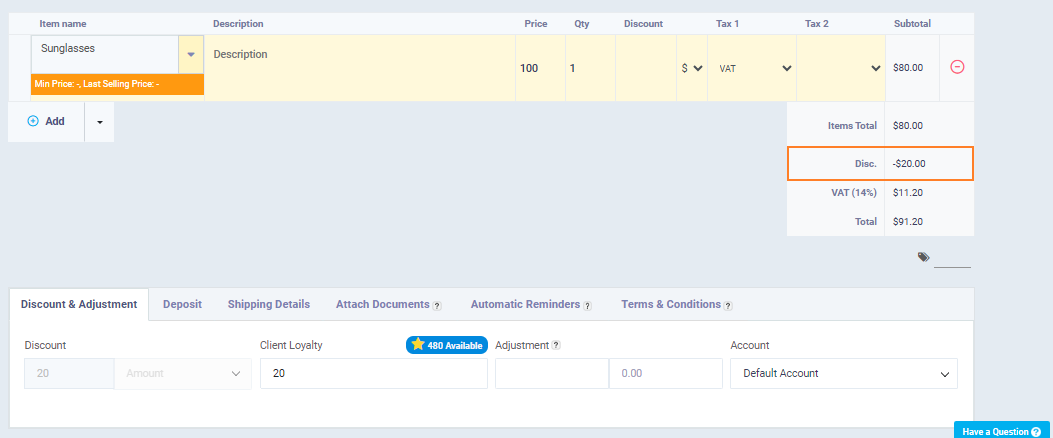
Once you have specified the number of loyalty points the client will use as a discount, it will have an immediate impact on the invoice, as shown in the following image. Please note that we have set the loyalty points conversion factor to be “1,” so the discount will be worth $20.
After completing filling in all the invoice details, click on “Save without printing” or “Save and print.”
Returned Invoice Containing Loyalty Points
What happens if a client wants to return an invoice where they received a loyalty points discount?
If a client returns an invoice that had loyalty points used for a discount, the system does not allow the client to refund those consumed points.
In this way, we have concluded a comprehensive tour of applying loyalty points. We have reviewed how to activate it in the account, add new loyalty rules, and configure their settings. We also learned how to set the loyalty points conversion factor and the difference between it and the points accumulation factor.
We have also practically seen the impact of loyalty rules on sales invoices and return invoices. Finally, we concluded by explaining some features of loyalty points, such as modification, deactivation, reactivation, and permanent deletion.