


Creating Recurring Invoices and Issuing Them Automatically
One of the sales invoices types in the Daftra is the “Recurring Invoice,” specifically designed for sales transactions that occur on a regular and recurring basis. In this topic, we will delve into the details of this type of invoice and how to create and utilize it to streamline your sales management.
What is the Recurring Invoice in Daftra?
The recurring invoice in Daftra is a type of sales invoice commonly used for sales transactions that occur on a recurring basis, such as subscriptions, rentals, and more. When creating a recurring invoice, you have the flexibility to specify the number of times it should be generated and the time interval between each invoice. The system will then automatically generate these invoices.
For example, if you want to create a recurring invoice for a customer’s monthly web hosting subscription, you would enter the invoice details as you would for a regular sales invoice. You’ll also define the billing frequency, such as daily, monthly, weekly, or annually, along with the number of times the invoice should be issued.
For instance, if you set it to be generated once a month, and you specify 12 occurrences, the subscription will last for one year. Along with these features, there are additional tools in the system to facilitate the management of this type of sales, which we will explore further in the following sections.
Steps to Create a Recurring Invoice
To create a recurring sales invoice in Daftra, follow the steps provided below as we apply them to a realistic model for the client “Anas,” as shown:
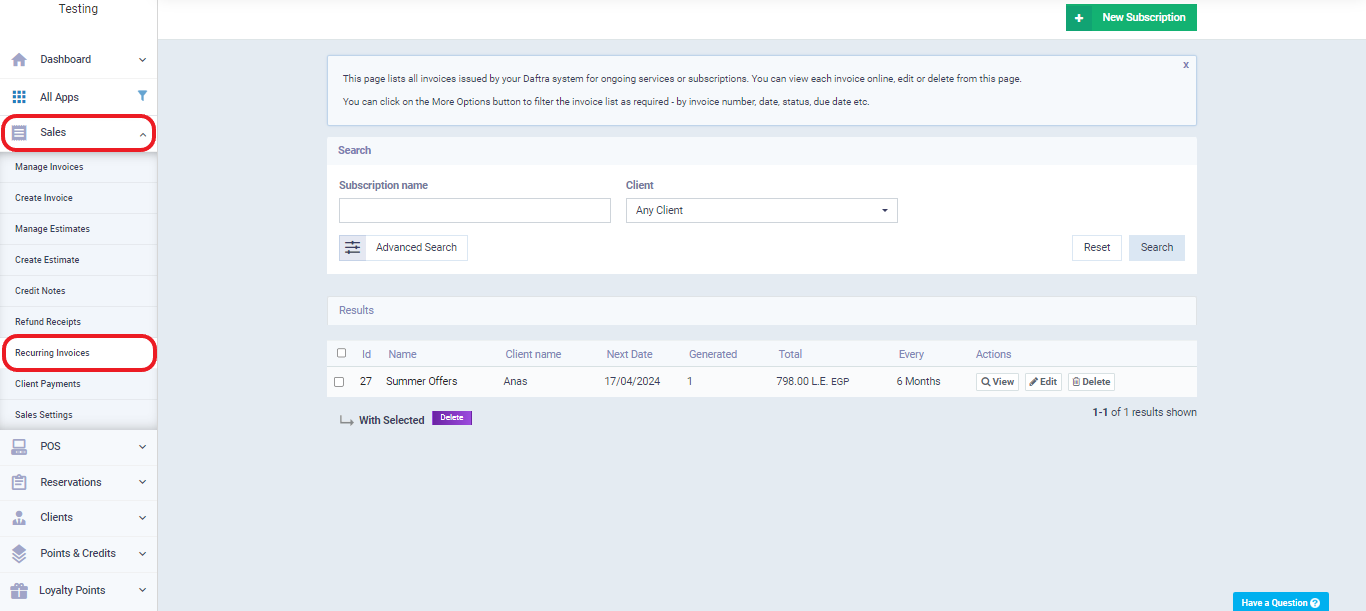
- Start by clicking on “Sales” from the main menu, then select “Recurring Invoices.”
- Click on the “New Subscription” button, as shown in the following screen.
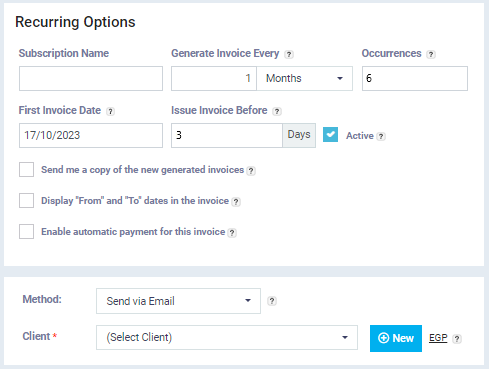
Now, we are presented with the recurring invoice creation screen. This screen is almost identical to the regular sales invoice creation screen, with the key difference being the options for automatic invoice issuance. Here’s an explanation of this section:
- Subscription: Here, we add the name of the subscription, such as “Car Wash Service Subscription.”
- Generate Invoice Every: In this field, we specify the time interval between each invoice, which can be a day, week, month, or year. In our practical example, let’s choose “month.”
- Occurrences: In this field, we define the number of times the invoice will be repeated, which will be 6 times.
- First Invoice Date: Here, we set the date for the first invoice to be issued, serving as the basis for calculating the duration and number of future invoices.
- Issue Invoice Before: With this option, we can notify the system to issue the invoice before its due date with a specified lead time, ensuring the subscription is paid in advance before the new period begins.
- Active: This option allows you to activate or deactivate the subscription as needed.
- Send me a Copy of the New Generated Invoices: When you activate this option, the system will automatically send a copy of the invoice to the client’s email upon issuance.
- Display From” and “To” dates in the Invoice: Activating this option will display the start and end dates for the period covered by this invoice within the subscription.
- Enable Automatic Payment for this Invoice: Enabling this option allows the system to automatically pay the invoice. Please note that this feature can only be activated for clients with registered credit cards on one of the available electronic payment methods in Daftra.
Learn more about payment options in the Daftra.
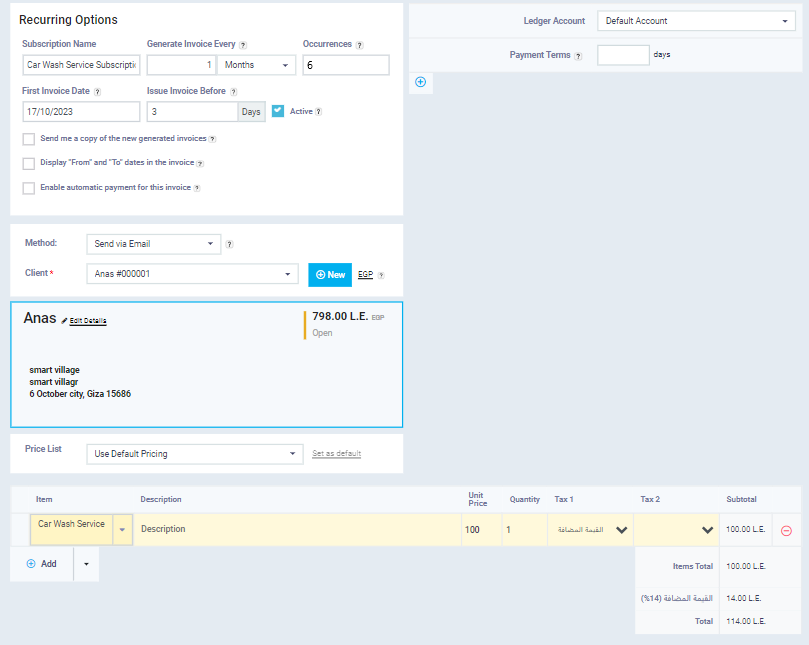
- Complete the remaining invoice details by following the instructions in the Daftra Sales Invoice Creation Guide.
- After filling in the invoice details, click “Save.”
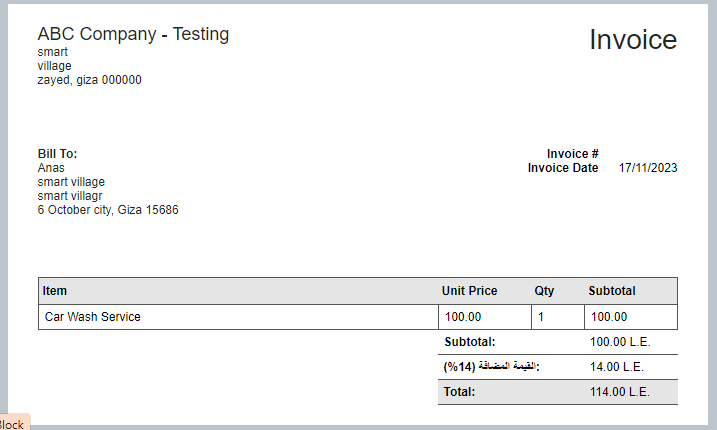
With this, you have created a recurring invoice for the client Anas. This invoice covers a six-month subscription for car wash service, with monthly automatic issuance, sent via email three days before the due date.
Viewing Recurring Invoice Details
Daftra allows you to review the recurring invoices you have created and take relevant actions. To access the screen for viewing the details of the subscription invoice and managing it, follow these steps:
- Click on “Sales” in the main menu.
- Then click on “Recurring Invoices.“
You will see a list of the subscriptions you have created.
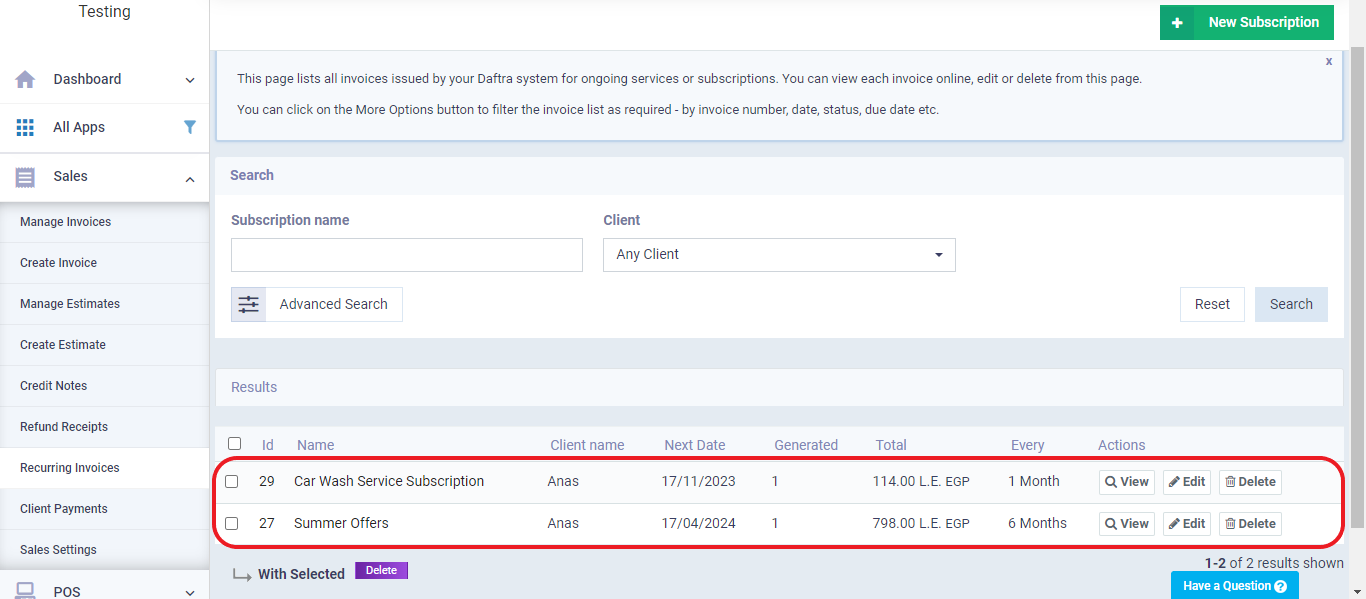
You can click on the “View” button next to any subscription to review its details and take various actions, as shown in the following screen.

The system displays the subscription details as follows:
General Information
These general details include the following: the start and end date of the subscription, the number of invoices already issued, the number of invoices supposed to be issued in the future based on repetitions, the date of the next upcoming invoice, as well as the total amount paid for these invoices and the outstanding balance until that moment.

Upcoming Invoice
In this part of the subscription details, the upcoming invoice is displayed as shown.
Previous Invoice
In this section, you can review all the invoices that have already been issued as part of the subscription, with options to download them in “PDF” format or view them in a separate window.
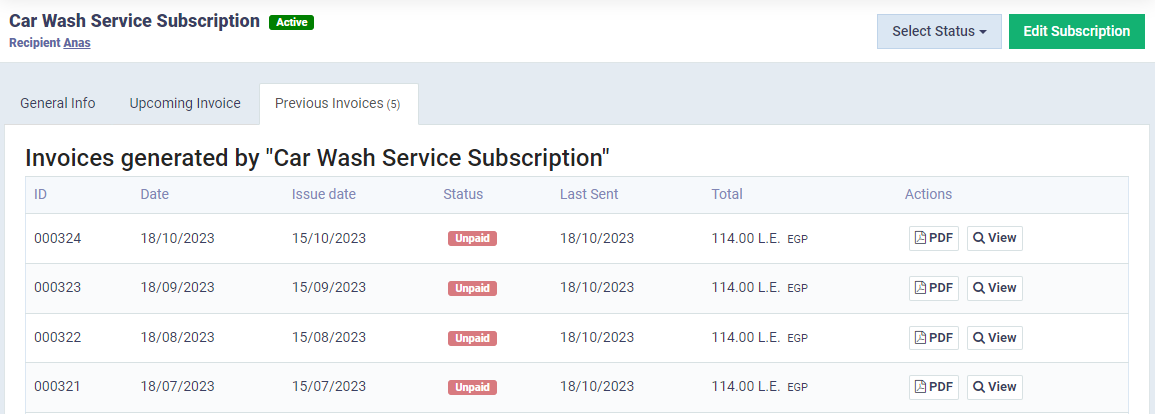
In addition to the previous information, two actions can be taken. The first allows you to change the status of the invoice, while the second action enables you to edit the recurring invoice by clicking the “Edit Subscription” button
And thus, our tour of recurring invoices in the Daftra has come to an end. We’ve learned what they are, how to make use of them in managing sales invoices, and how to create, modify, and review their details.