How to Block Invoice Preview
The system allows employees to preview an invoice before saving it, which can lead to some issues or facilitate accounting and financial manipulation. Therefore, you can control this feature and block invoice previews before saving. Here are the details explained in this guide.
Different Ways to Block Invoice Preview
There are two ways to block invoice preview. One applies to all the system users, and the other applies to specific user roles you choose.
First Method:
Deactivate the “Preview Invoice Before Saving” Option for All Users
You can deactivate the invoice preview option before saving for all users in the account by following these steps:
1. Click on “Sales” from the main menu.
2. Click on “Sales Settings“.
3. Click on “General Invoice / Estimate Settings“.
4. On this page, deactivate the option ““.
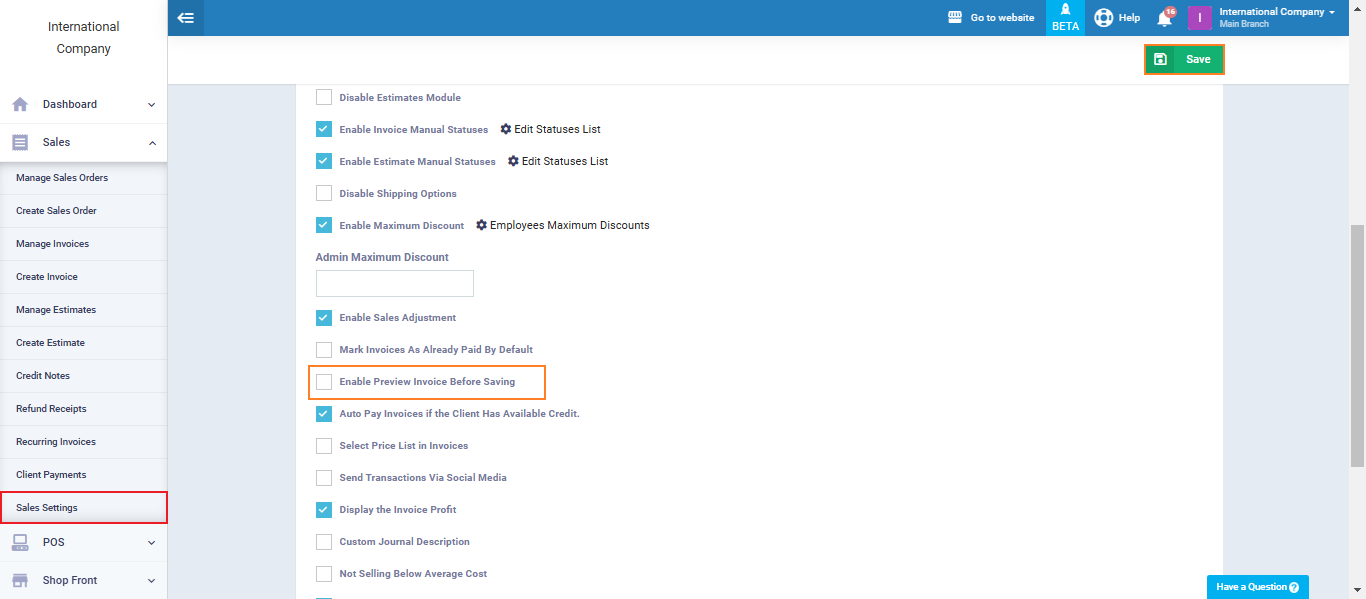
After saving, the preview option will no longer appear during invoice creation until it is re-enabled.
However, by disabling this option, the ability to preview the invoice before saving will be deactivated for all users, including the account admin.
Thus, no one will be able to preview the invoice until this option is re-enabled.
Second Method:
Steps to Block the Invoice Preview Page for a Specific Role
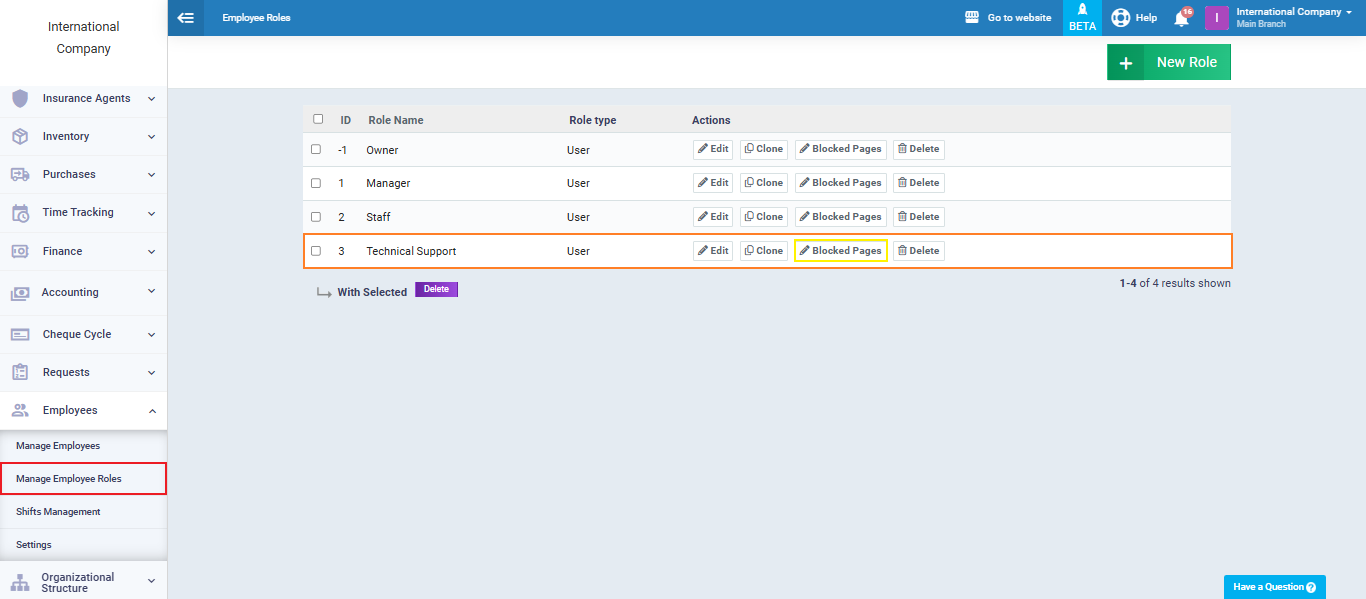
1. From the main menu, click on “Employees“.
2. Click on “Manage Employee Roles“.
3. Click on the “Blocked Pages” button next to the role you want to block the invoice preview for.
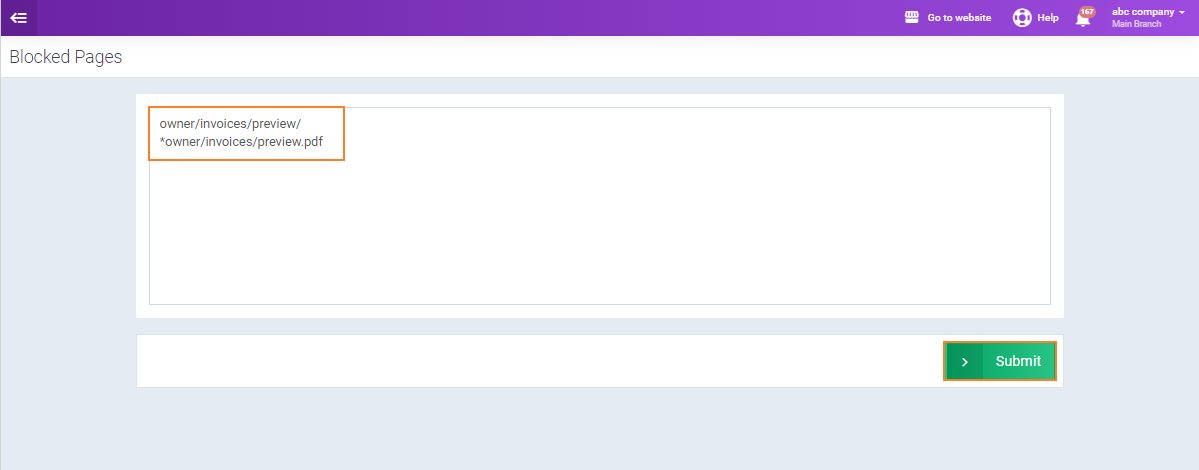
Copy these links for blocking invoice preview:
To block preview in the browser: owner/invoices/preview/
To block preview through PDF: *owner/invoices/preview.pdf
Paste them into the restricted pages for this role and click “Submit“.
Each line from the above should be placed on a separate line by pressing “Enter“.