Routing the Product Sales to a specific Sales Account
We often need to separate the sales of certain products from the default sales account, so that we can track the movements and sales of these products more accurately. This helps you to track your products and review their profits separately.
To implement this mechanism, you can follow the steps explained sequentially.
Creating an Account for the Product Sales in the Chart of Accounts
Steps to add a new Account in the Chart of Accounts
- Click on “Accounting” from the main menu.
- Click on “Chart of Accounts”.
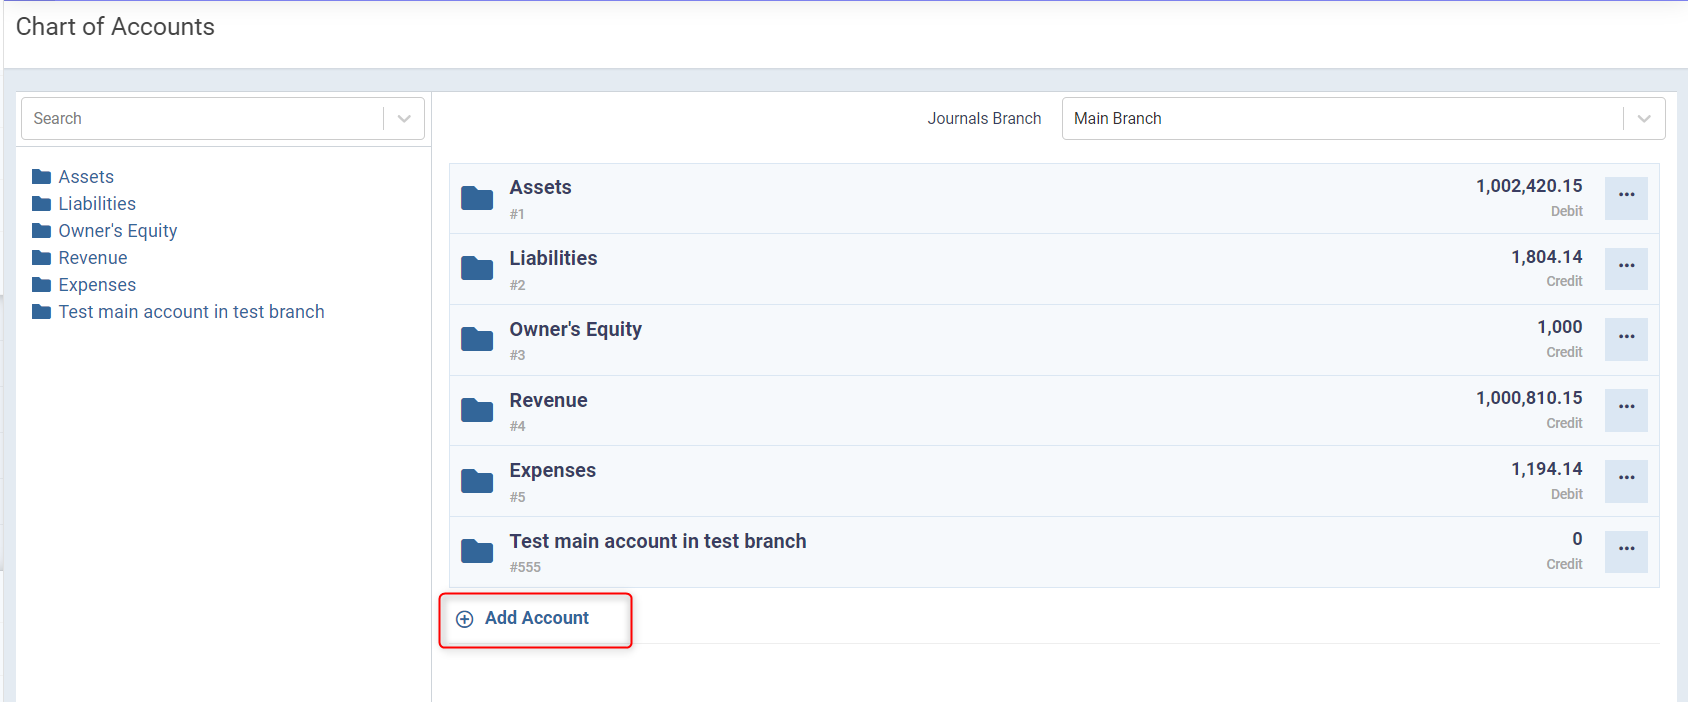
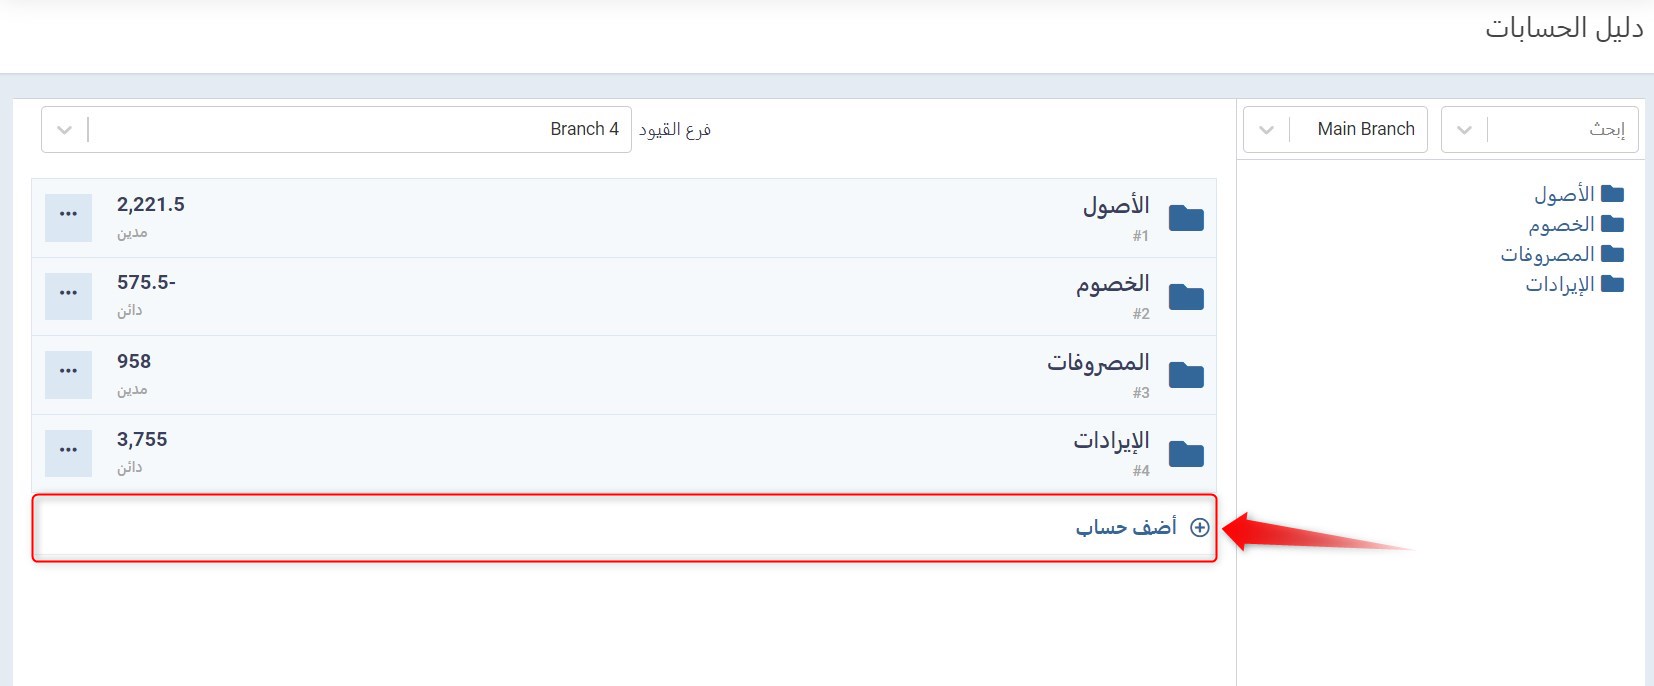
- The program displays the chart of accounts in a tree-like organization.
- Click on the “Add Account” button.
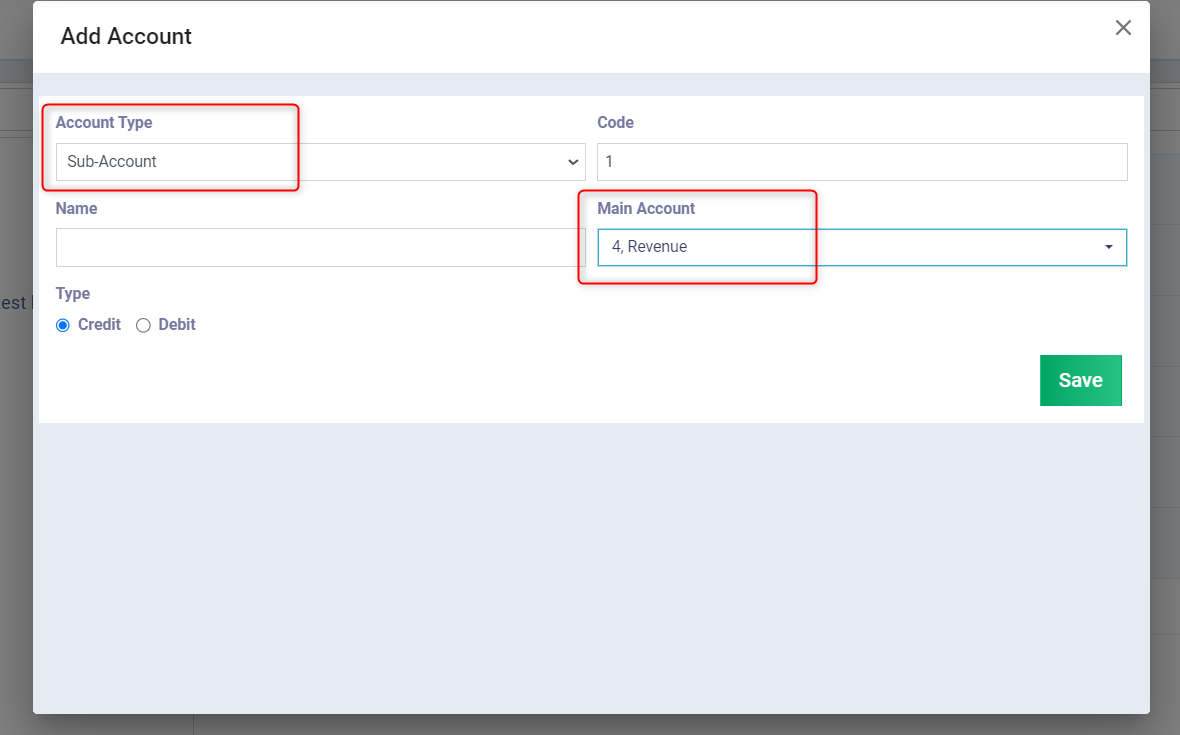
- Enter the data for the account to be added to the chart:
- Account Type: Select the type of account as “Sub-account”.
- Code: Assign a code for the new account.
- Note: The system does not allow duplication of codes for any sub or main accounts within the chart.
- Name: Enter the name of the account as required.
- Main Account: You can determine the main account under which the new account will be listed.
- Type: Define the nature of the account as “Credit” or “Debit”.
- Click on the “Save” button.
Example: Click on “Add Account”
Set up the data for the account to be added
Setting up the Account Routing Settings for the Product Sales Account
Steps to route the Product Sales Account
- Click on “Accounting” from the main menu.
- Click on “Accounting Settings”.
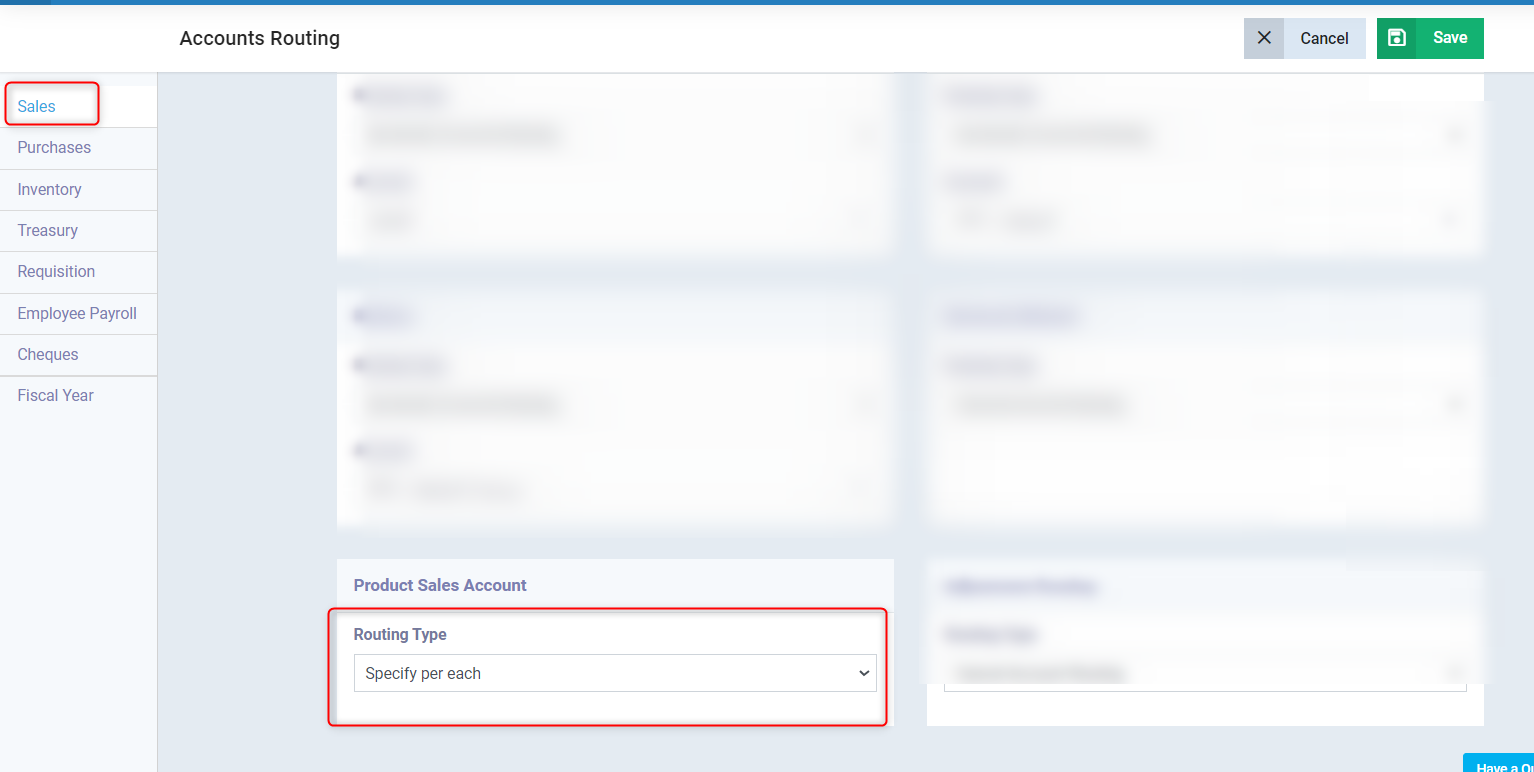
- Click on the “Accounts Routing” card.
- Click on “Sales” from the menu on the left.
- “Routing Type”: Choose “Specify per each” so you can assign a dedicated sales account to the product.
- Click on the “Save” button.
Assigning the specified Sales Account to the Product
Steps to assign the Sales Account in the Product File
- Click on “Inventory” from the main menu.
- Click on “Products & Services”.
- Browse the file of the product/service you wish to modify.
- Click on the “Edit” button on the product display page.
- Click on the dropdown menu for the “Product Sales Account” field.
- Select the sales account that was added in the chart of accounts (choose the account you want to assign).
- Click on the “Update” button.
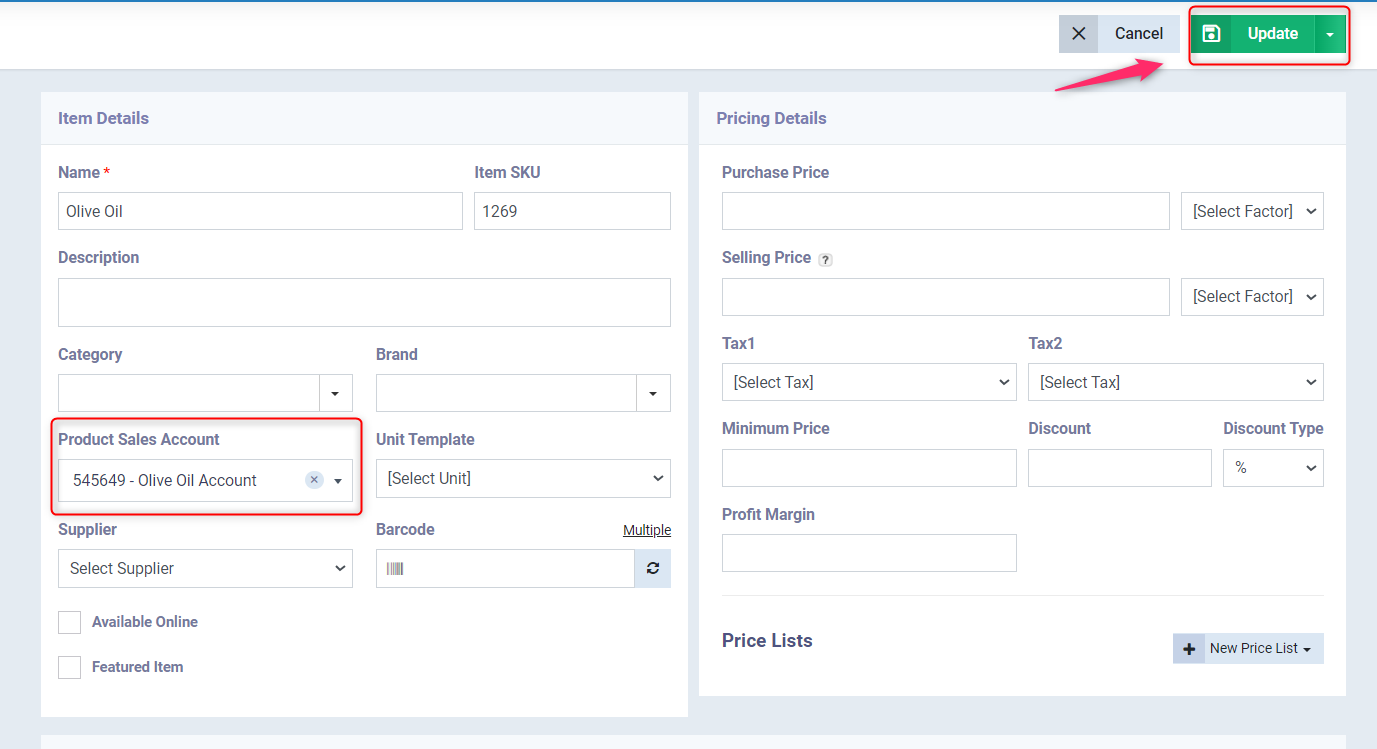
Example: Click on the “Product Sales Account” field within the product/service file

Search for the name/code of the account you wish to assign and then select it from the dropdown list
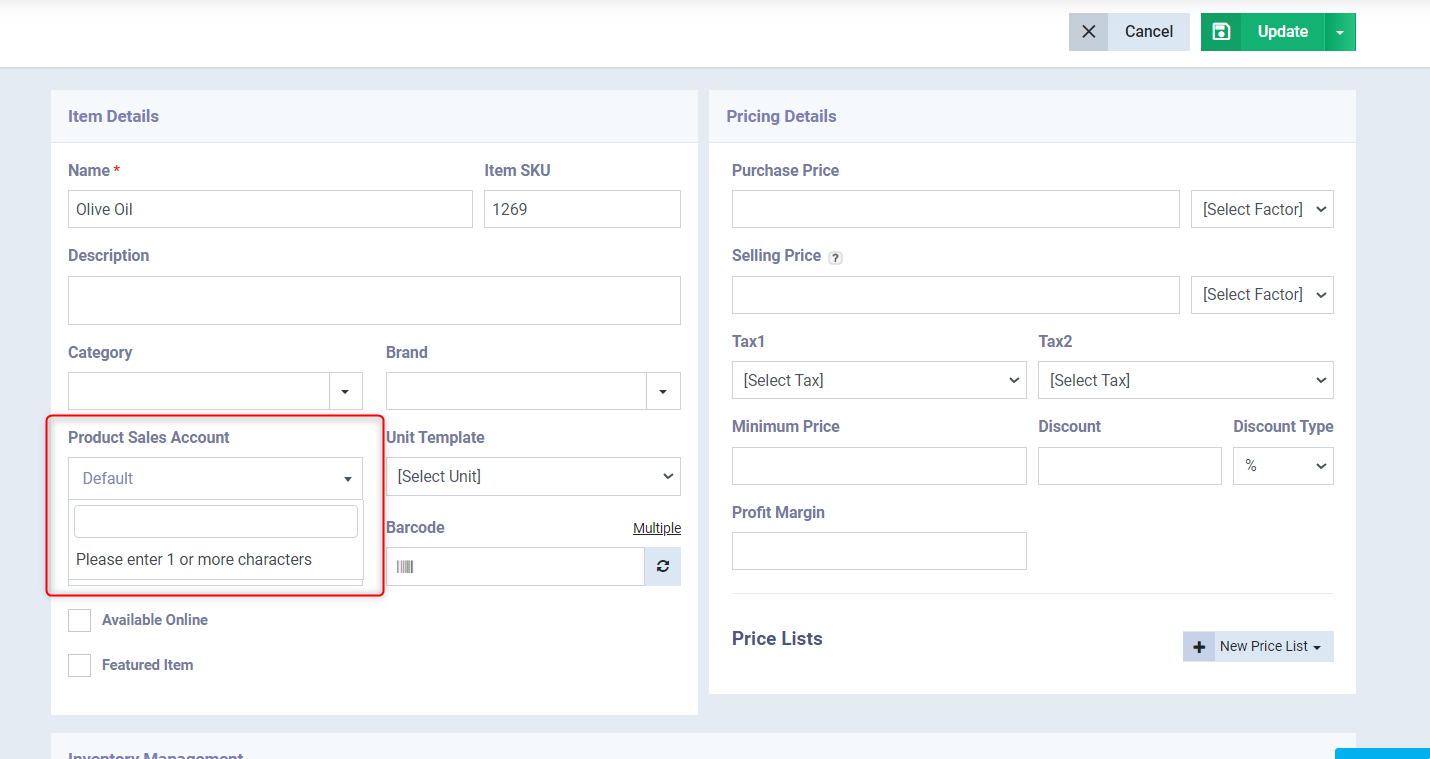
After selecting the account, click the “Update” button for the product to be affected by the added modifications