Adding a QR Code to Each Product
If you want to include the QR code of one or all products in the invoice, you can do so by adding the feature to display the QR image of the products in the desired invoice template. Then, include the QR code image for each product in its respective file. This is useful in many cases, such as facilitating the salesperson’s access to the product through the invoice. We will review the steps in this guide.
Adding the Product QR Code to the Invoice Layout
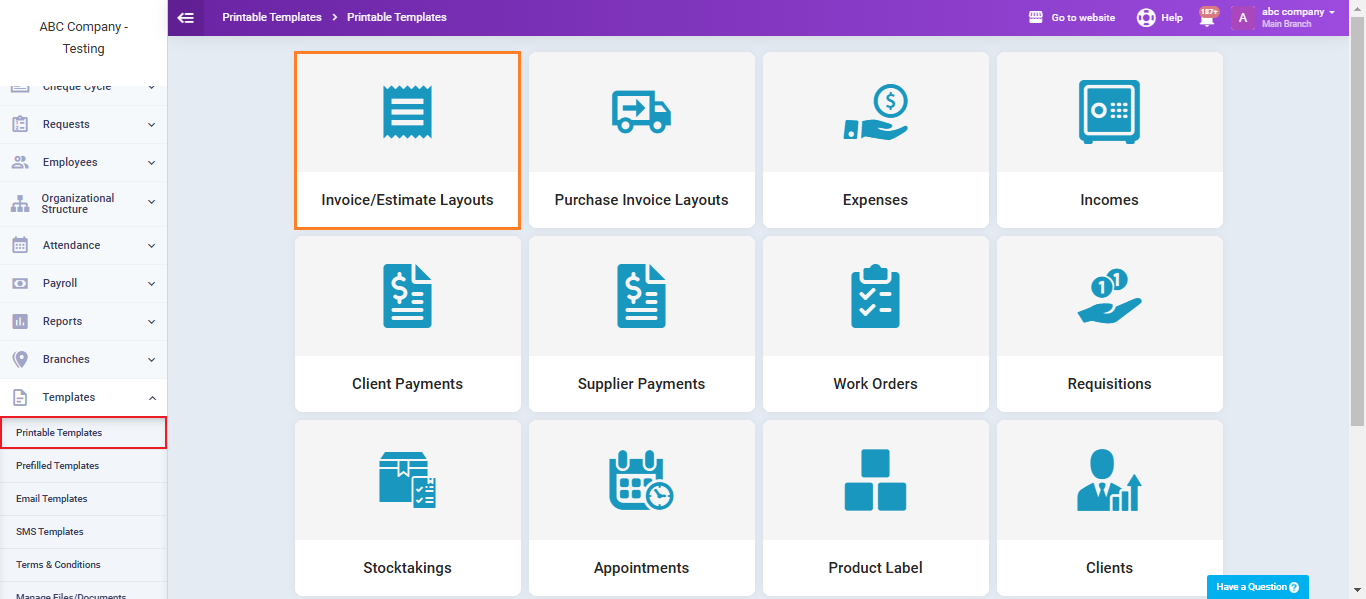
Click on ‘Printable Templates‘ under ‘Templates‘ in the main menu, then click on ‘Invoice/Estimates Layouts.’
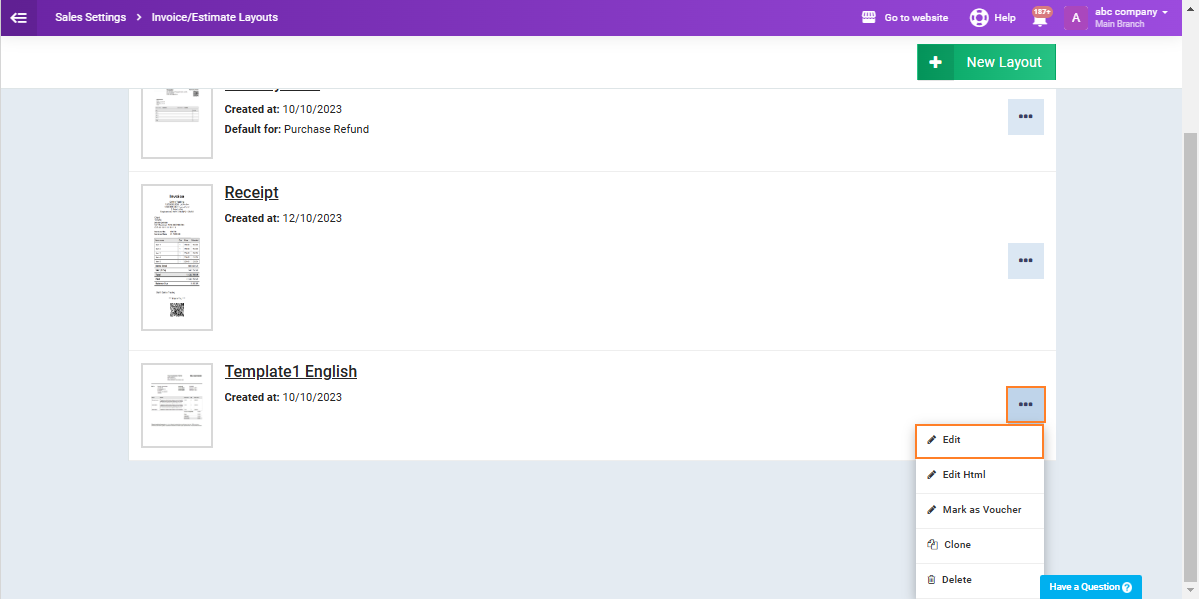
Click on the three dots next to the layout you want to add the QR Code to, then click on ‘Edit‘ from the dropdown menu.
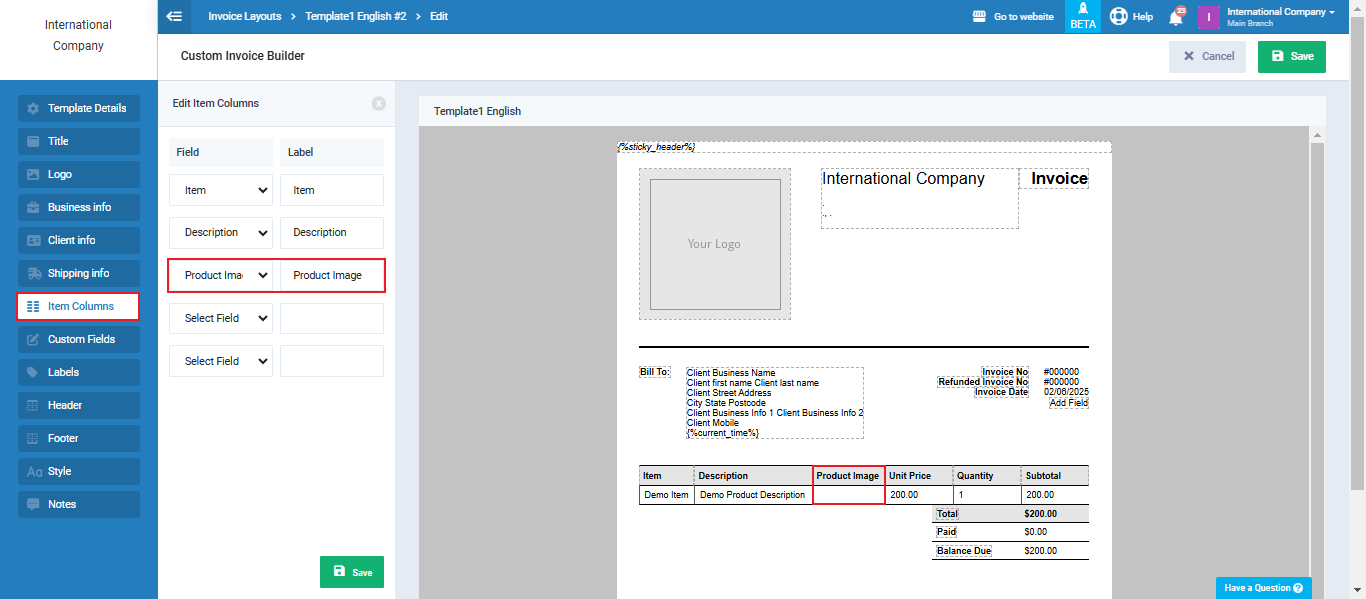
Click on ‘Item Columns‘ in the sidebar, then click on ‘Select Field‘ and choose ‘Product Image‘ from the dropdown menu. Then, click the ‘Save‘ button.
Adding the QR Code to the Product File
After saving the product QR image you wish to display in the invoice, you need to add the code image to the product file by following these steps:
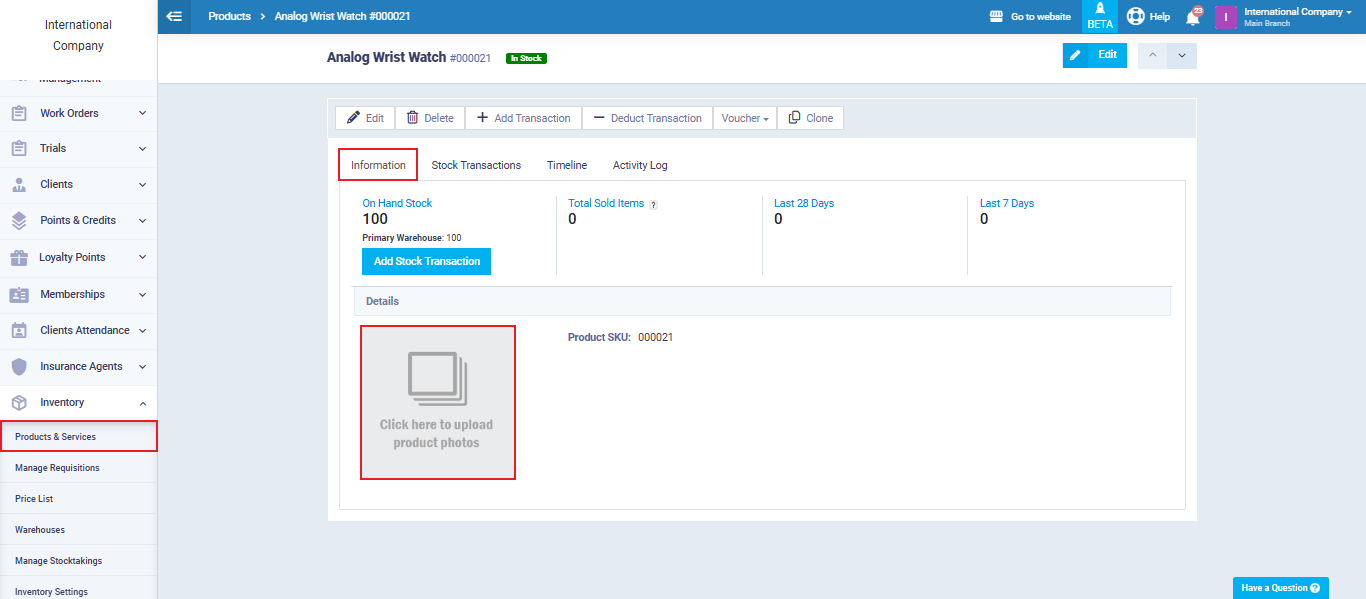
Click on ‘Products & Services‘ under ‘Inventory‘ in the main menu, then click on the desired product. In the ‘Information‘ tab of the product file, click on ‘Click here to upload product photos‘ to upload the product QR code from your device.
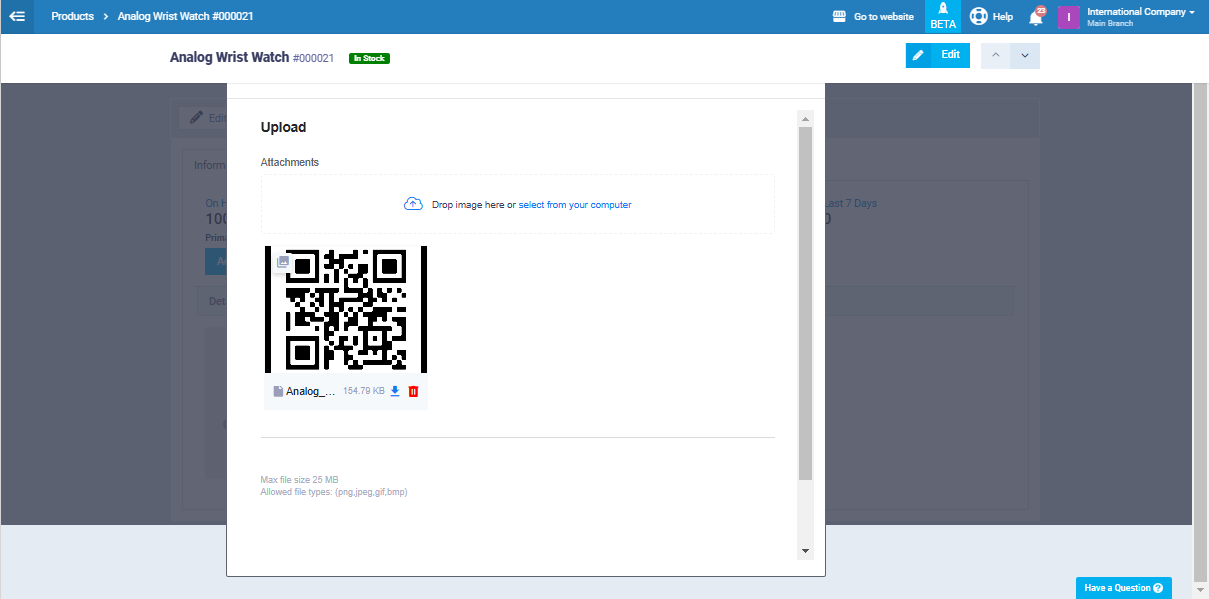
Click on ‘Drop image here or select from your computer‘ and select the QR code image for this product. Once the image appears, it will be saved within the product information.
Printing the Invoice Including the Product QR Code
To create a new invoice including product QR code, click on ‘Create Invoice‘ under ‘Sales‘ in the main menu and make sure to select the invoice template we modified to display the product QR code image. This can be done from the dropdown list under the ‘Invoice Layout‘ field.
Then, enter the invoice details and products, and click the ‘Save‘ button.
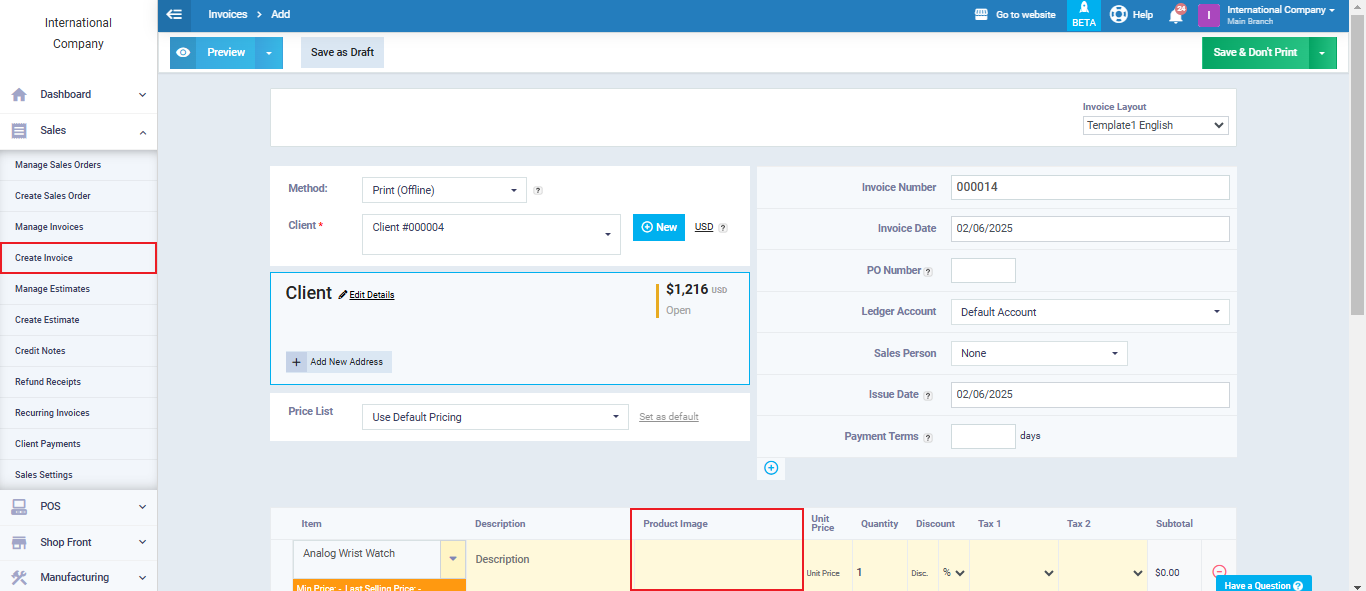
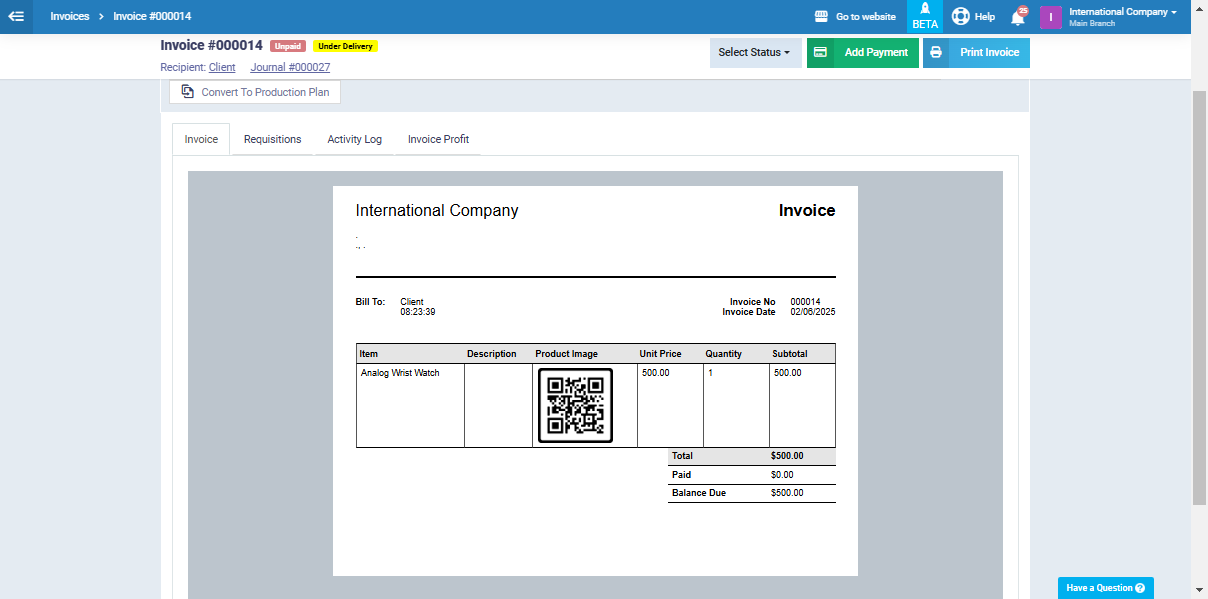
You will find the product QR code displayed within the product fields in the invoice after saving, as shown in the following image.
