


The Full Payable Cheque Cycle: From Cheque Book to Collection
A payable cheque is a cheque your business issues from its bank account to a supplier or any other payee. The system tracks it from issue until the bank pays it, and creates the right journal entry at each stage automatically. This tutorial walks through the full payable cheque cycle with a practical example: adding a cheque book, issuing a cheque to a supplier, delivering it, and then collecting it, with the journal entries at each stage.
Before you start
- Activate the Cheque Cycle app from Apps Manager.
- Have an active bank account of type Bank in Treasuries & Bank Accounts.
- Have the Add Cheque Book permission, which lets you issue cheques and change their statuses.
- Have the supplier’s account in the chart of accounts, because the cheque is recorded against it.
Add a cheque book
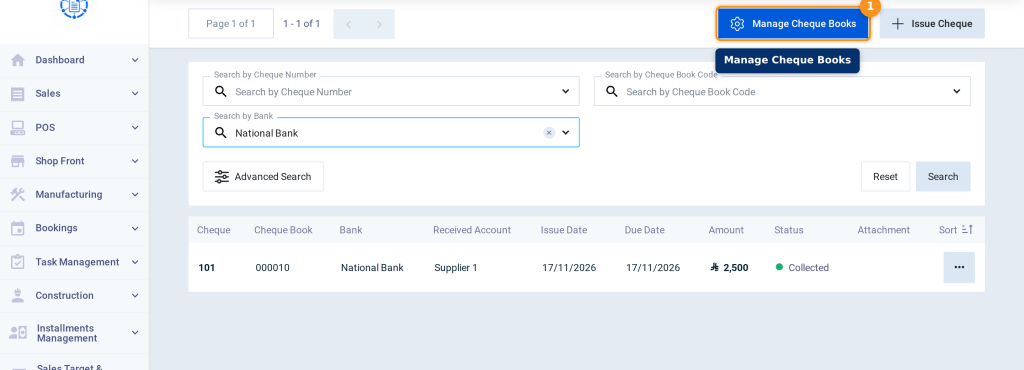
- Go to Cheque Cycle, then click Payable Cheques.
- Click Manage Cheque Books.
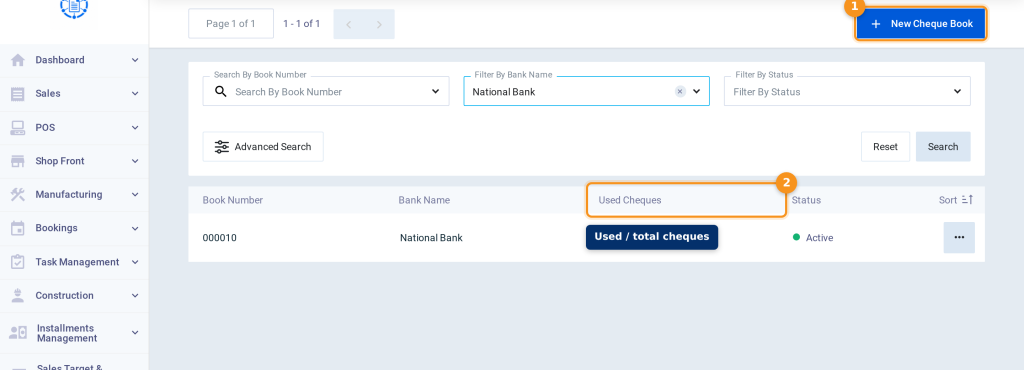
- Click New Cheque Book. Each cheque book in the list shows the number of Used Cheques out of its total cheques.
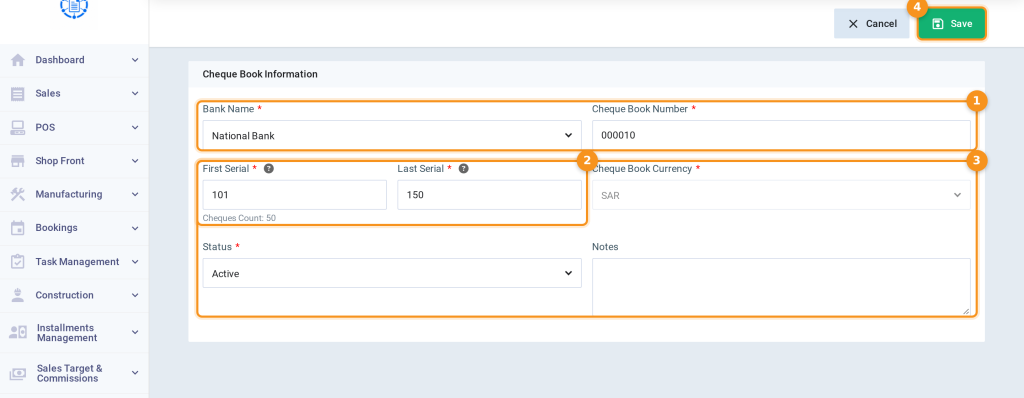
- Enter the Bank Name, Cheque Book Number, First Serial, and Last Serial as in the paper cheque book; the number of cheques appears automatically.
- Review the Cheque Book Currency and Status, then click Save.
Issue the cheque
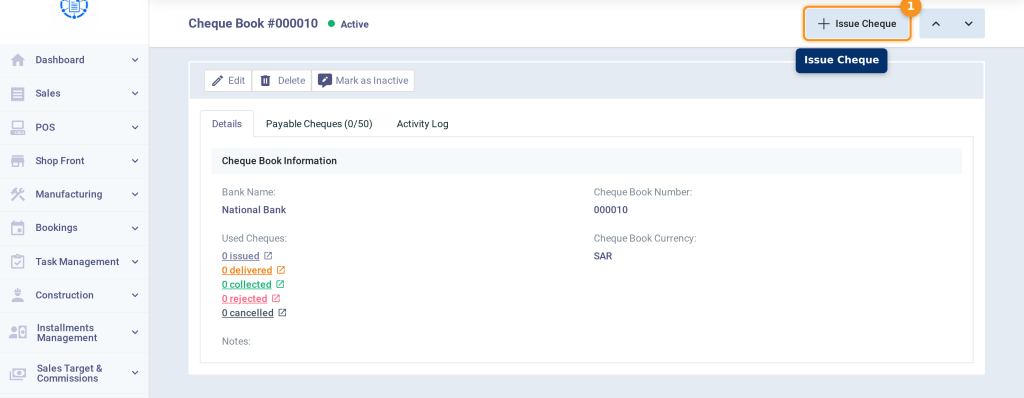
- Open the cheque book and click Issue Cheque; the cheque book, bank, and first available cheque number are selected automatically.
- Enter the Value, Description, Issue Date, and Due Date.
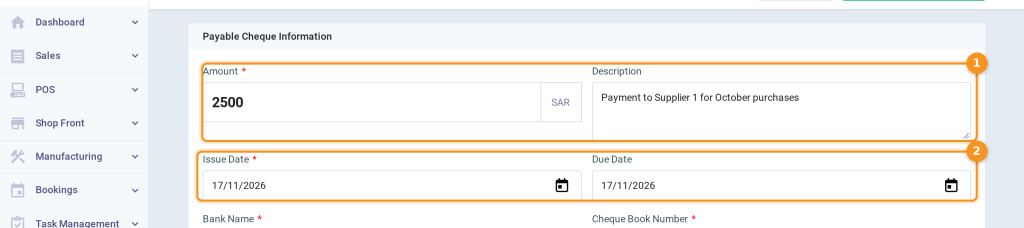
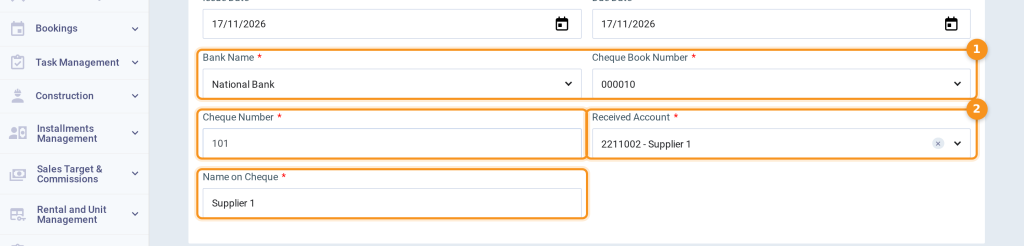
- Review the Bank Name, Cheque Book Number, and Cheque Number, select the supplier’s account in Received Account, and enter the Name on Cheque.
- To save without delivering, click the arrow next to Issue and Deliver and select Issue. If you have already delivered the cheque to the supplier, click Issue and Deliver directly.

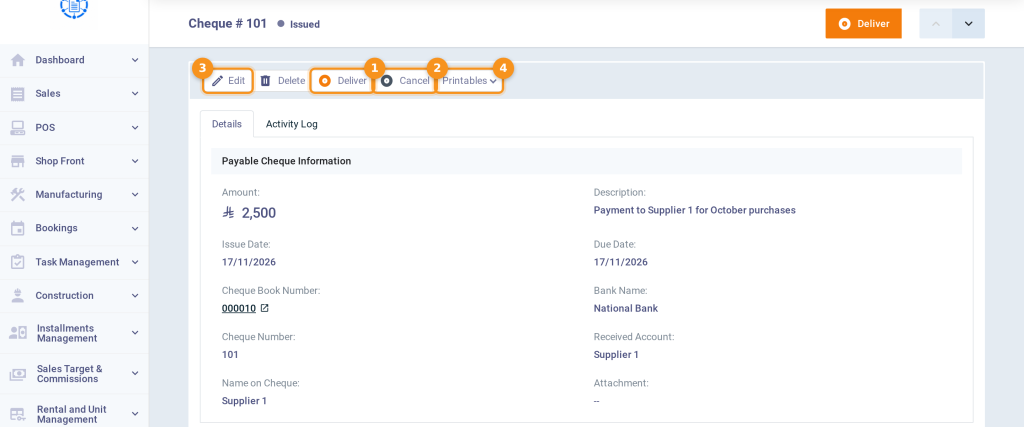
- From the cheque page, you can Deliver the cheque, Cancel it before delivery, Edit its data, or print it from Printables.
Deliver the cheque
- When you deliver the cheque to the supplier, open the cheque and click Deliver.
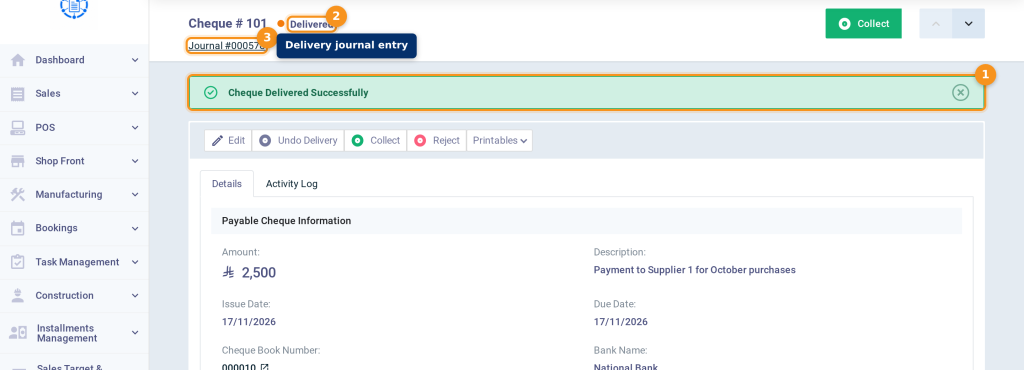
- The Cheque Delivered Successfully message appears, the status becomes Delivered, and the entry link appears under the cheque number.
Collect the cheque
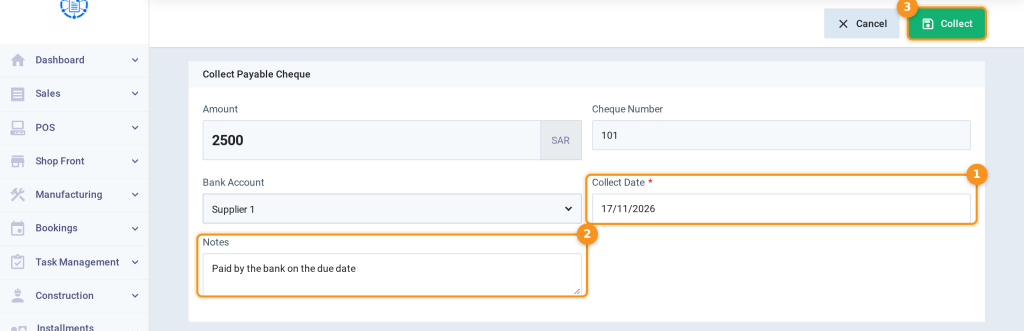
- When the bank pays the cheque, open the cheque and click Collect.
- Enter the Collect Date and Notes, then click Collect to save.
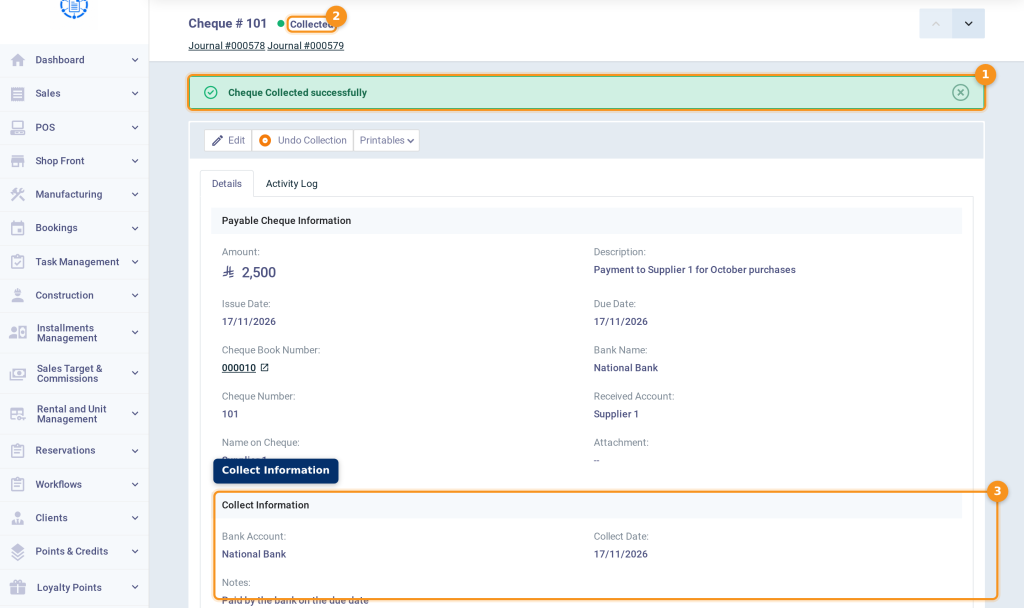
- The Cheque Collected successfully message appears, the status becomes Collected, and the Collect Information section appears with the collection entry link.
Journal entries in the cheque cycle
| Status | Debit | Credit | Effect |
|---|---|---|---|
| Issued | — | — | No entry. |
| Delivered | Received Account (the supplier) | Payable Notes | The supplier balance decreases. |
| Collected | Payable Notes | Bank account | The bank balance decreases. |
| Rejected | Payable Notes | Received Account (the supplier) | The amount becomes due to the supplier again. |
| Cancelled | — | — | No entry. |
Rejecting the cheque and undoing actions
| Action | When to use it | Status after it |
|---|---|---|
| Reject | If the bank refused to pay the cheque (a bounced cheque). You enter the Rejection Date. | Rejected |
| Cancel | For a cheque that wasn’t delivered yet, such as a damaged cheque. | Cancelled |
| Undo Delivery | Delivered by mistake. | Issued |
| Undo Collection | Collected by mistake. | Delivered |
| Undo Rejection | Rejected by mistake. | Delivered |
| Undo Cancellation | Cancelled by mistake. | Issued |
Track cheques from the report
- Open the Payable Cheques List.
- Select the Status and Due From Date / Due To Date, then click Show Report.
- Print the report from Print, or export it from Export.
FAQs
Does issuing the cheque pay the purchase invoice?
No. The payable cheque isn’t linked to the purchase invoice, so its payment status doesn’t change, and the payment appears in the supplier’s statement. Don’t add a payment to the invoice for the same cheque, so the payment isn’t recorded twice.
When does the bank balance decrease?
Only when the cheque is collected.
When does the supplier balance decrease?
When the cheque is delivered, if you selected the supplier’s account in Received Account.
Can the cheque be collected before its due date?
No. The collect date can’t be before the due date.
The cheque bounced. What should I do?
Open the cheque and click Reject, and enter the rejection date; the amount becomes due to the supplier again.
Can the cheque be deleted after delivery?
No. A cheque can be deleted only while it is Issued. Undo the delivery first, or use Cancel.