Closing the Financial Year for Multi Branches
Daftra lets you close the financial year for all of your account’s branches in a single action, instead of repeating the closing process for each branch separately. You can exclude specific branches and define how to handle branches that fail validation before closing. This guide explains the steps for closing the financial year across the entire account, and the behavior of each stage of the wizard.
Permissisons
- Using this feature requires the “Manage Closed Periods” permission.
- Users can only close the branches they have access to. The branch list in the first step of the wizard shows only the branches available under their permissions.
- If a user has access to only some of the branches, they can still use the wizard to close those branches, and an alert message appears:
“You are closing a subset of branches according to your permissions. There are [N] branches in this account that are not visible to you.”
Feature Scope
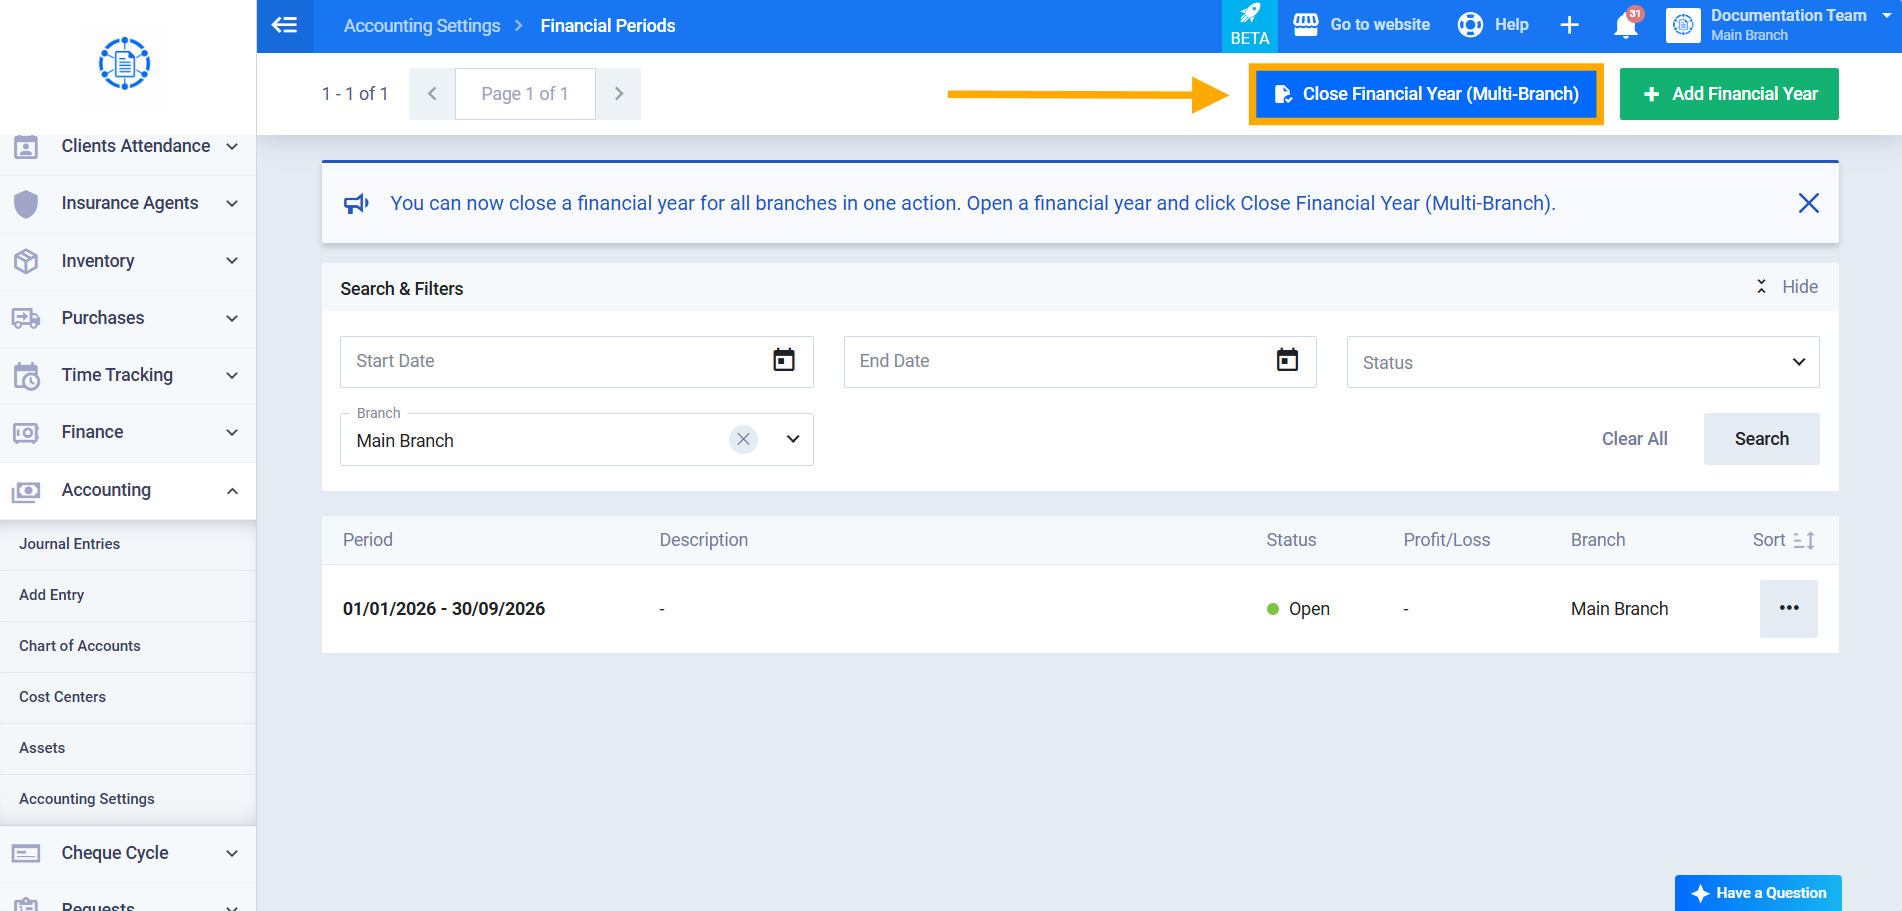
- A new action button titled “Close Financial Year (Multi-Branch).” appears on the Financial Years list screen.
- This feature does not change the existing closing logic for each individual branch. The three journal entries created for each branch remain unchanged.
How to Access the Screen
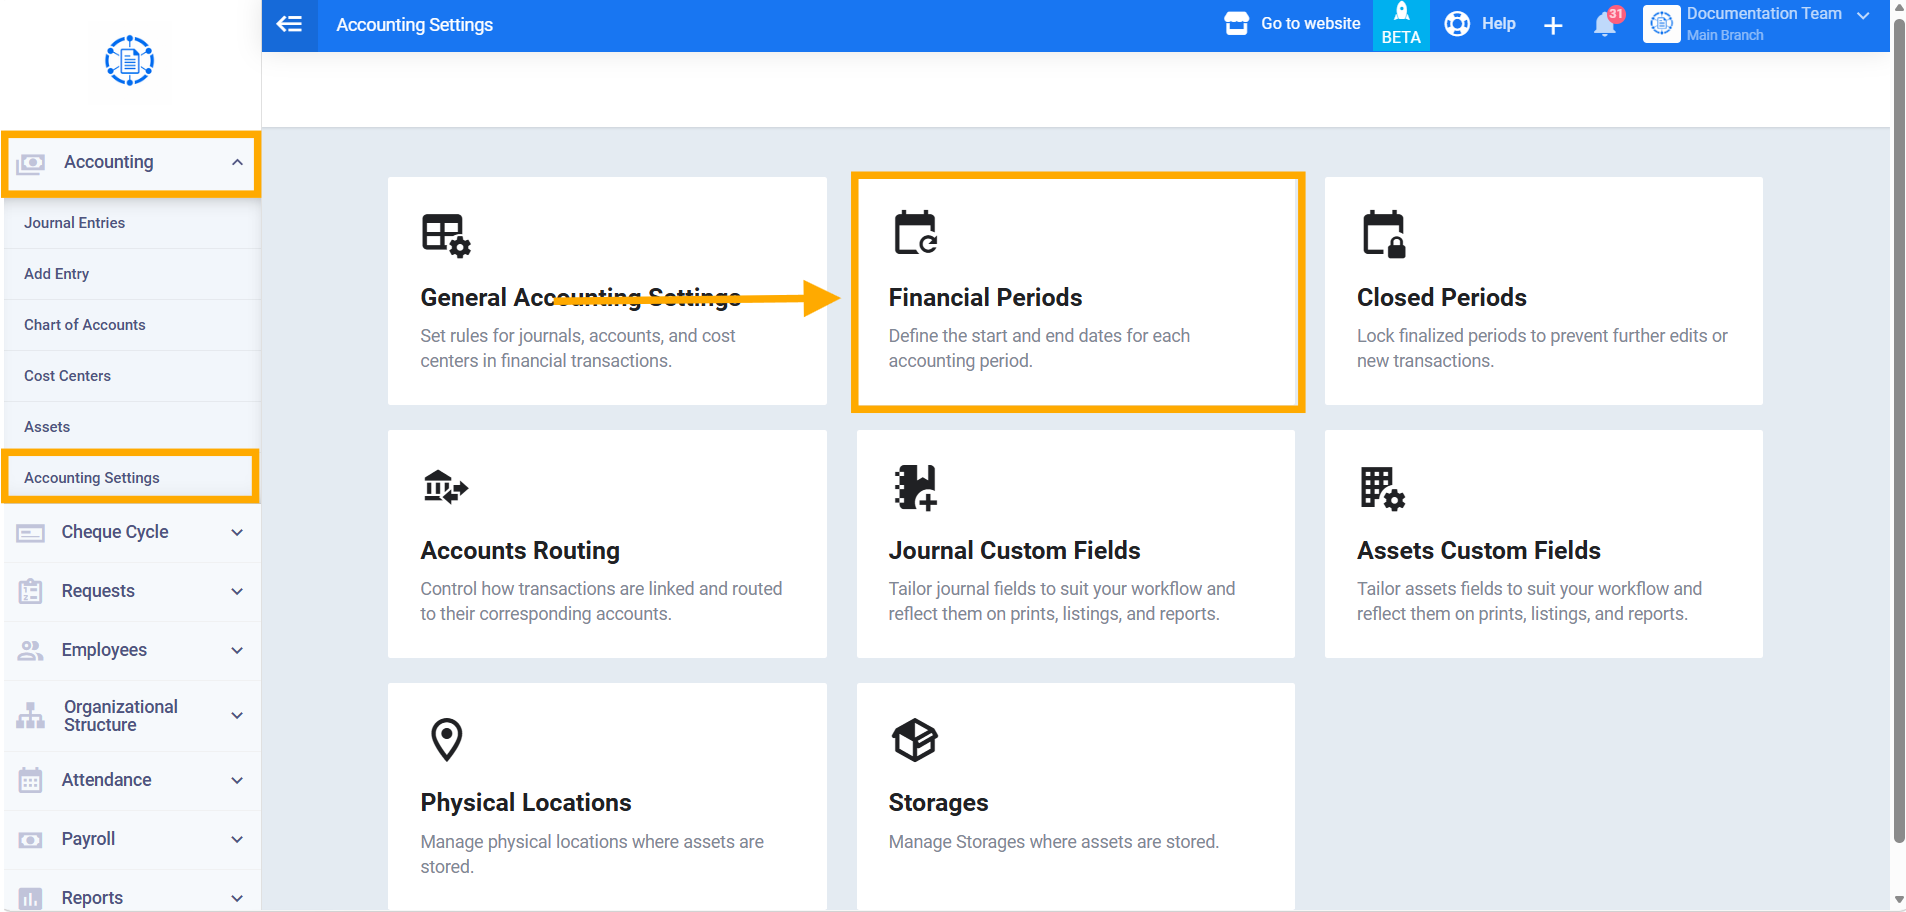
- From the main menu, click “Accounting”.
- Then click “Accounting Settings”.
- Choose “Financial Periods”.
- Click the “Close Financial Year (Multi-Branch)” button next to the financial year you want to close.
Step 1: Select Branches
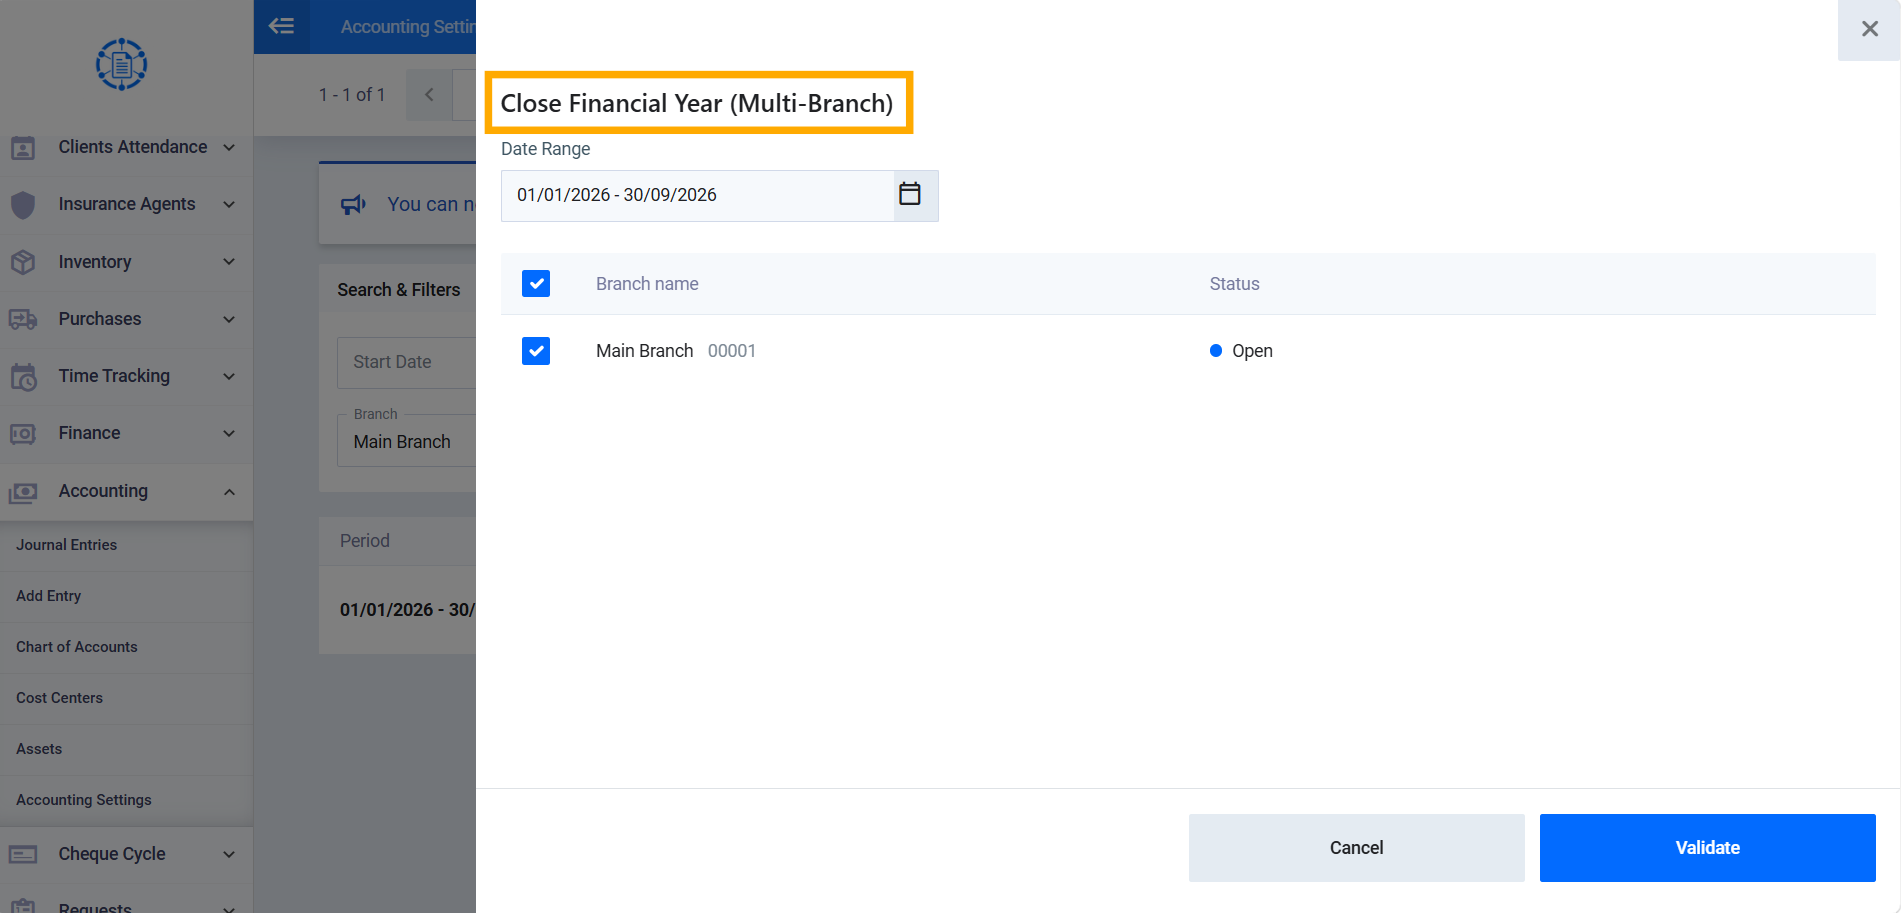
- This step displays the financial year’s From/To period as a single date range.
- The branch list shows two main columns, “Branch Name” and “Status”, along with a checkbox for each row.
- Each branch’s status appears as one of two options:
- “Open” (blue badge): The branch can be selected and is eligible for closing in this action.
- “Pending” (green badge): The branch’s checkbox is disabled and it cannot be selected in this batch.
- All eligible branches (with the status “Open”) are preselected by default.
- You can deselect any branch to exclude it from the closing.
- The “Select All” and “Deselect All” options are available above the list.
- You must select at least one branch to continue to the next step.
Step 2: Pre-Closing Validation and Choosing the Failure-Handling Mode
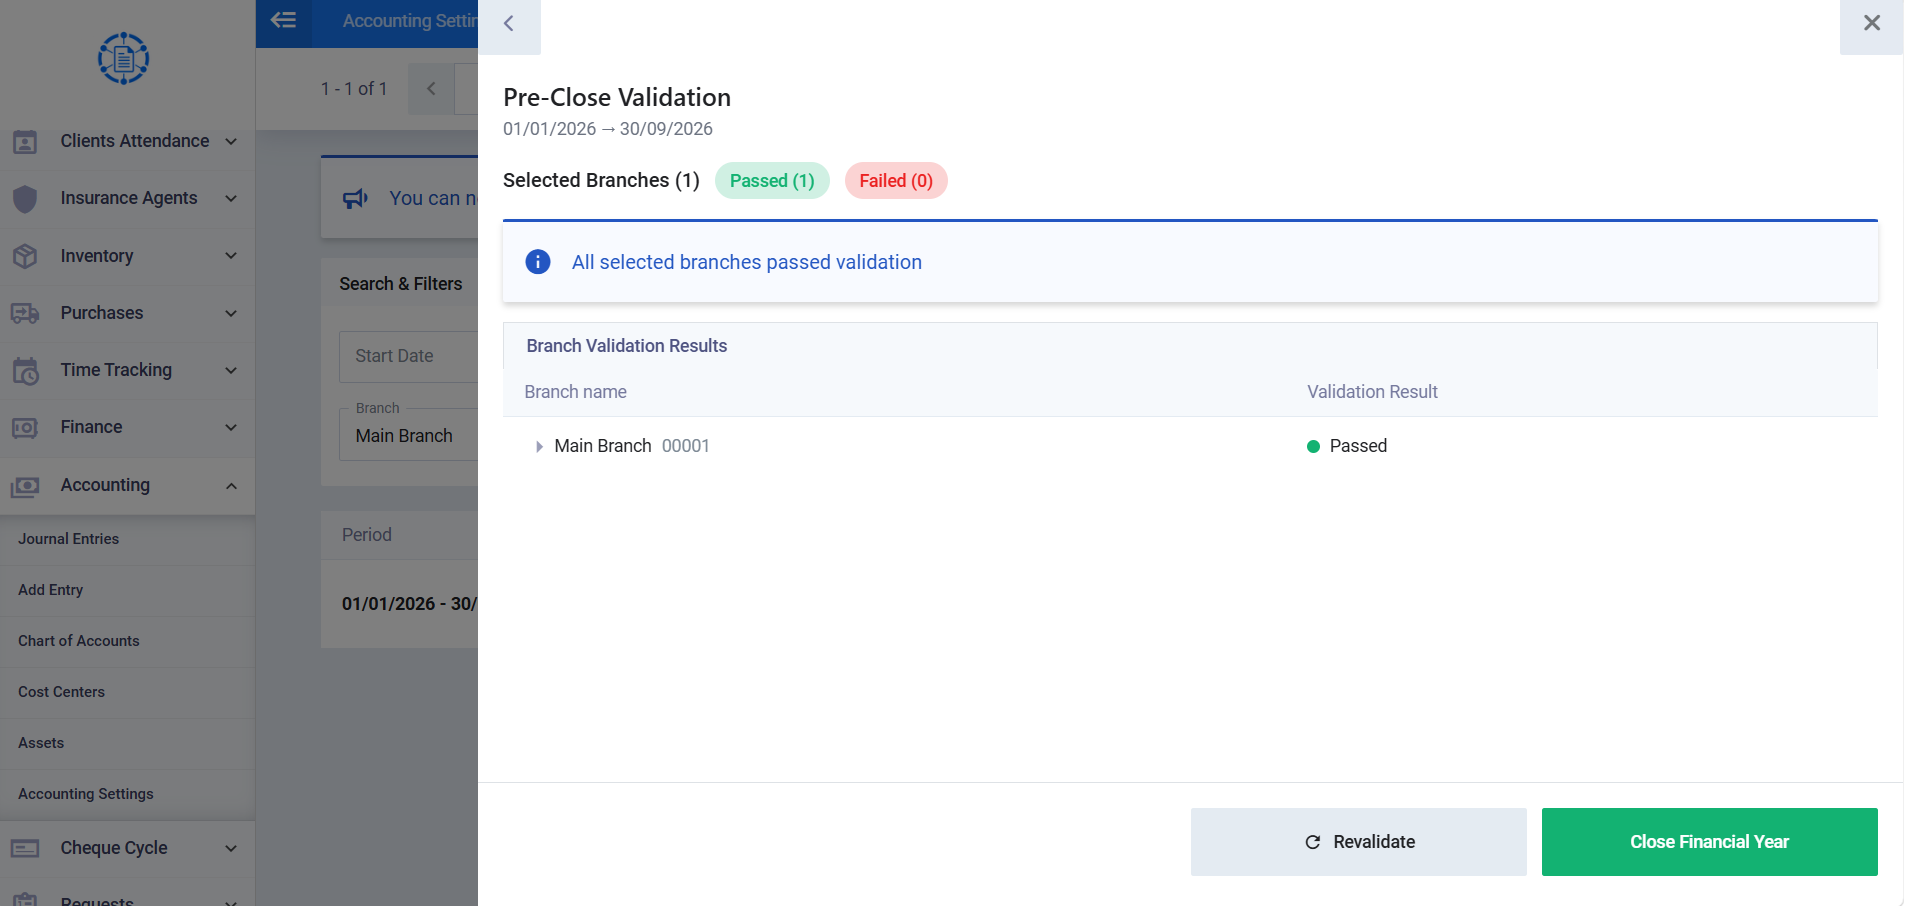
- The screen title “Pre-Close Validation” appears, with the financial year’s date range directly below it.
- The screen shows three summary cards:
- “Selected Branches”: The total number of branches selected in the previous step.
- “Passed”: The number of branches that passed validation.
- “Failed”: The number of branches that failed validation.
- If all selected branches pass validation, an informational message appears with an (ⓘ) icon: “All selected branches passed validation.”
- The “Branch Validation Results” table shows the following for each branch:
- “Branch Name”.
- “Validation Result”: Appears with a green “Passed” badge for branches that passed, or a red “Failed” badge with the failure reasons for branches that did not.
- Failure reasons are clickable where possible. Clicking one opens the relevant document or list, filtered to the affected branch, in a new tab.
Two buttons appear at the bottom of the screen:
- “Close Financial Year” (the primary button, in green): Continue to the confirmation and execution steps.
- “Re-validate” (with a refresh icon): Rerun the validations on the selected branches, if you made any change that removes the cause of failure.
Choosing the failure-handling mode
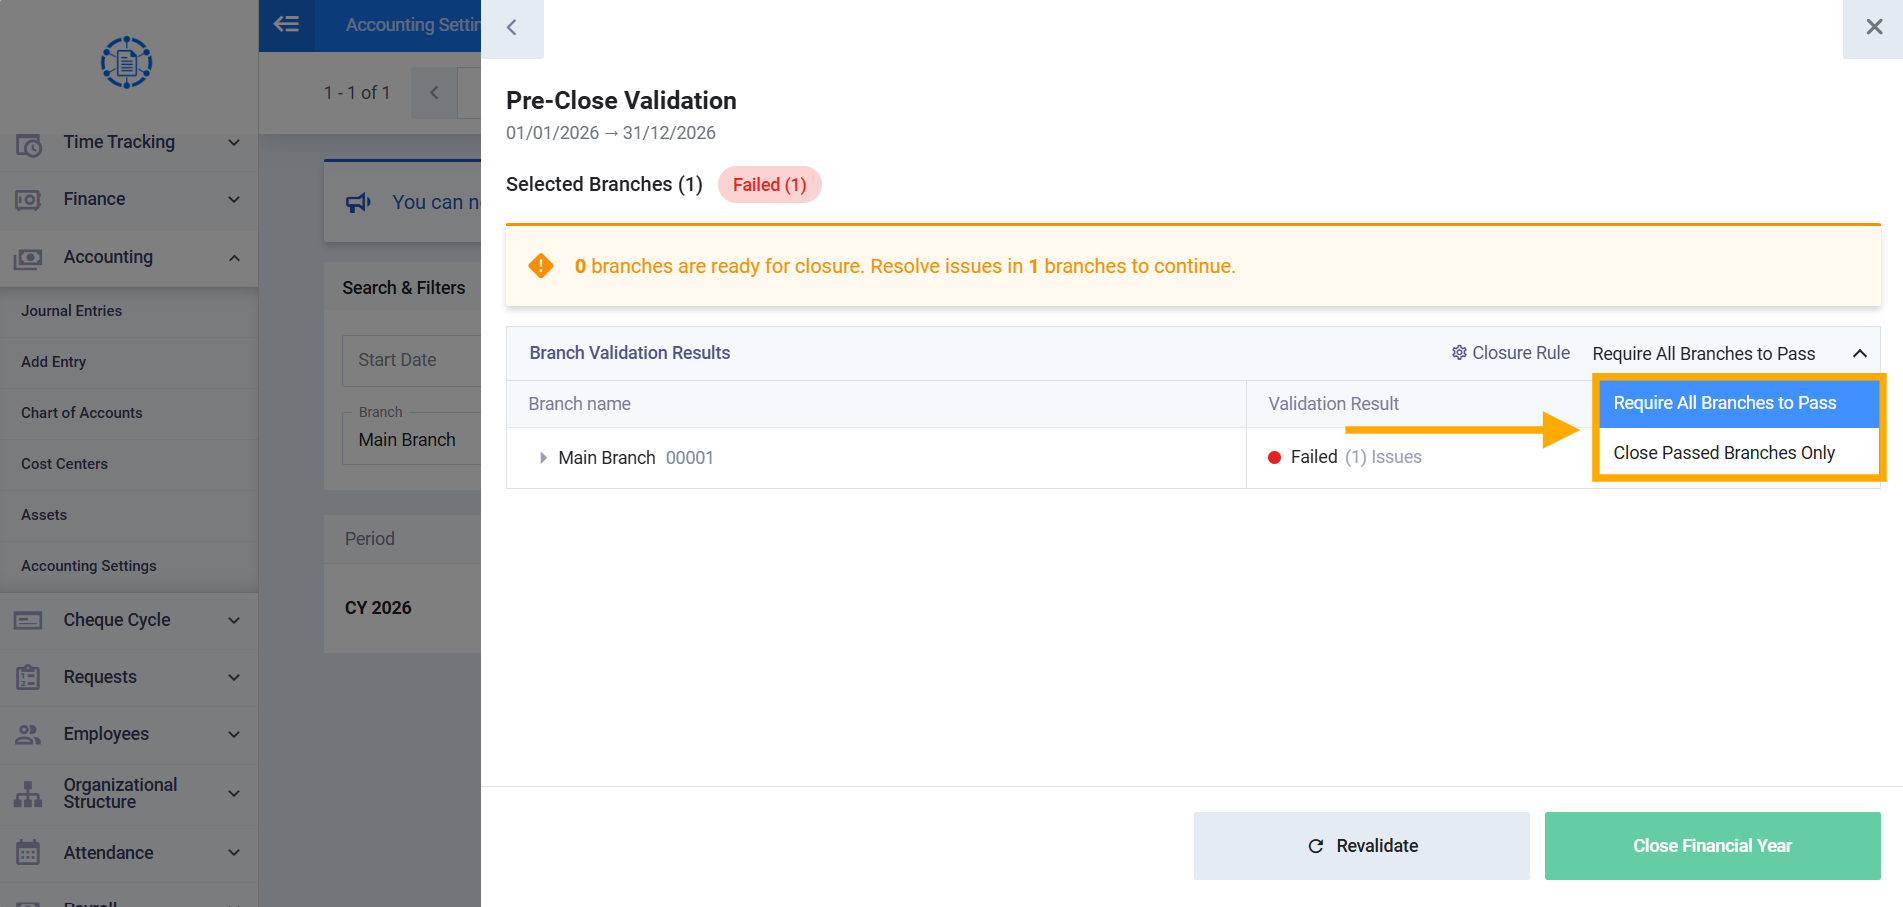
If at least one branch fails, you must choose one of the following options before continuing:
- “Require All Branches to Pass”: Requires all branches to pass validation. If any branch fails, none of the selected branches are closed.
- “Close Passed Branches Only”: Only the branches that passed validation are closed, and the failed branches are excluded. You can fix them and close them separately later.
Step 3: Confirm Closing and Add a New Financial Period
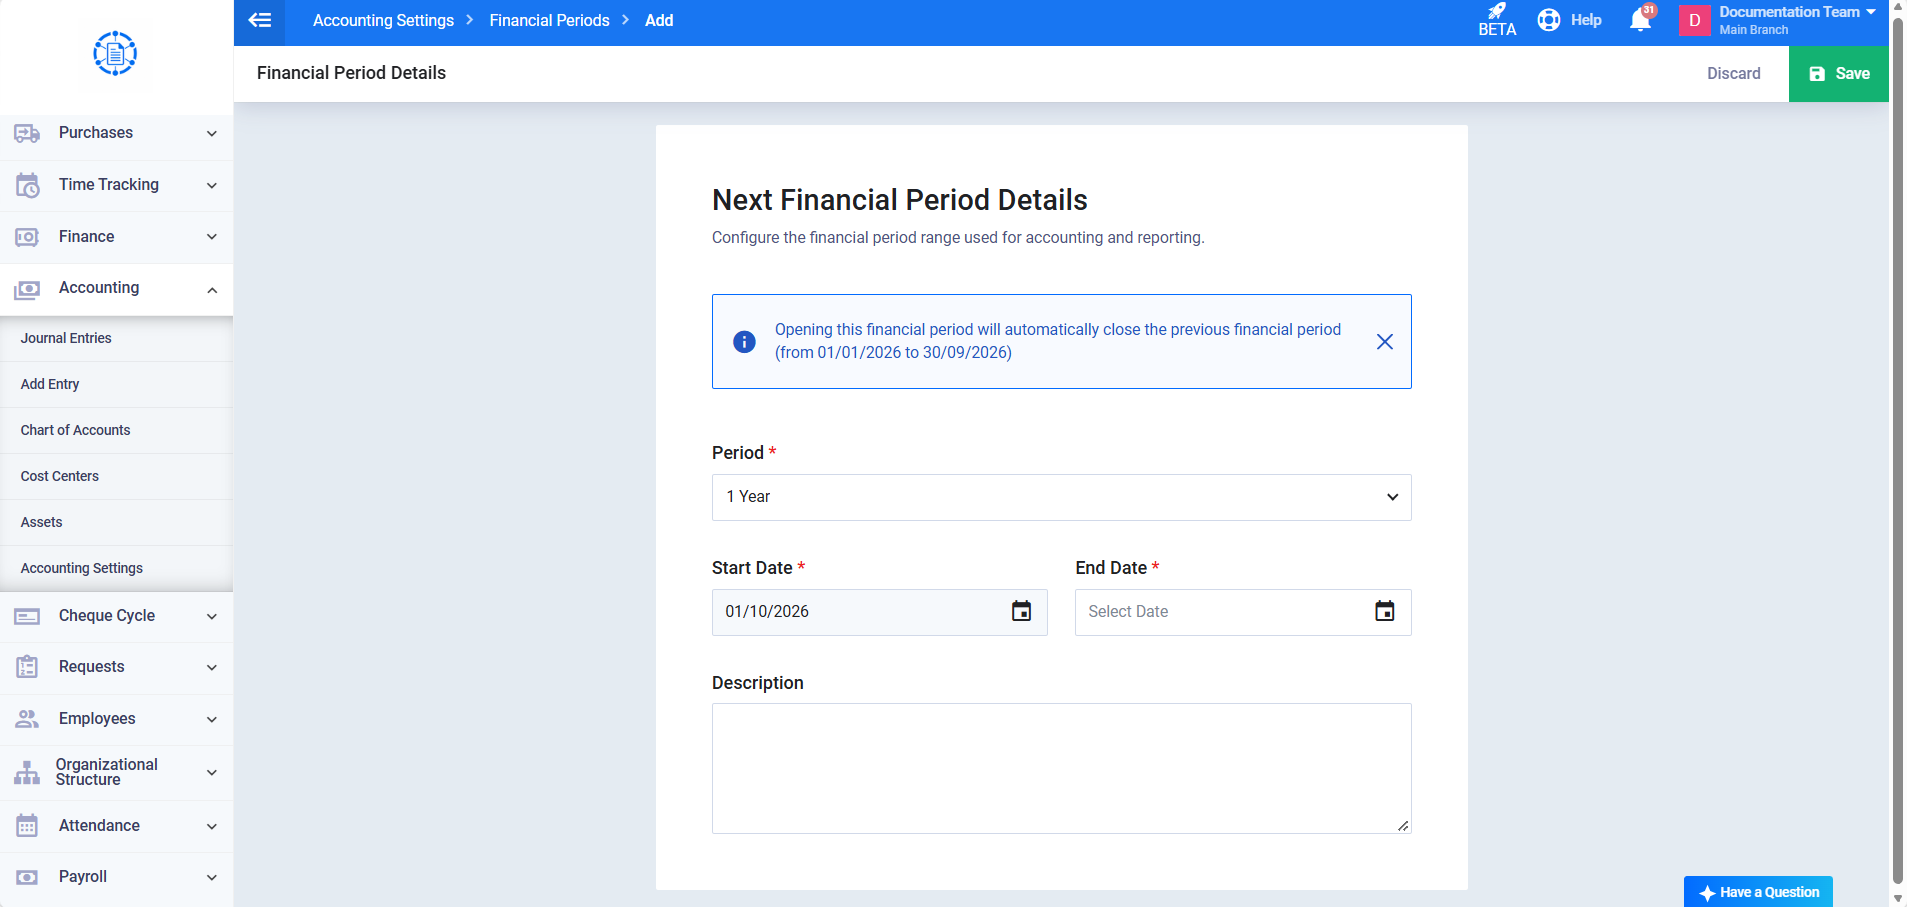
- After you click “Close Financial Year” to confirm, you will be redirected to the screen for adding a new financial period.
- Fill in the details, then click “Save”.