Comprehensive Assets Guide
Managing assets and related operations is crucial to ensuring accurate accounting reports and financial statements. It also helps in managing expenses spent on purchasing and depreciating assets in various ways, considering changes that might require re-evaluation or sale of the asset, as well as tracking different asset statuses.
Adding a New Asset
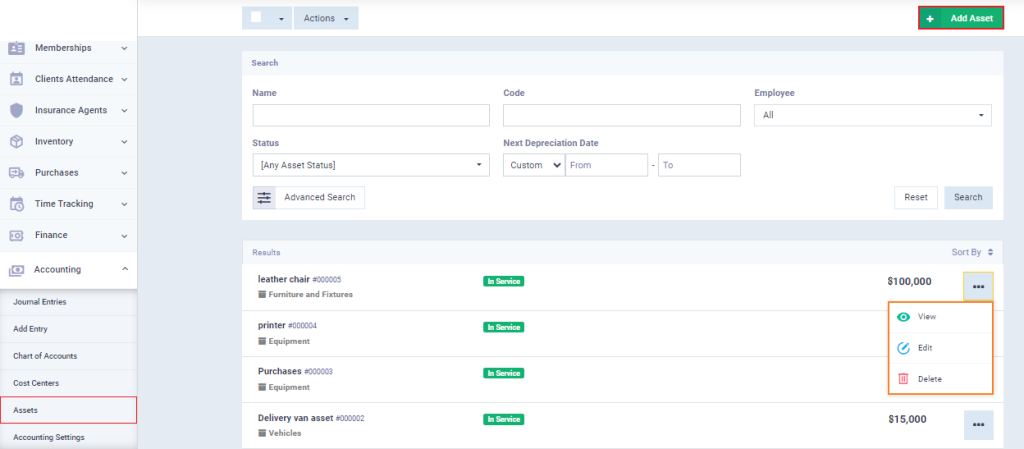
Through the assets menu, you can view the registered fixed assets and know the status of each asset, such as being in service or depreciated, and modify or delete these assets as needed.
To add a new asset, click on “Assets” under “Accounting” in the main menu, then click the “Add Asset” button.
Enter the required information
Add Asset Details:
- Name: The asset name as it appears in the chart of accounts and financial reports.
- Code: A unique identifier automatically generated by the system for each asset. You can edit it and customize its sequence as needed.
- In Service Date: Specify the date when the asset starts being used.
- Category Account: Choose from a list of main accounts that represent the nature of the asset.
- Physical Location : Enter the address or location of the asset. This is mainly used for non-movable assets such as land and real estate.
- Useful Life: The useful life of the asset depends on the depreciation period defined in the depreciation method settings.
- In Service Date: Specify the date when the asset starts being used, which is also the date from which depreciation begins.
- Serial Number: Enter the asset’s serial number if available.
- Barcode: You can generate a barcode for easier asset tracking.

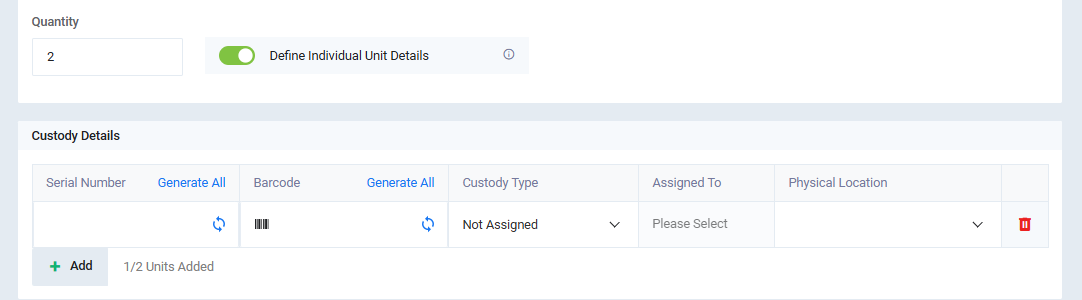
- Quantity: Specify the quantity of the asset purchased.
- Define Individual Unit Details: When enabled, the Custody Details section will appear to allow entering data for each unit separately. Follow these steps:
- Serial Number: Enter the serial number for each unit or click Generate All to auto-generate them.
- Barcode: Enter the barcode for each unit or click Generate to auto-generate barcodes.
- Custody Type: Select the custody type from the dropdown list (e.g., Employee, Department, or Location).
- Assign To: Specify the responsible person or entity after selecting the custody type.
- Physical Location: Select the actual location where the asset is stored or being used.
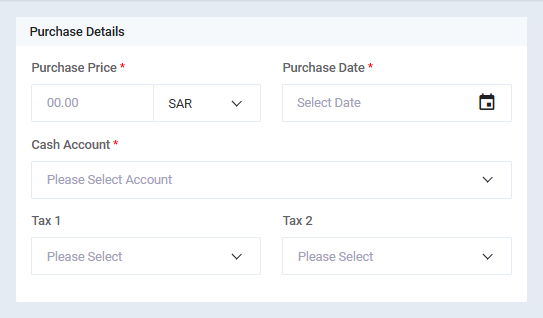
Add Pricing Details:
Purchase Price: The value of the asset at the time of purchase and the currency of the amount.
Cash Account: Specify the account representing the creditor from whom the asset was purchased.
Purchase Date: Specify the asset purchase date.
First and Second Tax: Add the applicable taxes on the asset to calculate their values automatically.
Depreciation of Assets and Their Types
Generally, an asset’s productive capacity decreases over its useful life until it is completely worn out. This necessitates distributing the cost of using the asset over its life as periodic expenses, making it easier to set aside the required amount for asset replacement after the end of its depreciation. This is the function of depreciation.
Depreciation of assets is accounted for in three methods, which you can apply on the system.
Depreciation Methods
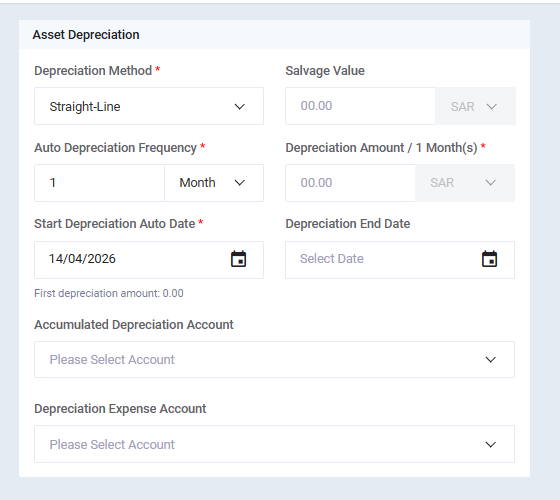
Straight-Line Depreciation
In straight-line depreciation, the value of the asset is distributed as a fixed amount evenly over the productive period.
Depreciation data using the straight-line method:
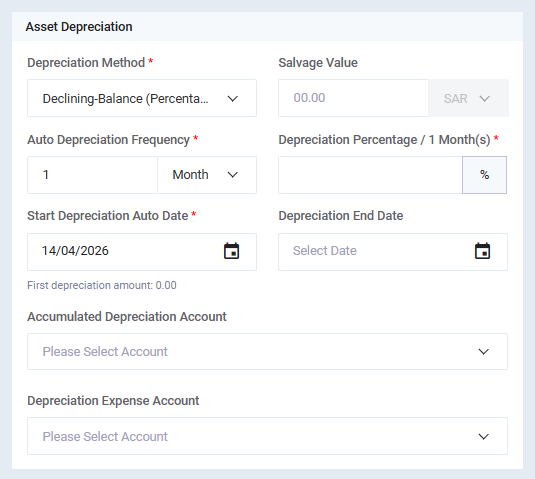
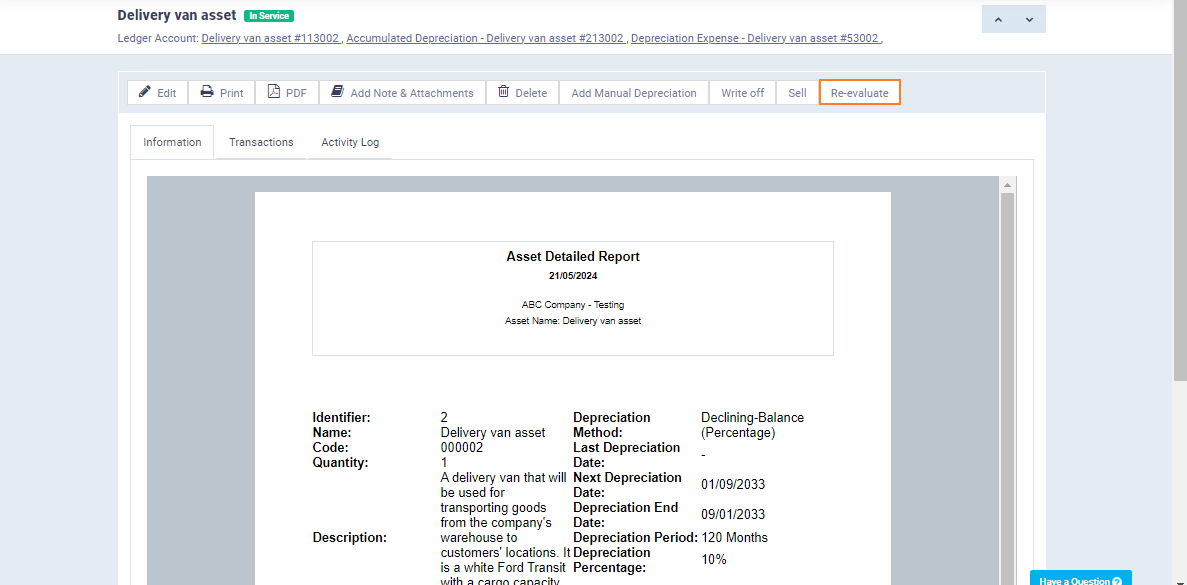
Declining Balance Depreciation (Percentage)
In declining balance depreciation, the depreciation amount is higher at the beginning of the asset’s useful life and gradually decreases over time as the productive efficiency decreases. The decreasing amount is adjusted by calculating a percentage rate.
Depreciation data using the declining balance method:
Salvage Value: Enter the estimated residual value of the asset at the end of its useful life.
Auto Depreciation Frequency: Specify how often depreciation will be calculated automatically (e.g., every 1 month).
Depreciation Percentage / 1 Month(s): Enter the depreciation rate (%) to be applied for each selected period.
Start Depreciation Auto Date: Select the date from which automatic depreciation will begin.
First Depreciation Amount: Displays the value of the first depreciation entry based on the selected date and percentage.
Depreciation End Date: Select the date when depreciation will stop.
Accumulated Depreciation Account: Choose the account where accumulated depreciation will be recorded.
Depreciation Expense Account: Select the account used to record depreciation expenses.
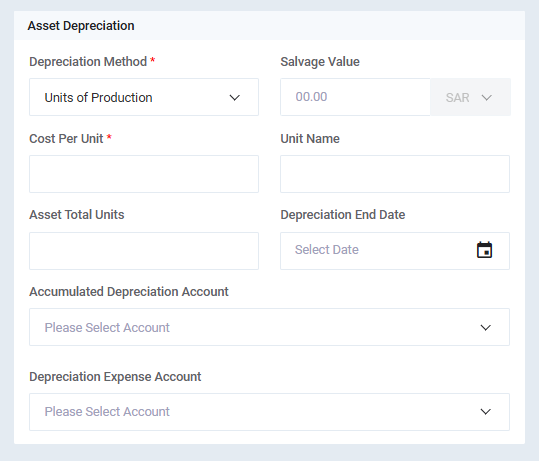
Units of Production
In this method, the depreciation value is calculated based on the asset’s usage rate. As the asset’s productivity and usage increase, the depreciation amount for the corresponding period also increases.
Depreciation data using the units of production method:
Depreciation, Sale, and Revaluation of Assets
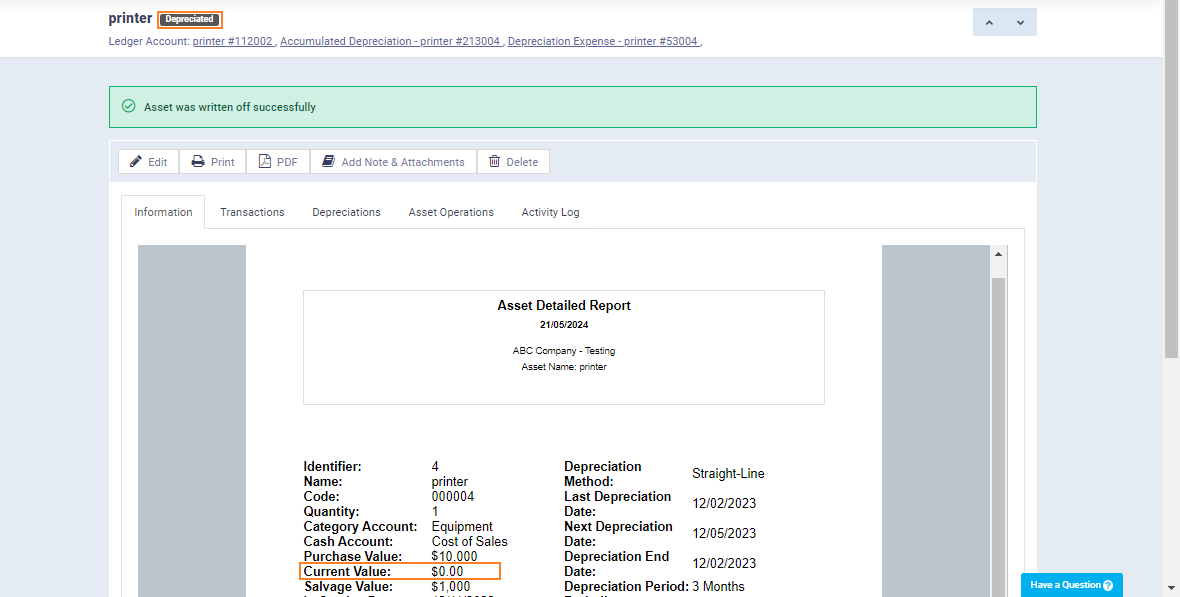
Asset Depreciation: Fully depreciating the asset and converting its current value to zero.
Click on “Assets” under “Accounting” in the main menu, then select the asset you want to fully depreciate (write-off), and click on the “Write-off” button.
Before write-off, note that the current value of the asset is 2000 and its status is “In Service“.
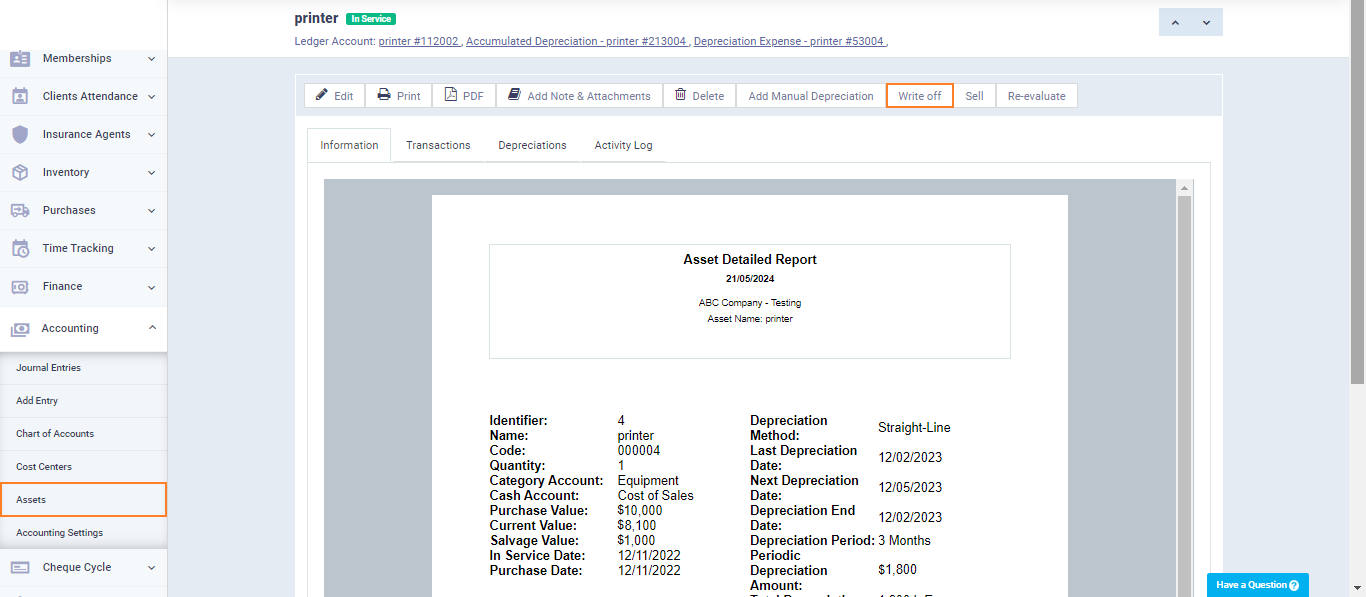
After writing off the asset, its status changes to “Depreciated” and its current value becomes zero.
You can sell the asset and document the sales transaction for accounting purposes, whether it results in a loss or profit.
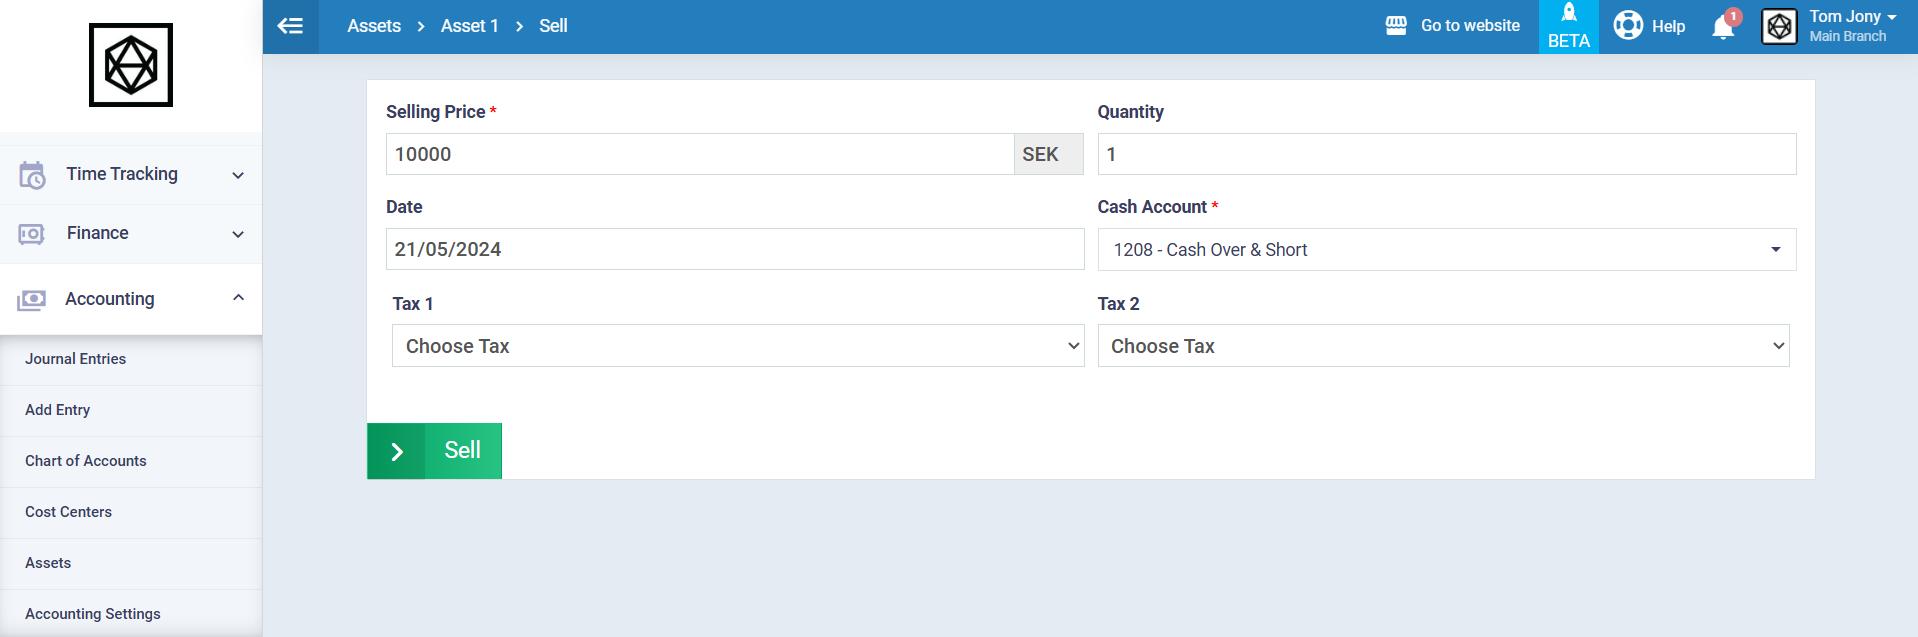
Click on “Assets” from the dropdown menu under “Accounting” in the main menu. Then, select the asset you want to sell and click on the “Sell” button.

Enter the required information for selling the asset:
Sales Price: Enter the selling price of the asset.
Date: Select the date of the sale transaction.
Tax: Enter any applicable taxes on the asset from the available taxes in your account.
Cash Account: Select the debit party to whom you sold the asset.
Then, click on the “Sell” button.
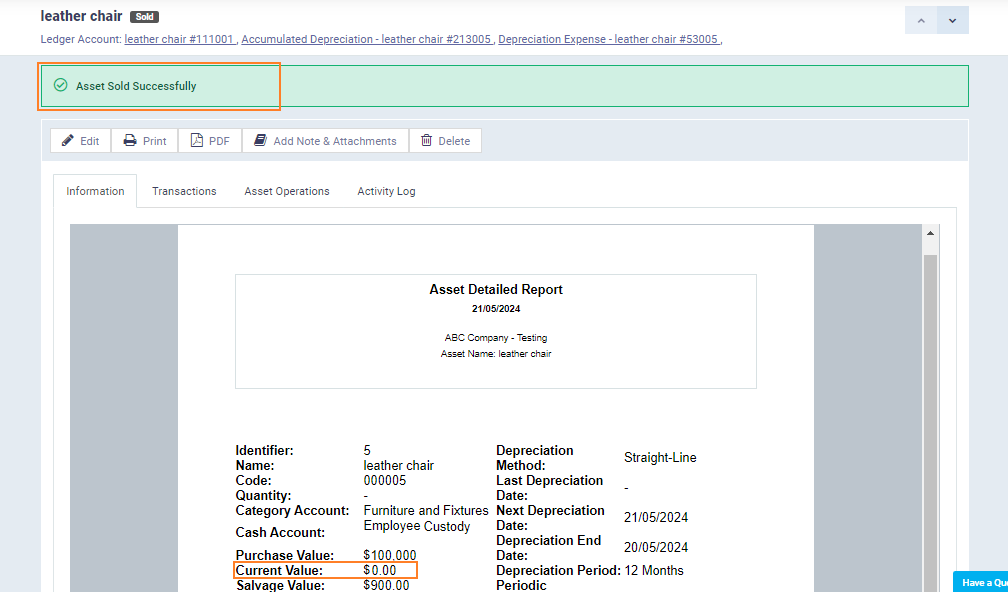
After Selling the asset the message “Asset Sold Successfully” will appear and its status will change to “Sold” and its current value will become zero.
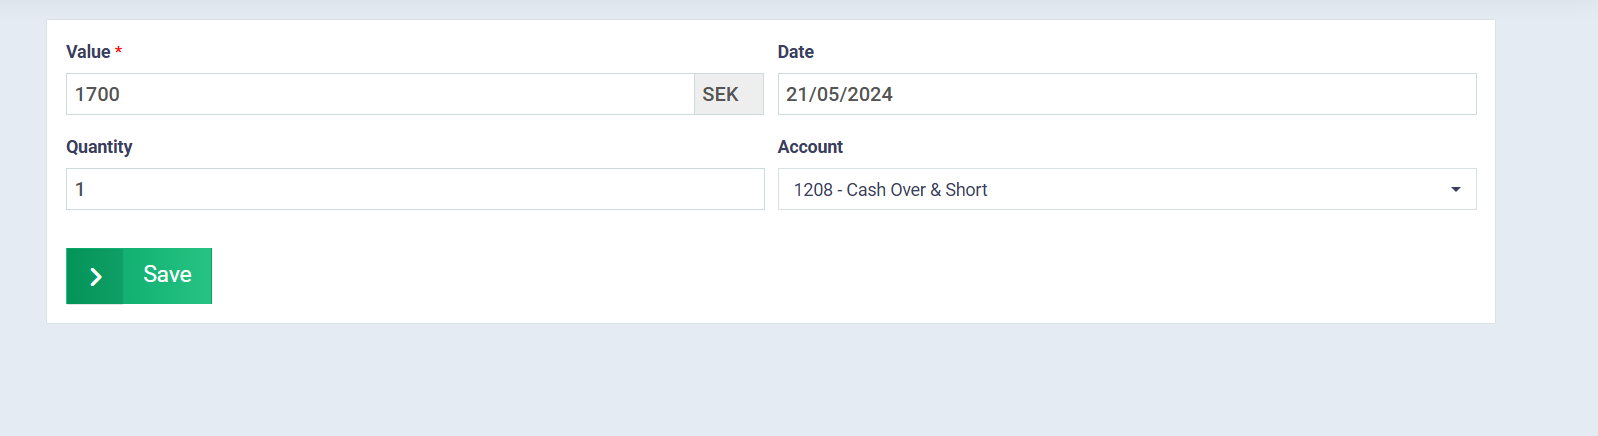
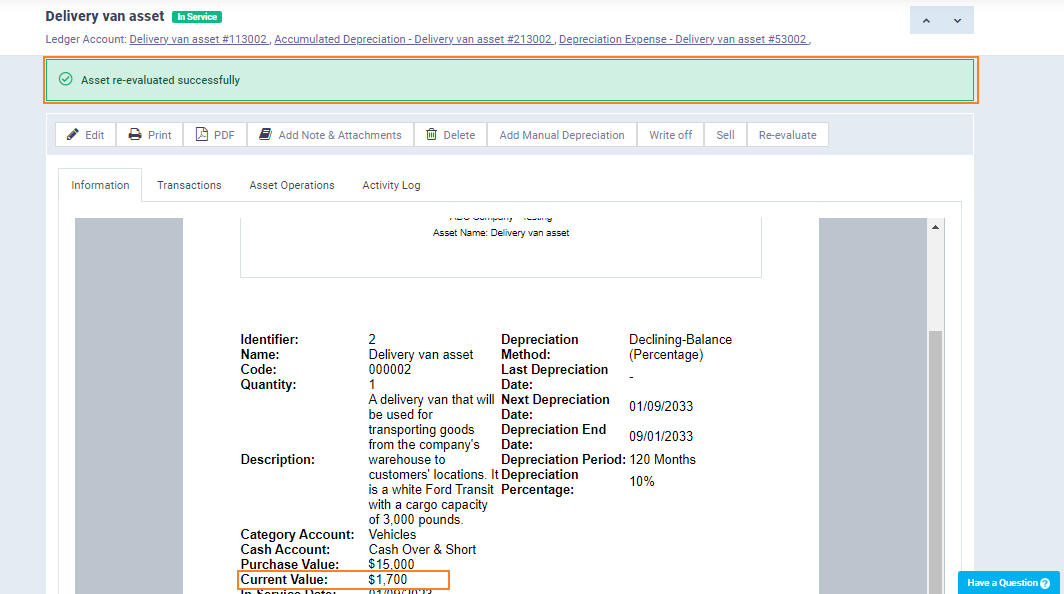
Asset Revaluation: You can revalue the asset and manually enter a new value, based on which subsequent depreciation will be calculated.
Click on “Assets” from the dropdown menu of “Accounting” in the main menu then select the desired asset and click on “Revaluate“.
Enter the new asset value and the revaluation date, then click the “Save” button.
After revaluation, you will see the message “Asset re-evaluated successfully.”
The current value of the asset will change to the new value, which in this example is now 1700.
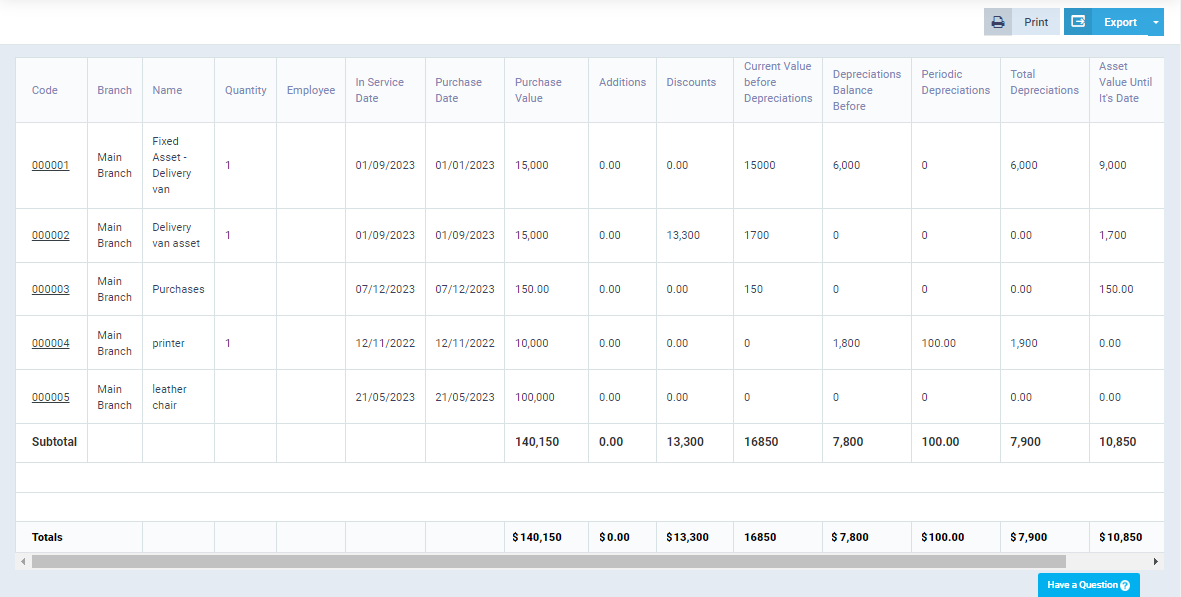
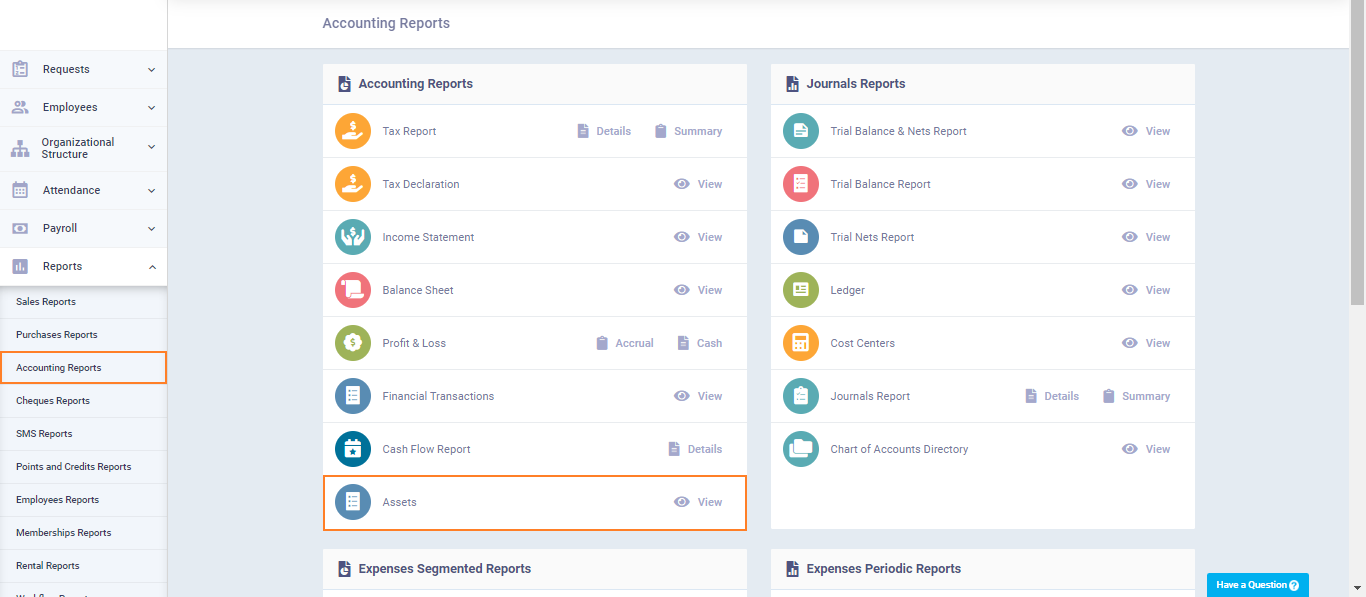
Assets Reports
To view asset reports, click on “Accounting” under the “Reports” section in the main menu, then click on “Assets.”
Click on “Show Report“
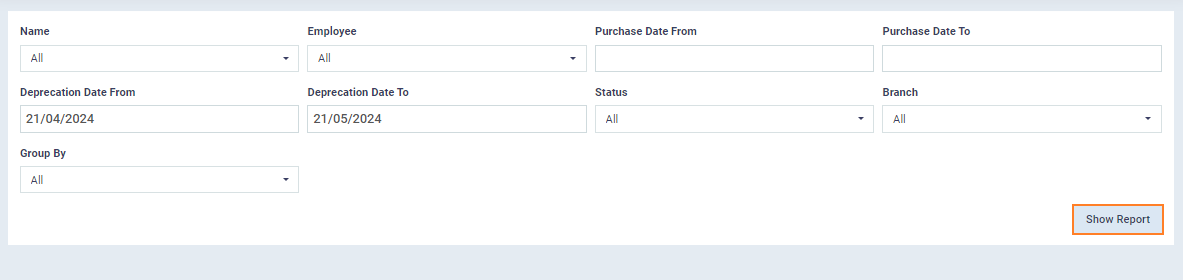
You will find a complete asset report that you can download or print.