


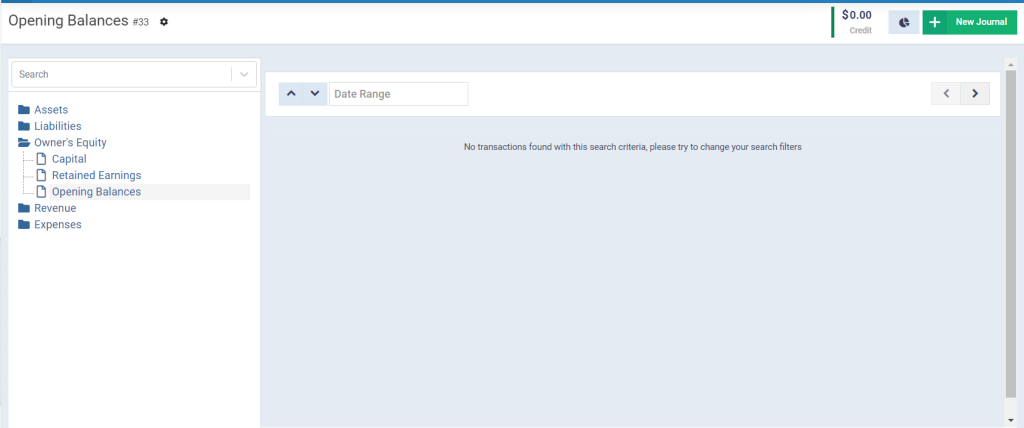
Adding the Accounts’ Opening Balances
What are the Opening Balances?
Opening balances are the amounts carried over at the beginning of the year/financial period from old accounting transactions for these accounts. The balance is positive (+) if the account is the debtor of the financial amount. It is negative (–) if the account is the creditor of the financial amount.
Notes:
- Opening balances for inventory should not be added through journal entries, but rather through “Inbound Requisitions”.
- If you want depreciation to be calculated automatically, the opening balances for assets should be added through their respective app “Assets” from the accounting menu.
Adding the sub-accounts in the Chart of Accounts
First, it is necessary to ensure that all sub-accounts are added within the chart of accounts so that you can add an opening balance for them.
The system provides a sub-account within the chart of accounts, which is the account “Opening Balances” that falls under the “Owner’s Equity” account. You can use this account if the opening entry for the opening balances is unbalanced, meaning if you wanted to add an opening balance to some debtor accounts only, or creditor accounts only. In this case, we use the “Opening Balances” account to adjust the entry.
Example: If you are a new client of the software and want to add an opening balance to the treasury account with a value of $1,000, but this amount is the result of a previous financial period without an opposite account to complete the entry,
In that case, we use the “Opening Balances” account, and the journal entry would be as follows:
$1,000 from the Treasury Account
$1,000 to the Opening Balances Account
*You can use any other account that is most suitable for the accounting treatment appropriate to the nature of your business.
Steps to Add the Opening Balances to the Accounts
- Note: Before starting, make sure to activate the Chart of Accounts App in your account.
- Click on “Accounting” from the main menu.
- Click on the “Add Entry” button.
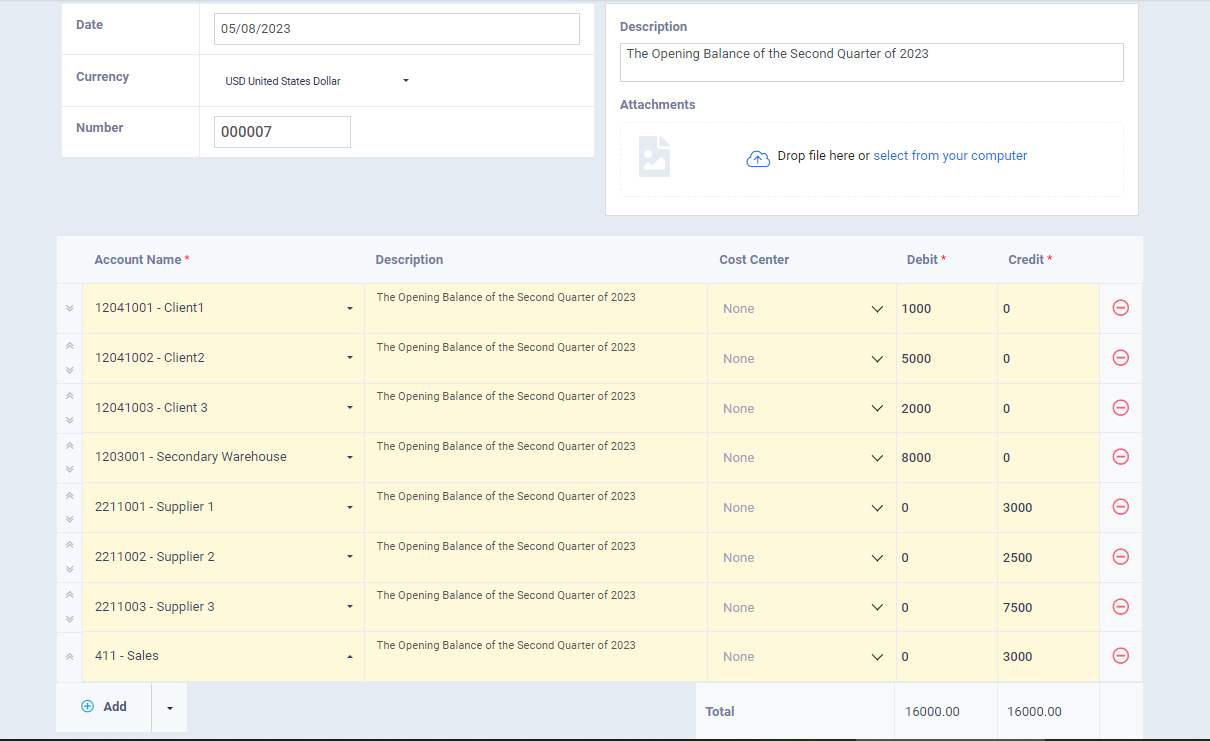
- Enter the “Date” field to determine the date for the opening balance journal entry.
- Select the “Currency” for the opening balance.
- Enter the “Description” for the entry, example: “Opening Balance for 2023”.
- Select the accounts required to represent the “Debit” side of the entry.
- Enter the description for the debit accounts in the entry.
- Assign the value or balance of the accounts in the “Debit” column of the entry.
- Click the “Add” button to add the following accounts.
- Select the accounts required to represent the “Credit” side of the entry.
- Enter the description for the credit accounts in the entry.
- Assign the value or balance of the accounts in the “Credit” column of the entry.
- Click on the “Save” button.Notes:
- Before saving the entry, ensure that the “Total” value is equal in both the “Debit” and “Credit” columns of the entry.
Copying the Data from a Data Sheet
- The system offers the feature “Paste from Sheet”, which enables you to copy data of sub-accounts from a separate “Excel” file and paste that data into the program.
- You can use this feature if you have a trial balance with all the accounts or some accounts for which you need to add an opening balance on an external Excel file.
Steps of Copying from a Data Sheet
- Note: First, ensure that all data is added in the Excel file and that the “Name / Account Code” in the Excel file matches what is in the system.
- After entering the “Add Entry” page as shown in the steps above, the following steps must be completed:
- Click on the “arrow” opposite the “Add” field located below the line item row.
- Click on “Paste from Sheet”.
- A table will appear containing the following data, into which you must copy and paste the data from the Excel file:
- “Account Code / Name”: Copy the data from the “Name / Code” column of the account from the Excel file and then paste it into this column.
- “Description”: Copy the data from the “Description” column of the Excel file and then paste it into this column.
- “Debit”: In this field, paste the data related to the debit values of the sub-accounts from the Excel file.
- “Credit”: In this field, paste the data related to the credit values of the sub-accounts from the Excel file.
- “Cost center Code / Name”: In this field, paste the data related to the cost centers of the sub-accounts from the Excel file if available.
- “Clear Old Records”: If you click on this field, any data entered manually before importing the data will be erased.
- Click on “Import” to add the data to the entry addition page.
- After adding the data to the page and ensuring its accuracy and match, click on “Save”.

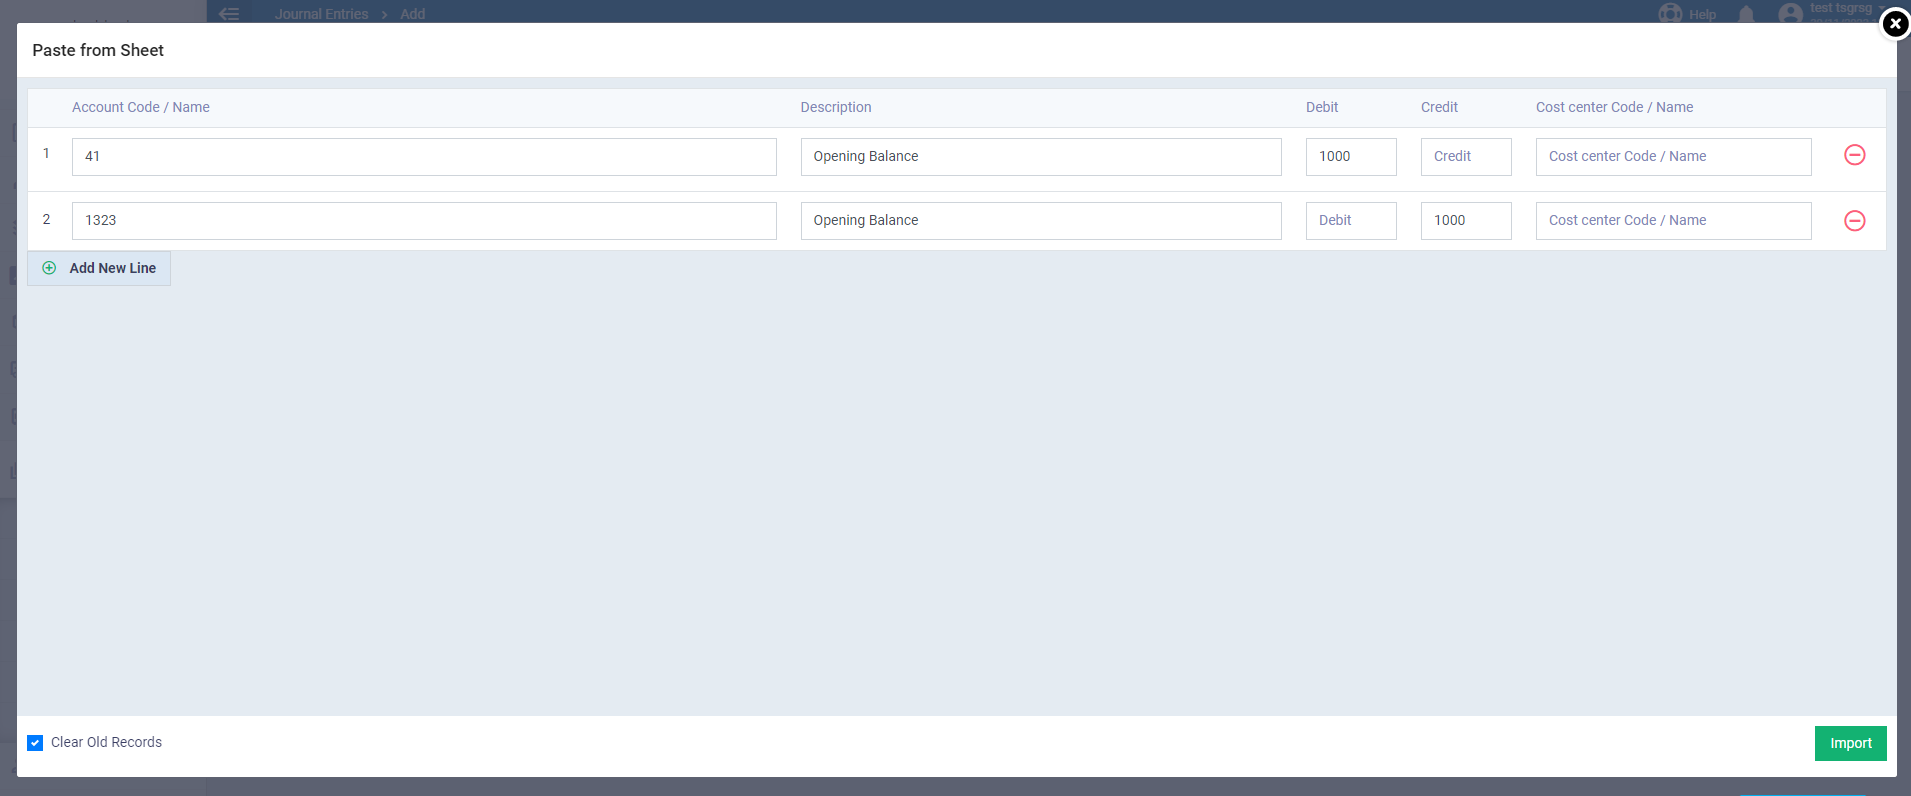
*You can copy an entire column from the Excel file and then paste it into the first field of the corresponding column in the program, and all column data will be added automatically.
*If there is a mismatch in the data during the “Paste from Sheet” process, the data will not be imported until it is completely matched.