How to Set Up a Main Account for Clients and Suppliers for Each Branch Individually
There may be multiple branches in many organizations; accordingly, these branches are added to the system. Through this software, users may need to separate the main accounts for clients or suppliers for each branch individually. The sub-accounts for newly added clients are categorized under the main account specified for each branch separately.
Creating a Client's Main Account for Each Branch Individually in the Chart of Accounts
First, it is necessary to ensure the addition of the main sub-accounts for clients of each branch through the chart of accounts and also specify who has control over each account through the available branches.
- Click on “General Accounts” from the main menu.
- Click on “Chart of Accounts“
- Click on “Add Account“
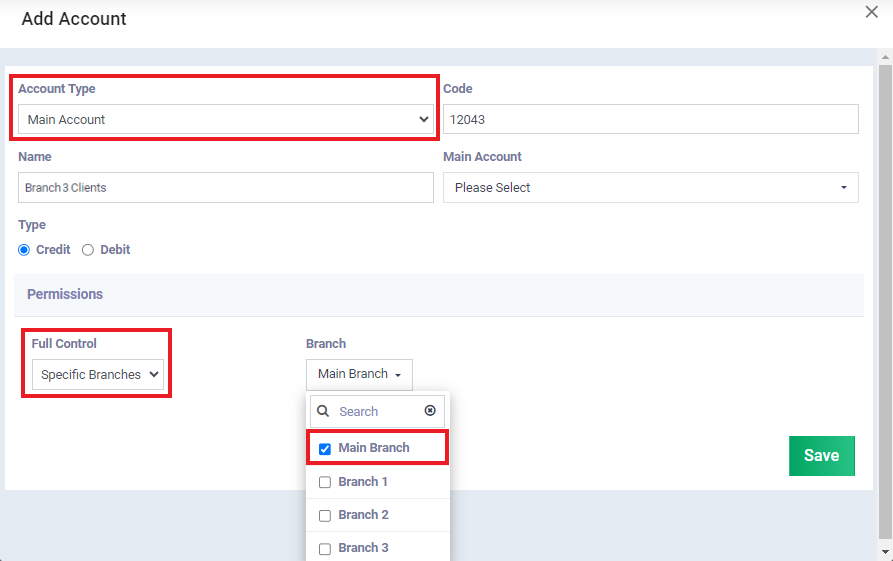
- Enter the required account details:
- Account Type: Select the account type as “Main Account.“
- Code: Assign a code to the new account.
- Note: Avoid duplicating any codes used for subsidiary or main accounts within the chart of accounts.
- Name: Enter the account name as required.
- Main Account: Specify the main account under which the new account will be listed.
- Type: Choose the account type based on its nature, either “Credit” or “Debit.”
- In the Permissions field, choose “Specific Branch,” then assign the branch that has control over this account.
- Click on “Save“
Note (1): Make sure to activate the “Specify Account Branches” option found in the “Branch Settings” so that you can designate branches for each account individually.
Note (2): After saving, to view the newly added account, you must select the desired branch in the “Account Branch” field in the chart of accounts. This step is necessary for the added account to appear as new.
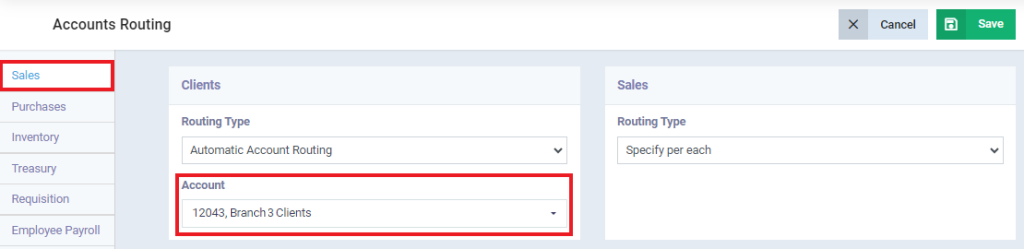
Route Client Accounts to the Branch's Main Account.
- Click on “Accounting” from the main menu.
- Click on “Accounting Settings“
- Click on the “Accounts Routing” tab
- Click on “Sales” from the column on the left
- Choose the “Accounts Routing” for “Clients” and select:
- Automatic Account Routing: The system automatically directs the client account to the “Main Account” specified in the “Account” field in the “Chart of Accounts.”
- Account: Choose the main account that has been added and specified for the branch where you are adjusting the settings.
- Any new client added under this account will be listed in the chart of accounts.