Guide to Uploading a Bank Statement Using AI
Daftra allows you to upload a bank statement using AI in any supported format, so that AI automatically extracts the transactions, reviews them, and then imports them in bulk to your bank account. In this article, we explain the upload, review, and save steps in detail.
Steps to Uploading a Bank Statement Using AI
First: Accessing the Screen
Step 1: Open the Upload Screen from the Bank Account Page
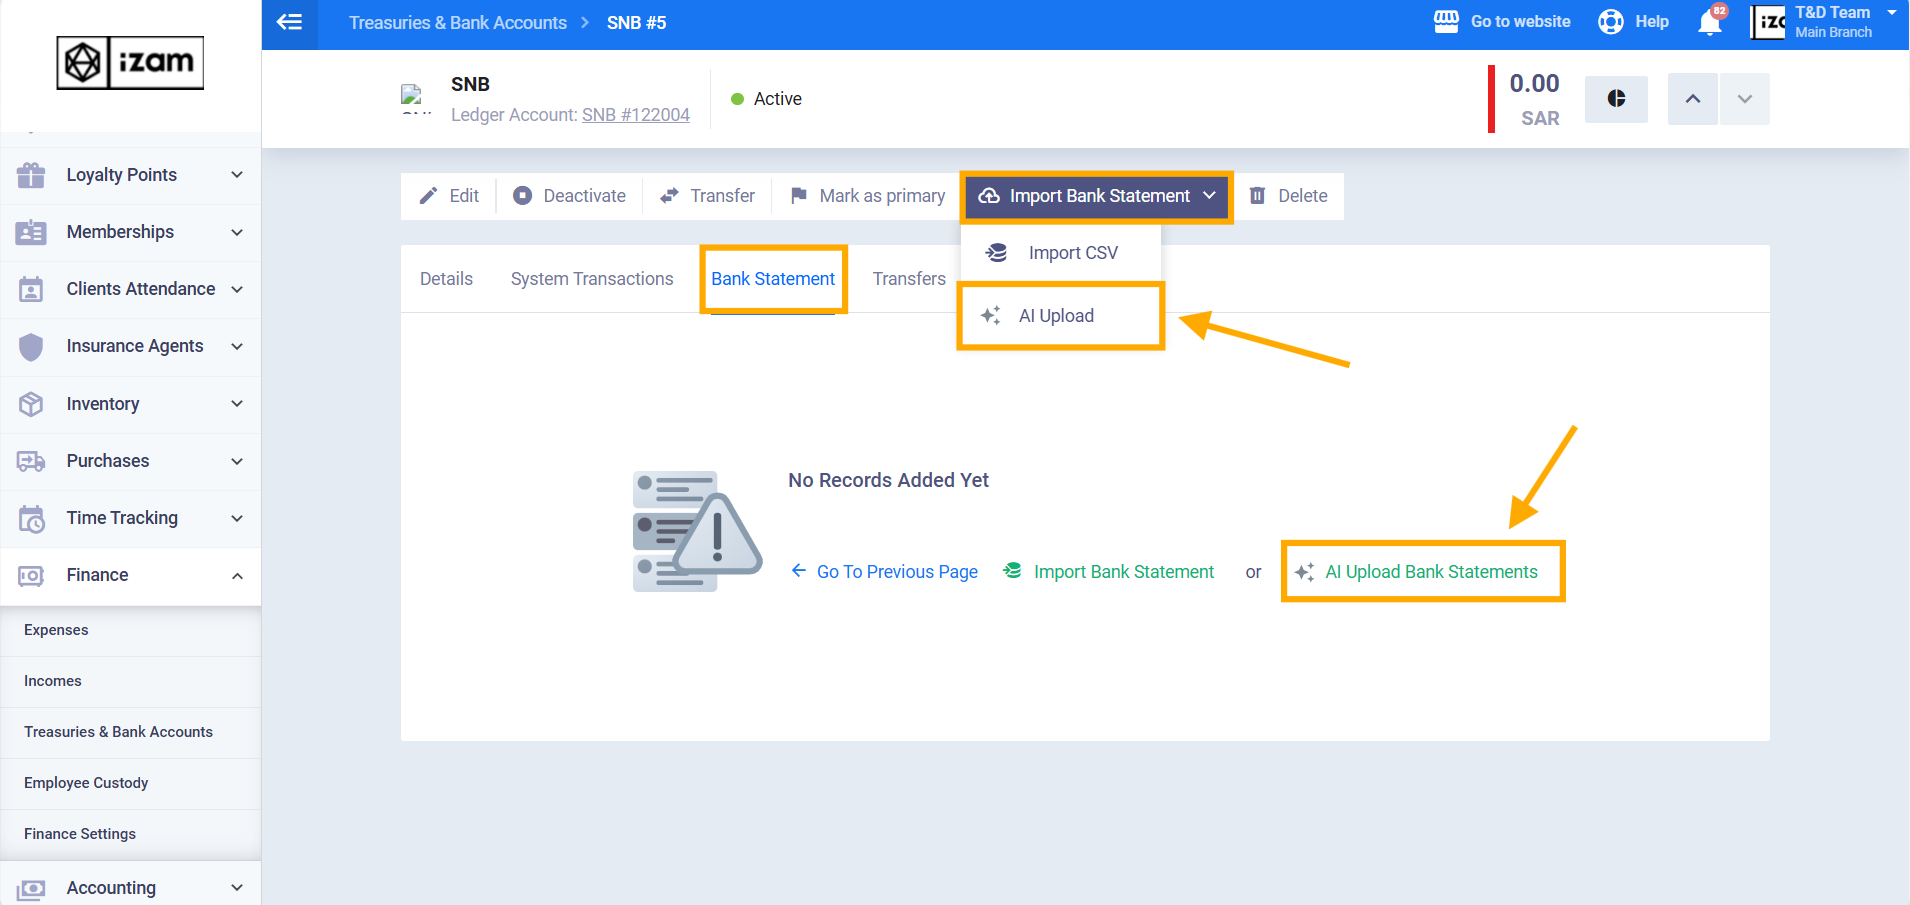
From within the required bank account page, do one of the following:
- If the “Bank Statement” tab is empty (with no records yet), you can click the “AI Upload Bank Statements” link shown directly within the tab itself.
- Click the “Import Bank Statement” button shown in the action buttons area, then click “AI Upload”.
Second: Uploading Files and Setting Session Options
Step 2: Upload the Statement File
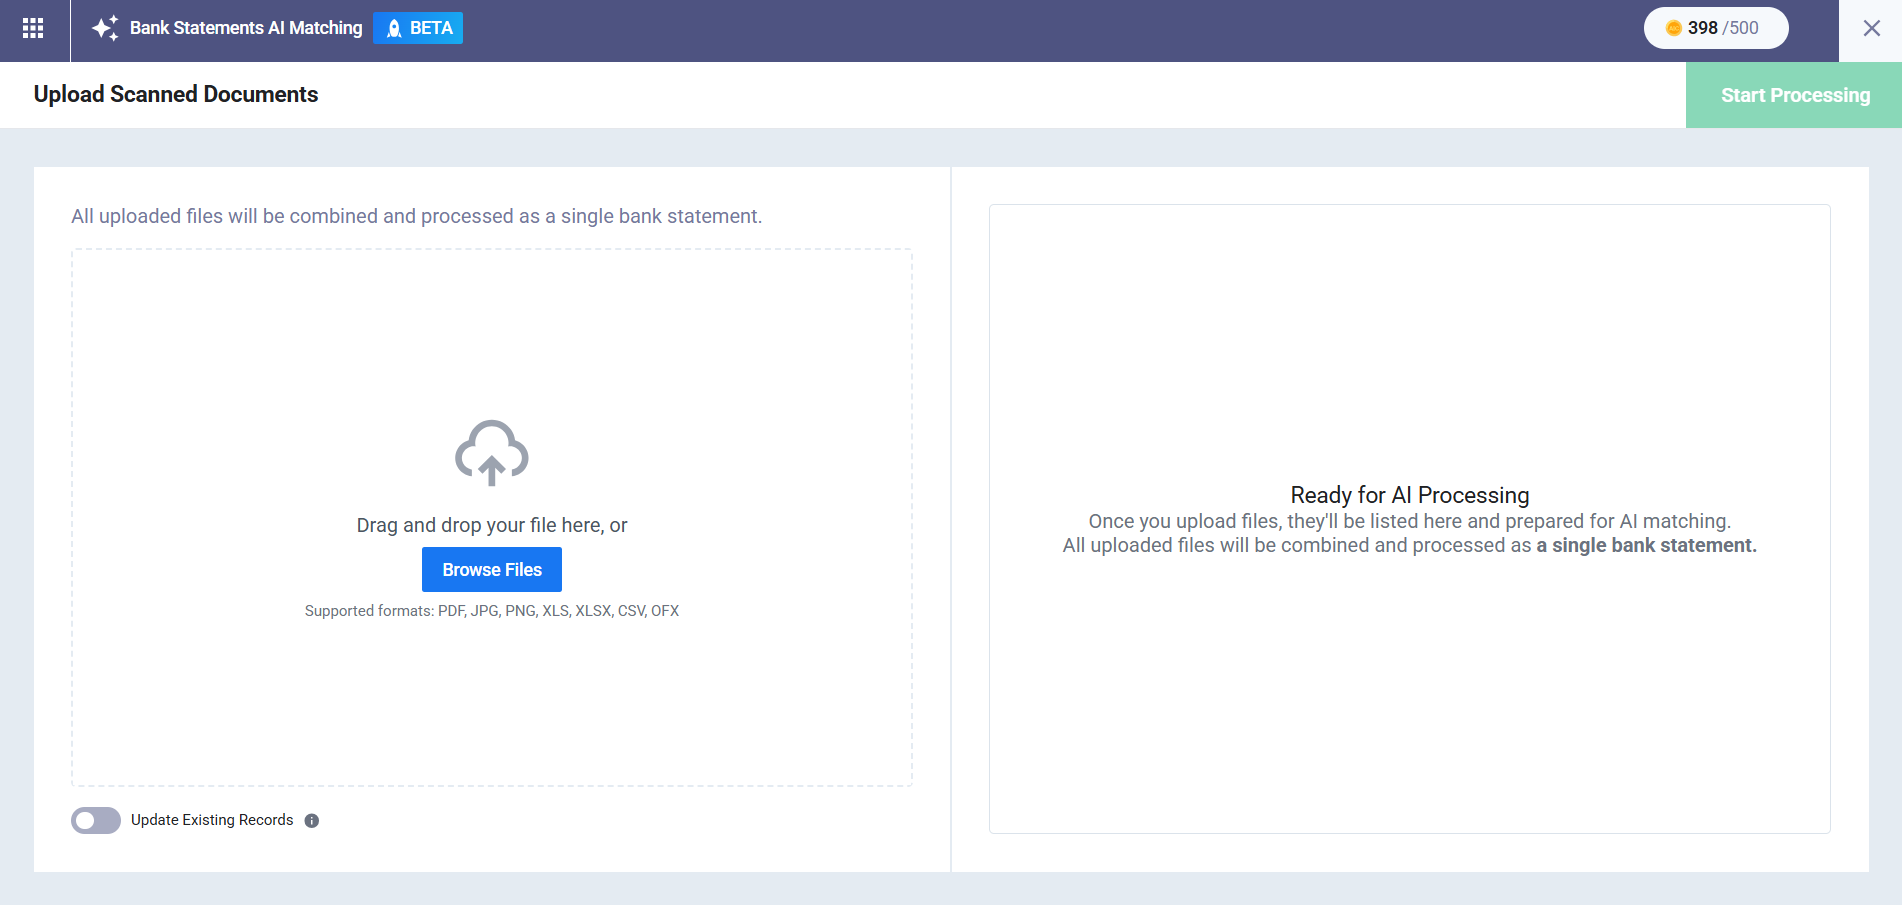
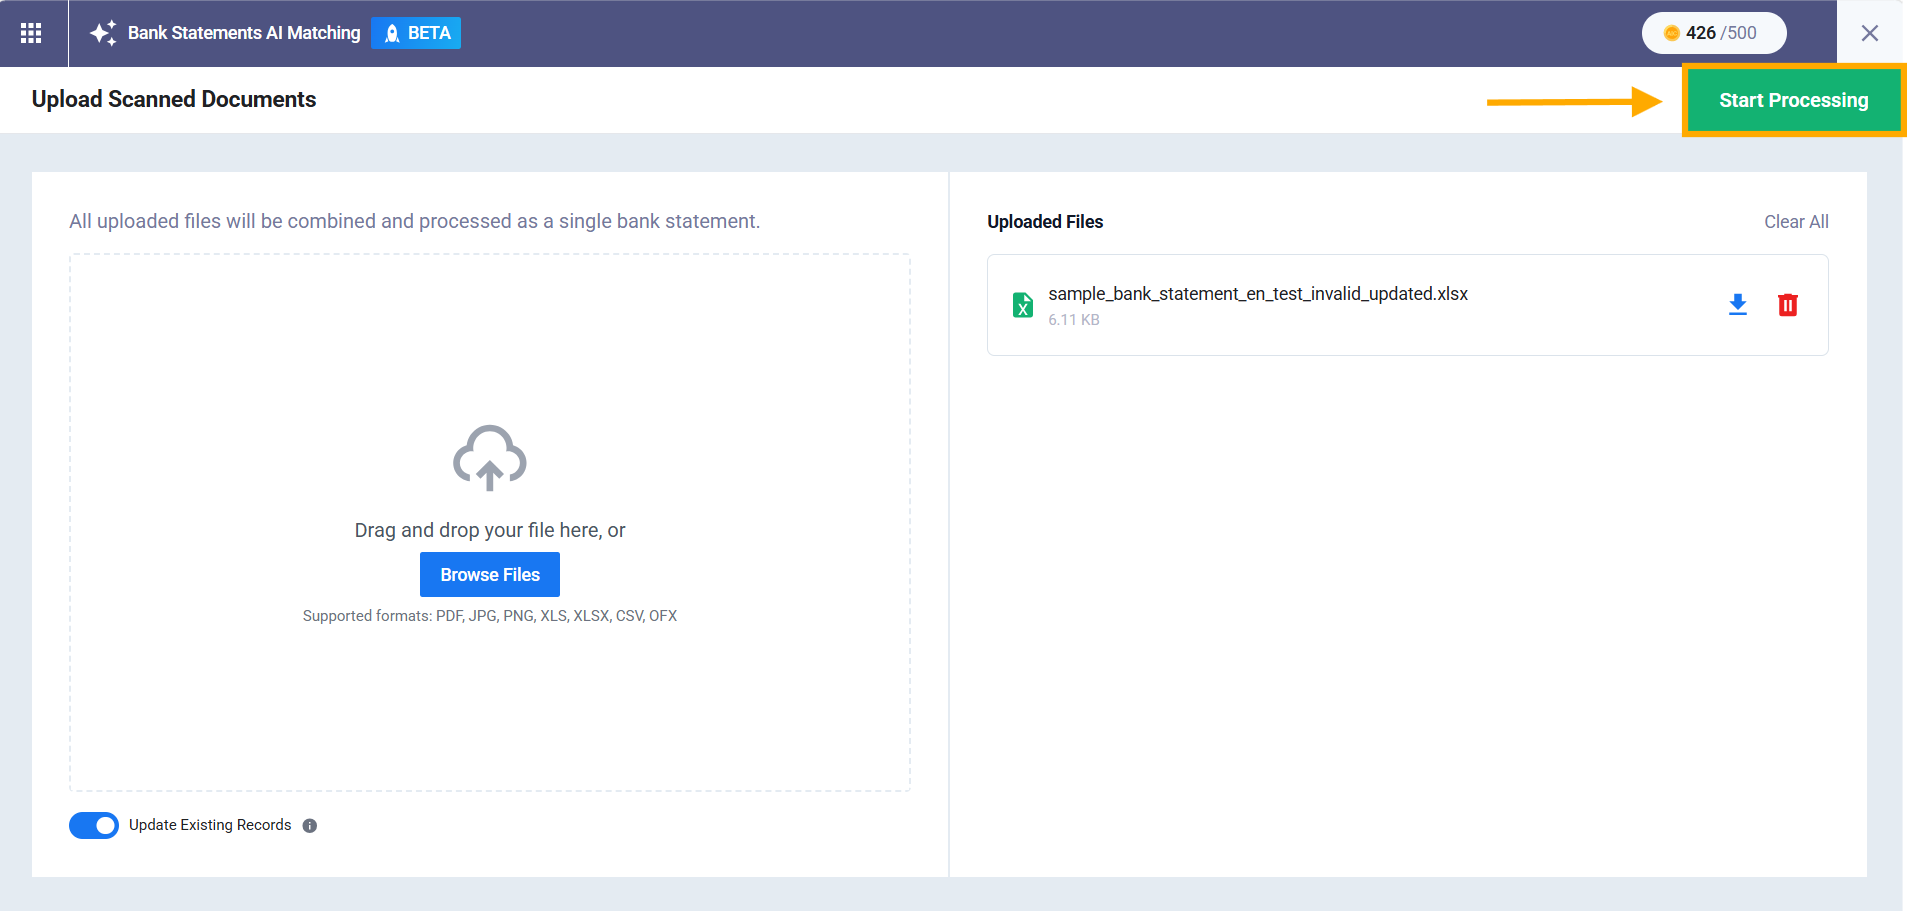
Upload the file via drag and drop, or by clicking “Browse Files.” Supported formats: PDF, JPG, PNG, XLS, XLSX, CSV, OFX, with a maximum of 50 MB per file.
When uploading more than one file, they are all automatically combined and processed as a single bank statement, with no need for any manual merging action. Each file appears with its name and size in the file list on the right side of the screen, with the option to delete any file via the delete icon next to it.
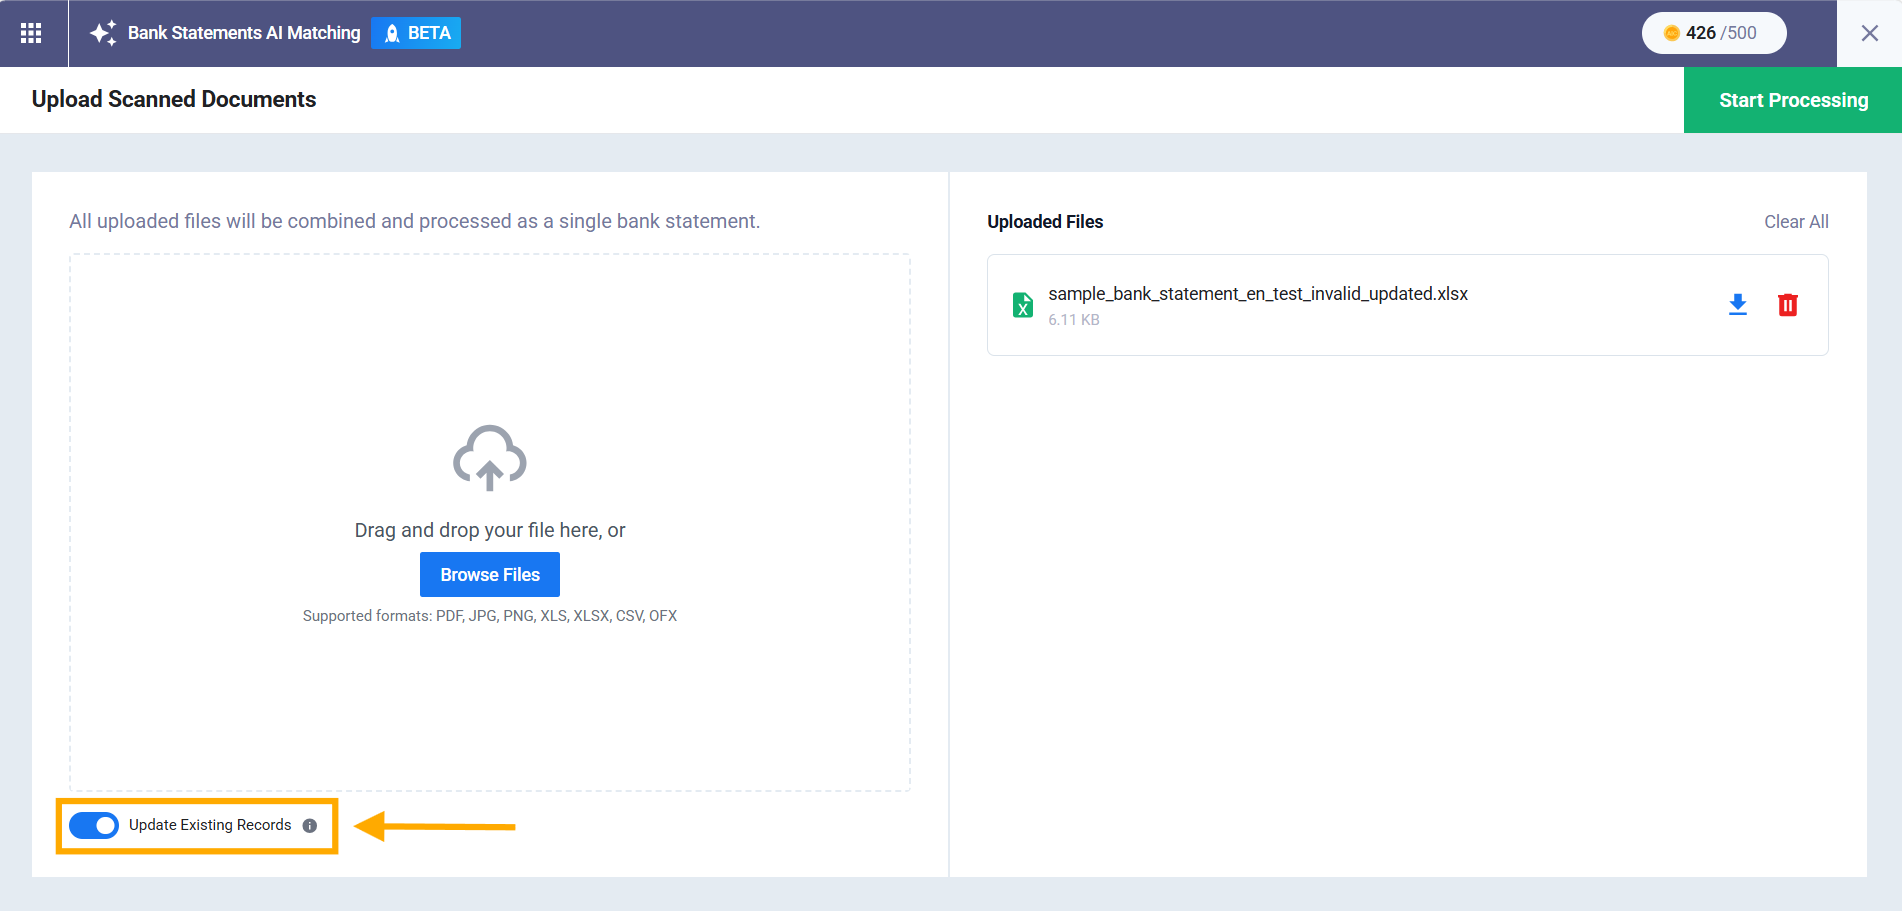
Step 3: Enable the “Update Existing Records” Option (Optional)
Enable this toggle (disabled by default) if you want the system to check each transaction by its reference ID against existing records in the same bank account; if a match is found and the record is not yet linked to a journal entry, it will be updated with the new file’s data. If it’s linked to a journal entry, the row will be classified as “Invalid.” When the toggle is off, all transactions are treated as new records.
Step 4: Start Processing
Once you’ve confirmed there are no files with errors, click “Start Processing” to move to the transaction extraction and review screen.
Third: Reviewing the Extracted Transactions
Step 5: View the Transactions Summary
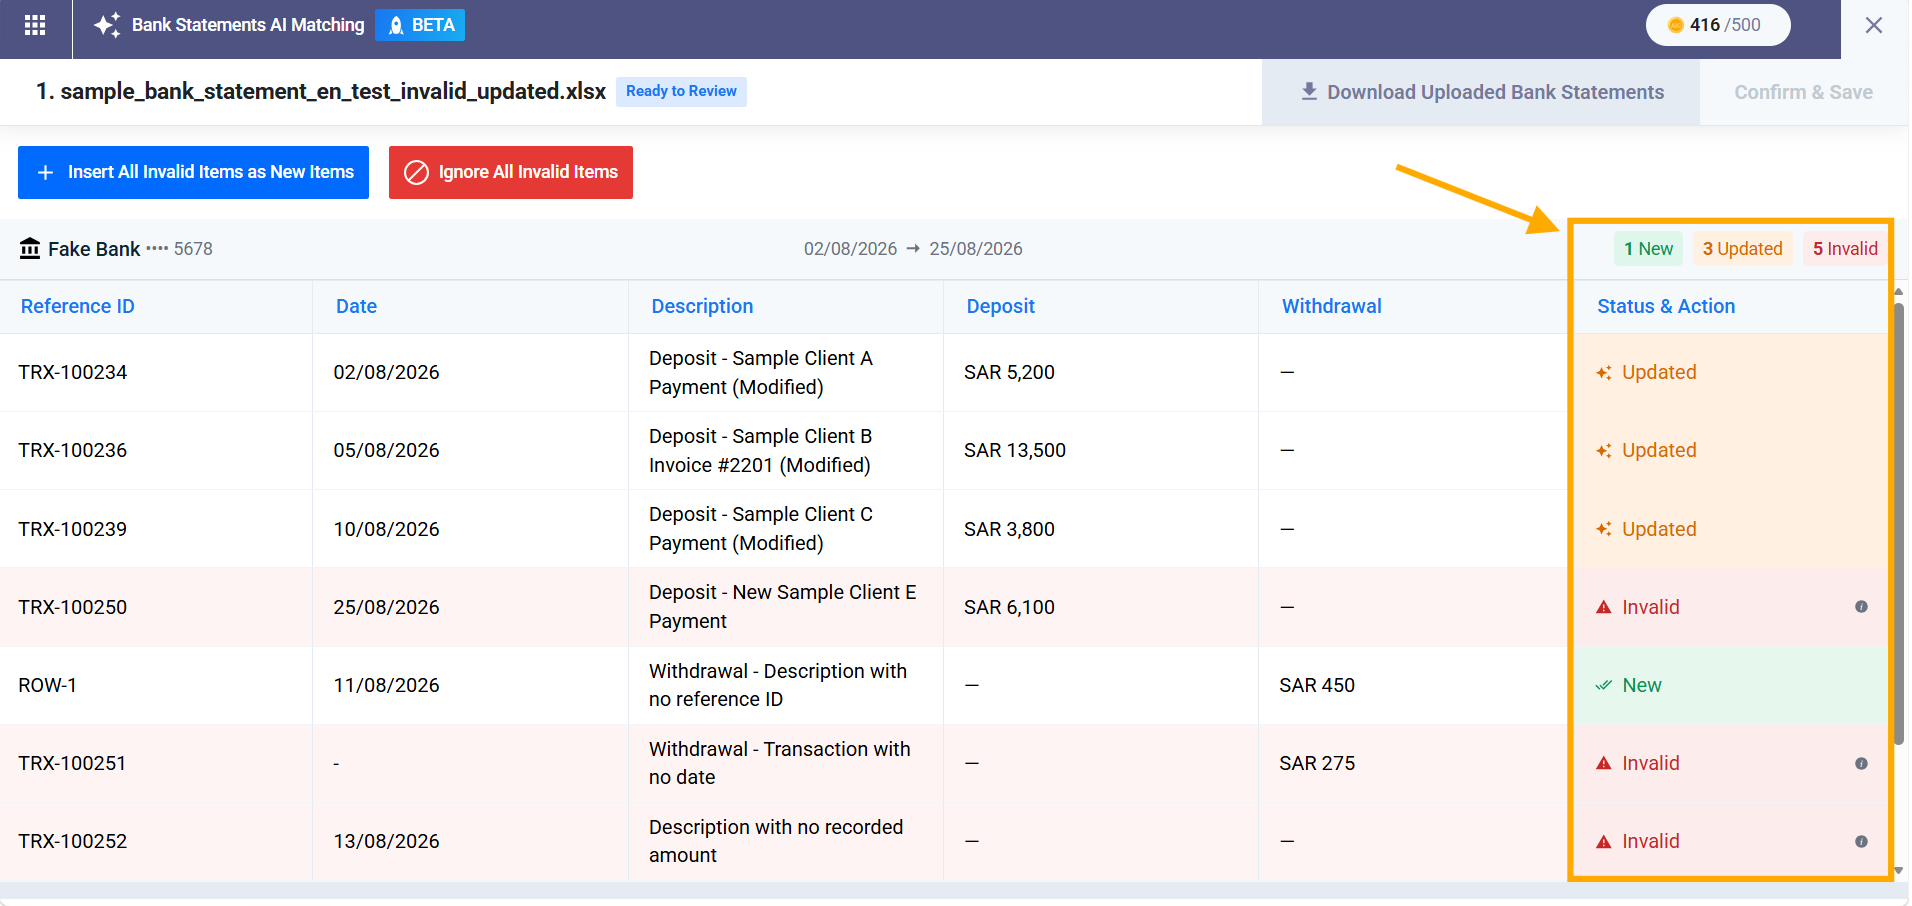
Once the file has finished being read by AI, the review screen appears, and its header displays the bank account name and its status “Ready to Review,” in addition to the count summary: the number of New transactions, the number of Updated transactions (only appears if the “Update Existing Records” option is enabled), and the number of Invalid transactions.
Step 6: Review the Transactions Table
The table displays all extracted transactions with the columns: Reference ID, Date, Description, Deposit, Withdrawal, and Status & Action. Each transaction’s status is one of: “New,” “Updated,” “Invalid” (with a sub-classification explaining the reason: Duplicate transaction, Already matched to a journal entry, AI could not read this transaction, or Missing data), or “Ignored.”
Step 7: Handling Invalid Transactions
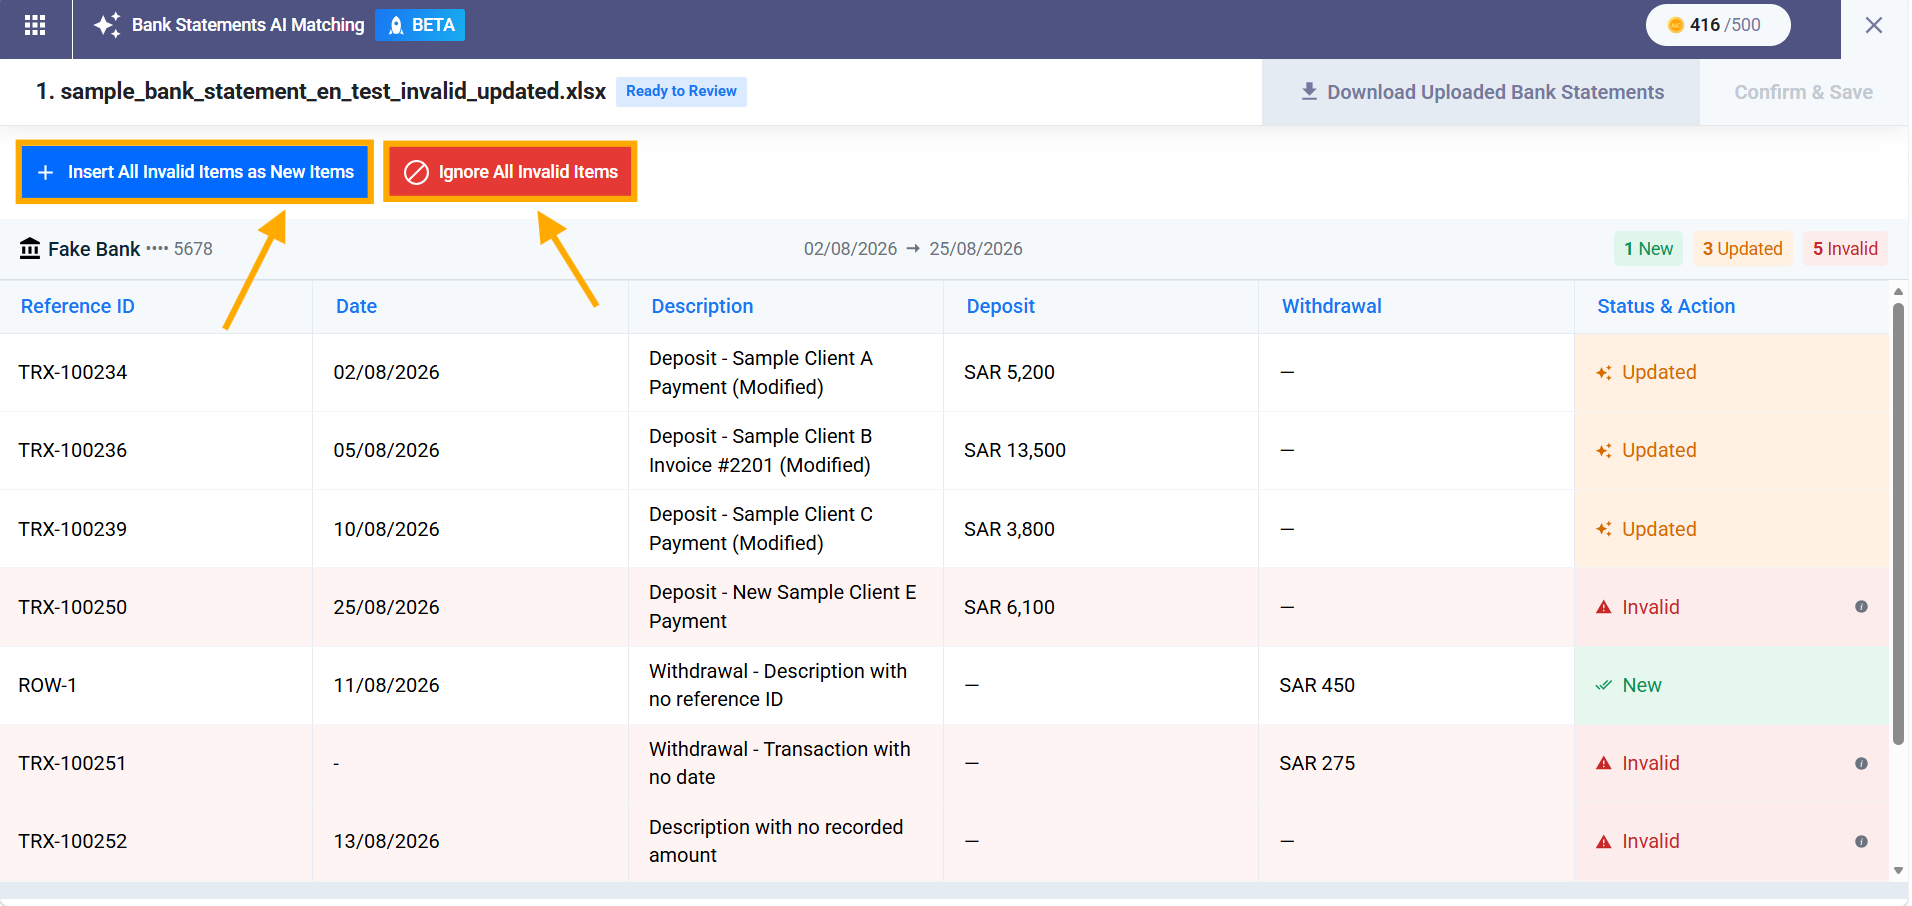
All actions on invalid rows are performed in bulk only:
- Click “Insert All Invalid Items as New Items” to insert them as new records (a warning appears first if some rows have no readable data).
- Or click “Ignore All Invalid Items” to immediately convert them to “Ignored” status with no warning.
Step 8: Confirm the Save
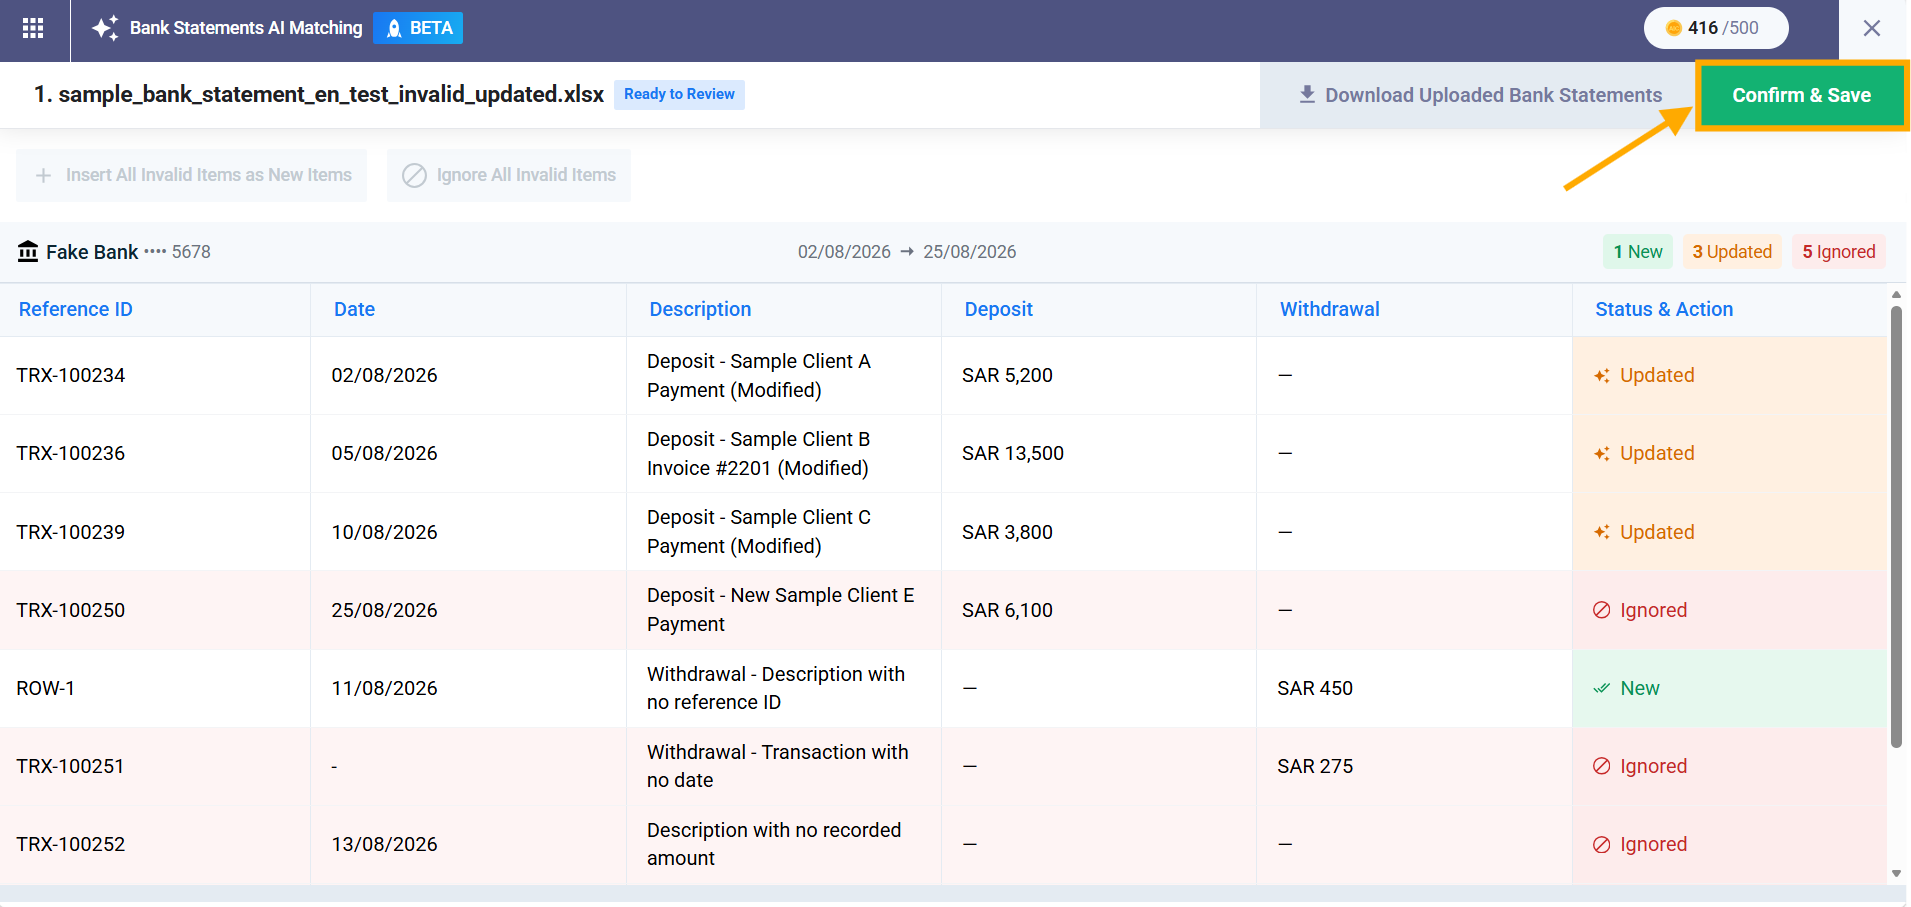
Once all invalid rows are resolved, the “Confirm & Save” button becomes enabled. Click it to start the saving process.
Fourth: Completing the Import
Step 9: Review the Import Success Screen
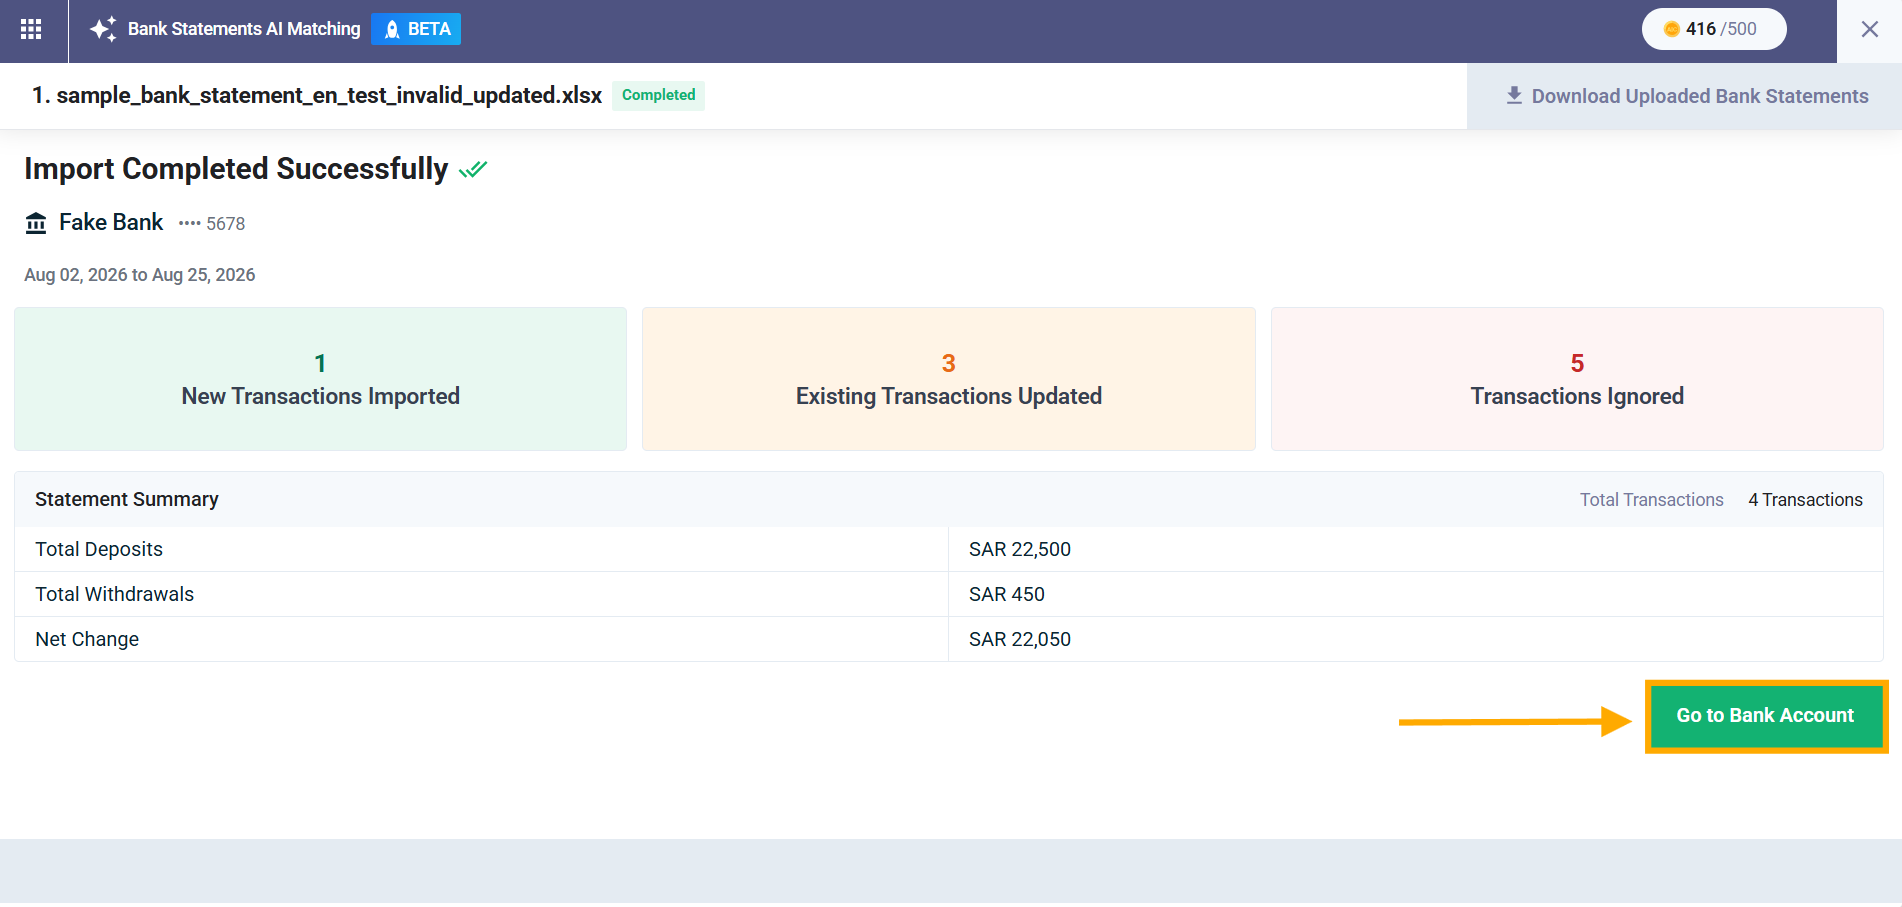
Once the save is complete, a screen titled “Import Completed Successfully” appears, and includes:
- Three count cards: “New Transactions Imported,” “Existing Transactions Updated” (always shown and shows 0 if the update option is disabled), and “Transactions Ignored.”
- A “Statement Summary” section: Total Transactions, Total Deposits, Total Withdrawals, and Net Change.
Click “Go to Bank Account” to exit and navigate directly to the “Bank Statement” tab of the bank account page.